A Look Inside
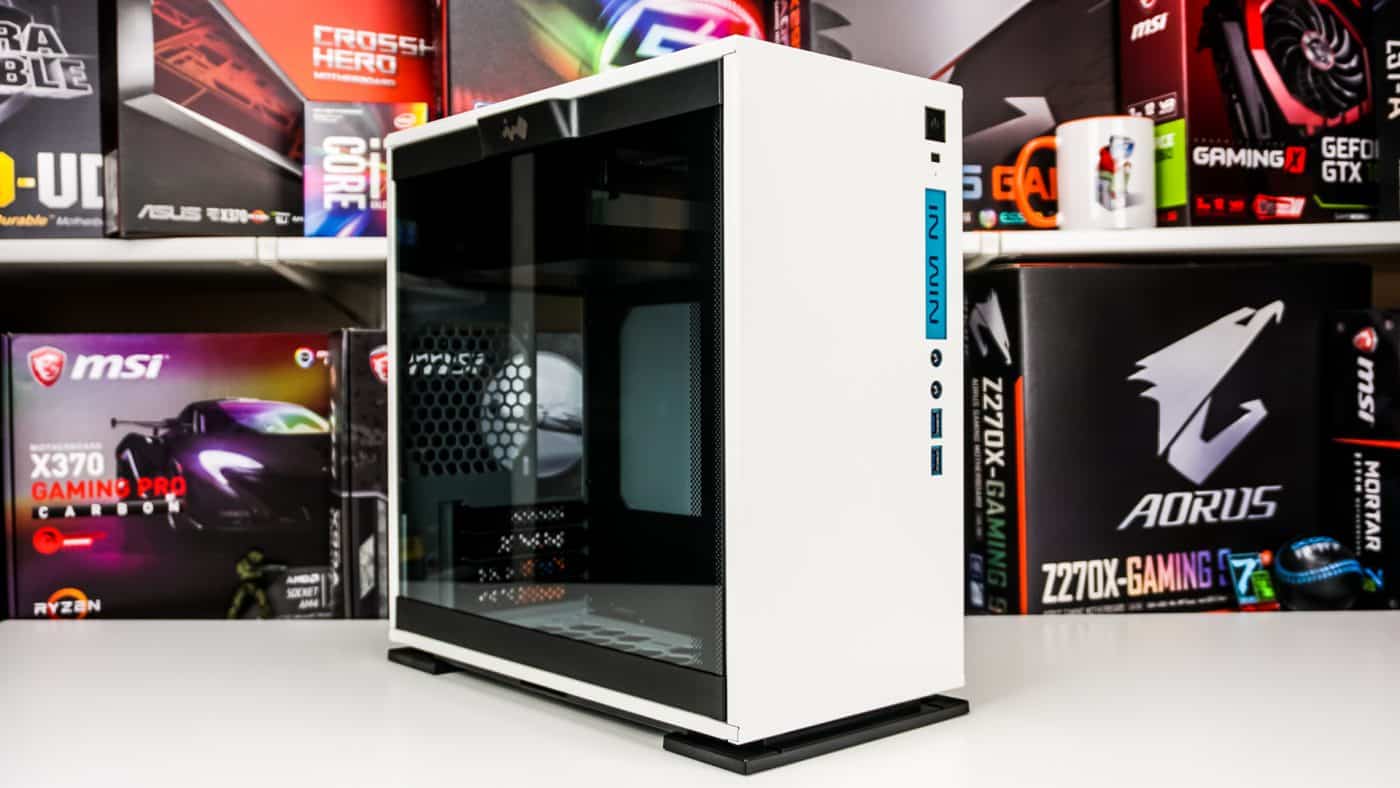
Getting inside the 301 is extremely easy, just press down on the button on the side panel. It will release and you can remove it. Once inside you can see that we have a simple, yet effective layout. Also most of the interior is black, which gives a nice contrast to the white on the case. In the main compartment you’ll find your motherboard tray, which supports both Micro-ATX and Mini-ITX builds. You can see that large CPU cut-out on the tray too.
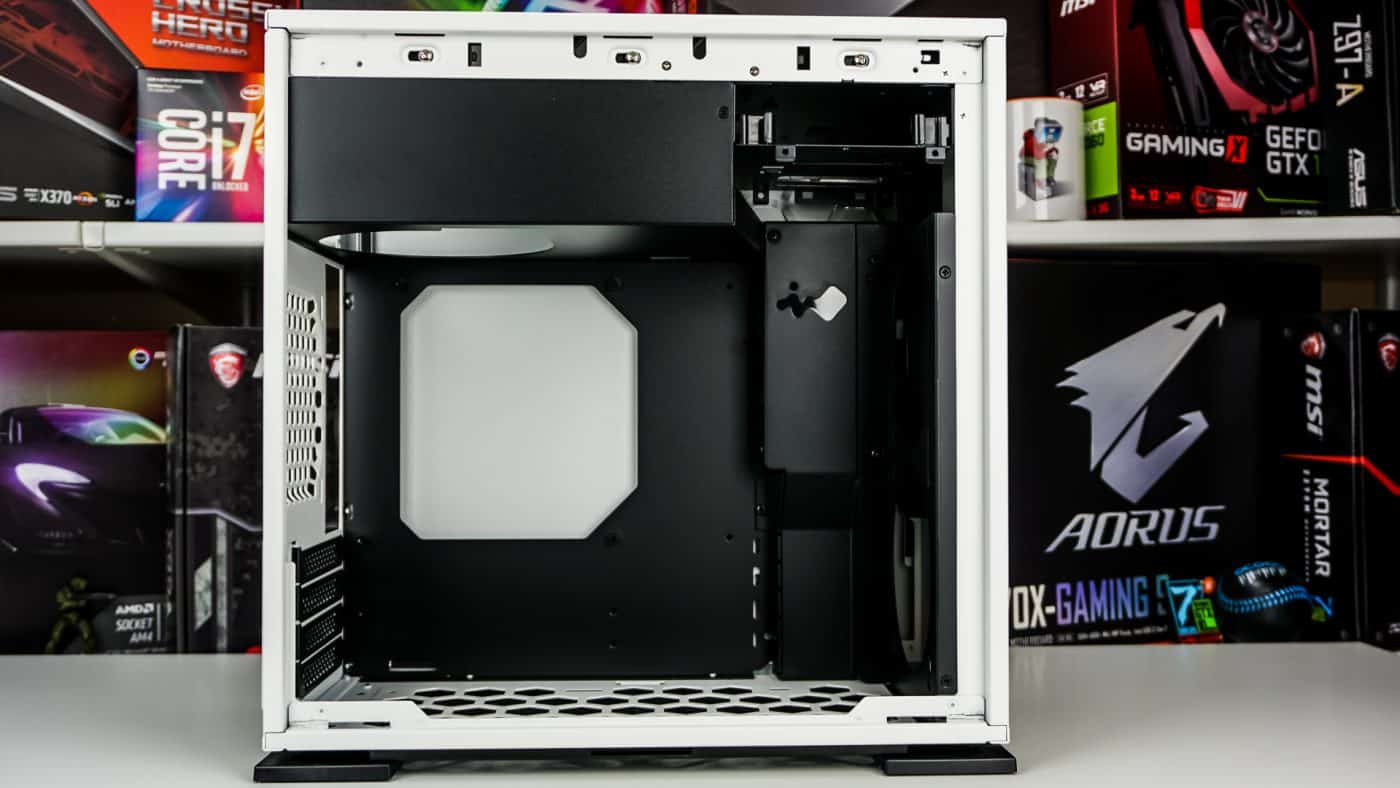
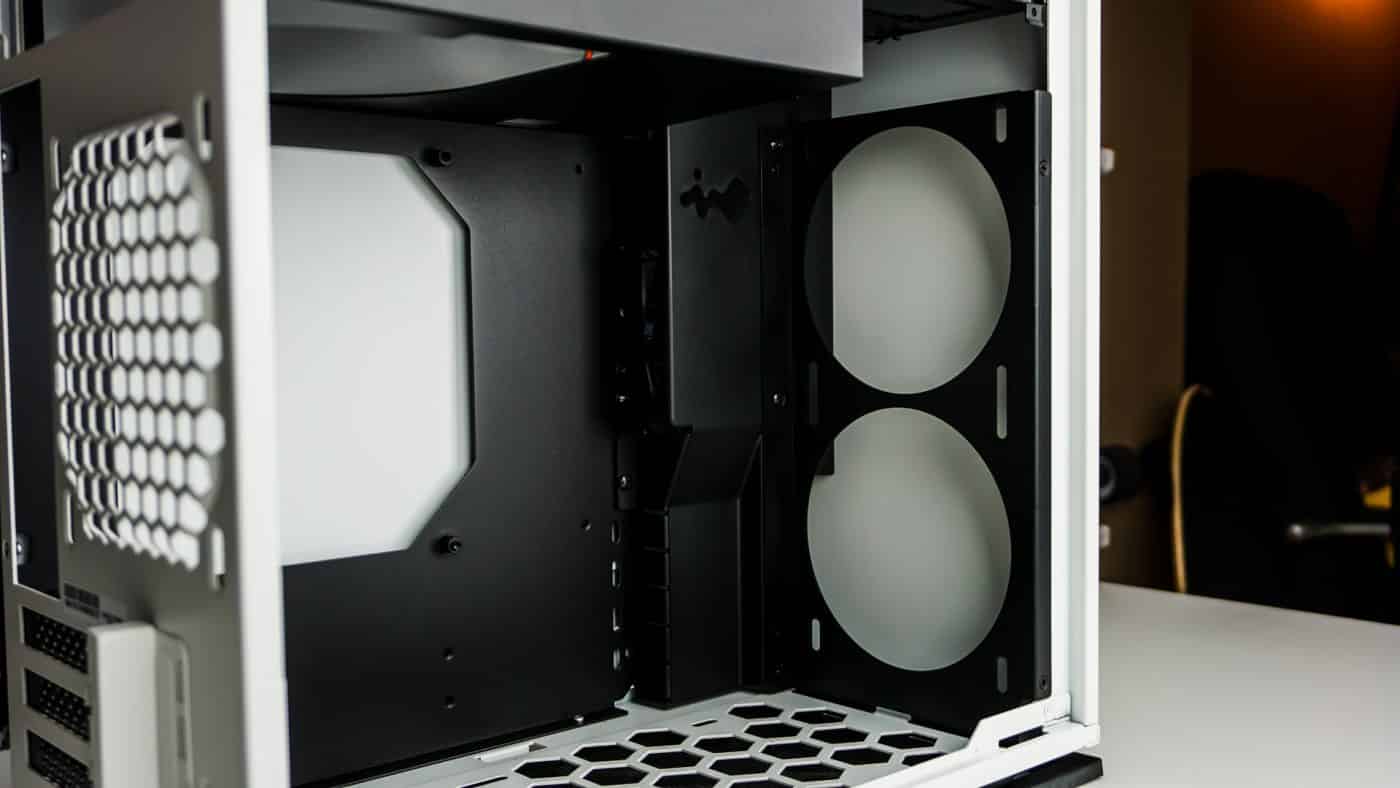
Towards the front of the case there is a fan mount that supports two 120 mm fans or watercooling radiators up to 240 mm. This piece is actually removable so you can easily install your cooling gear outside of the case.
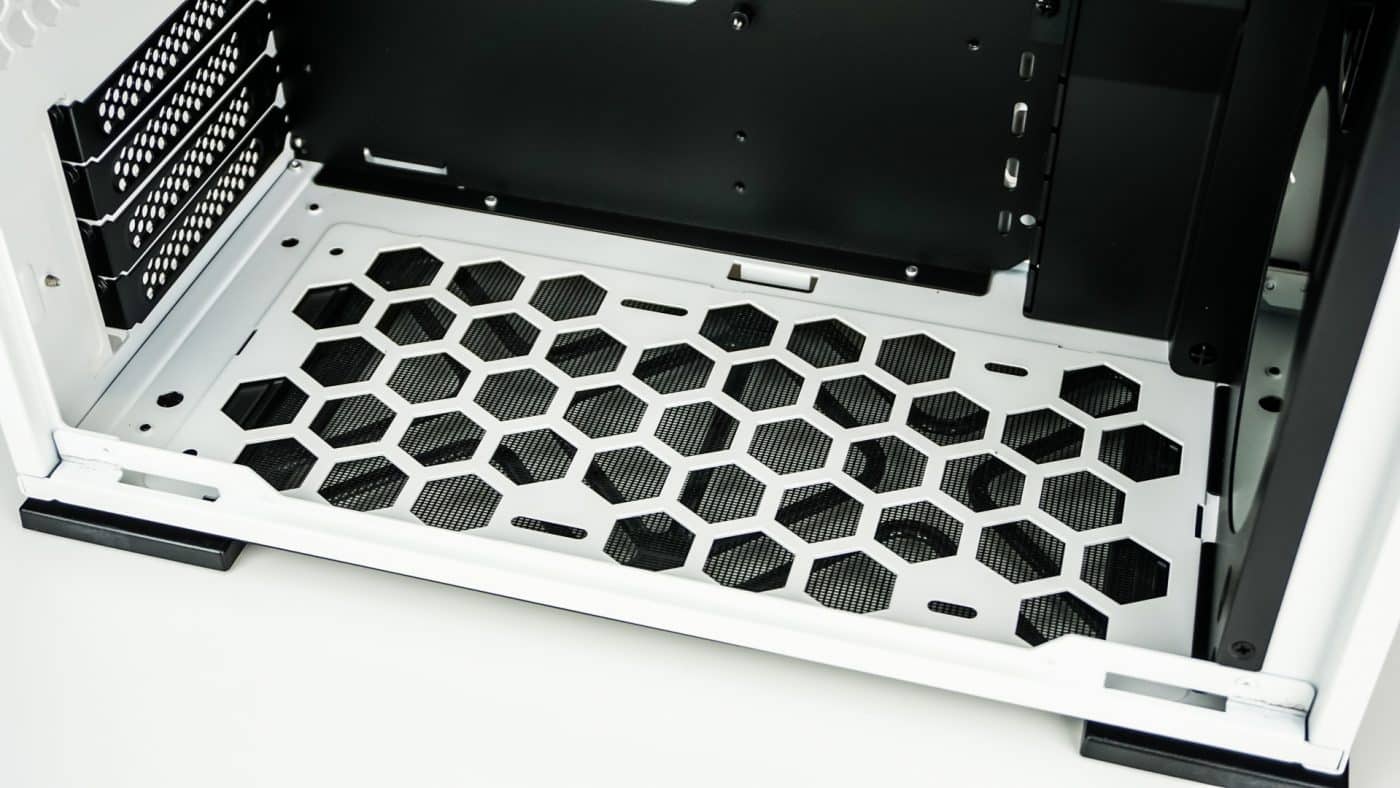
The entire bottom of the case is ventilated by a honeycomb design. Here you can install two 120 mm fans.
At the rear on the case you will find your third and final fan mounting spot, which supports a 120 mm exhaust fan.
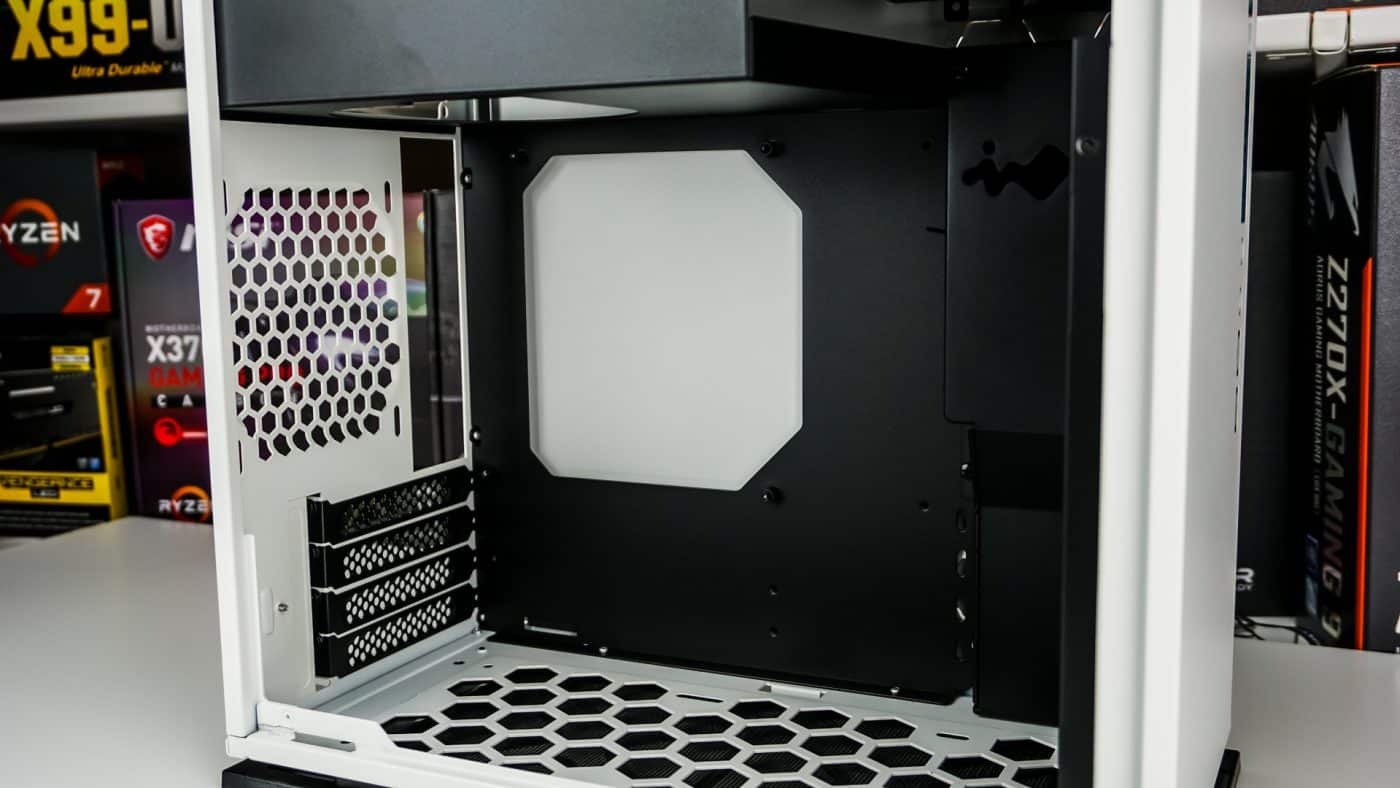
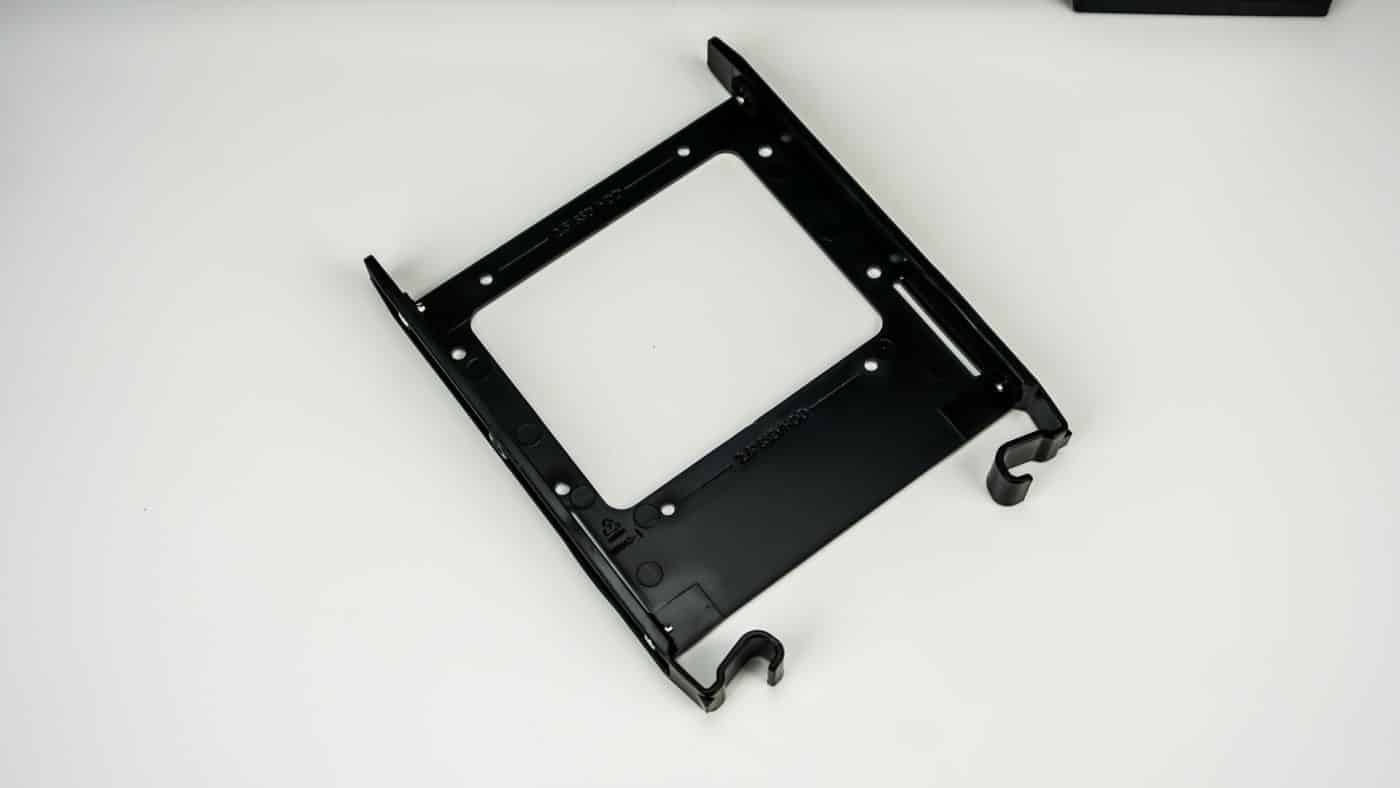
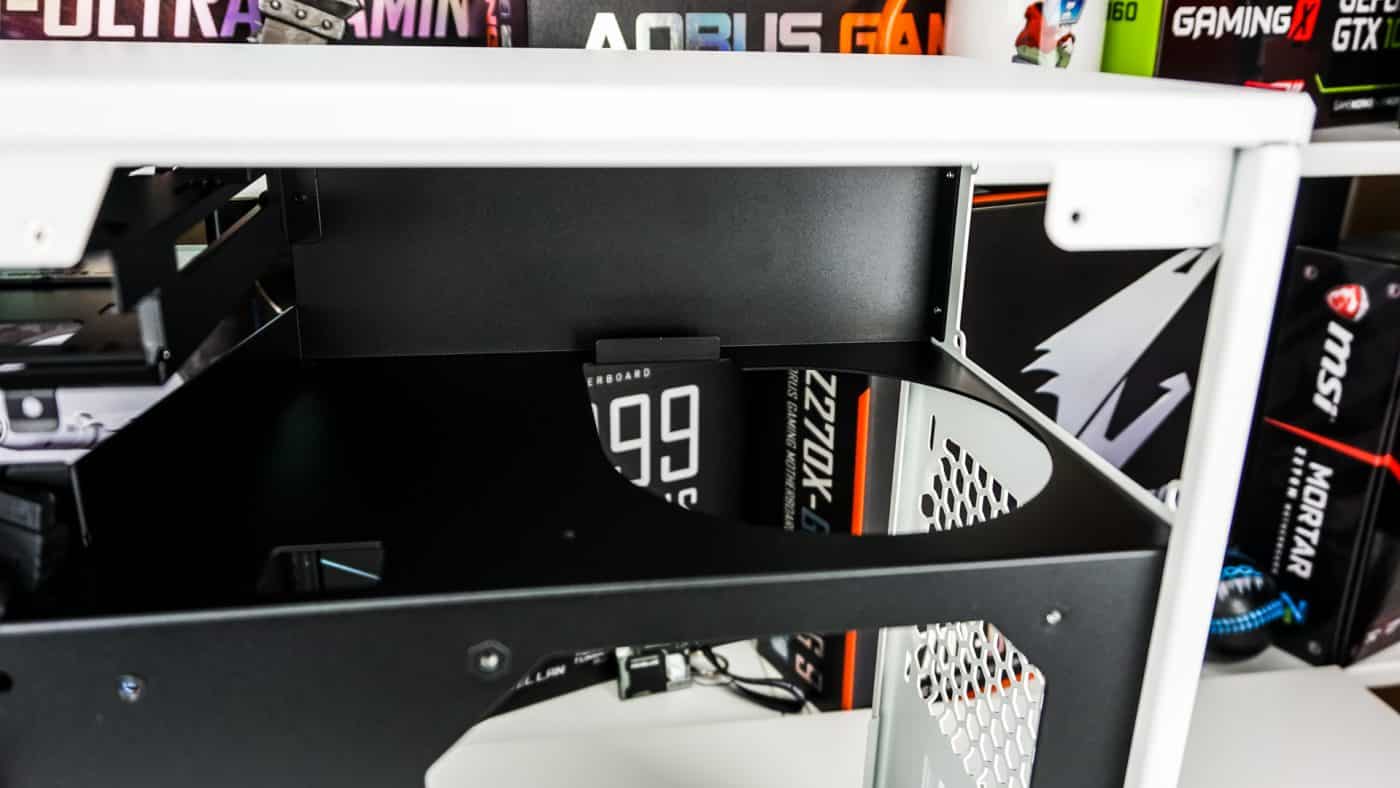
Moving back towards the front of the case at the top you are going to find a hard drive tray that pulls out. The tray supports both 2.5-inch and 3.5-inch hard drives. There is also a 2.5-inch SSD mount right below it.

Removing the back side panel of the case we can get a look at the rest of the case. You can see the motherboard tray takes up most of the case. On one side there is a small cable channel, which is where you are going to have to route all of your cables as there is no room behind the motherboard tray. We will see if this becomes an issue once we get into installation.
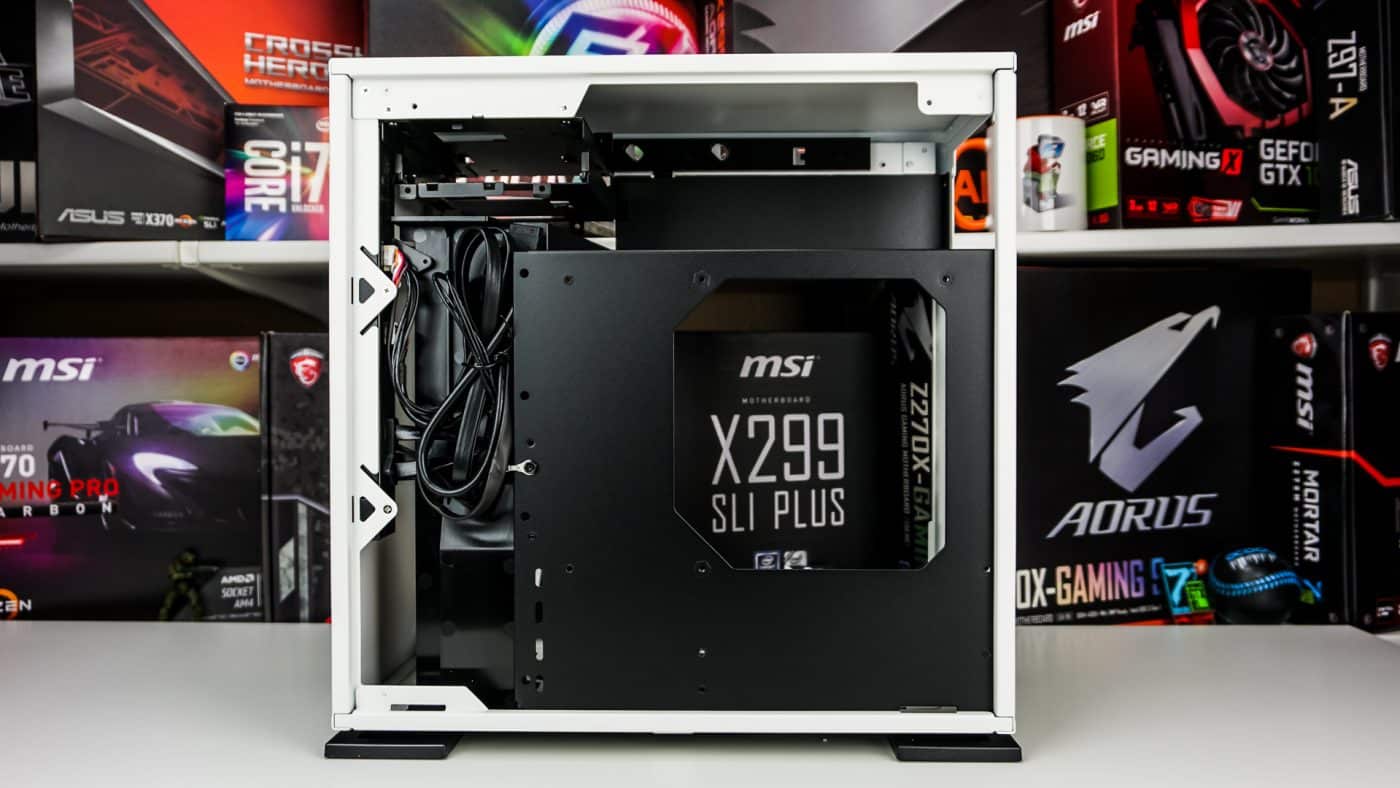
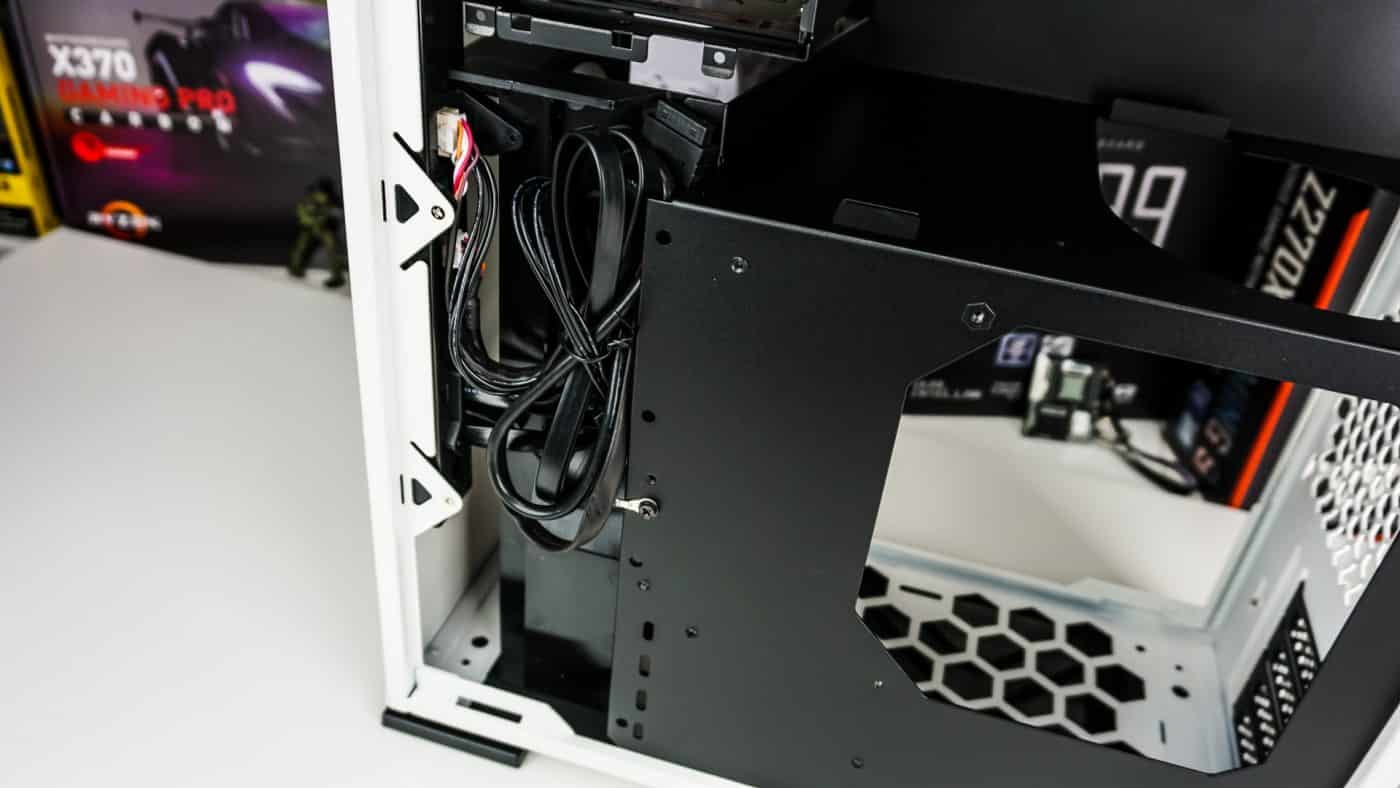
At the top of the case is your power supply mount, which is open at the bottom for ventilation. You will also notice a square hole up there, that is to easily route your EPS connector to your motherboard.


Silverston tj08 and ps08 are about the same size can fit more drives and have been out for yonks.. def not as elegant. note they charge extra! for plain side panel….
…and TJ08 supports only 2 fans which is very bad. Also very ugly…chassis like from 90′. PS08 have 4 fans but it’s definitely bigger. Many people in this years also don’t need external 5,25″ slots. Like me. 😉