
TestNG by far is the most widely used framework for Selenium automation testing. We have already covered the features of TestNG and what makes it stand out in our TestNG series. Additionally we have seen how to implement the TestNG framework in Eclipse, but with increasing use and popularity of IntelliJ we will now see how TestNG can be installed and implemented in IntelliJ.
To get started, you will have to first fulfill a few prerequisites –
- Download IntelliJ IDEA on your machine.
- Download Selenium WebDriver Language Bindings for Java.
Since we have already covered the selenium binding download in the Eclipse article, I assume that you know you need to save the jar files at any convenient location on your machine.
Let us now begin with the installation of TestNG in IntelliJ.
Installing TestNG in IntelliJ
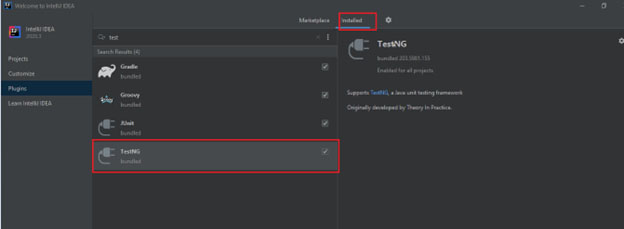
Step#1 As soon as you launch IntelliJ, navigate to Plugins tab.

Step#2 you may then click on the Installed tab and search for TestNG. You will see the TestNG plugin displayed in the list. In case you do not see the plugIn you may click on Marketplace, search TestNG and install the same from the list displayed.
And there you go! Did you see how easy it is to get TestNg in your IntelliJ IDE as compared to Eclipse? Next step is setting up the Java project with Selenium and TestNG libraries to start with our Selenium TestNG journey using IntelliJ.
Setting Up TestNG in IntelliJ Project
Once you have installed TestNg to the IntelliJ TDE, the next step is setting up the selenium and TestNG jar files in the IntelliJ project. So, there are two ways to go about it.
- First you may add the jars downloaded for Selenium language bindings and TestNG to your project structure.
- Alternatively you may create a Maven project and add the desired dependencies to your pom.xml.
We will review both of these ways and you may select the way that best suits you.
Adding JAR files to the project
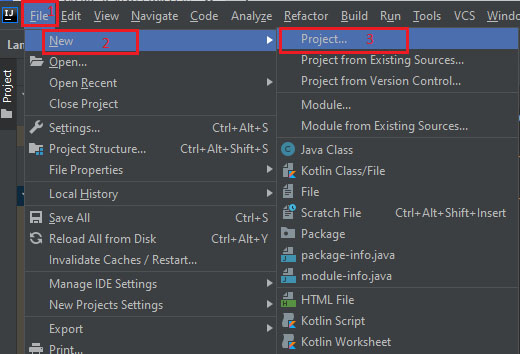
- Create a new Java Project by navigating to File>New>Project.
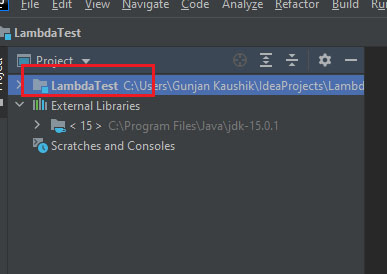
- You then need to follow through the windows that appear, give a name to your project and click on Finish. You will see that the project is created as shown in the screenshot below-
- The next step is importing the Selenium jar files , i.e. the java language bindings that we have installed in our system.For this you need to go to File>Project Structure.

- The Project Structure dialog would open up. You need to click on Modules and then on Dependencies. To add the JARs you will have to click on the ‘+’ icon and then select JARs or Directories

- As soon as you select the JARs or Directories, you will see a new pop-up window like below-
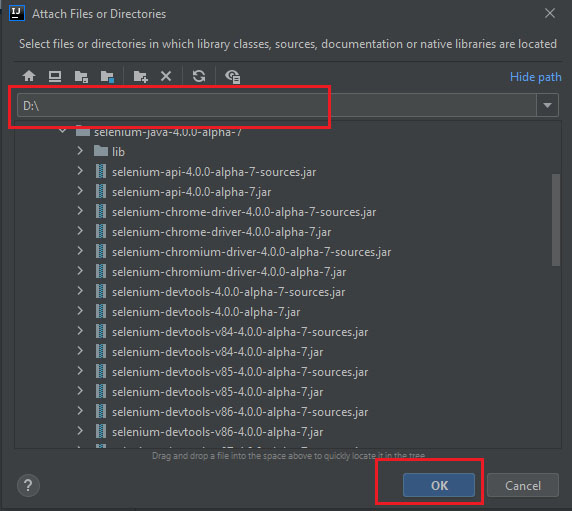
- Once you select all the desired jars click on OK. You will see that the jar files imported within the External Libraries-
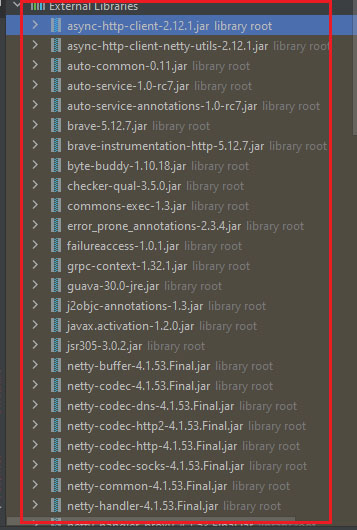
- Following the similar way add the TestNG jar file downloaded earlier.
Your project is now set with Selenium and TestNG JAR files.
Adding Maven Dependencies to the project
Rather than adding the jars manually you may alternatively use Maven dependencies for Selenium and TestNG in the Maven project. Instead of the general project we will create a Maven project and follow the steps below to add the dependencies.
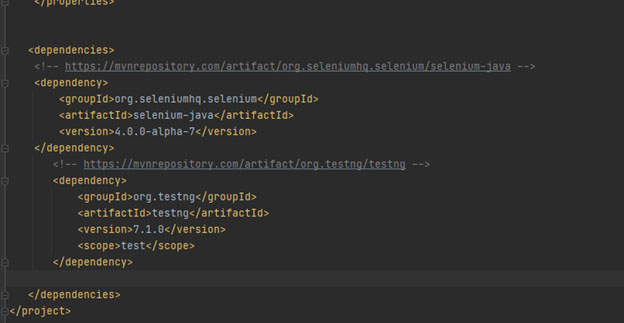
- You will find the Maven dependencies for Selenium and TestNG from the official Maven website. Let us first see how Selenium dependency is added.
- Similarly, you can add TestNG dependency in the pom.xml and save the same.
Your Selenium TestNG project is now all set and you can proceed with writing your TestNG tests on IntelliJ IDE.
Running first TestNG Test Script in IntelliJ
Now that we are done setting up TestNG and Selenium libraries, the next and the final step is writing the test script. We will try and automate the below use case in our test script.
Use Case
- Open the Lambda Test website.
- Compare the page title with the expected title.
- Print the results.
- Quit the browser.
Let us look at how the code for this would look like.
import org.openqa.selenium.WebDriver;
import org.openqa.selenium.chrome.ChromeDriver;
import org.testng.annotations.Test;
public class TestOne {
WebDriver driver;
//TestNG annotation for the test method
@Test
public void TestOne(){
//Setting the system properties to set chrome driver path
System.setProperty(“webdriver.chrome.driver”, “D:\\Selenium\\chromedriver.exe”);
driver = new ChromeDriver();
//Navigating to the website
driver.get(“https://www.lambdatest.com/”);
//Method to maximise window
driver.manage().window().maximize();
String expectedTitle = “Most Powerful Cross Browser Testing Tool Online | LambdaTest”;
String actualTitle = driver.getTitle();
if(actualTitle.equalsIgnoreCase(expectedTitle))
System.out.println(“We have landed on the correct page 🙂 >>> ” +actualTitle);
System.out.println(“Looks like it is an incorrect page :O >>> ” +actualTitle);
driver.quit();
}
}
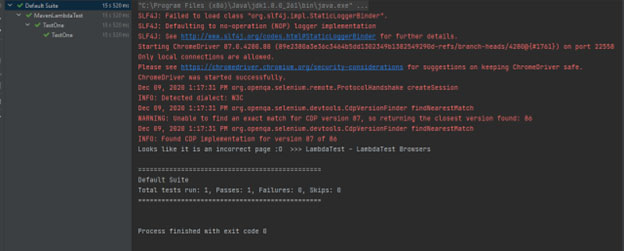
On executing the above code you will notice that the web browser opens up and the console logs display the TestNG logs with the test status.
So now that you have seen how to install and set up TestNG in IntelliJ IDE you may go ahead and start your test automation journey using IntelliJ. But make sure that the jar files for Selenium and TestNG are in sync so that your test doesn’t fail.
To perform Selenium testing with TestNG, you can choose from a different cloud testing platforms like Lambda Test that offers manual and automated cross browser testing across a wide range of real browsers and operating systems on its cloud-based Selenium Grid.
Happy testing!