Setup & Testing
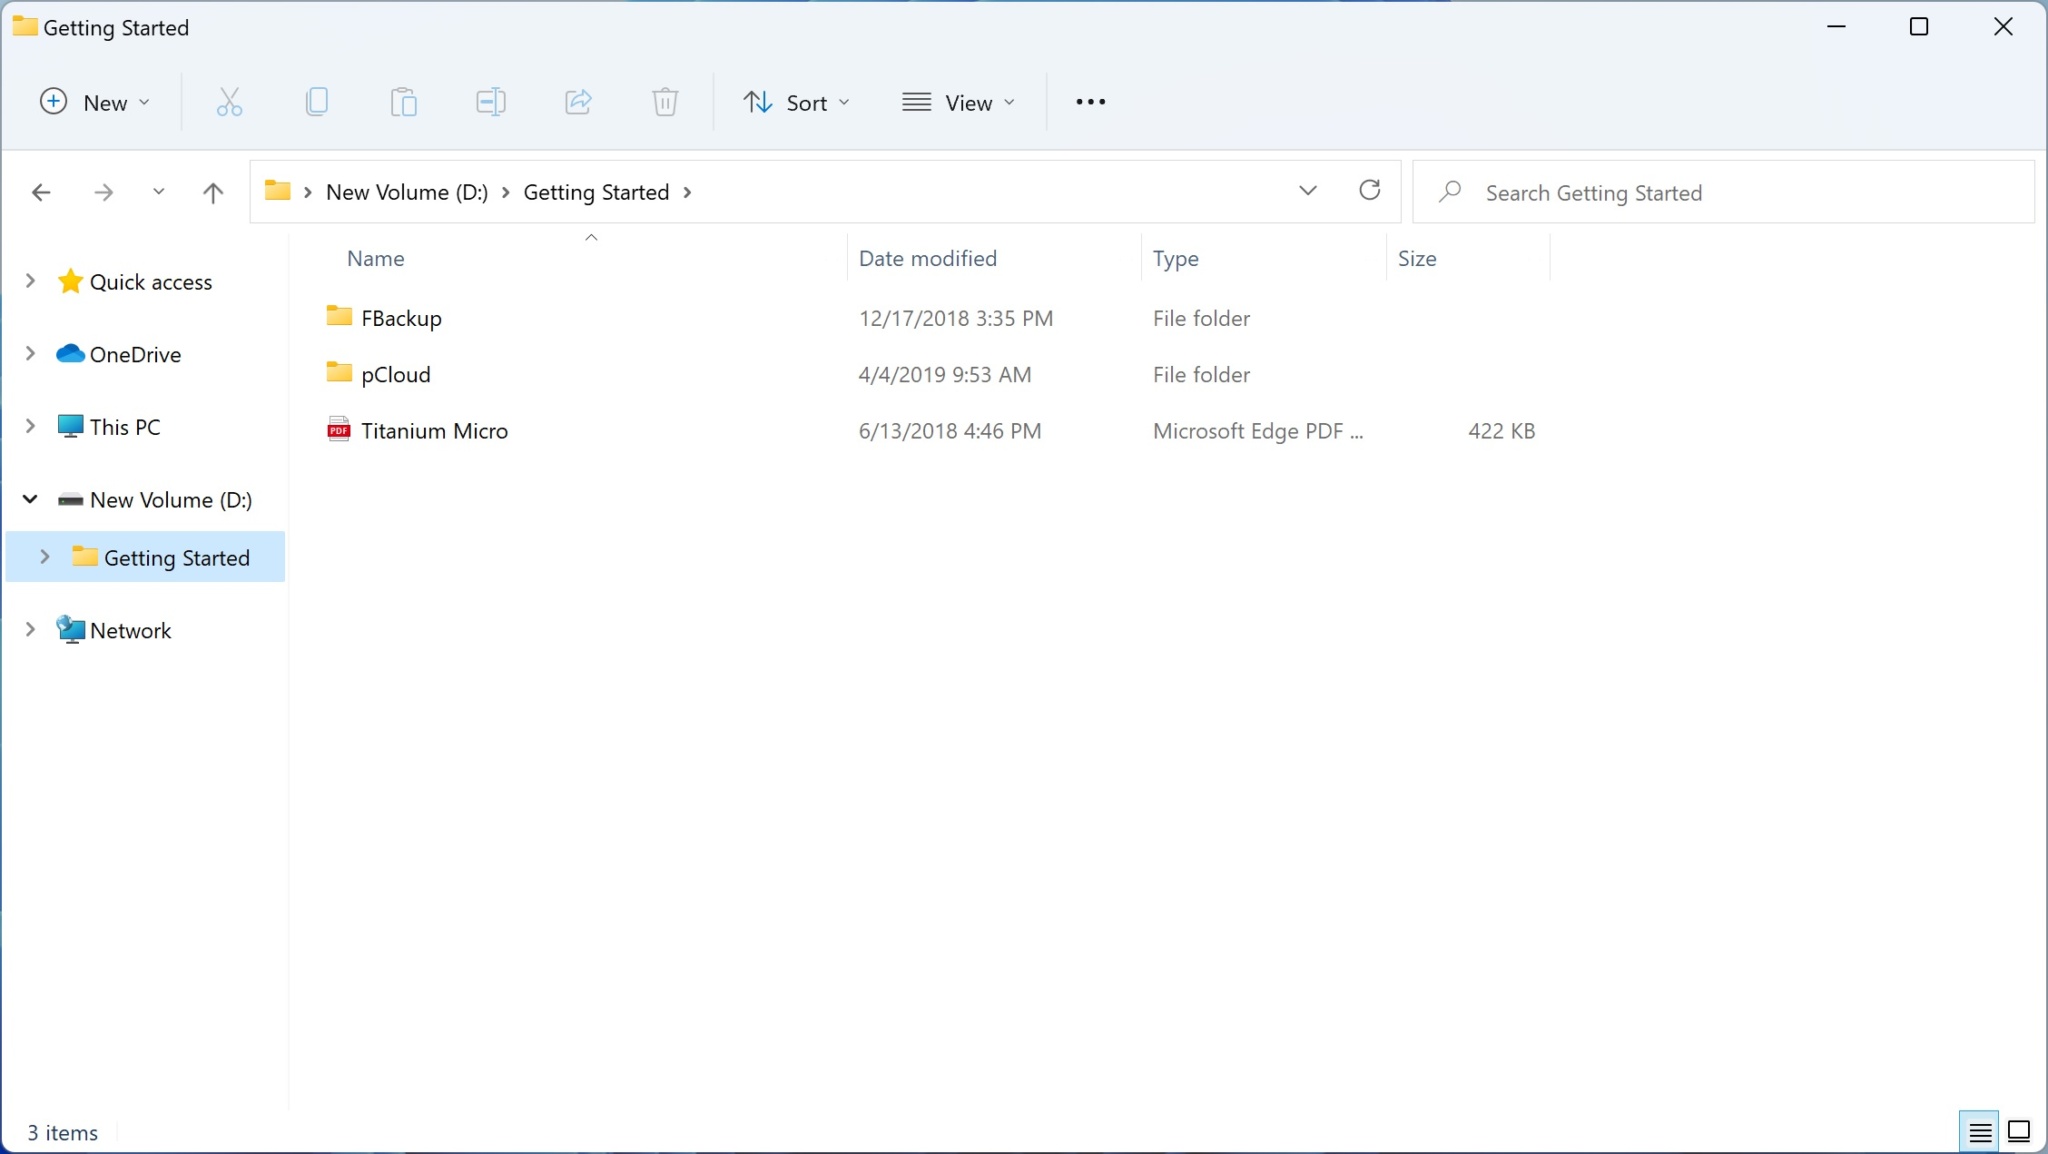
Just like any USB drive all you do is plug the Mercury into an open USB port in your computer. If you don’t have a Type-C port available Titanium Micro does provide a Type-C to Type-A adapter. Once plugged in Windows will automatically recognize the drive and you’ll be good to go. On the drive you’ll find a Getting Started folder that has a user’s guide on it and necessary files for getting FBackup and pCloud up and running.
The drive comes formatted as exFAT and has 1.81 TB of usable space.

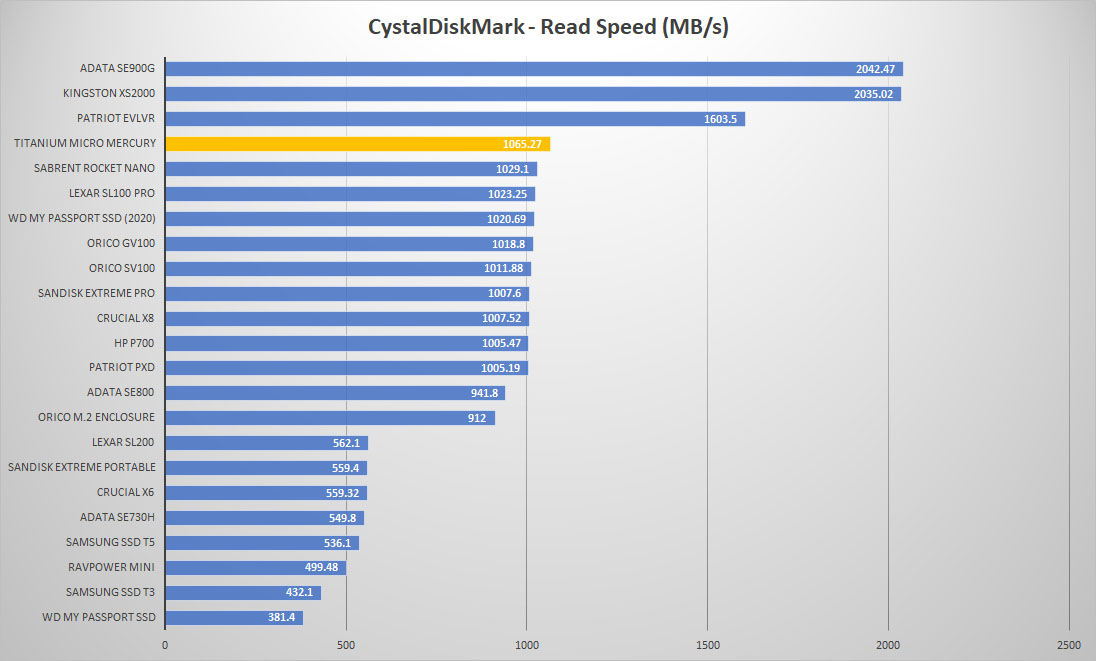
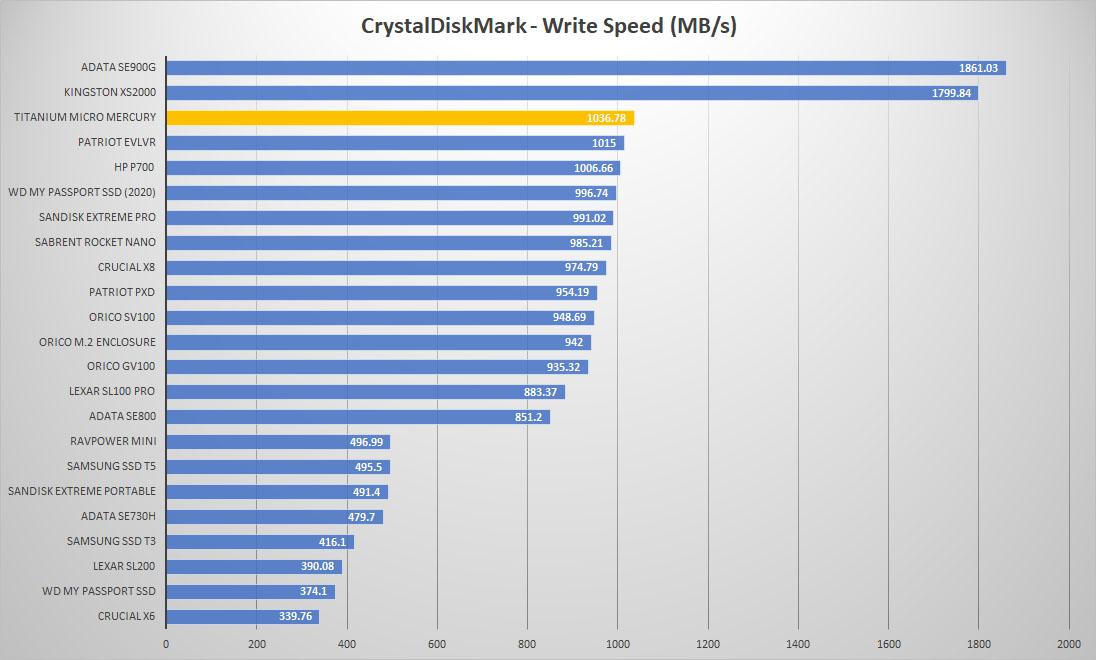
For testing we will be running the Mercury against other portable solid state drives we have on hand so you can see the difference between the drives. As a reminder Titanium Micro lists the speeds of this drive as 1000 MB/s for both read and write. First up we have CrystalDiskMark.
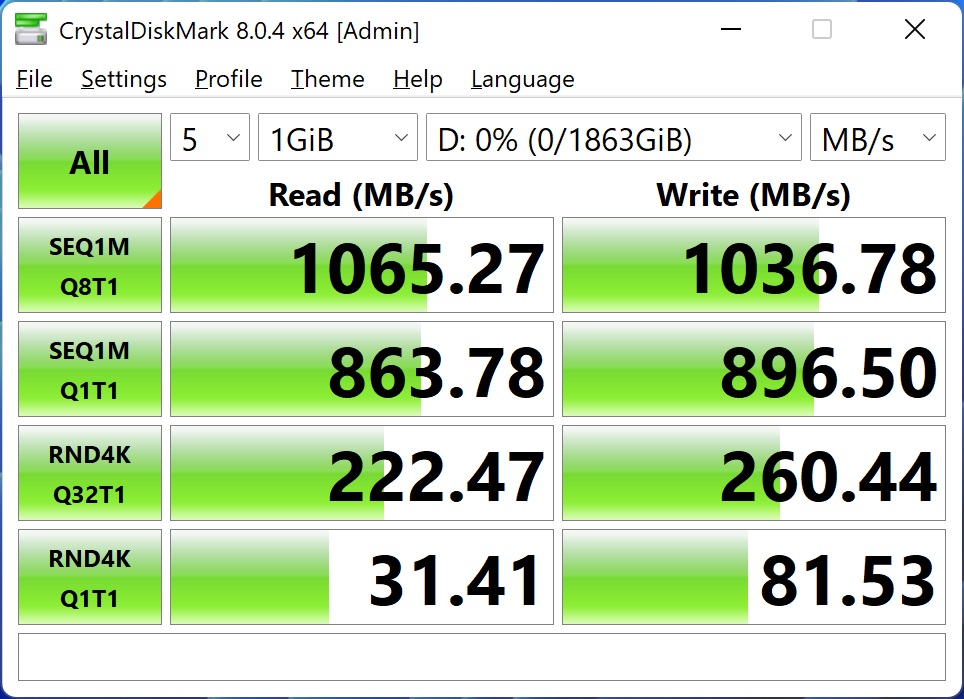
As you can see we have sequential read speeds of 1065.27 MB/s and write speeds of 1036.78 MB/s. Here is how the drive compares to other drives we’ve tested.
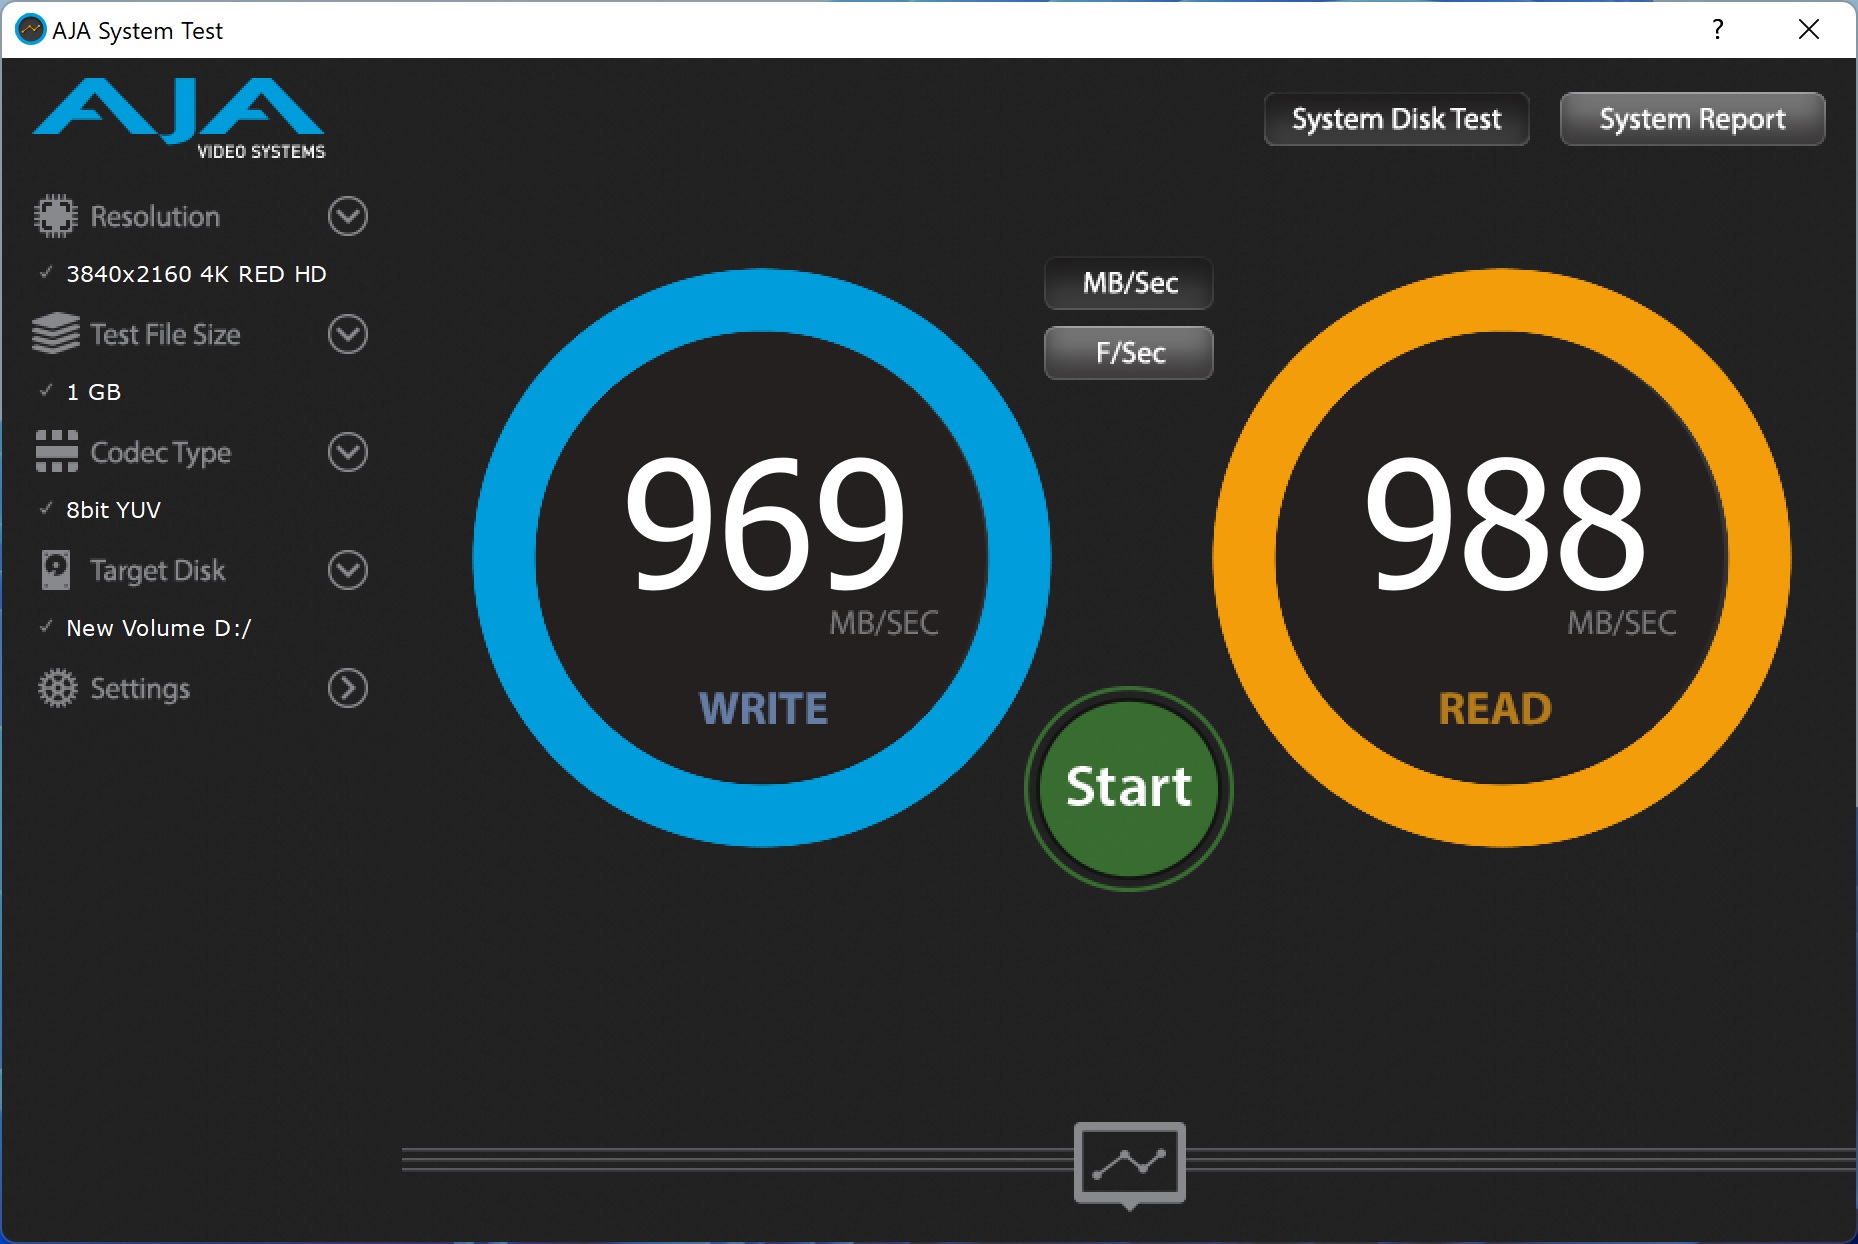
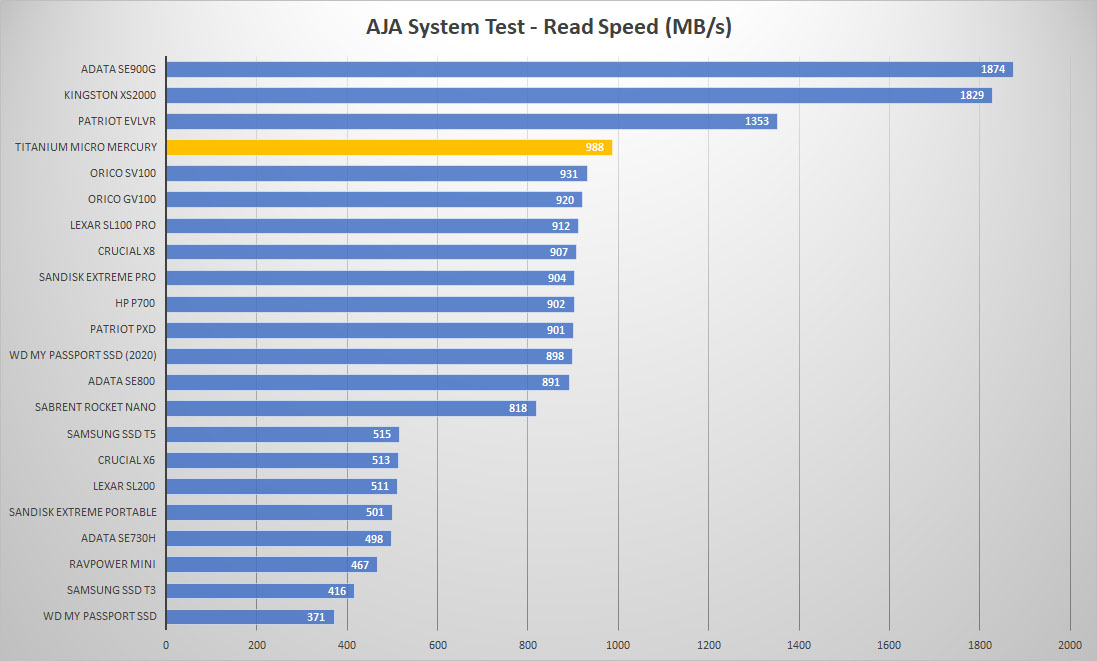
Next we run the the AJA System test. It tests different types of video formats and gives you throughput results for the drive. Our configuration was 4K RED HD footage, 1 GB test file size, and the 8bit YUV codec.
And those results compared to other drives.
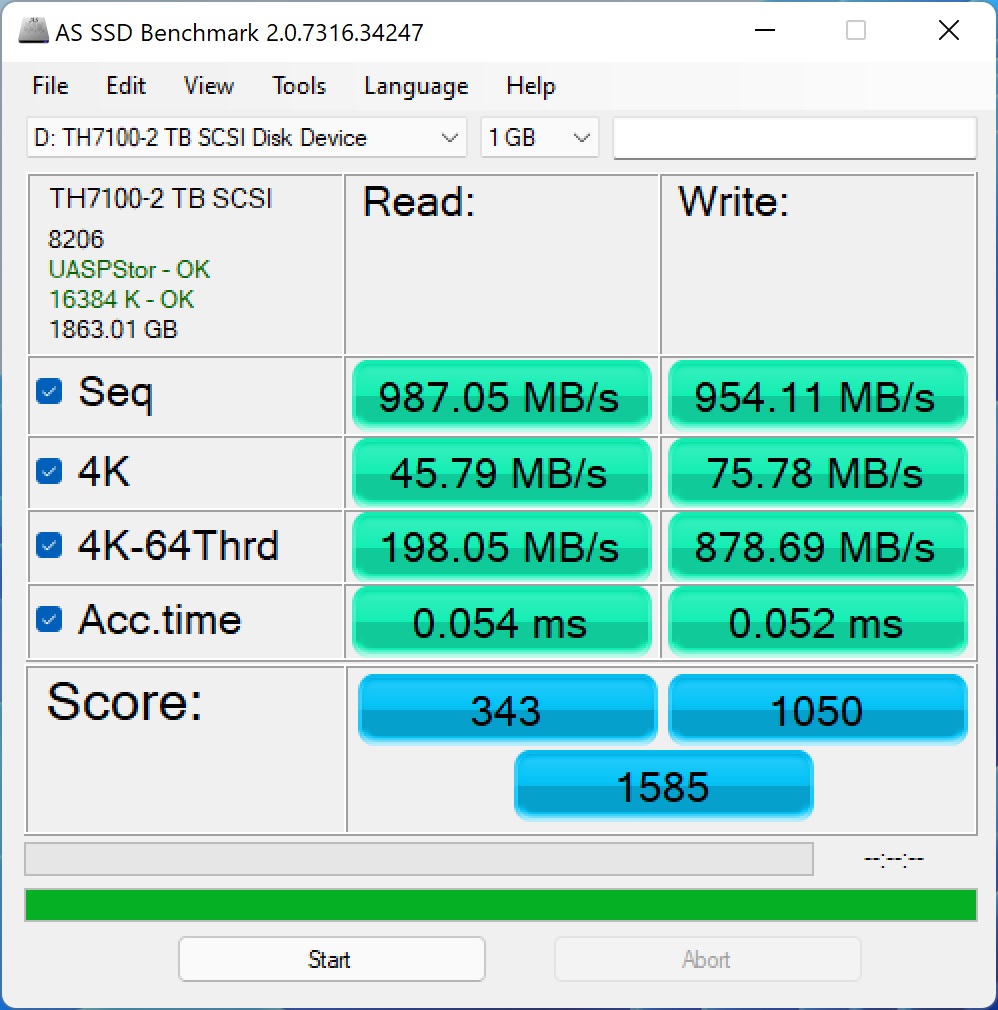
We also run the AS SSD Benchmark and ATTO Disk Benchmark.