Fans
If there is one thing that a PC needs for cooling no matter the type of cooling you choose, it’s fans. It’s sort of ironic that we come to water cooling because air cooling isn’t cutting it and then we still use air to remove heat from our loops! The nice thing is that we don’t need nearly so much of it. You might be thinking that you already have some fans so you are all set in that category. And while they may be good fans and they may even get you by, the fans used in water cooling perform much differently than the ones used for air.
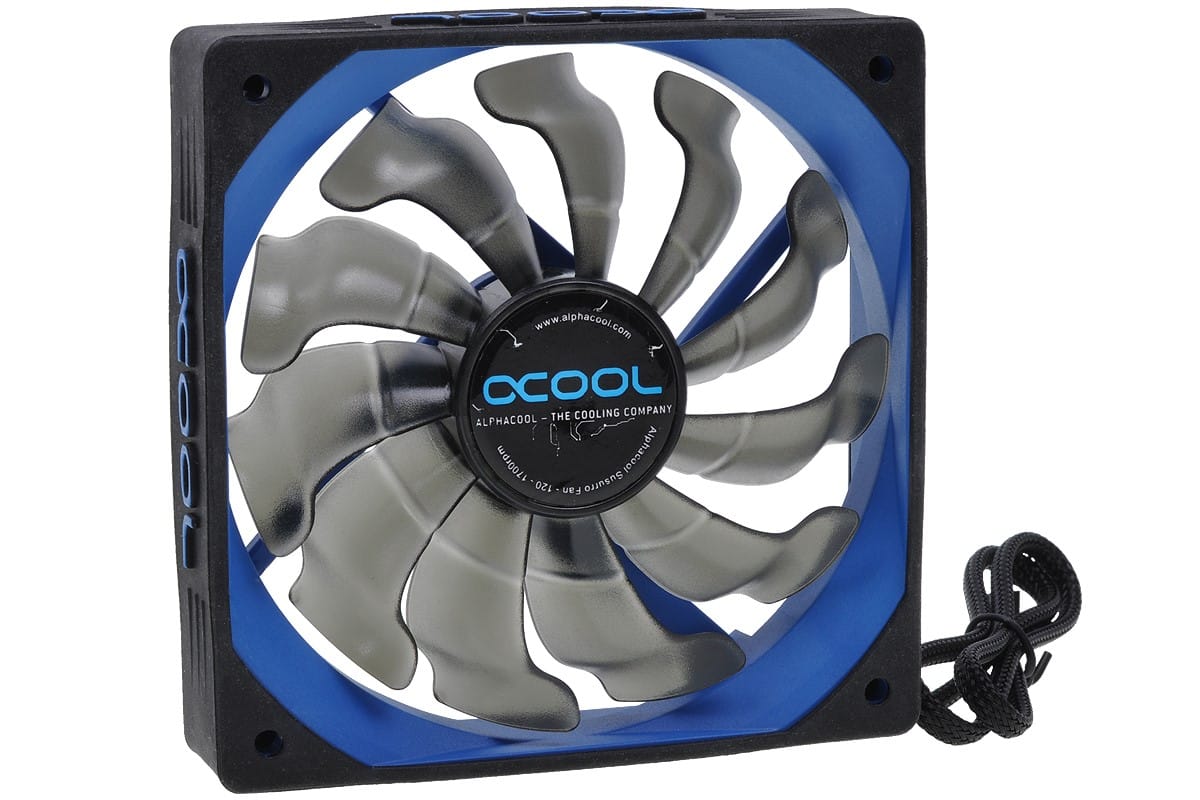
To start, get used to the term “Static Pressure”. Unlike air cooling we are not just blowing as many cubic feet of air around as we can (thus the CFM measurement used for standard cooling). In water cooling in essence we are pressing or pulling air through our radiators. To do this effectively fans must be designed in a way to use more power and less speed (think torque vs horsepower). Static pressure is measured in mmH20. That is the amount of water a fan can pull measured in mm. Here are a couple of fan spec sheets from Thermaltake, note the differences in static pressure.
Radiator Fan:

Standard Fan:

So now that you know what to look for in a fan that is good for water cooling, there are just a couple of other factors to consider. Fans come in lots of sizes and thicknesses. You will of course want fans that fit on your radiator. If you chose a 240mm radiator you will need two 120mm fans, a 280mm radiator would then of course need two 140mm fans. It’s simple math really. In water cooling the thicker the fan typically the more static pressure it will produce. Unfortunately we can’t all just slap a set of 55mm thick fans on our radiators and call it good. Remember when you measured for overall space available for the radiator? That number – the thickness of your chosen radiator ÷ two is how thick of a fan you can fit in your case. Now that is of course with fans on both sides of the rad in what we call a push/pull configuration. If you do not have enough space for this then you can run fans on just one side. Keep in mind doing so will cause your cooling capacity will be somewhat diminished.
So what brand fans? There are many many good ones out there. Prices vary from ~$7 up to ~$40 per fan. Build quality, static pressure, sound dampening, and warranty will all factor into this price. Choose something you can afford but with good static pressure that hopefully operates at a low dB level. Remember for just your 240mm radiator you will need four of these.


Accessories
There are a few items that you will want to have on hand to get your loop up and running. Of course you will need tools. Have a flathead and Philips screwdriver in several sizes handy. A pair of sharp scissors will get you by for cutting your tubing but a tube cutting tool will make the job much easier. You are going to need a fill bottle or funnel with tubing and fitting attached to get your loop started. Finally you will need a jumper for your power supply to get the loop filled without switching your whole rig on over and over.


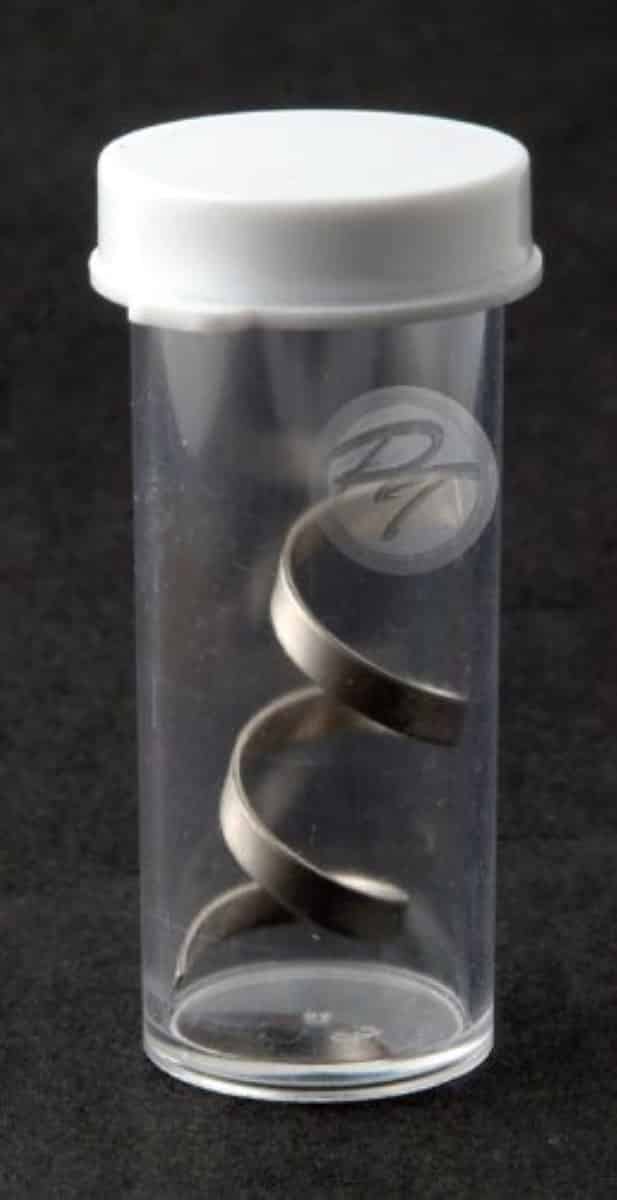
I’ve not covered dyes and coolants as this is a personal preference. I will however say that you will be 100% fine to run your loop with plain old distilled water from the grocery store. A gallon will keep you set for several full fills of your simple loop. A lot of people like to add a “kill coil” to the loop which is just a thin piece of 100% silver ribbon. This will prevent bacteria and algae from growing in your loop. You can avoid this altogether by simply performing more frequent water changes. If you choose to go with dye the the only brand I can recommend completely without hesitation is Mayhem’s Dyes. From from personal experience his dyes look the best, last, do not stain your parts, and do not encourage growth and build up. Additionally they are much more environmentally friendly than most.

I’ve covered the full range of parts needed for our simple entry level loop. Later in the series I’ll be upgrading the loop and adding an additional radiator, GPU block, and memory blocks. At that time I’ll do in depth explanations of each of those types of blocks and what makes one better than another. In the meantime carefully select your parts using my advice and your own research. This is not a cheap endeavor and you will want to be sure about what you are buying. While your parts are on the way I’ll be going over the parts we’ve selected for the ThinkComputers Water Cooled Rig and why we chose what we did. Hopefully you’re feeling slightly less overwhelmed already and excited for the next step in building your very own water cooled PC.
This has been Water Cooling 101: Episode 2!