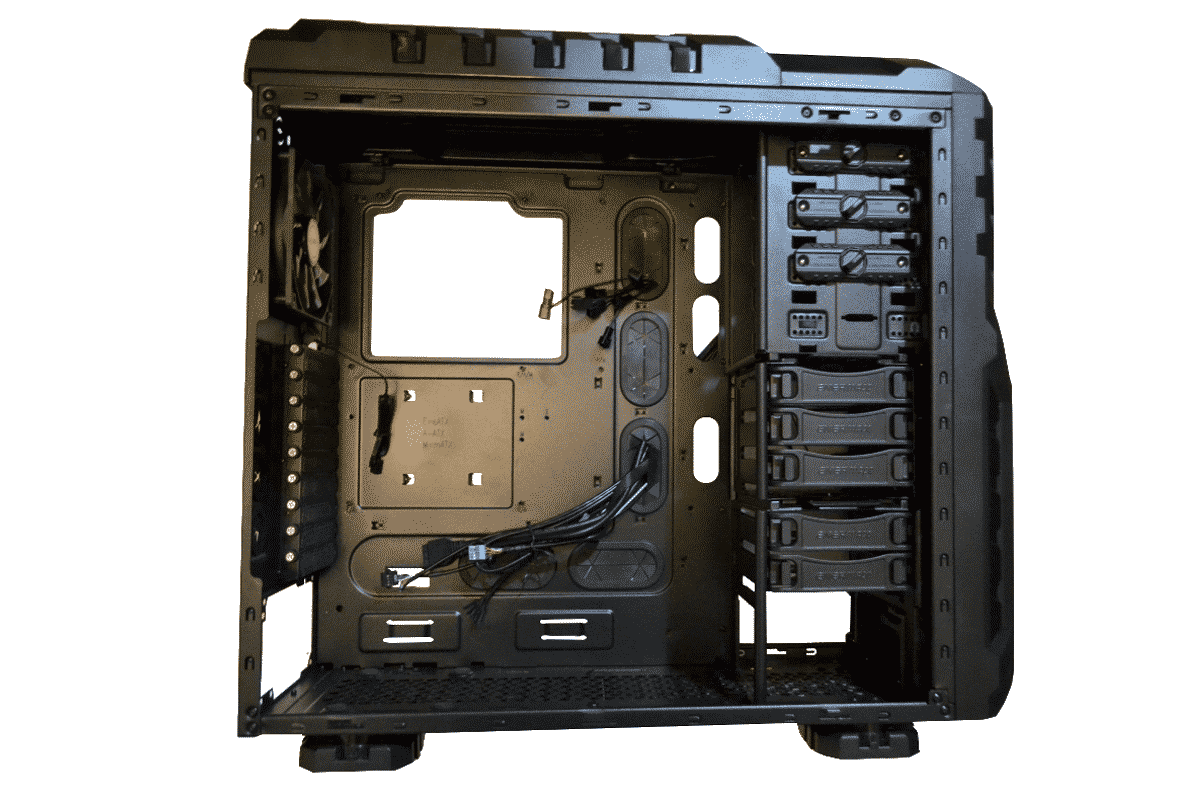
A Look Inside
Inside of the Enermax are a few innovative ideas but mostly you get space for huge motherboards. Those that have two CPU’s and 8 or 16 ram slots and enough graphics card to run a Jumbotron during the World Cup Soccer match, but I digress. Most times when they say E-ATX they mean that the Motherboard is one to two inches wider and for that it’s usually impossible to fit an E-ATX into a regular case. They are usually longer too by up to 9 PCI slots, so a lot of cases cannot fit these dimensions in their cases; but in the Enermax Thormax Giant its ready for any sized board you can buy.
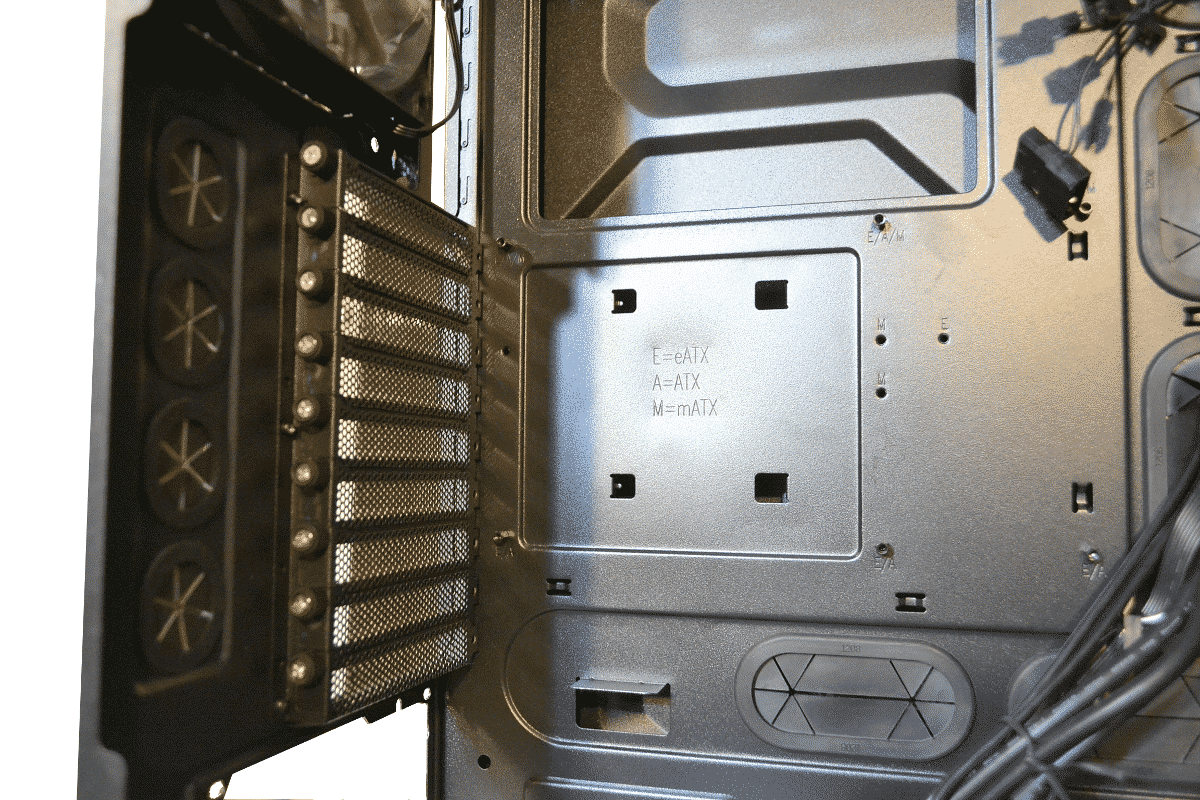
See the extra set of triple holes without the rubber grommet. Well those are there because boards will cover up those rubber covered holes and you will need to use those but the grommet will not be able to move to those holes. These are smaller so the grommets will not be exchangeable. Does it really cost that much to make the holes larger for the grommets to fit into. Maybe most people will use this with a regular ATX board and not worry about those but I am being really picky here. I think that a set of blanks for the ones that you might not be using could have been appropriate but that’s a small bother.
There is also a whopping 194mm of air cooling space head room if you are not going water-cooling so any air cooling solution is in the range of fitting inside and is not an issue with this case either.
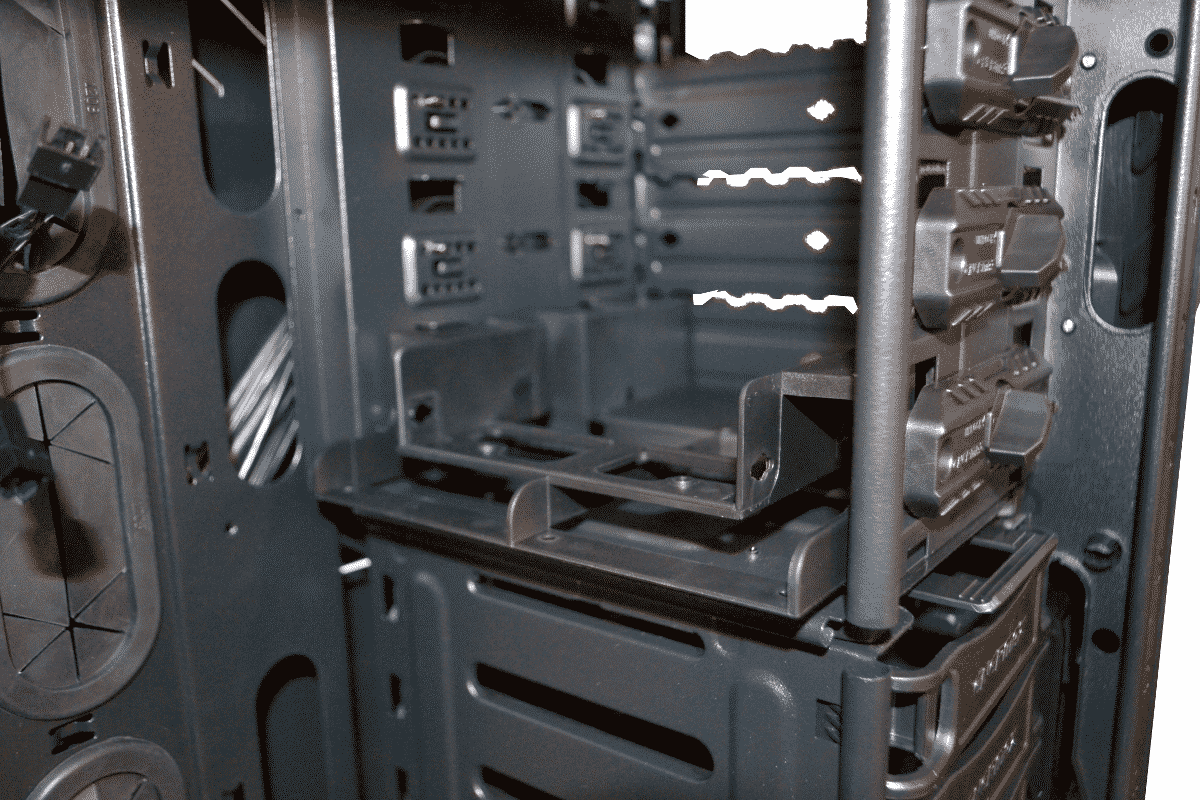
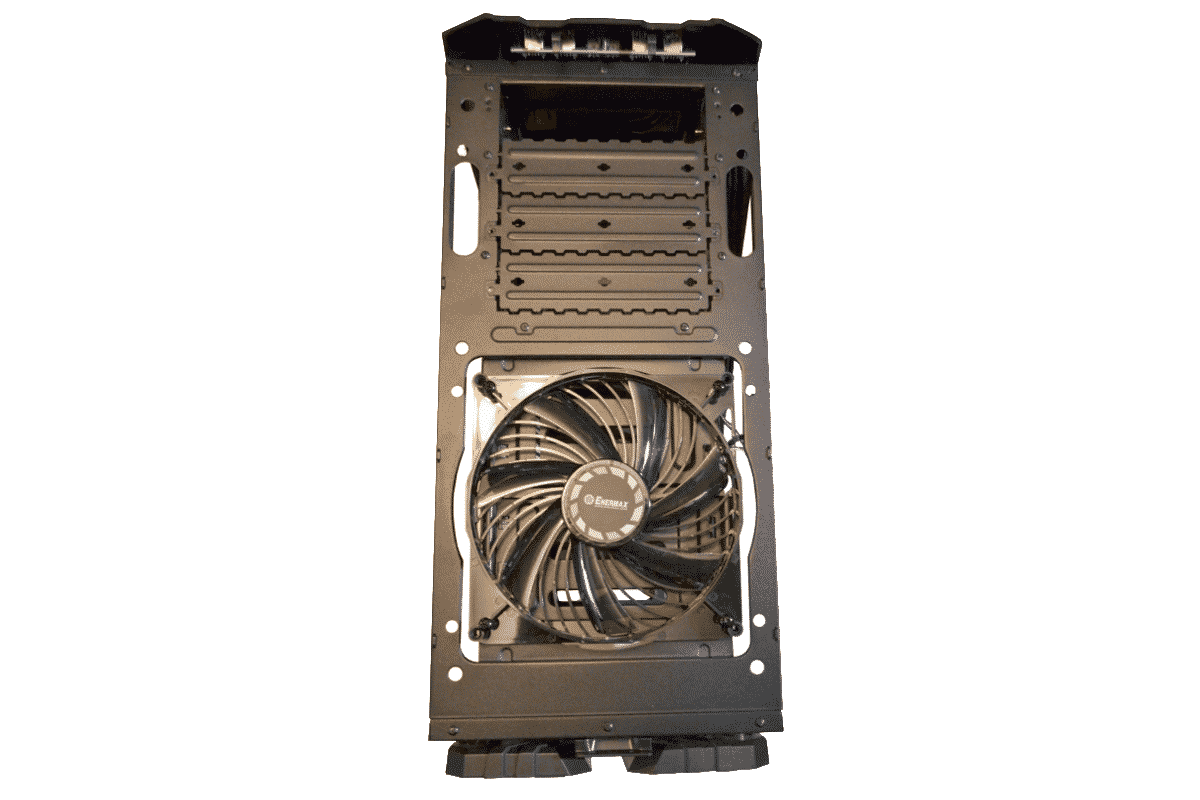
Here is a shot of the PCI slots that are ventilated and have the Rubber coated Screws that are mounted on the case. On the opposite side of this area is a single SSD drive mount behind this part of the motherboard tray.
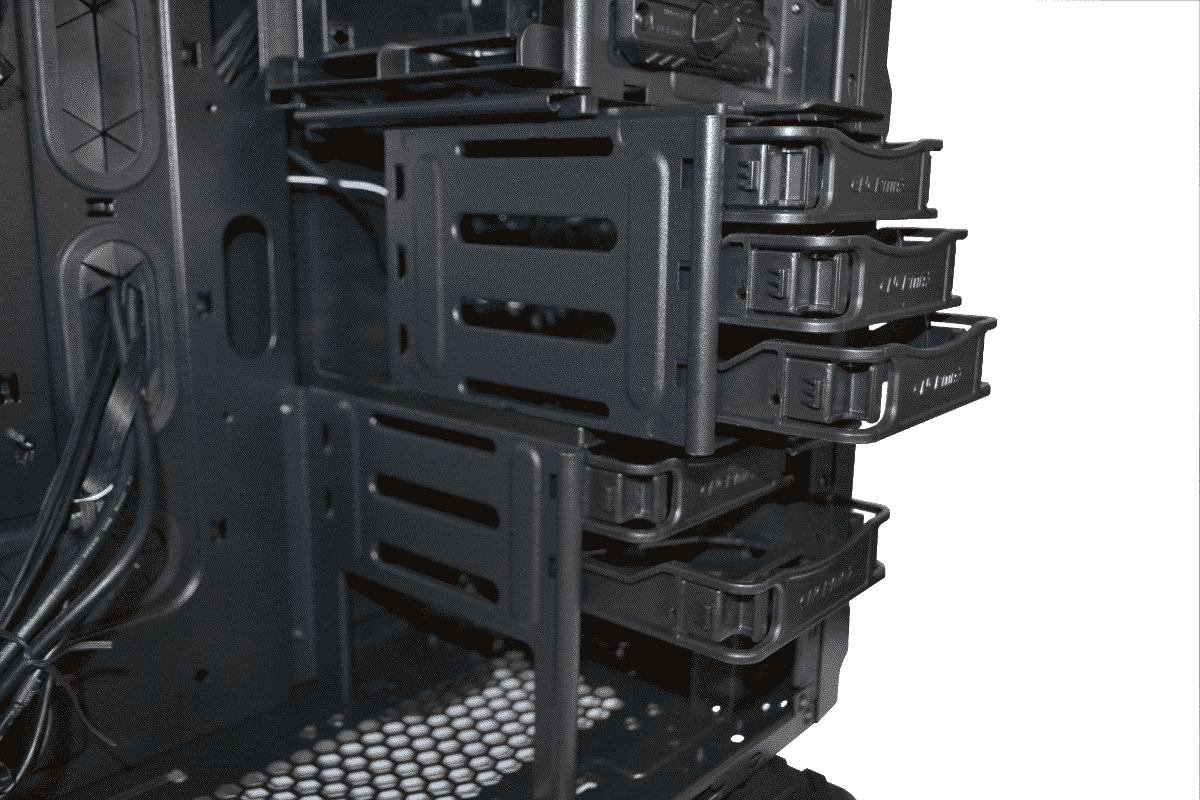
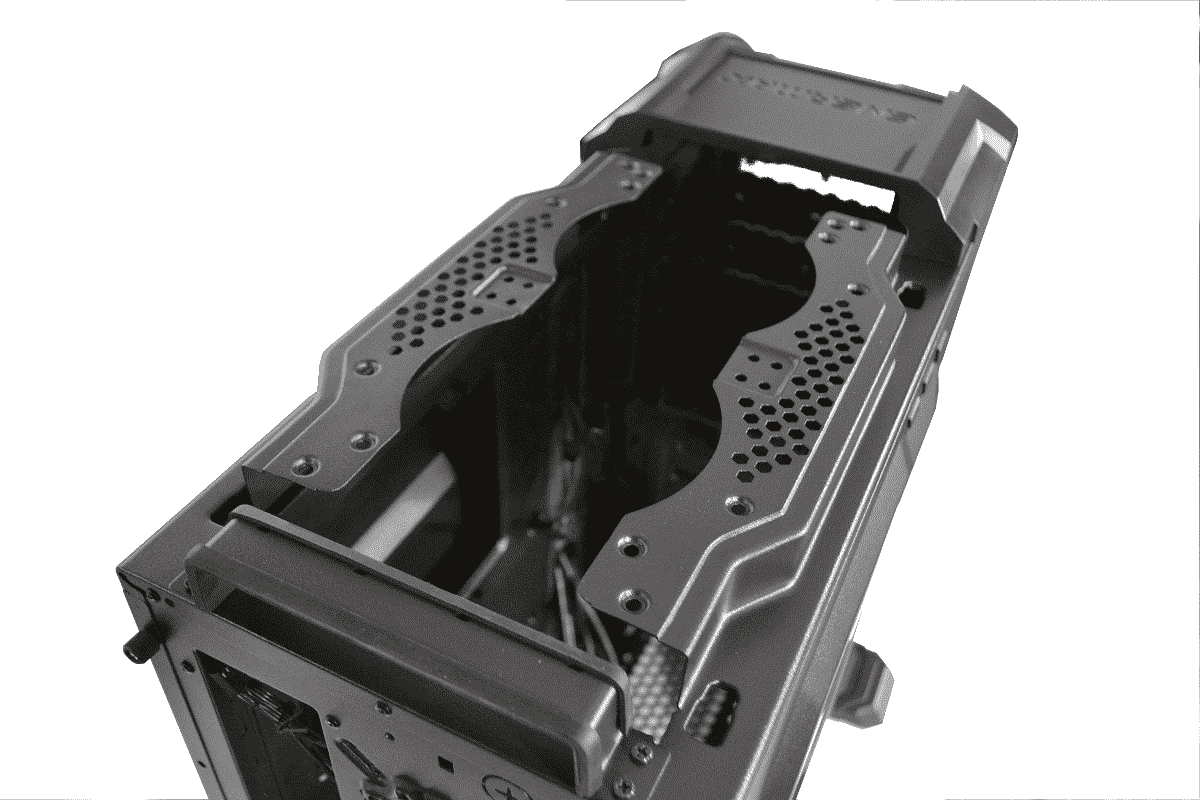
The central mechanical HDD and SSD drive bay can be removed with action of the two levers at the top and bottom levers of the unit. Unlocking is as easy and pinching or squeezing towards the middle. This will unlock the top and bottom lever locks and let the cube like structure slide out with little effort at all. It is also very stable when locked in and very tightly mounted. The bottom tray assembly is not made to be removed but the computer Modder’s use drill bits to remove these when need be. They are four small rivets and they are painted as well.
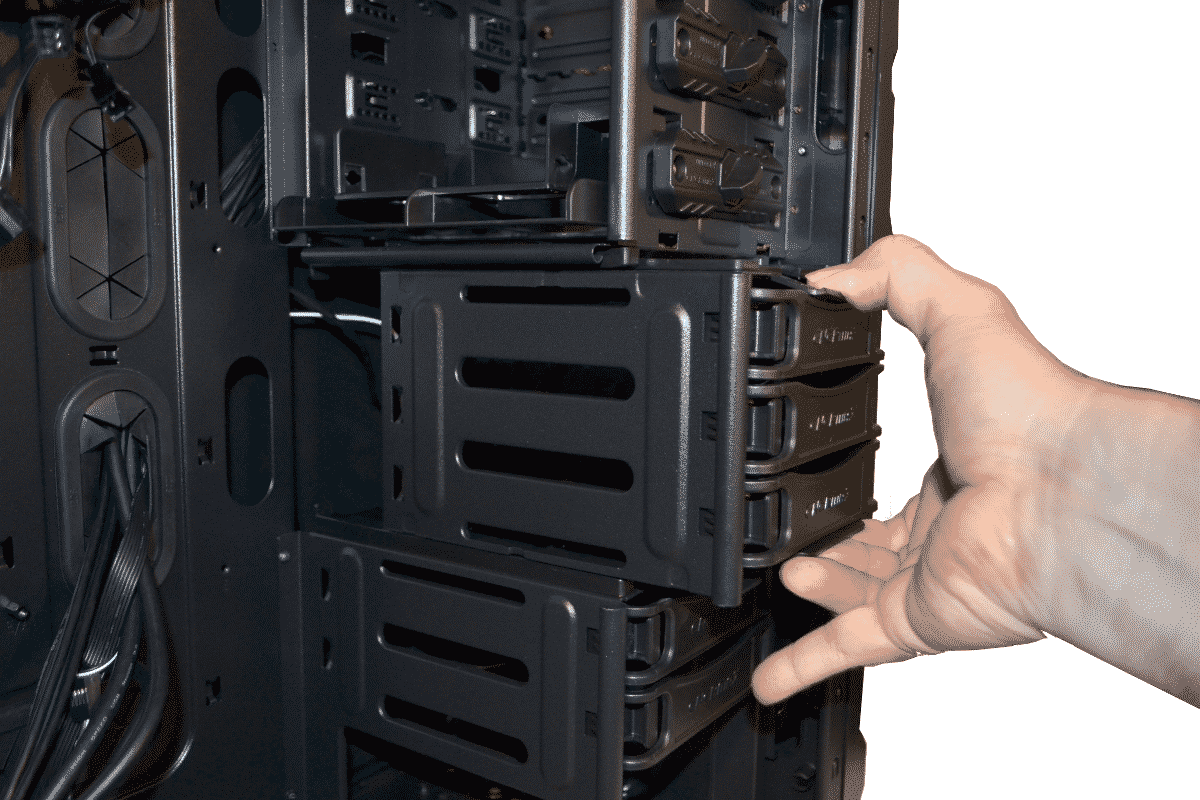
The individual HDD or hard disk drives can be removed and installed by a locking cassette tray that opens with a pinch and a pull. The Mechanical hard drives are tool-less installs but the SSD’s will need those 4 tiny screws that typically mount them. Enermax includes these screws if you need them in the case accessories.
Now with the bay removed we can see how much ventilation and graphics card space is gained for the builder in the Enermax Thormax giant, but now for a surprise
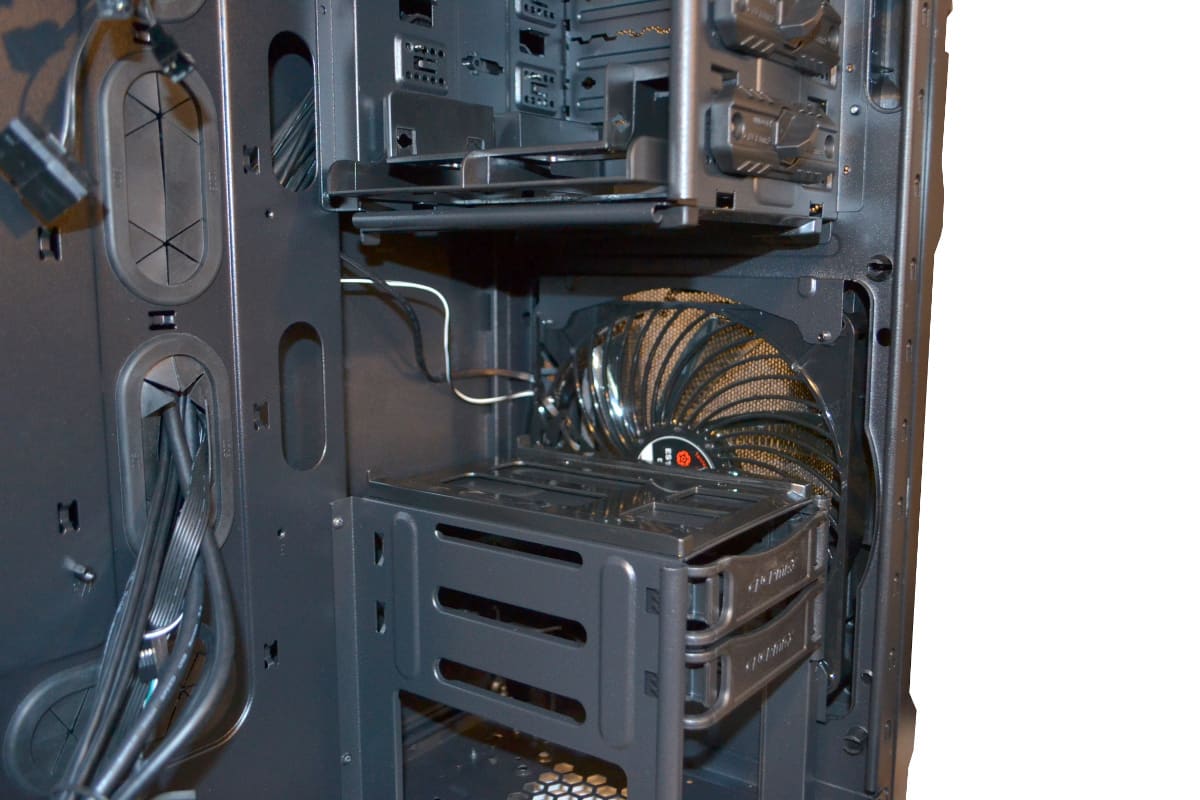
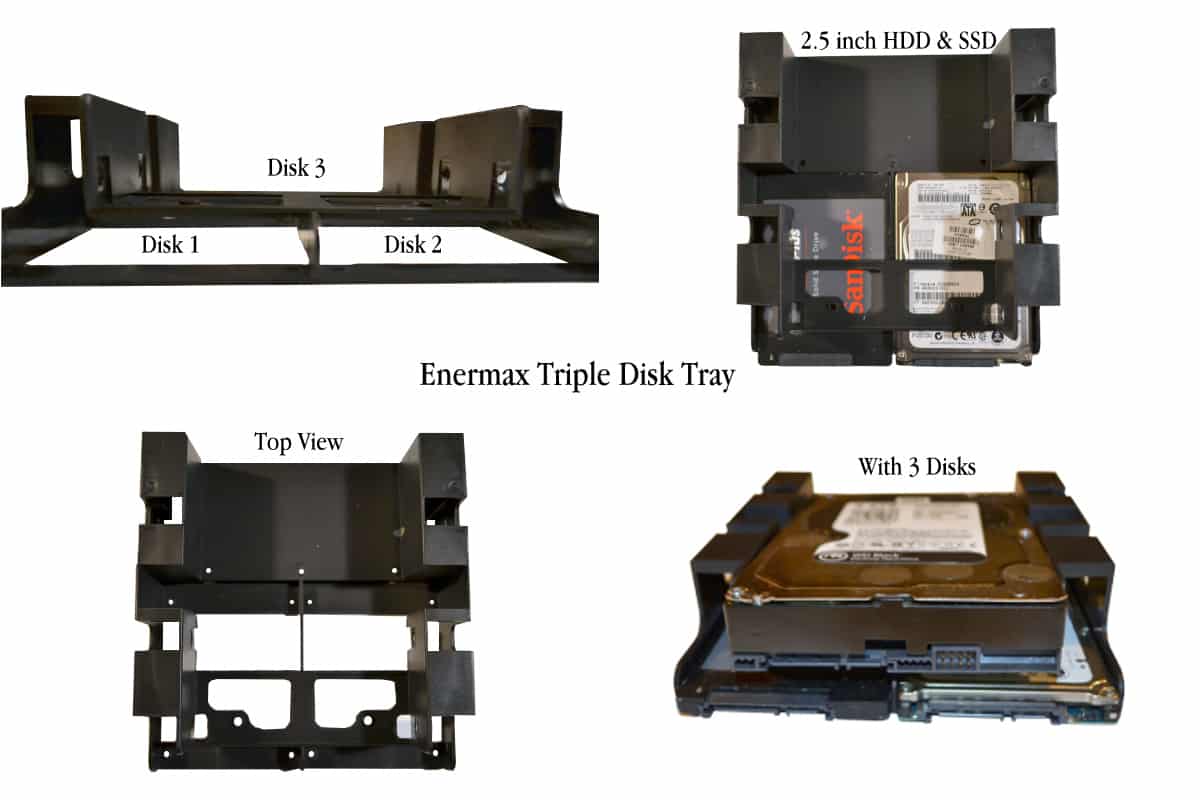
One of the best parts of the case is this handy dandy 3 in 1 HDD/SSD holder. With one cassette the builder can mount 2 X 2.5 inch SSD or laptop sized HDD and on top of that a very large capacity mechanical hard drive with just one space. This allows a computer Modder to actually take the bottom hard drive rack out entirely for a Pump and Reservoir combo.
This is a closer look “Enermax 3 in 1 triple disk array tray”. I gave it that name as it should be a separate product that Enermax sells for all case modders. It is a great little device that saves lots of room. The only problem I see is you must use all 90 degree S.A.T.A. and Power plugs or use all straight. Mixing them up could be a hassle for the top drive as its power is plugged right on top of the bottom left S.A.T.A. / 2.5 inch device and crowding could be an issue but overall I love the idea. Good one Enermax.
The outer portion of the front is pretty cut and dried and I wished they had added a 240 radiator mount with a couple of 120 fans in the front bottom instead of the big 200mm fan but after all it is a Vegas style fan and very beautifully Lit and it adds a lot to the look of the case so, I understand completely why they went with this plan. The top has spaces for 4 large 5.25 drive bay drives lots of room inside them. The bay covers are both Knockout type but it has screw return. So like most knockouts, when you take them off you throw them away and can’t replace them or modders use these little metal slot covers to mod parts for stabilizing and mounting things extra inside but with these you can replace them if you remove a device and no longer need to leave a front slot exposed. This is a smart cost cutting option and I love the way they did it. The steel is very solid as you can see the small little notch that holds the blank in place is very small. Hence the strong steel fabrication. This is good. Also the tool-less designed locks that are included with the case let the builder move the stays in five different lengths so this is a great system since not all bay accessories are created equal or the same whole distances. This moveable holder does well and is very well designed. This is another great part of this case and a good one for Enermax.
The back of the motherboard tray is vastly large but a lot of the important space is taken by a vast amount of fan, power and LED control lead wires. It’s not bad but it could have used a few more millimeters of space behind the motherboard tray for wire management, but we will address that in the next build page. The Rubber grommets are nice and there are three large and handy motherboard P8 pin / C.P.U. power lines for surely any motherboard style you could choose so no cutting and cussing needed there. The holes are big enough and wide enough but there is not much room behind the actual Motherboard tray.
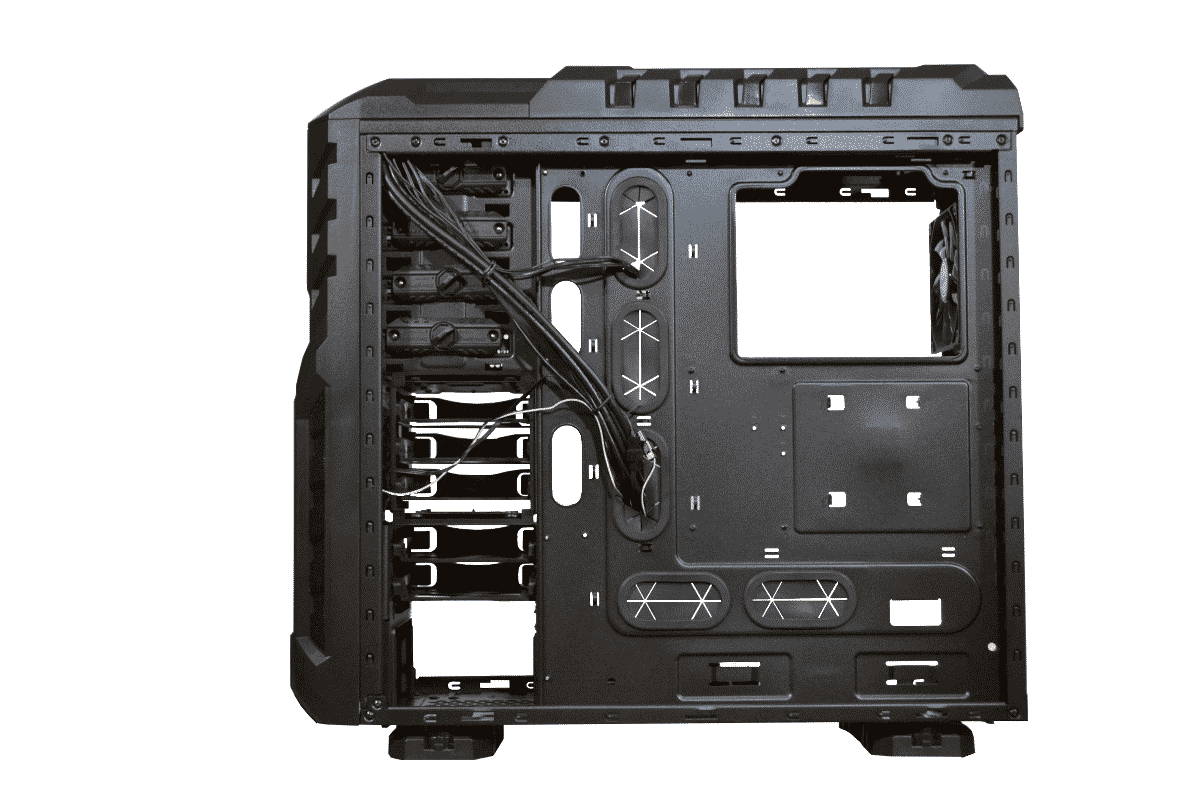
According to my (digit-al) measurement I am showing 7/8 of an inch distance behind the case. That is 2.3cm distance for the rest of the world that does not use American measurements. There is more room when you factor in the Side panels out cropping and with that the need for space should not be an issue in the end. The panel saves the day here or at least that is how I am thinking at this time in the review. I did actually use a solid ruler for this measurement. But a finger is so much more telling and fun.

Getting to the top of this feature filled case is the area where the 120, 140, 200 mm Fan can be added or the 120 X 240 and the 120 X 360 cm radiator. As the control area takes up almost a third of the top area, there is sufficient room for a 360mm long radiator but, you are not going to get much direct ventilation for that last 120mm extra portion of the case. To make room for the 360 Radiator the Enermax Thormax Giant has shaved back the top of the drive bay area to accommodate the extra 120mm of space, but the builder will get direct air from the top to only 240mm’s of the 360mm radiator. I don’t know if that will matter since you will still have more area for cooling with a longer stretch of Radiator and an extra bottom fan, but a regular Enermax 240 x120 all in one water cooling solution will go swimmingly at the top without any problems at all and would be my choice for this build.
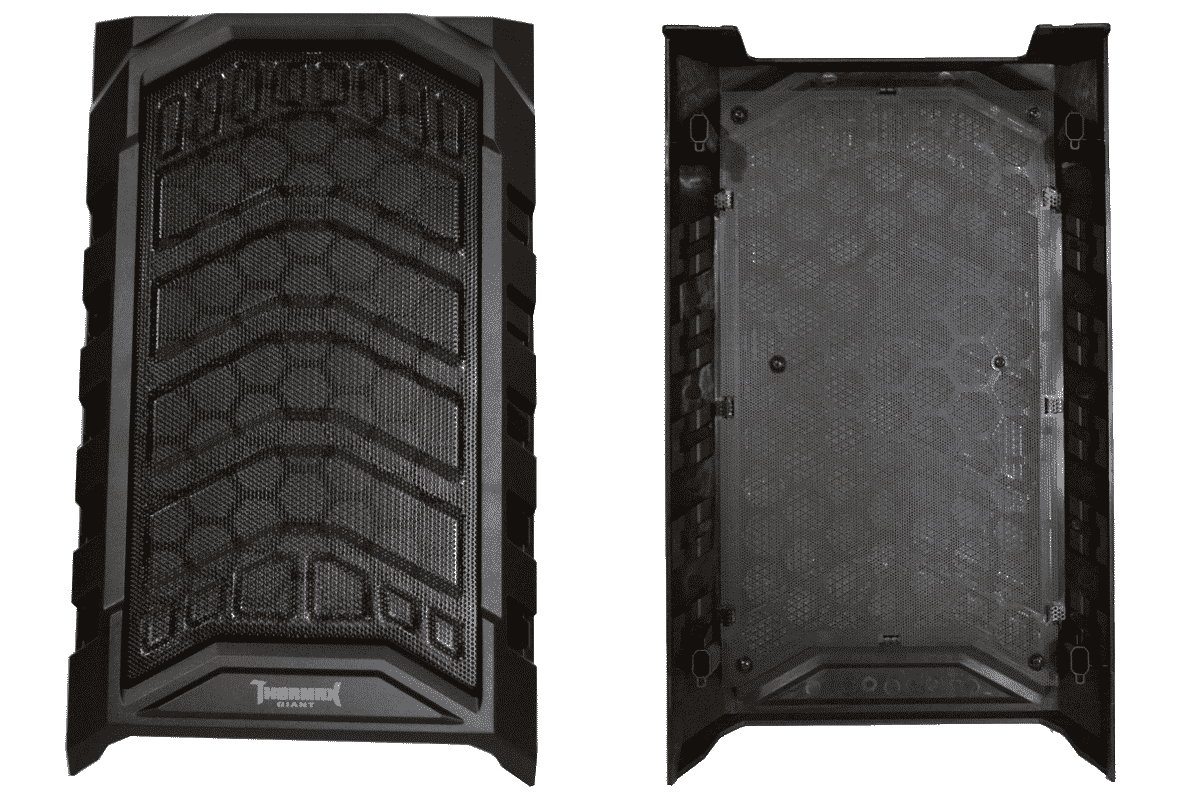
Ventilation is nice at the top of the Enermax Thormax Giant but you will need to clean the entire cover inside and out if you need to take away the occasional dust. The filter is a high quality clothing drier vent material that will last a long time but it is only removable by taking out six Phillips head screws and then bending back eight different tabs to remove.
So in short, clean it like the lint catcher in your drier or blow it out and wipe the top down with a dry cotton cloth, slide it back in to place with tough bump on the rear, and that should do it.
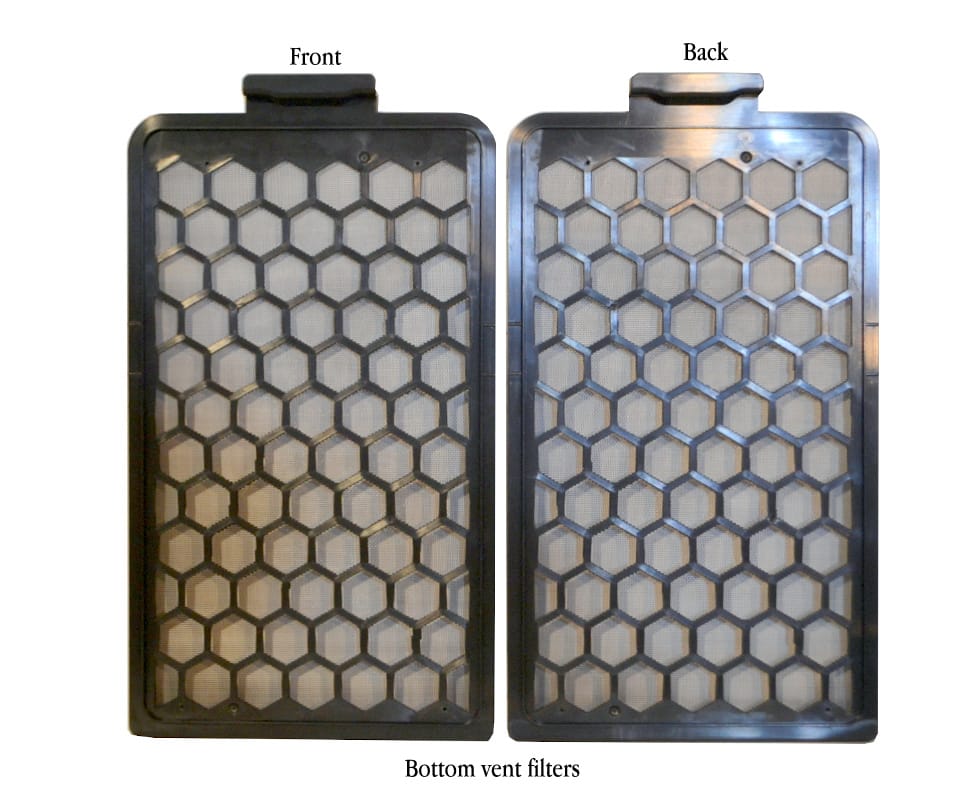
Two drawer type vents come from the bottom, one from the front and one from the back. They cover the entire bottom surface of the bottom frame for dual 120 x 120 fans or one 120 X 240 Radiator custom video card cooling loop or for one of those huge 290X with water cooling installed. This case can do it.
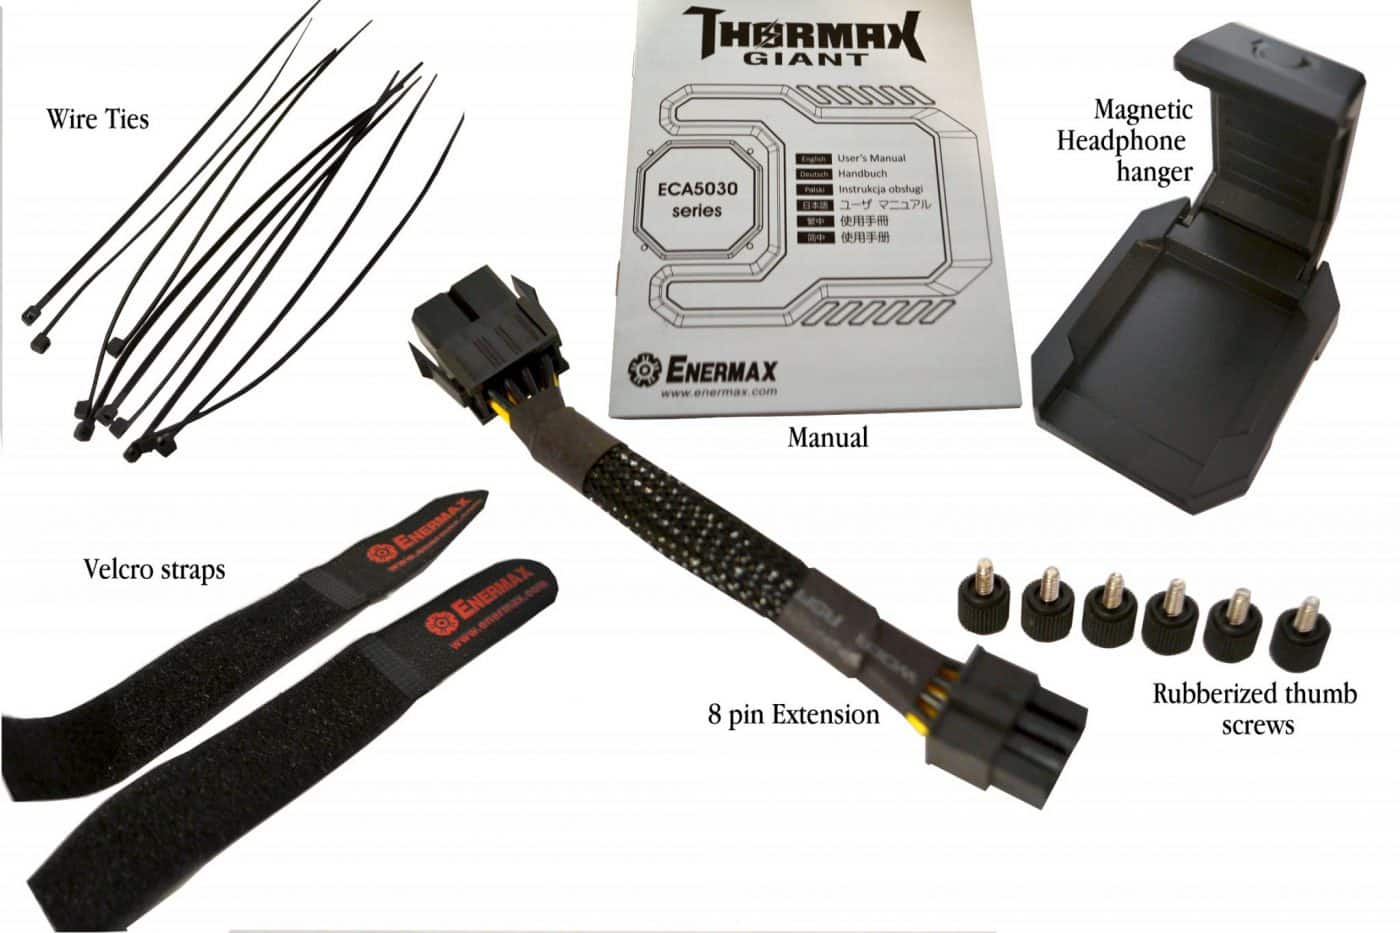
These are not all of the accessories but they are all of it minus all the screws that I will show in the build phase of this Review.
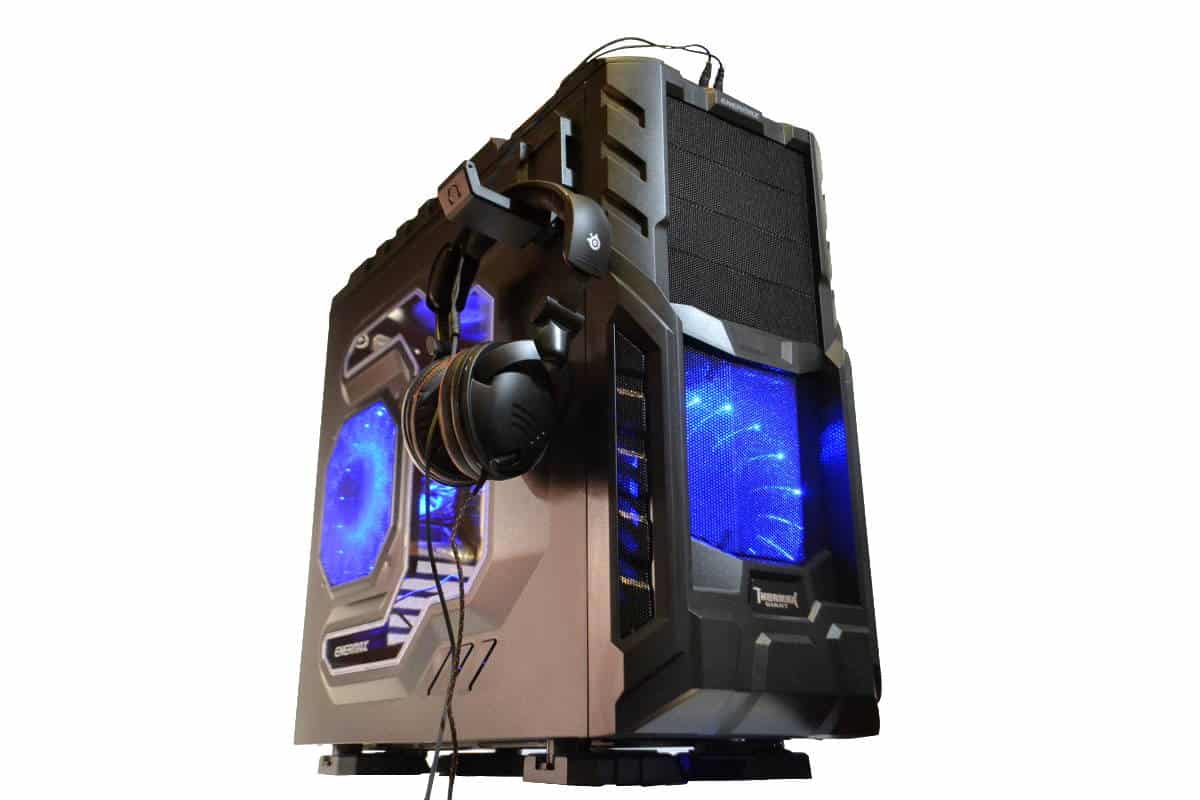
Here you can find two Velcro Straps for large wires or water tubing, there is also the magnetic head phone hanger that can be placed anywhere steel is located on the case. There is the rubberized thumb screws that are really unique. The user’s manual is great for understanding the obvious but does tell you all the places you can put a fan at.. And there are a lot of places. The wire ties that come with this is about the first kit I have ever seen that has the right amount, then there is a 8 pin extension wire just in case your wire is slightly too short. After all, this is a big case.


The cooler Master Cosmos II case is the chassis I’ll every buy, well at least for a good decade and when that time comes, I’ll make it fit. Working with a 50lbs case ant fun yet it’s rewarding when you first turn it on at the beginning of the day.
PhoneyVirus
https://twitter.com/PhoneyVirus
https://phoneyvirus.wordpress.com/