Installation
We are building a completely new test system for our Sandy Bridge P67 setup. It is comprised of the following components.
Intel Core i5-2500K Processor
MSI P67A-GD55 Motherboard
8GB Patriot Viper Xtreme Division 2 DDR3-1866 Memory
Sapphire Radeon HD 6850 1GB Video Card
Thermaltake Toughpower 1200W power supply
Western Digital 1TB SATA 6GB/s hard drive
ASUS Blu-ray drive
Thermaltake FRIO CPU Cooler
Cooler Master CM 690 II Advanced Case
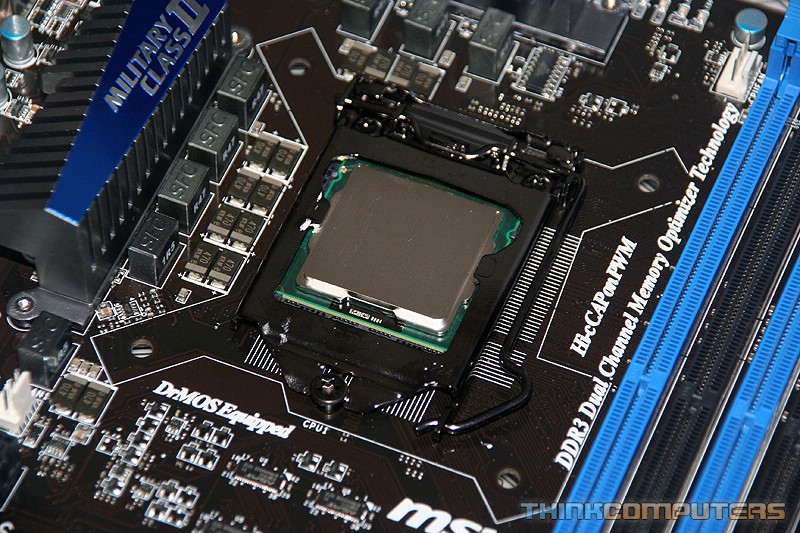
Installing the processor is just like any other Intel processor. While this is an 1155 socket it is not different than the 1156 when it comes to the CPU cooler mounting system. So we can use older CPU coolers like the Thermaltake FRIO CPU cooler. So all you have to do is place your CPU in the socket, apply the thermal paste and mount your CPU cooler and you are good to go. Then just go ahead and install the rest of your components and you are ready to power on your machine.

Overclocking
By default the Core i5-2500K has a clock speed of 3.3GHz. Many people have heard that overclocking Sandy Bridge processors was hard and that it would be impossible, but actually it could not be easier. The first thing you need to do is go into your BIOS. With the MSI P67A-GD55 you have the new Click BIOS so that makes things even easier. You will first need to go in to the OC settings. You will notice that you cannot change the CPU Base Frequency of BCLK as most of you know it. This really makes things easy as you just need to adjust the CPU ratio to overclock the CPU.
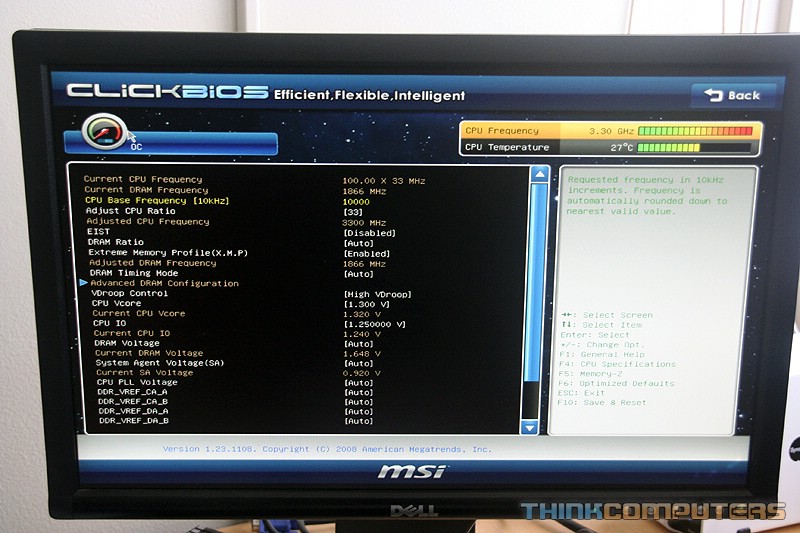

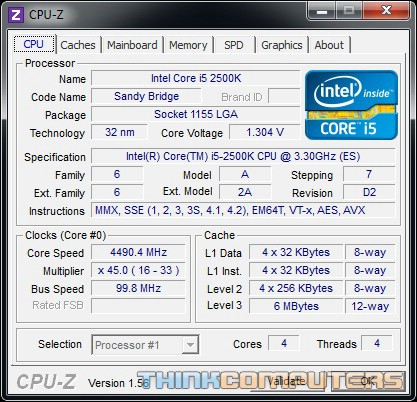
By default the CPU ratio is at 33. I first moved it up to 40 to get the CPU up to 4.0GHz. This was done without any other adjustments. To test how stable the system was I ran Prime 95, 3DMark Vantage and Super Pi all at the same time. After I knew the system was stable I started moving up in 100MHz intervals. I got stuck at 4.4GHz, but then I upped the CPU voltage to 1.3V and that allowed me to get up to 4.5GHz stable. Not a bad overclock at all at 1.2GHz!

Before I got into real testing I wanted to see how well the thermal performance on this processor was and I was really impressed. Check out the graph below to see the temperatures at both stock settings and overclocked.
