Drive Installation & Testing
Getting your M.2 drive installed inside the ORICO M.2 enclosure is pretty easy. First remove the hex bolt on the back of the enclosure and then slide the back of the enclosure off. Next carefully pull out the PCB. We will be installing the Lexar NM700 inside the enclosure.
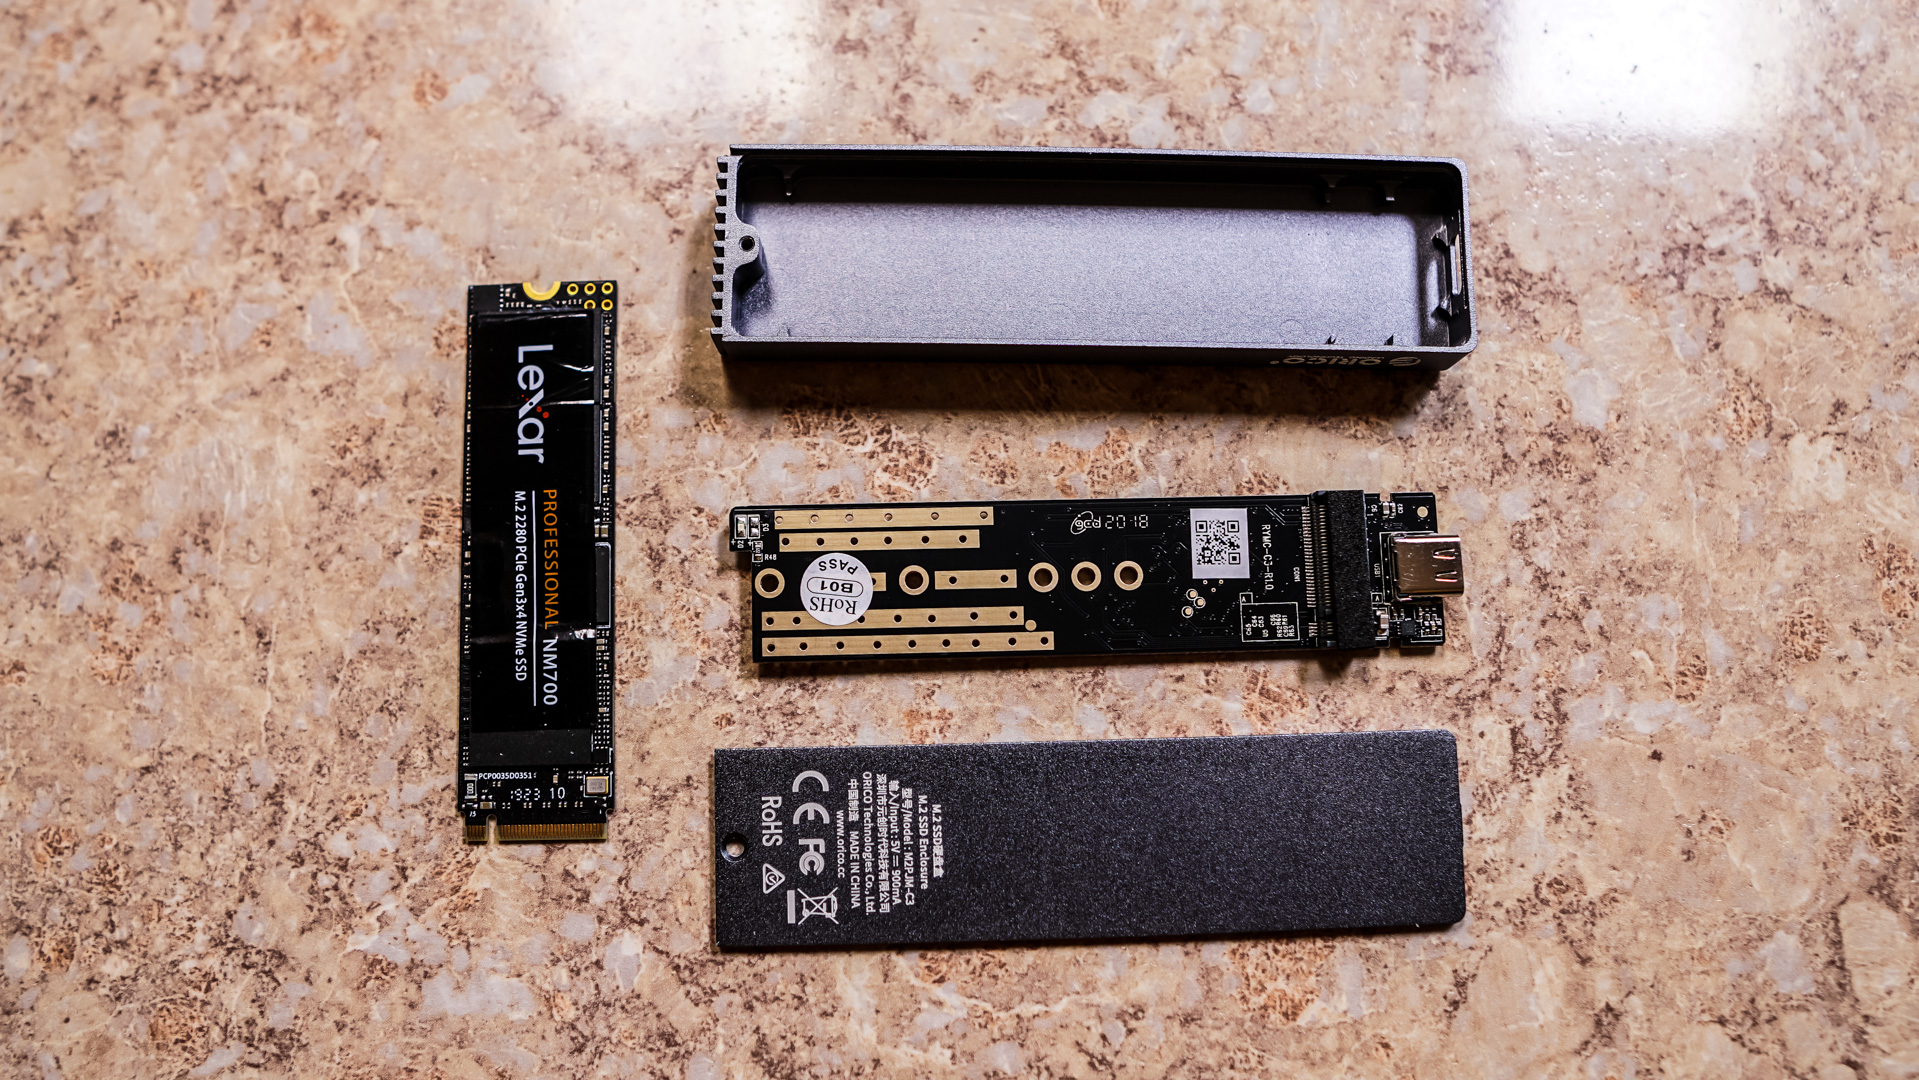
Take your M.2 drive and install it in the M.2 slot on the PCB. Using the included mounting hardware, screw the locking pin in from the bottom of the PCB.
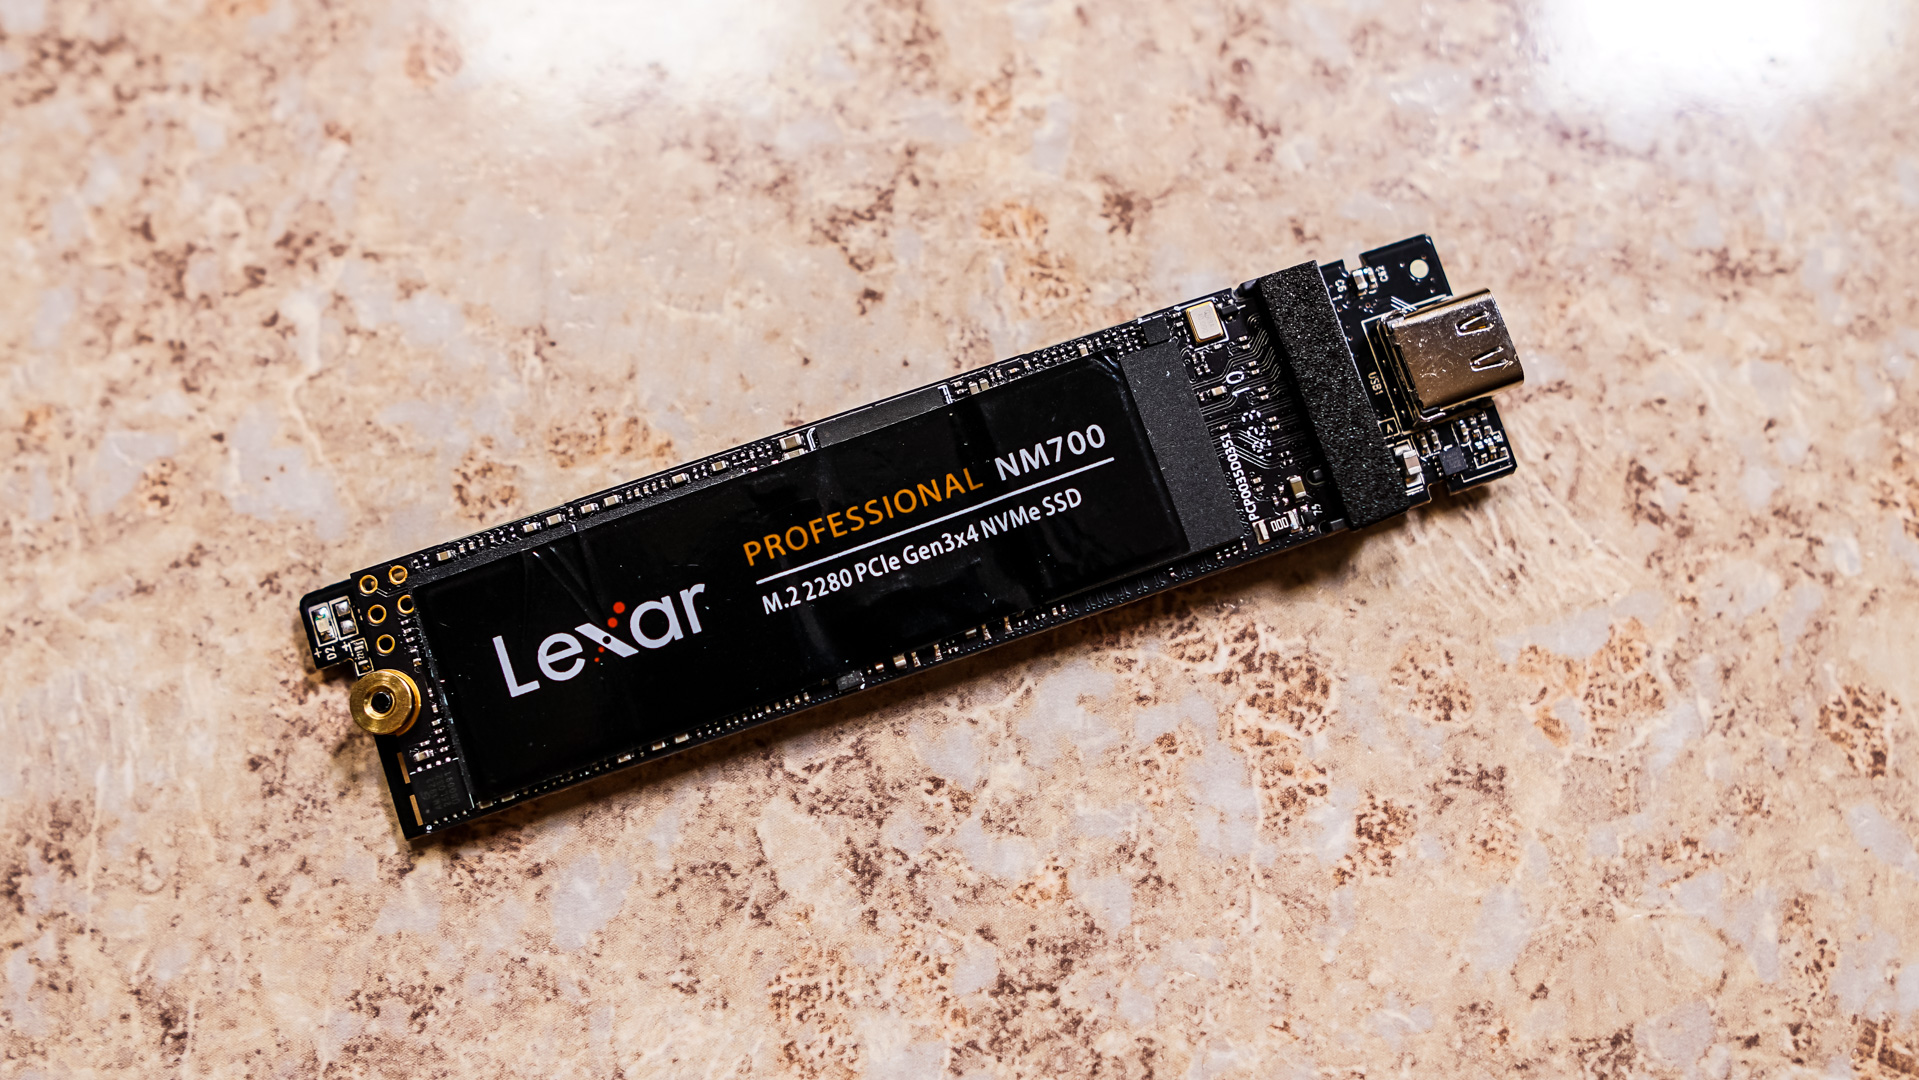
Finally place the entire PCB, with the M.2 drive installed inside the enclosure. You can install the included thermal tape for a tighter fit if you want. Finally put the back on the enclosure and reinstall the hex screw and you are good to go.

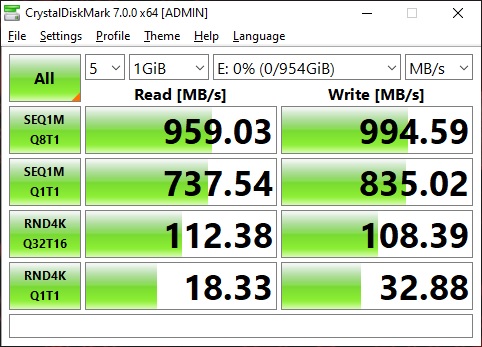
We will be doing some simple speed tests to make sure the enclosure lives up to its USB 3.2 gen 2 speeds. First up we have CrystalDiskMark.
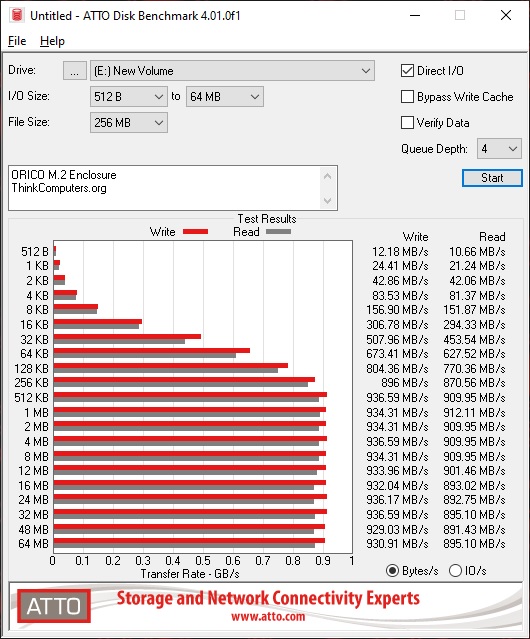
Next up is ATTO Disk Benchmark.
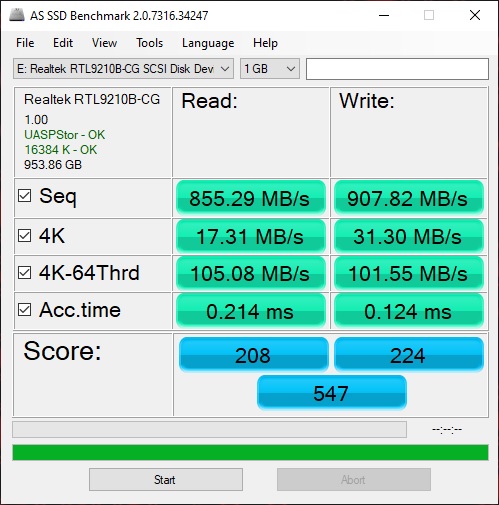
Finally we have AS SSD Benchmark.