Your Windows laptop may feel completely safe at home, but an unfamiliar network changes the situation.
At home, features such as device discovery, file sharing, wireless printing, and local app access can be useful. At a hotel, café, airport, conference, or gaming event, those same features may expose more than you need.
This guide walks through a short preflight check for Windows users. First, you will confirm that Windows treats the network as public. Then you will check firewall and sharing settings. Finally, you will verify that your VPN connection is active and that DNS requests appear to follow the expected route.
For the VPN portion, this article uses X-VPN as the example client because the same provider offers both the download page and DNS testing tool needed for the walkthrough. The steps are still useful if you use another VPN service with similar connection and testing features.
The goal is not to suggest that every public Wi-Fi network is dangerous. Most modern websites use HTTPS, which encrypts traffic between your browser and the website. The goal is simpler: reduce unnecessary local sharing and confirm that the protections you expect are actually working.
Once you know where the settings are, the full check should take about 10 minutes.
Why an Unfamiliar Network Deserves a Quick Check
Think about what your laptop does on your home network.
It may connect to a printer, find another computer, share files, stream media, or allow a game or app through the firewall. These features are helpful when you trust the people and devices around you.
They are less useful when the same Wi-Fi is shared by dozens of strangers.
The network is also only one part of the picture. Your browser, operating system, accounts, apps, and online habits all matter. A VPN can create an encrypted connection between your device and a VPN server, but it cannot replace software updates, a firewall, strong passwords, or careful browsing.
The first step is therefore not installing more software. It is checking what Windows is already allowing.
Make Sure Windows Treats the Network as Public
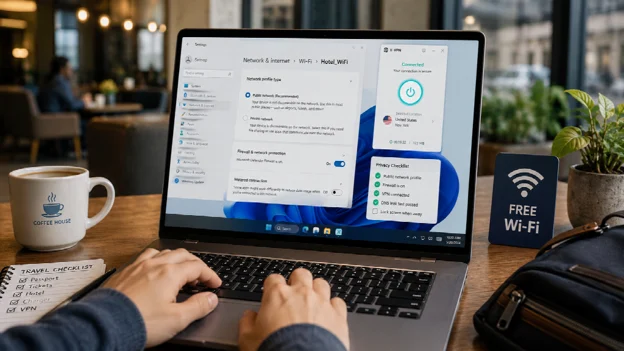
Windows 11 normally marks a new network as public.
In public mode, your PC is harder for other devices on the network to discover, and common sharing features are limited. A private network profile does the opposite. It allows more local discovery and sharing, which is useful at home but usually unnecessary in a hotel, café, or airport lounge.
To check the setting:
- Open Settings.
- Select Network & internet.
- Select Wi-Fi, then choose the network you are using.
- Under Network profile type, select Public network.
For a hotel, airport, coffee shop, conference, or gaming venue, public is usually the safer choice.
Be cautious if a venue or app asks you to switch the network to private just to make something work. That change may make your laptop more visible to nearby devices.
If your laptop is managed by your employer or school, follow its security rules instead of changing settings on your own.
Turn Off Sharing You Do Not Need
The public network profile already limits much of Windows’ normal sharing behavior, but it is still worth checking a few settings.
Open Windows Security, choose Firewall & network protection, and make sure Microsoft Defender Firewall is turned on for the active network.
If an app needs network access, allow that specific app instead of turning off the firewall. Disabling the firewall removes protection for everything, not only the app you are trying to use.
Next, search Windows Settings for Manage advanced sharing settings. Under public networks, keep Network discovery and File and printer sharing turned off unless you have a clear reason to use them.
You can also review the apps allowed through the firewall. Remove access for software you no longer use, and do not approve an app you do not recognize just because a pop-up interrupts you.
The goal is not to lock down every feature. It is to avoid sharing things you do not need on a network you do not control.
Install the VPN Client You Plan to Verify
A hotel lobby or busy event venue is a bad place to troubleshoot network software. If you plan to use a VPN on the trip, install and test it while you are still on a trusted connection.
For the walkthrough in this article, use the official page to download VPN, install the Windows version, and sign in before joining an unfamiliar network.
The point is not just to install the app. You should know how to connect, where the connection status appears, and what happens when the laptop sleeps, wakes, or changes networks.
Run a short test at home. Connect to a server, open a few normal websites, and then put the laptop to sleep for a minute. After waking it, check whether the VPN reconnects on its own or needs to be started again.
Repeat the test after disconnecting and reconnecting Wi-Fi. You should also find any settings related to automatic connection or a kill switch, if available. You do not need to enable every option, but you should understand what happens if the encrypted connection drops.
The useful question is simple: could you notice and fix a lost connection without searching through menus at an airport gate?
Check That the VPN Is Actually Connected
Opening a VPN app does not always mean the VPN is active.
After joining the venue’s Wi-Fi, connect the VPN before opening sensitive accounts or beginning work. Check the app for a clear connected status.
Depending on how the client works with Windows, you may also see the connection under Settings > Network & internet > VPN. Some apps may show their own status more clearly than Windows does, so the client itself should remain your main reference.
Check the connection again after your laptop wakes from sleep, switches networks, or briefly loses Wi-Fi.
These small changes can interrupt a VPN session without making the problem obvious. A quick status check takes only a few seconds and is more reliable than assuming the connection stayed active.
Check Whether DNS Requests Follow the Connection
A connected status tells you that the VPN client believes the tunnel is active. A separate test can help you check whether DNS requests are also following the expected route.
DNS, or the Domain Name System, turns website names into the numerical addresses computers use.
Without a VPN, these requests often go through your internet provider. After connecting through a VPN, you would normally expect the detected DNS servers to change.
With X-VPN connected, open its DNS leak test and run the check. Compare the result with a test taken before the VPN was connected.
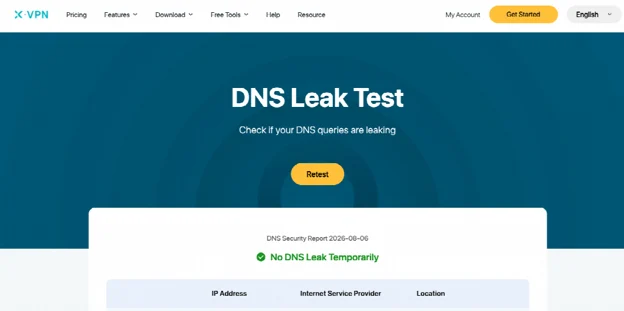
The value of the test is that it checks one visible part of the setup instead of asking you to trust a connected icon alone.
However, a clean result does not prove complete anonymity. It does not confirm that every app is protected, that a website is trustworthy, or that cookies and signed-in accounts cannot identify you.
It only shows which DNS servers the test can detect at that moment.
Avoid sharing screenshots that reveal your real IP address, location, or internet provider.
Remember What a VPN Cannot Protect You From
A VPN can protect traffic between your device and the VPN server. It cannot decide whether the website you are visiting is safe.
A scam site may use HTTPS and still steal the information you type into it. The padlock in the browser means the connection is encrypted. It does not mean the people running the website are trustworthy.
Keep using the other security habits that matter.
Turn on multifactor authentication for email, cloud storage, banking, and gaming accounts. Use a different password for every important service and store those passwords in a trusted password manager.
Do not ignore browser or certificate warnings. Avoid installing software pushed by an unexpected Wi-Fi login page. Verify unusual payment, delivery, login, or password-reset links through an official app or a known web address.
Physical privacy matters too. Someone sitting nearby may be able to read a private document, see a notification, or watch you enter a password. No VPN can hide information that is visible on your screen.
Lock the laptop whenever you step away, even if you are only getting another coffee.
Save the Check for Your Next Trip
Once you have done the process a few times, it becomes a quick routine:
- Update Windows, your browser, and important apps.
- Set unfamiliar Wi-Fi networks to public.
- Keep the firewall on and turn off sharing you do not need.
- Install and test the VPN on a trusted network.
- Recheck the connection after sleep or a network change.
- Run a DNS test to confirm that the connection is behaving as expected.
- Keep using MFA, strong passwords, careful link checking, and screen locking.
No single setting or app can make a laptop completely safe.
Better security comes from a few simple layers working together: sensible Windows settings, limited sharing, an encrypted connection, connection checks, stronger accounts, and careful decisions.
Save the routine in your notes app or travel folder. The first check may take 10 minutes. After that, it should feel more like a quick preflight than an IT project.