ASUS ROG Maximus Z890 Hero Motherboard Overview
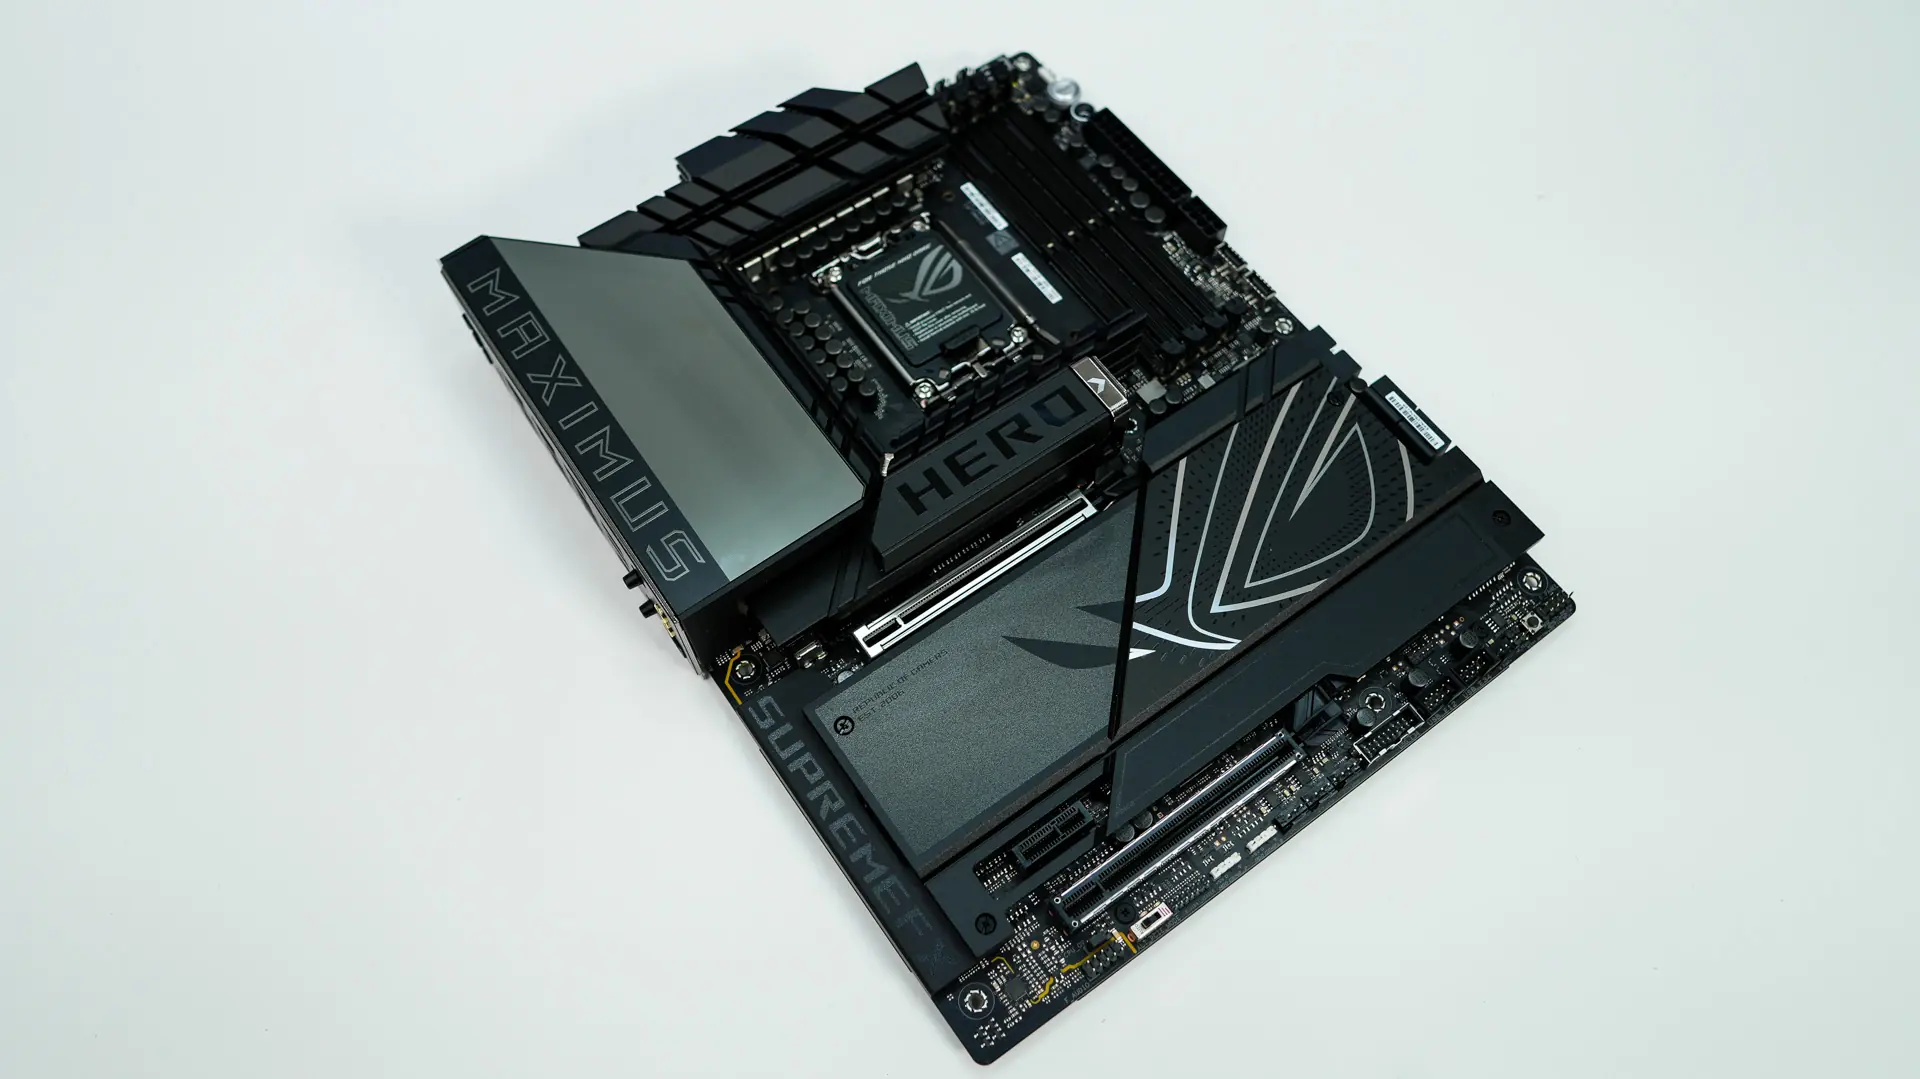
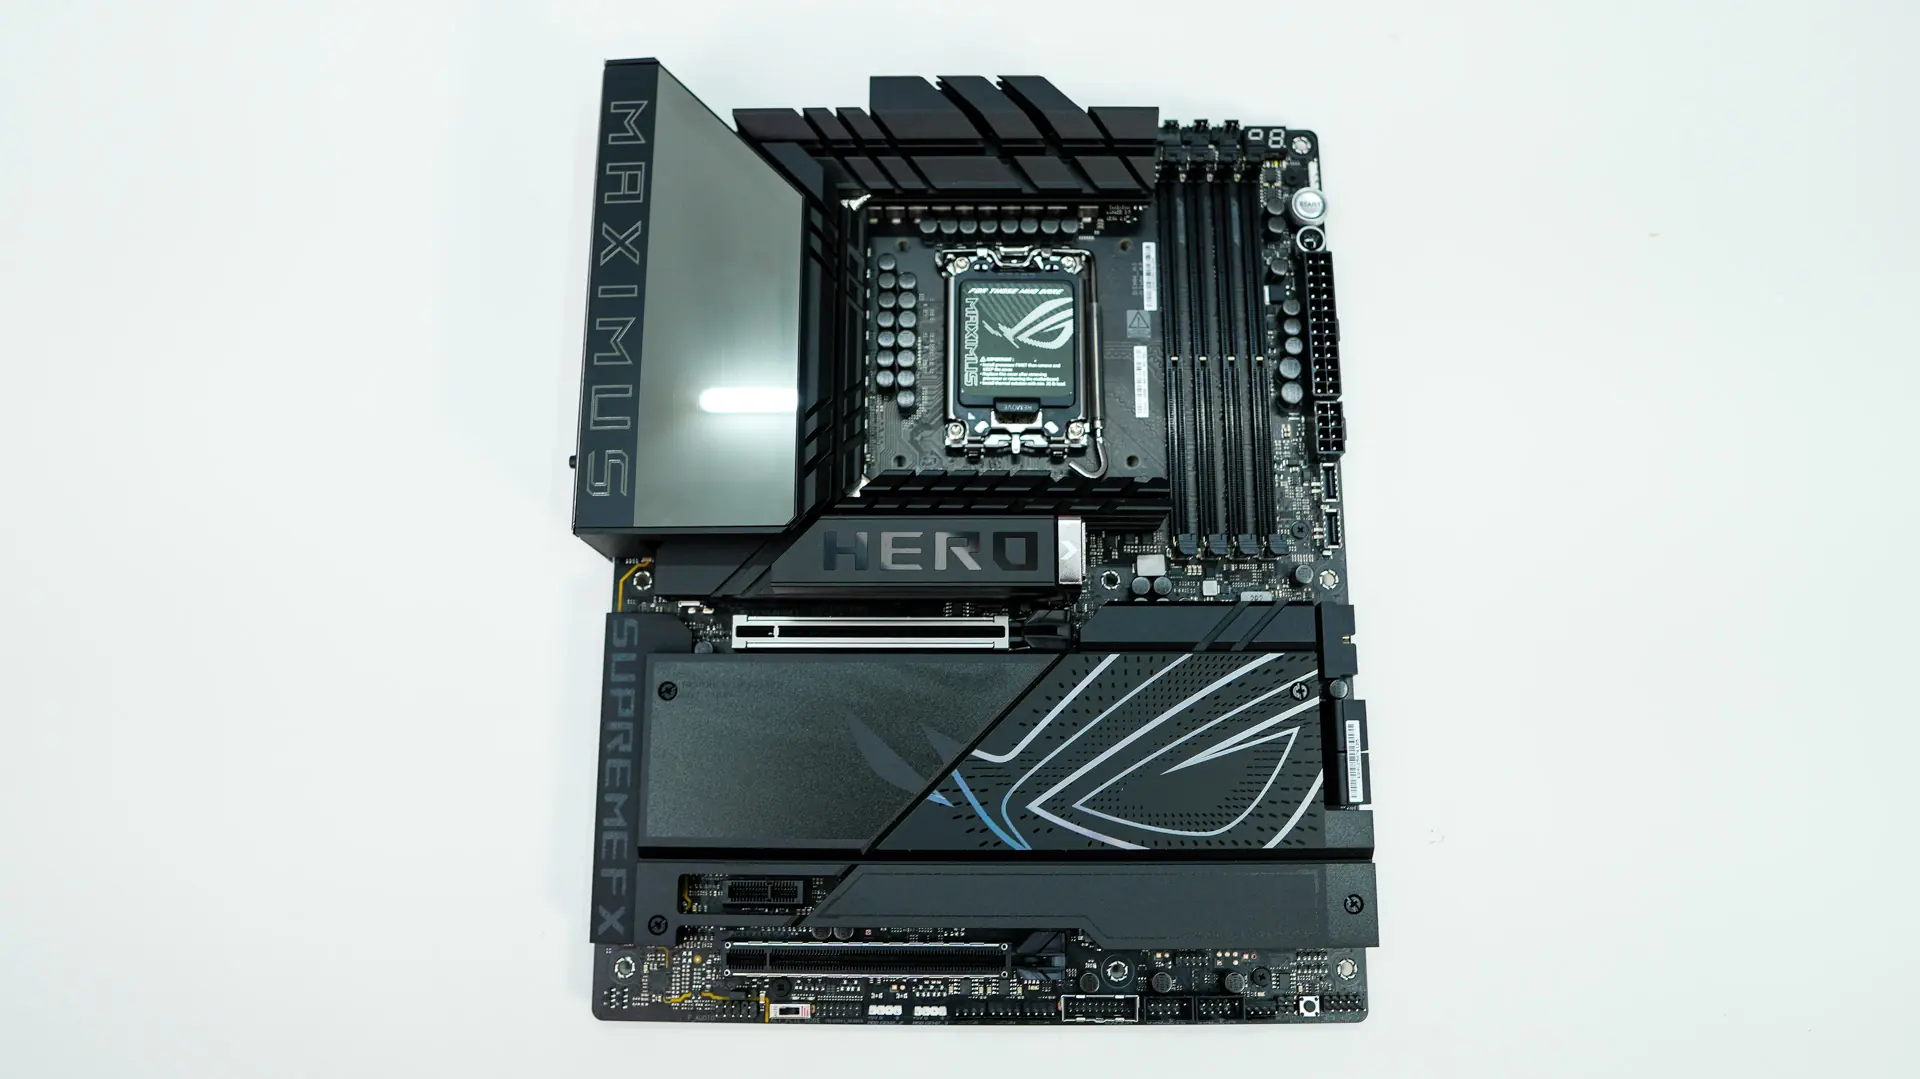
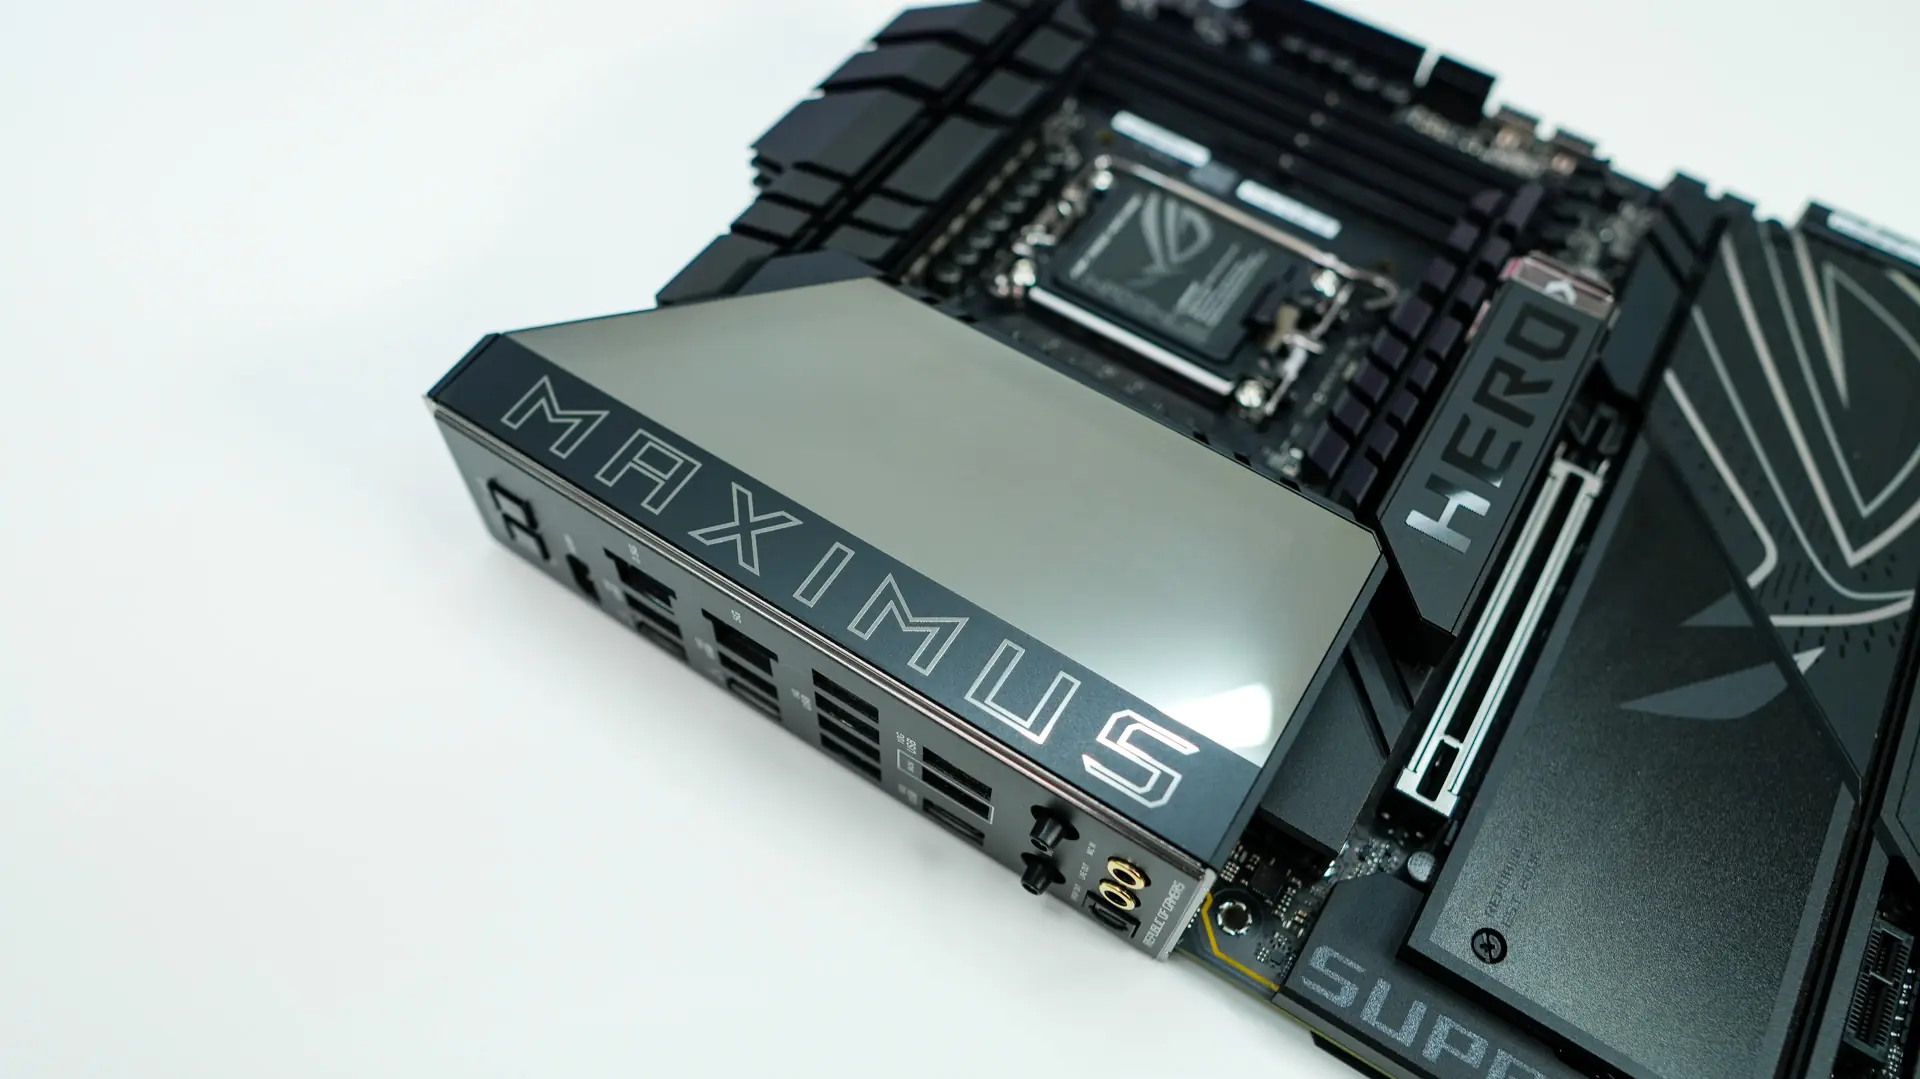
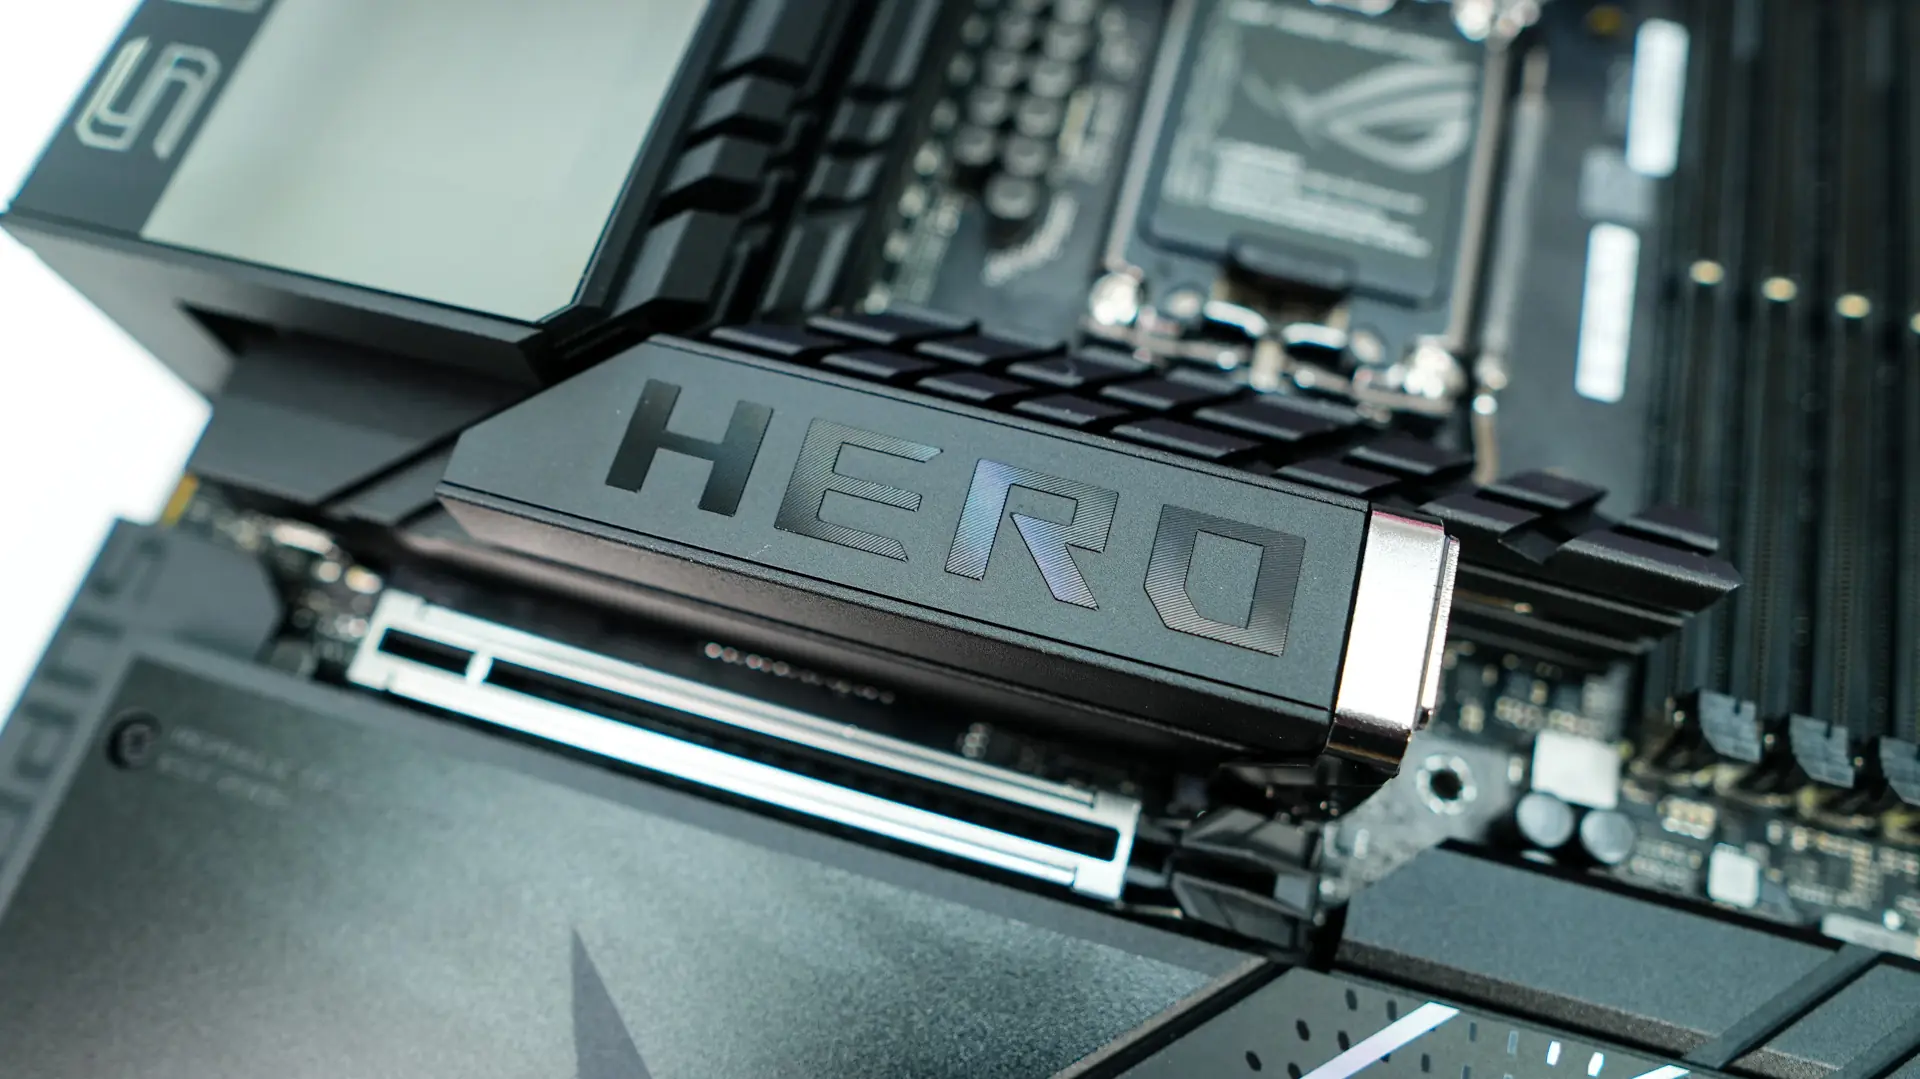
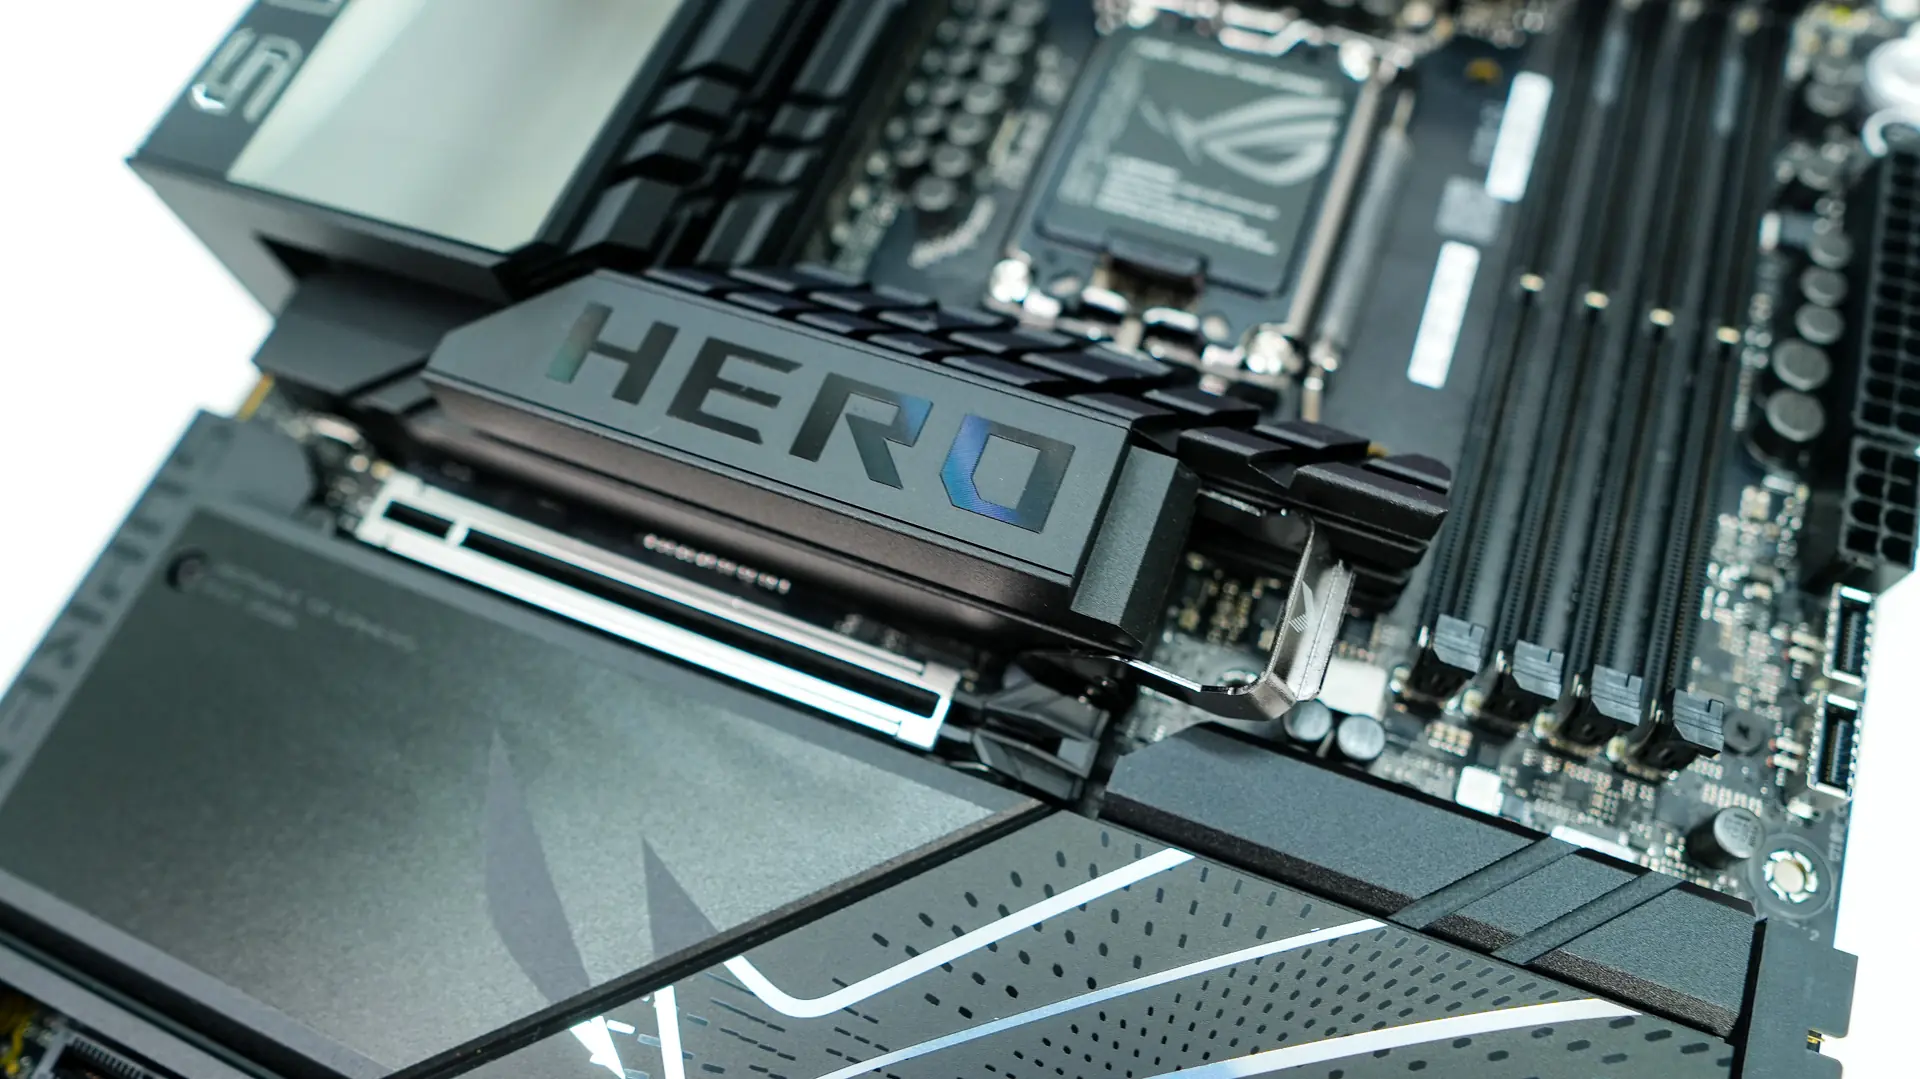
The ASUS ROG Maximus Z890 Hero is an ATX motherboard and has a black colorway with silver accents. There is a large MAXIMUS logo on the rear I/O cover and this is where the Polymo Lighting II is (more on that in a bit). Right in the center of the board is a large HERO logo on the top M.2 heatsink and then finally towards the bottom of the board is reflective ROG eye. This board is going to look good in pretty much any build!
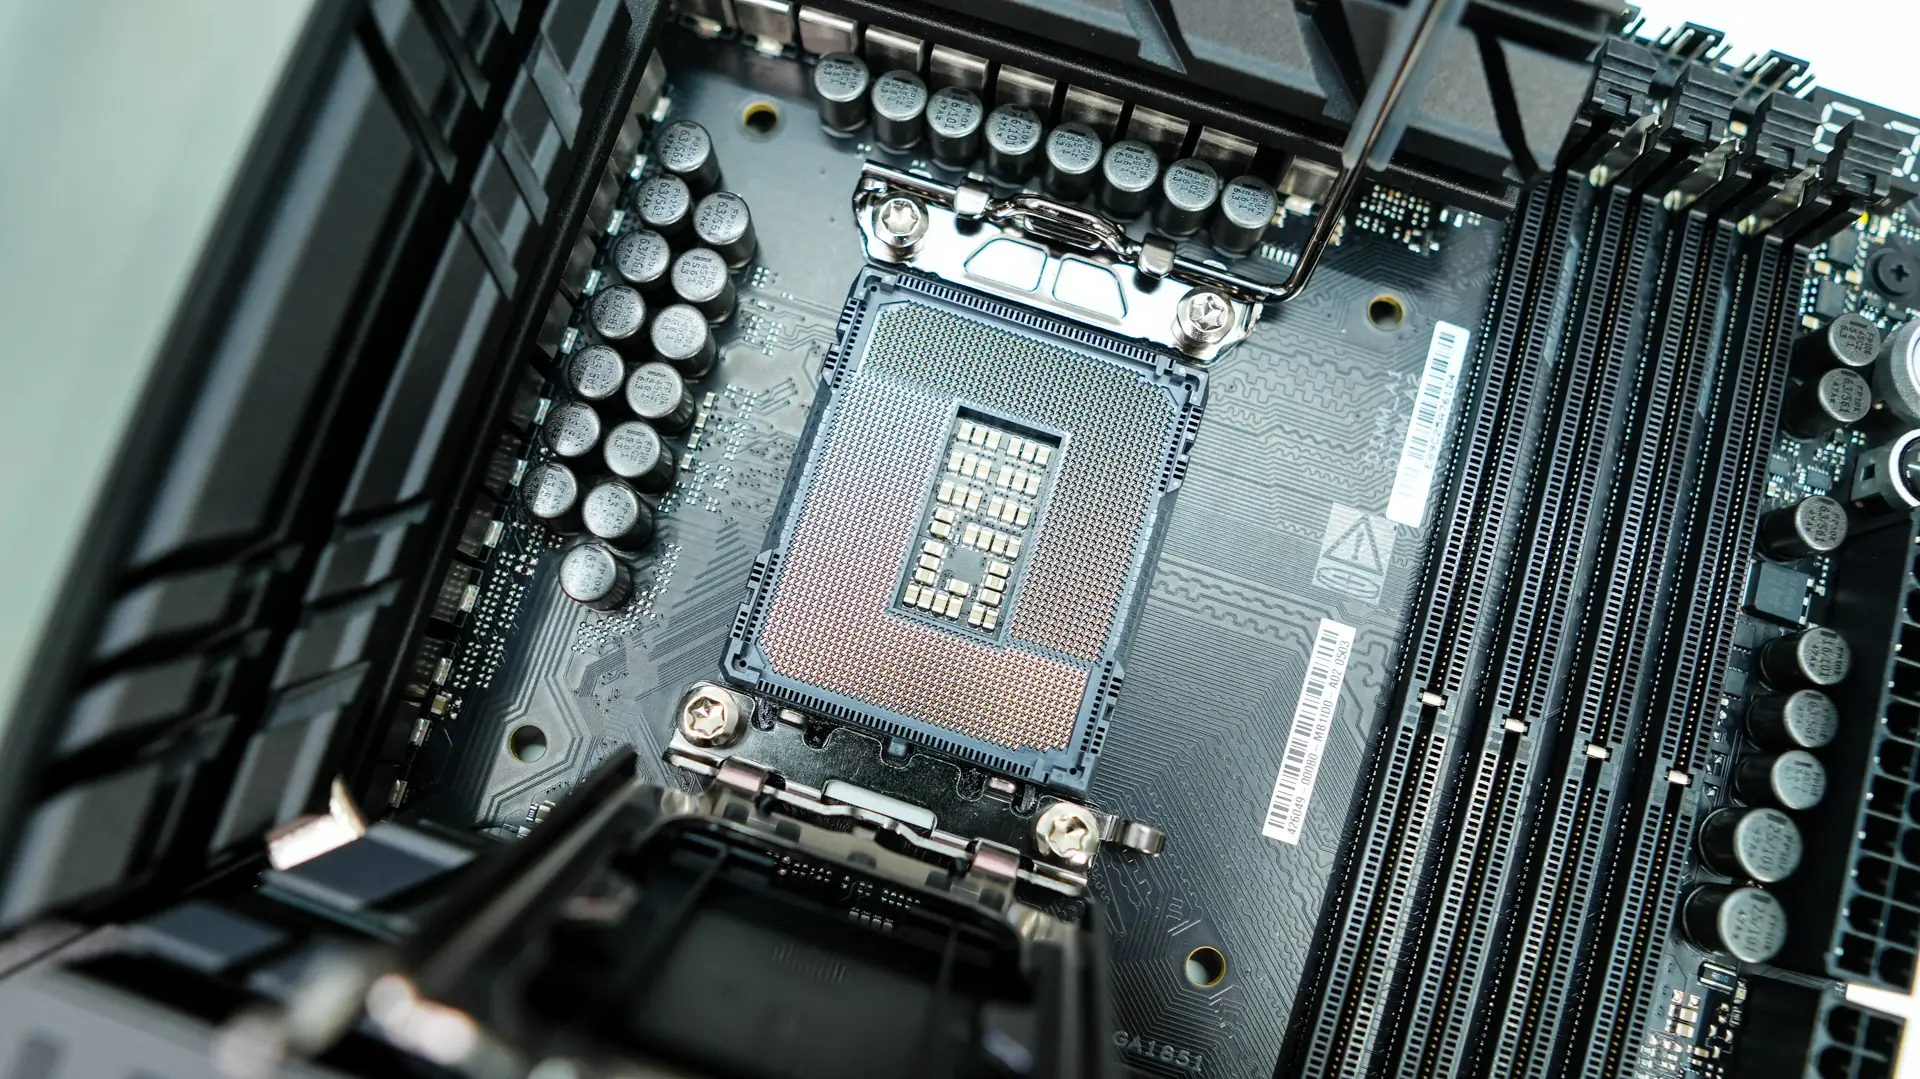
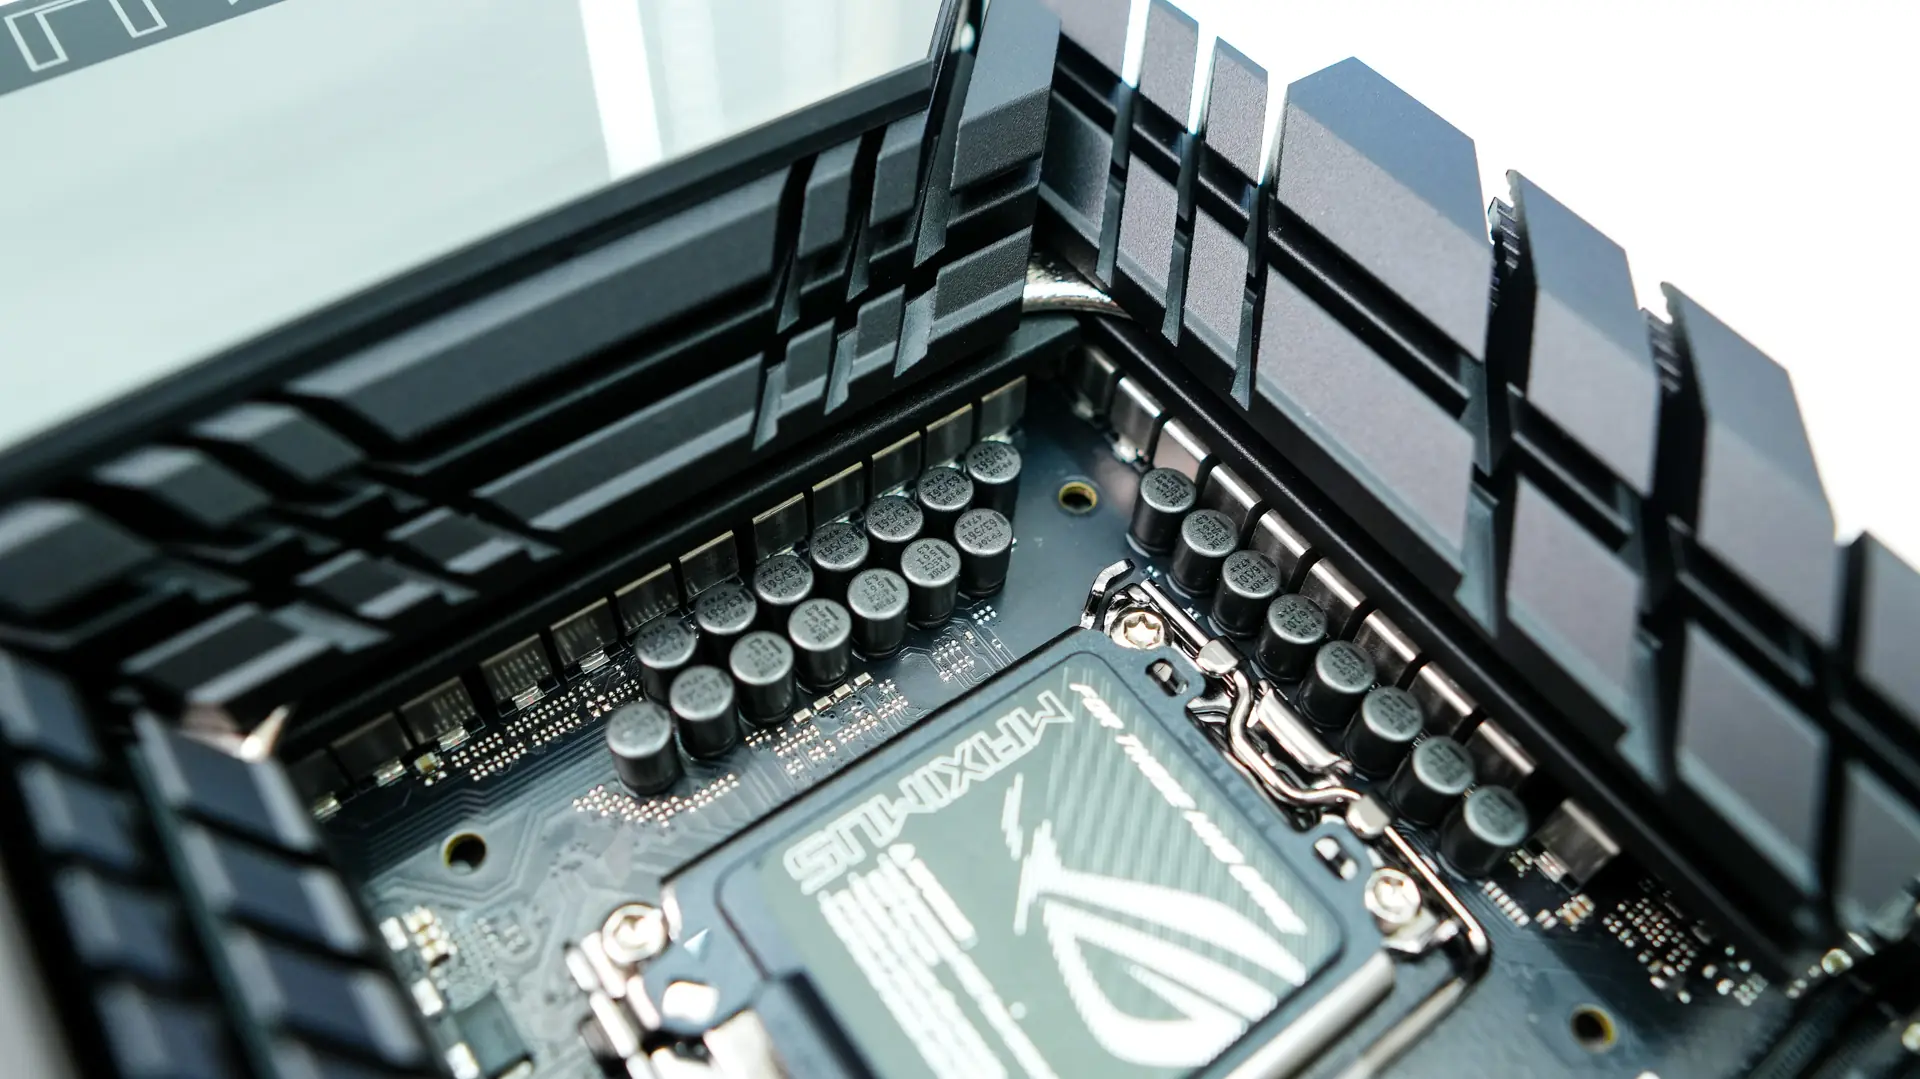
Starting at the CPU socket we have the new LGA 1851 socket, which currently only supports this generation of processors. This socket has the same dimensions and the same center-to-center distance for the mounting holes as LGA 1700, so LGA 1700-compatible CPU coolers will work on this socket. It is worth noting the small piece of rubber and flat end on the release latch. The rubber makes it so you don’t scratch up your heatsinks and the flat end makes the latch easier to press down and release.
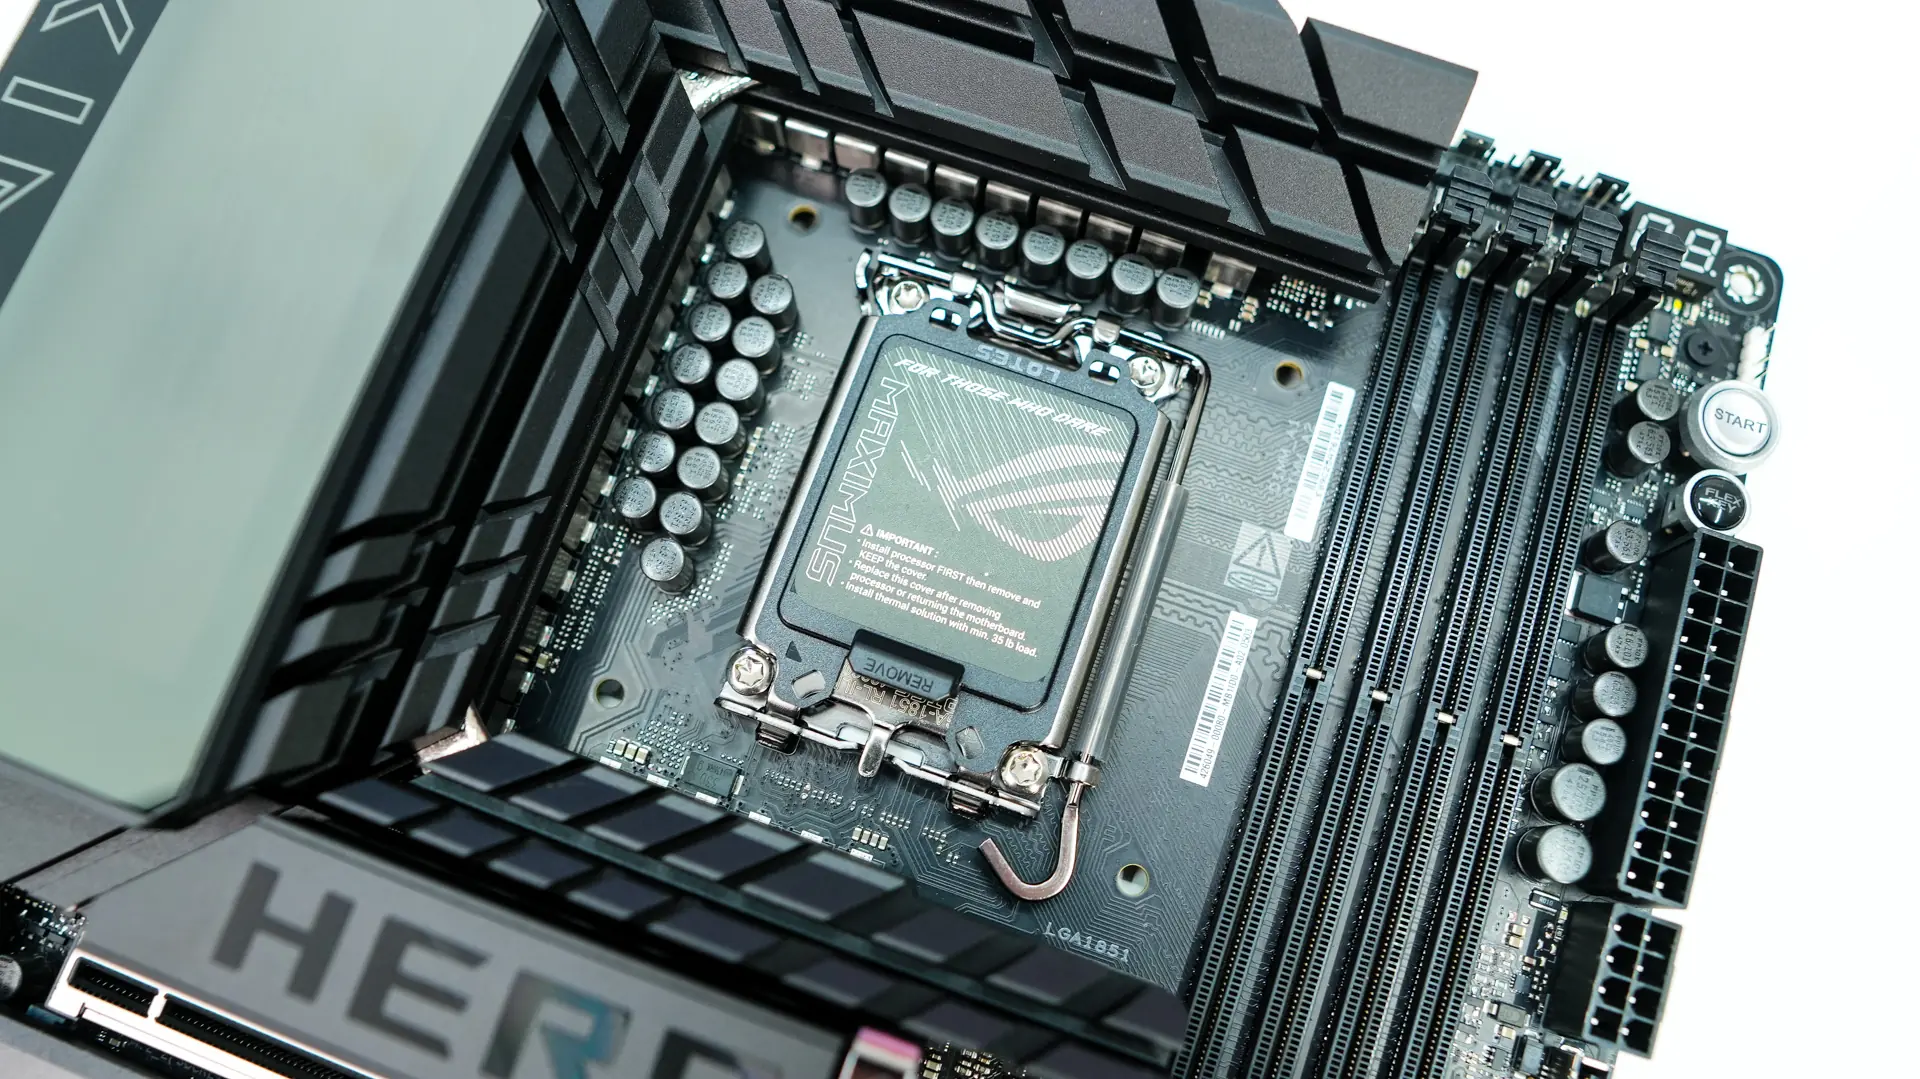
Surrounding the CPU socket we have our power delivery components and ASUS is making us of 22(110A)+1(90A)+2(90A)+2(80A) power stages with ProCool II power connectors, MicroFine alloy chokes and premium metallic capacitors. These power delivery components are cooled by three separate heatsinks, all of which are connected by a heatpipe.

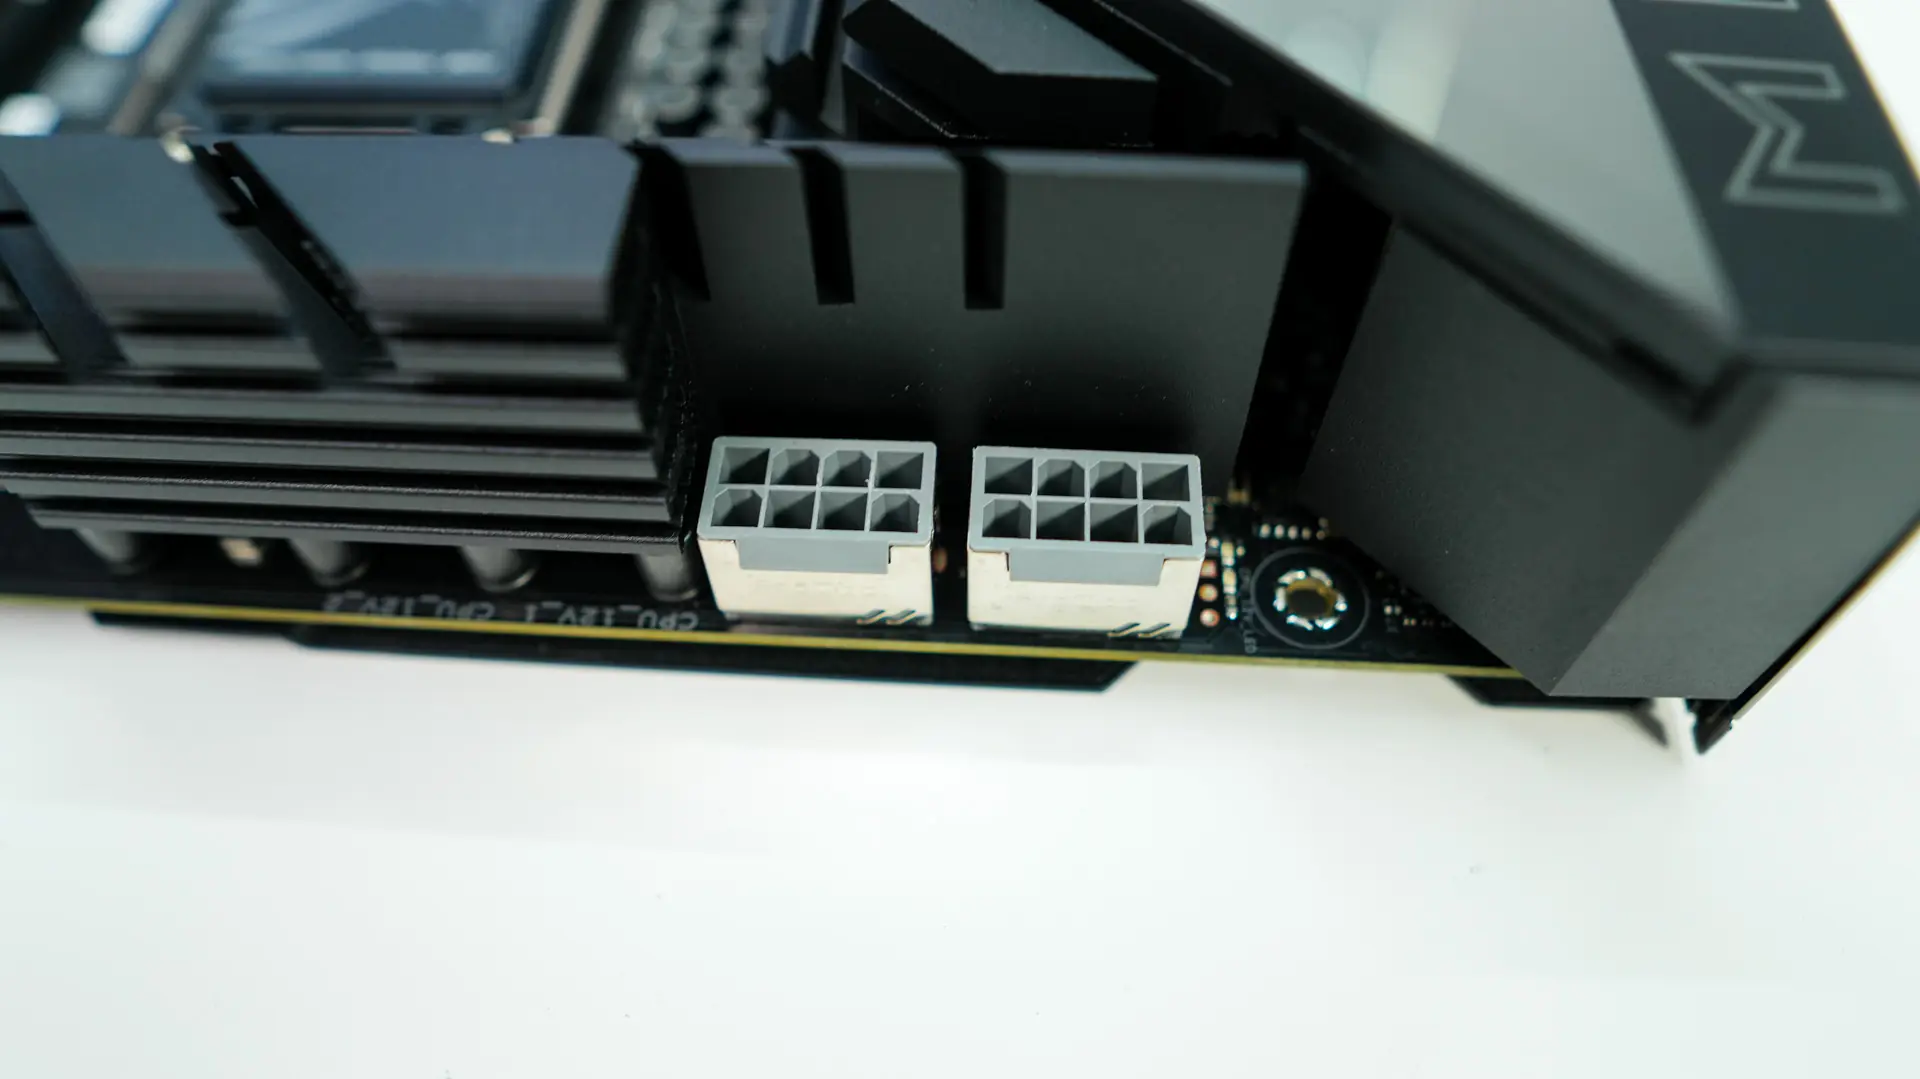
The top corner of the board comes together with a large rear I/O cover. This cover has a mirror-like finish on it, but will light up with ASUS Polymo Lighting II when you have your system powered on. Hiding in the top corner of the board you’ll find two 8-pin EPS connectors, which are metal reinforced.
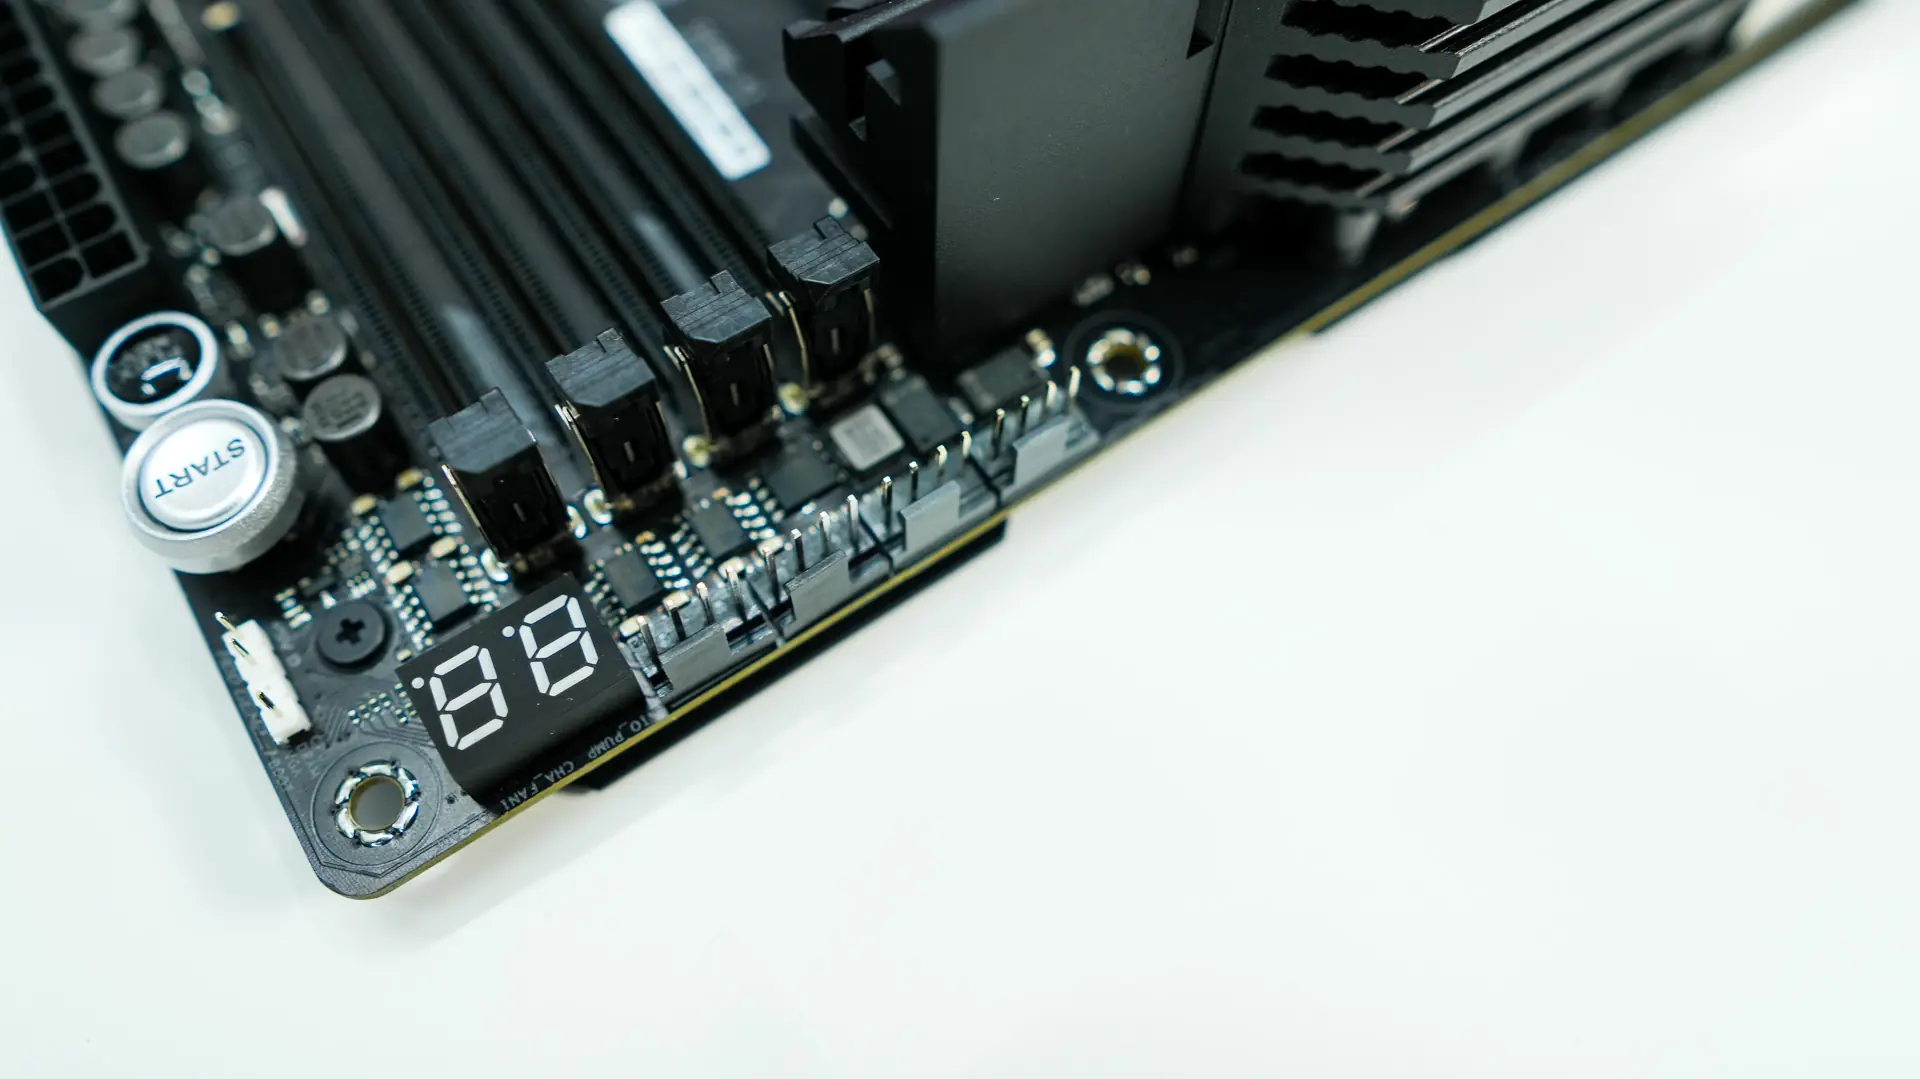
Moving across the top-edge of the board there are four 4-pin headers. The two grey headers are your CPU fan and optional CPU fan headers, while the other two are your AiO pump header and a normal fan header. Also up here you’ll find your POST code display.
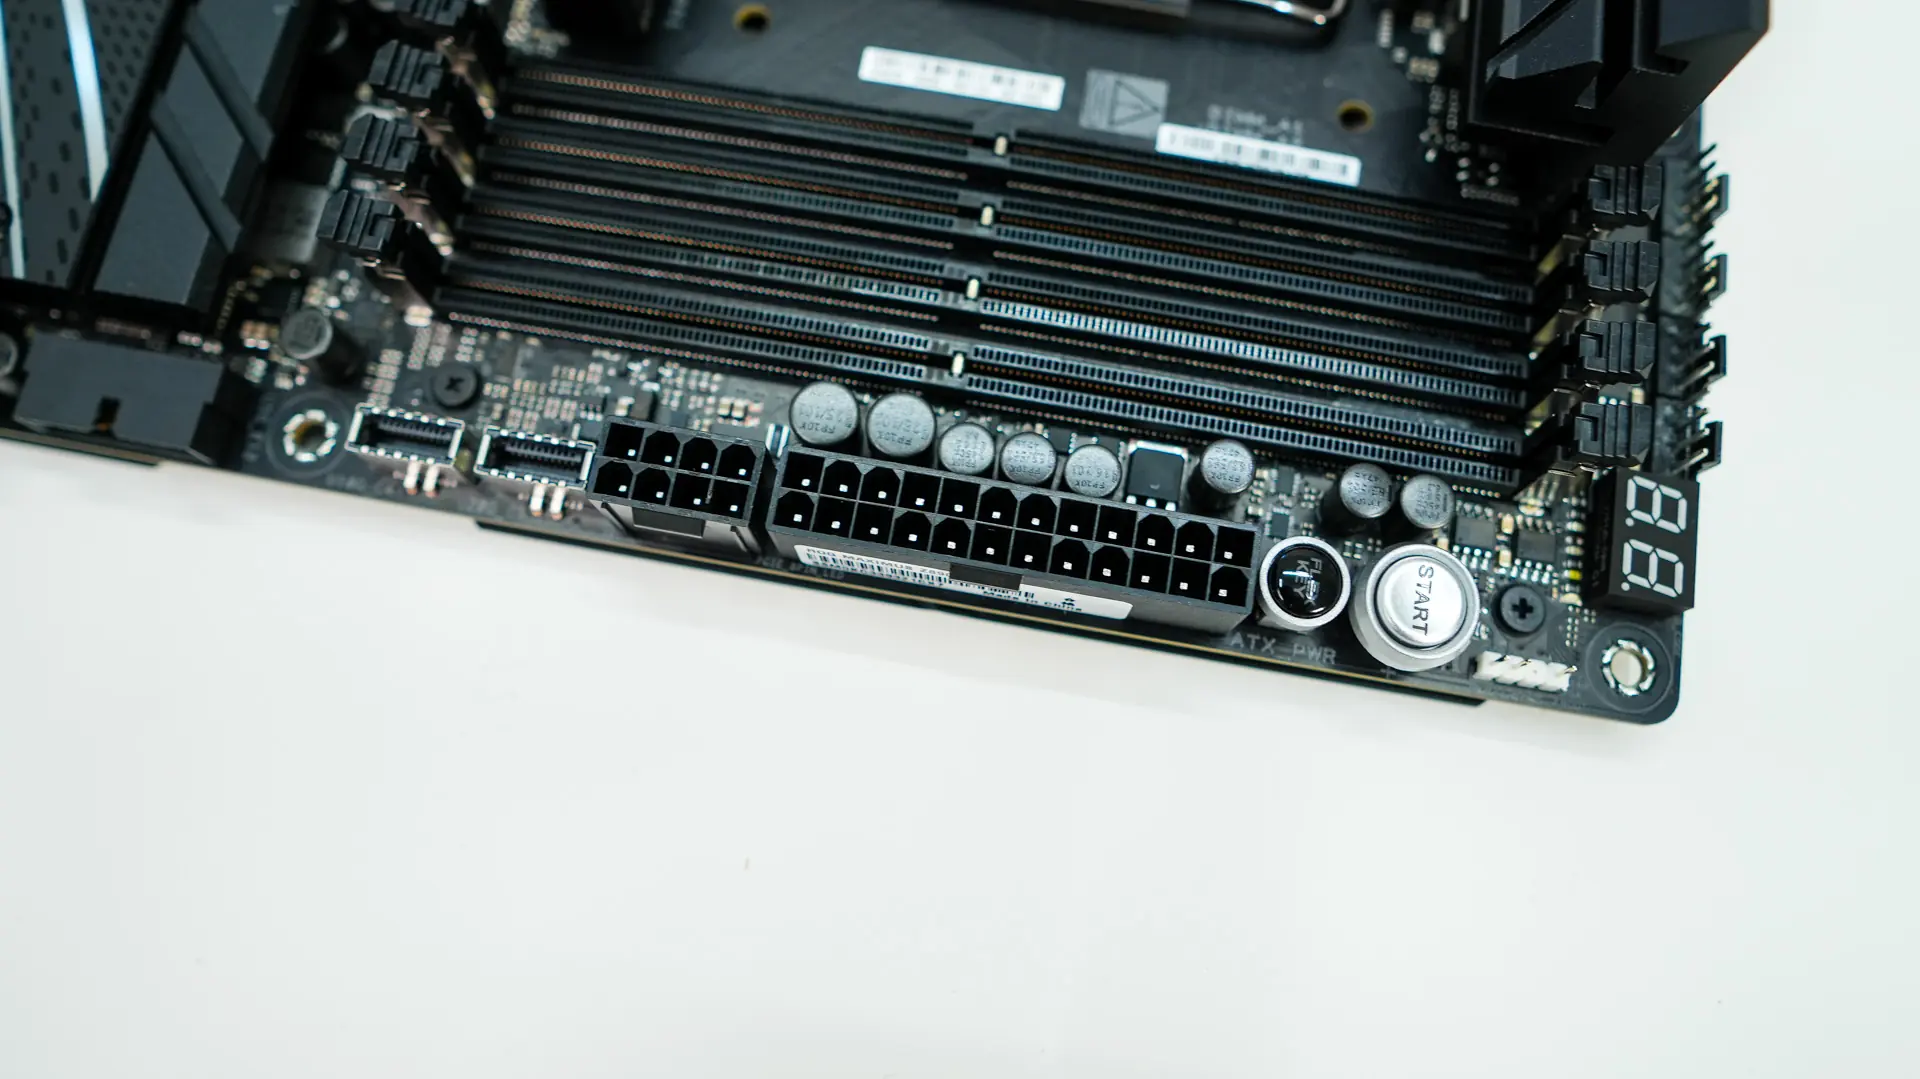
Coming over to the memory slots we have four DDR5 DIMM slots that support up to 192GB of DDR5-9200 memory. These slots have actually been redesigned and ASUS is calling this NitroPath DRAM. The new slots feature pins that are looped to terminate at the very end, eliminating the resonant excess section of the original design. Internal testing found that the NitroPath DRAM design could lead to significantly increased headroom across multiple configurations.
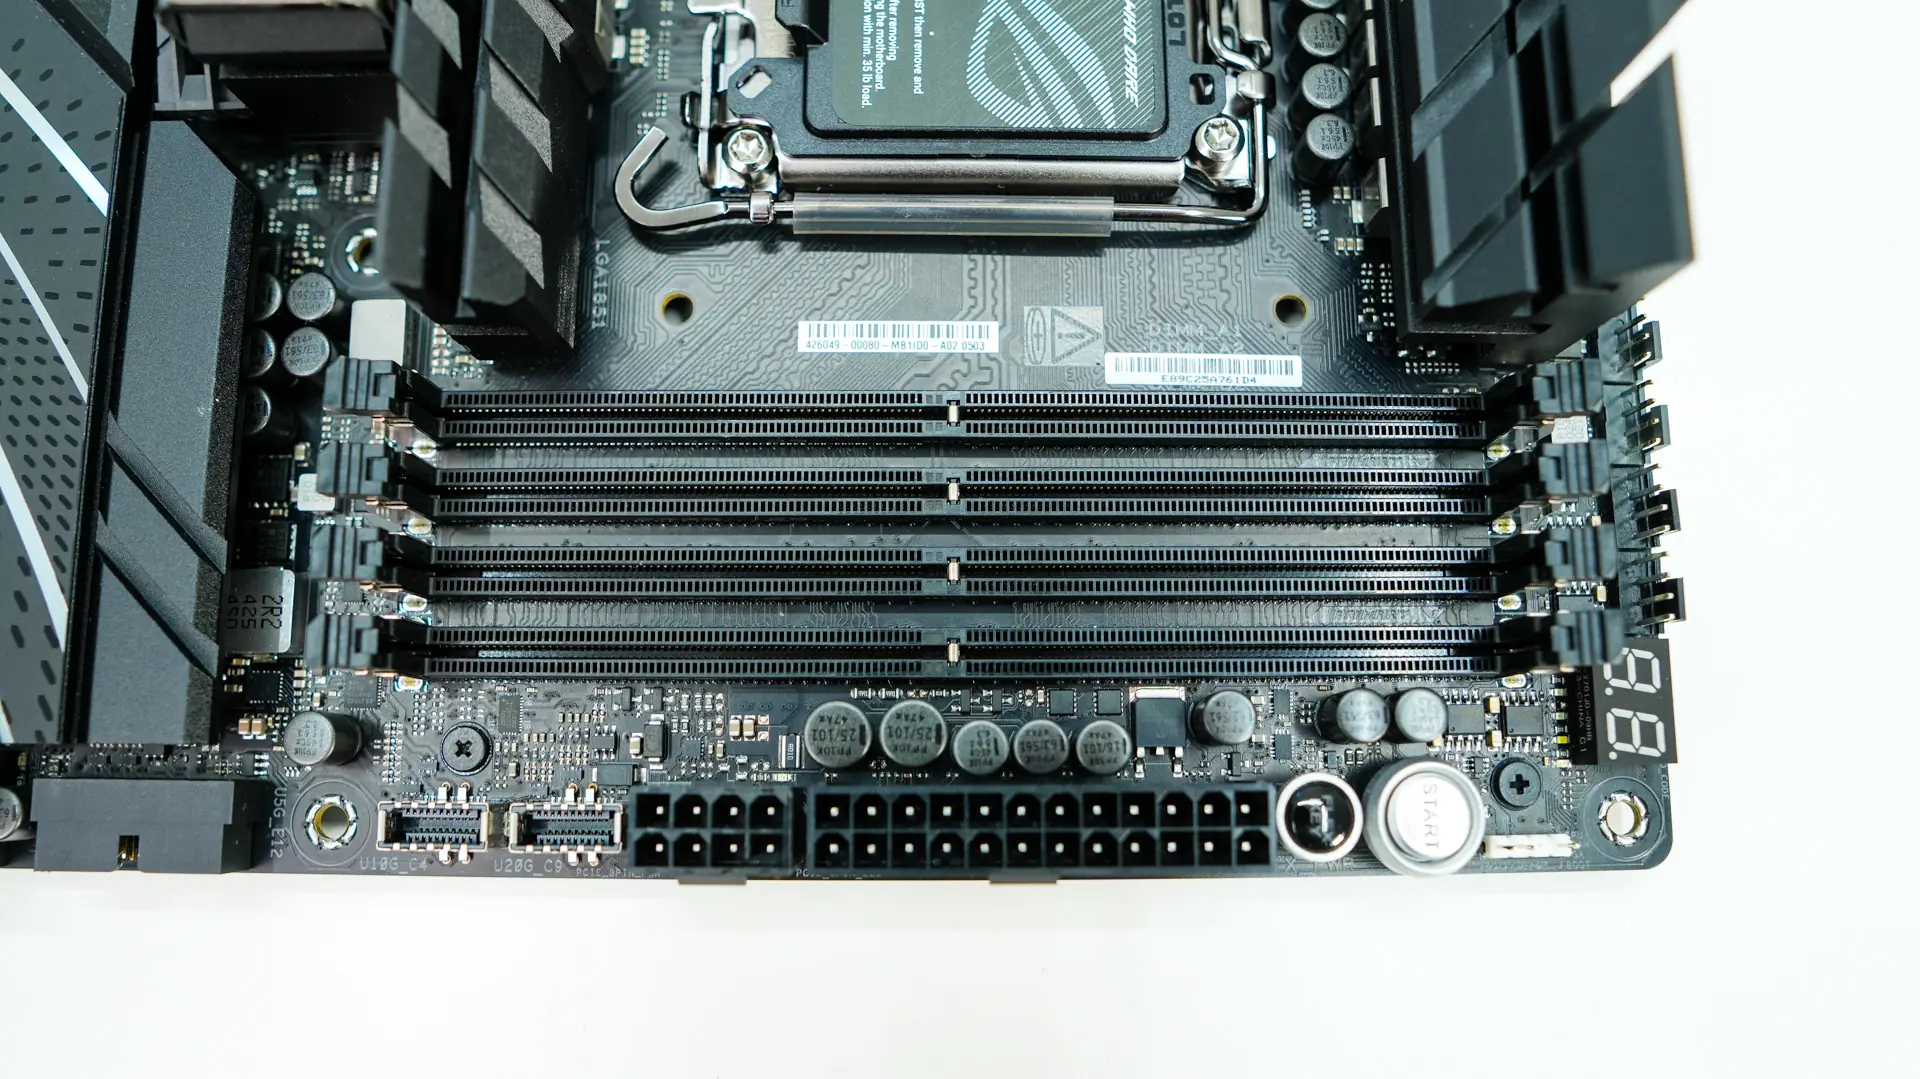
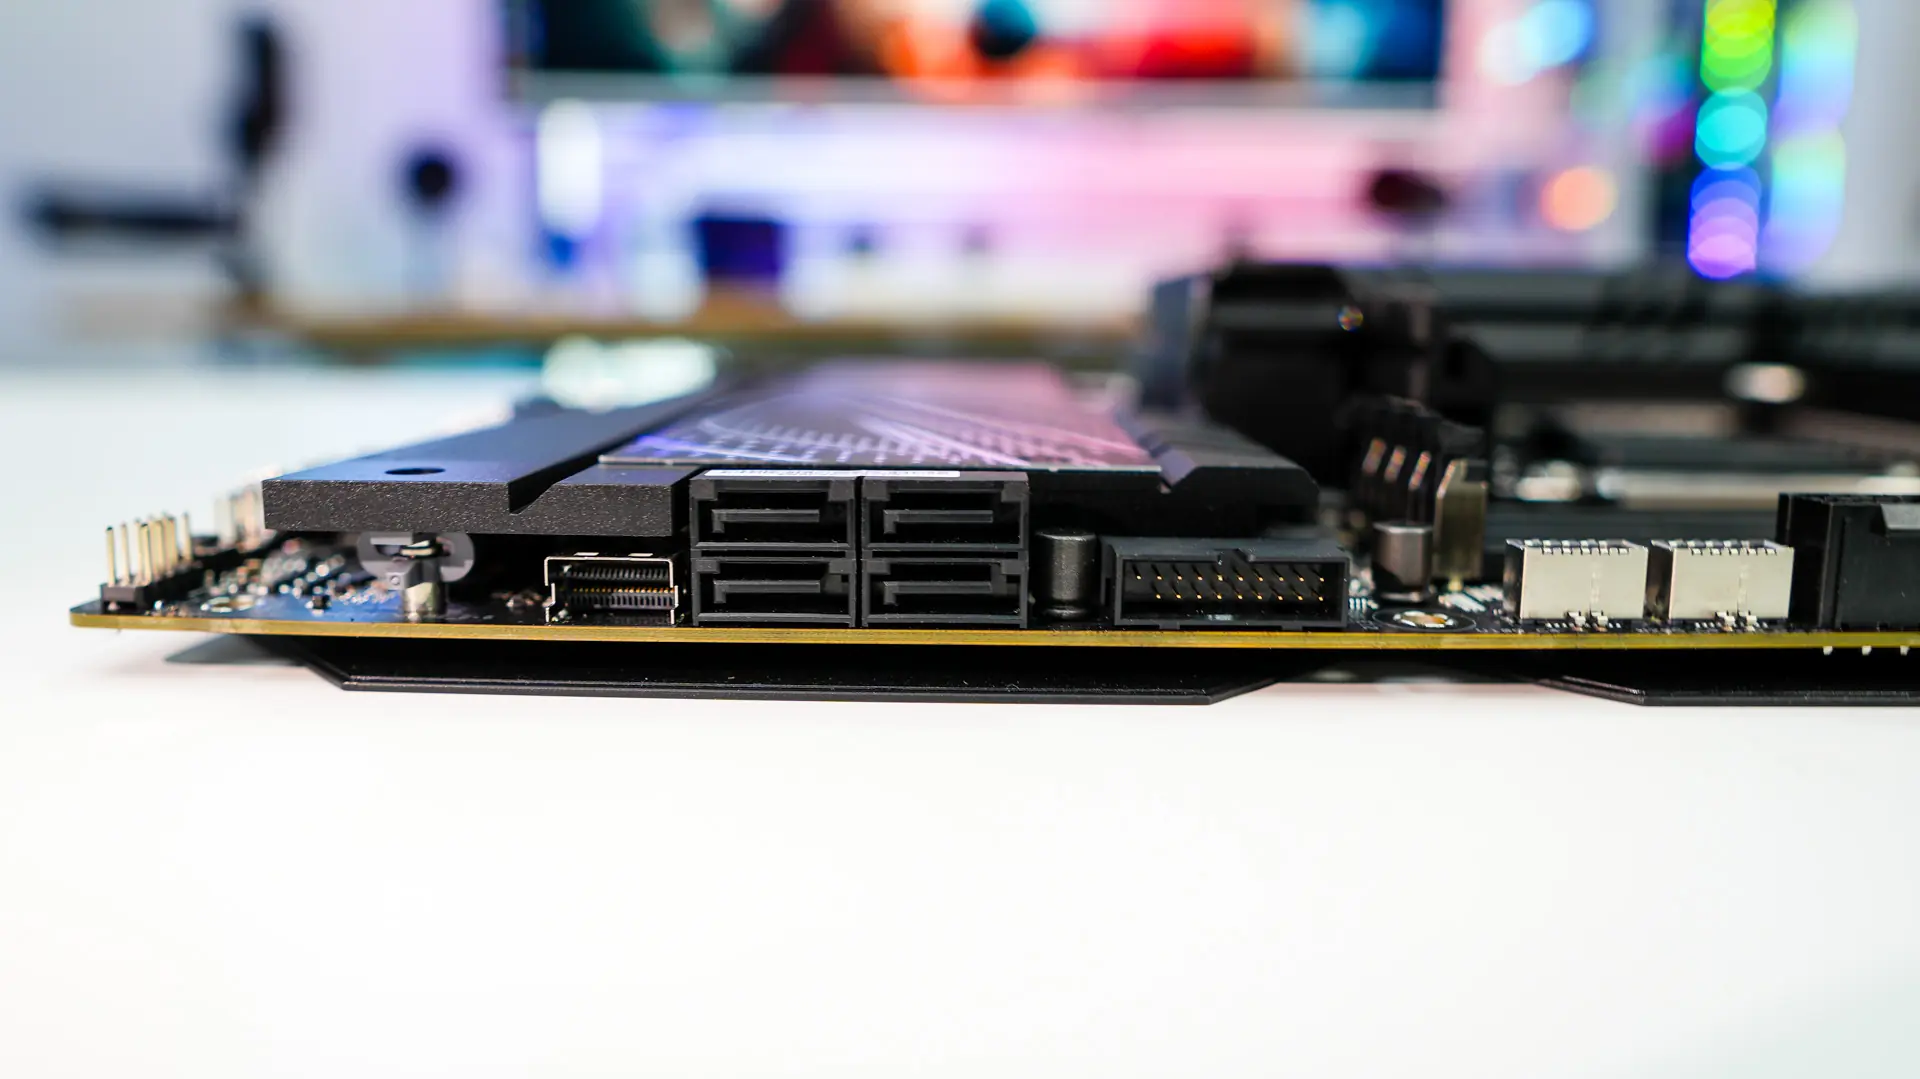
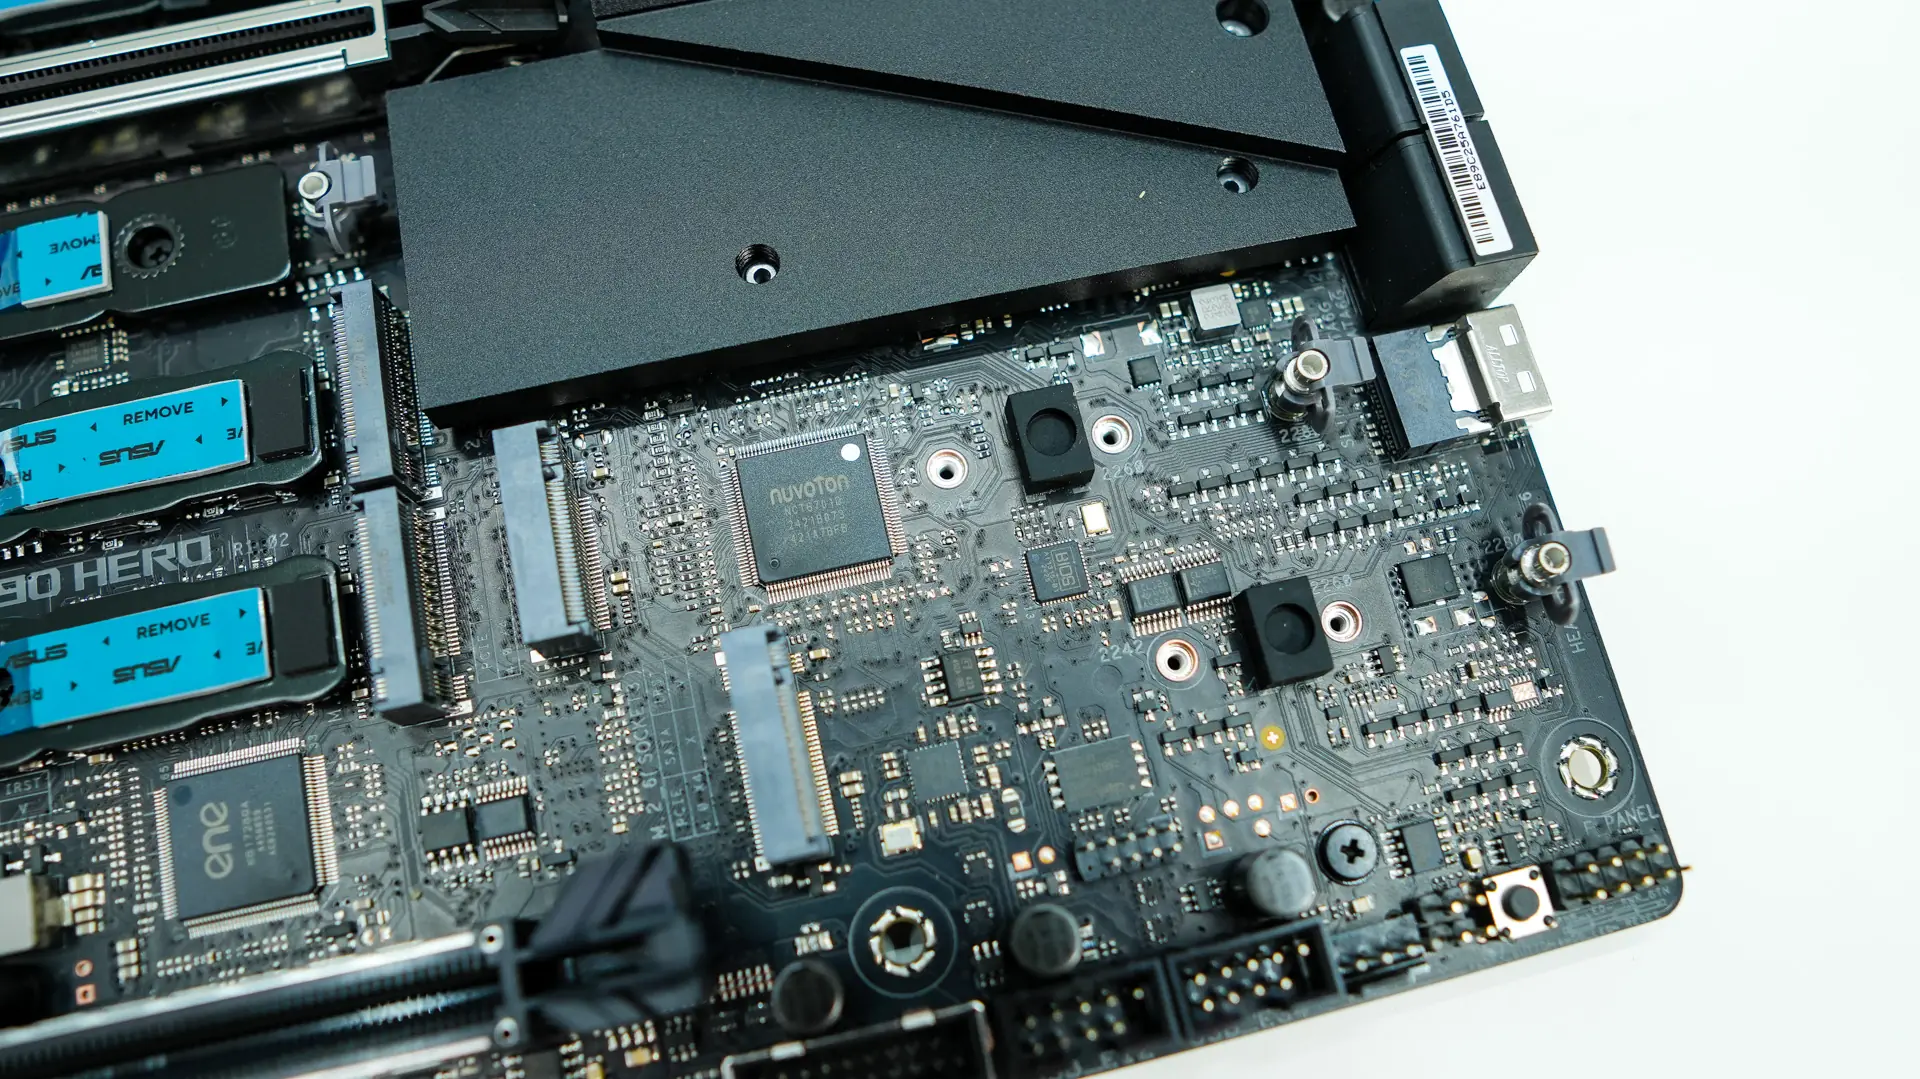
Coming to the edge of the board we have a 3-pin addressable RGB header, power button, flex key button, 24-pin ATX power connection, 8-pin PCIe power connector, USB 3.2 gen 2×2 header, and a USB 3.2 gen 2 header. The 2×2 header can delivery 60W of power delivery, but only when you plug in that 8-pin PCIe power cable, by default it is only 27W. Moving down the board there is a USB 3.2 gen 1 header, four SATA 6GB/s ports, and a SlimSAS connector. All of these are at a 90-degree angle so they won’t get in the way of your graphics card or other expansion cards. The addition of the SlimSAS connector is actually quite cool to see. SlimSAS allows you to connect U.2/U.3 SSDs, and unlike traditional 2.5-inch SSDs, you can get these in capacities up to 60TB!
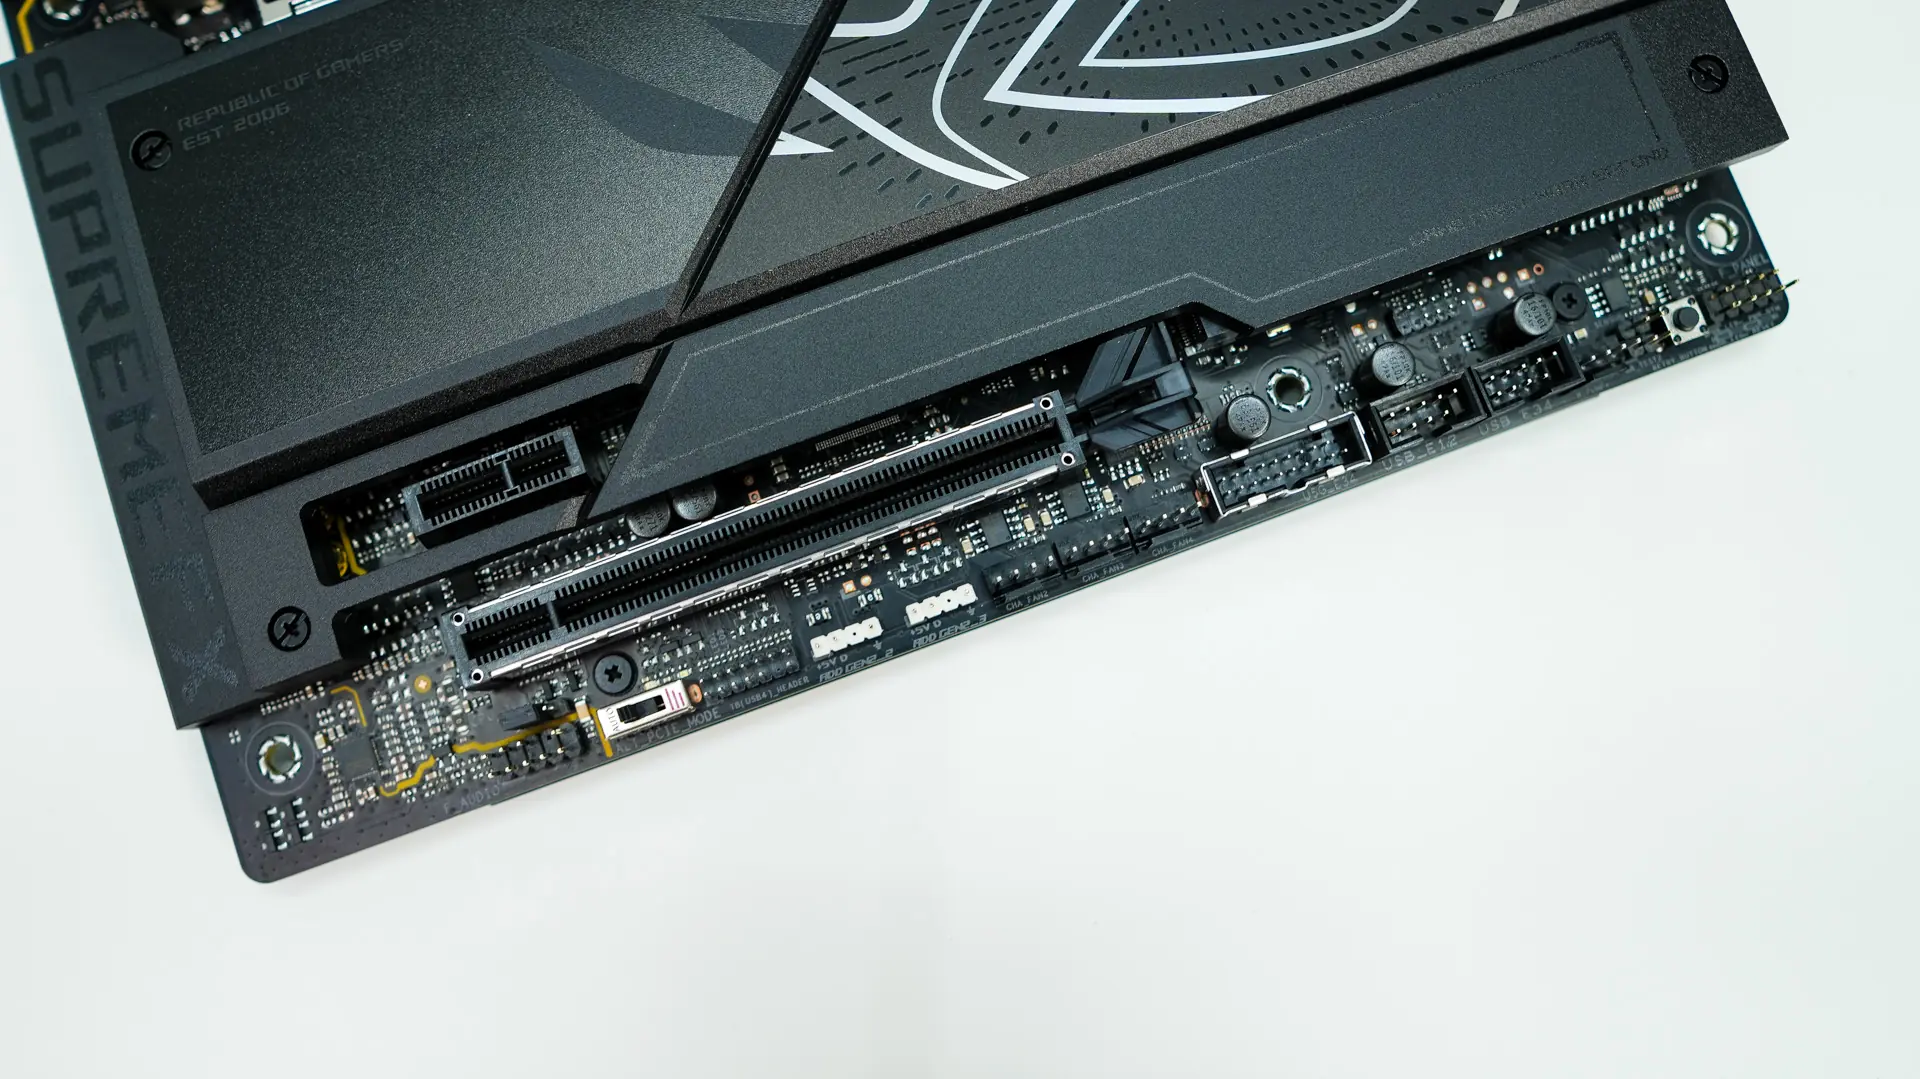
At the bottom of the board you’ll find the rest of your headers and connections. From left to right you have your HD audio header, ALT PCIe mode switch, Thunderbolt 4 header, 2 more 3-pin addressable RGB headers, three 4-pin fan headers, a USB 3.2 gen 1 header, two USB 2.0 headers, a water pump header, retry button, and your front panel headers.
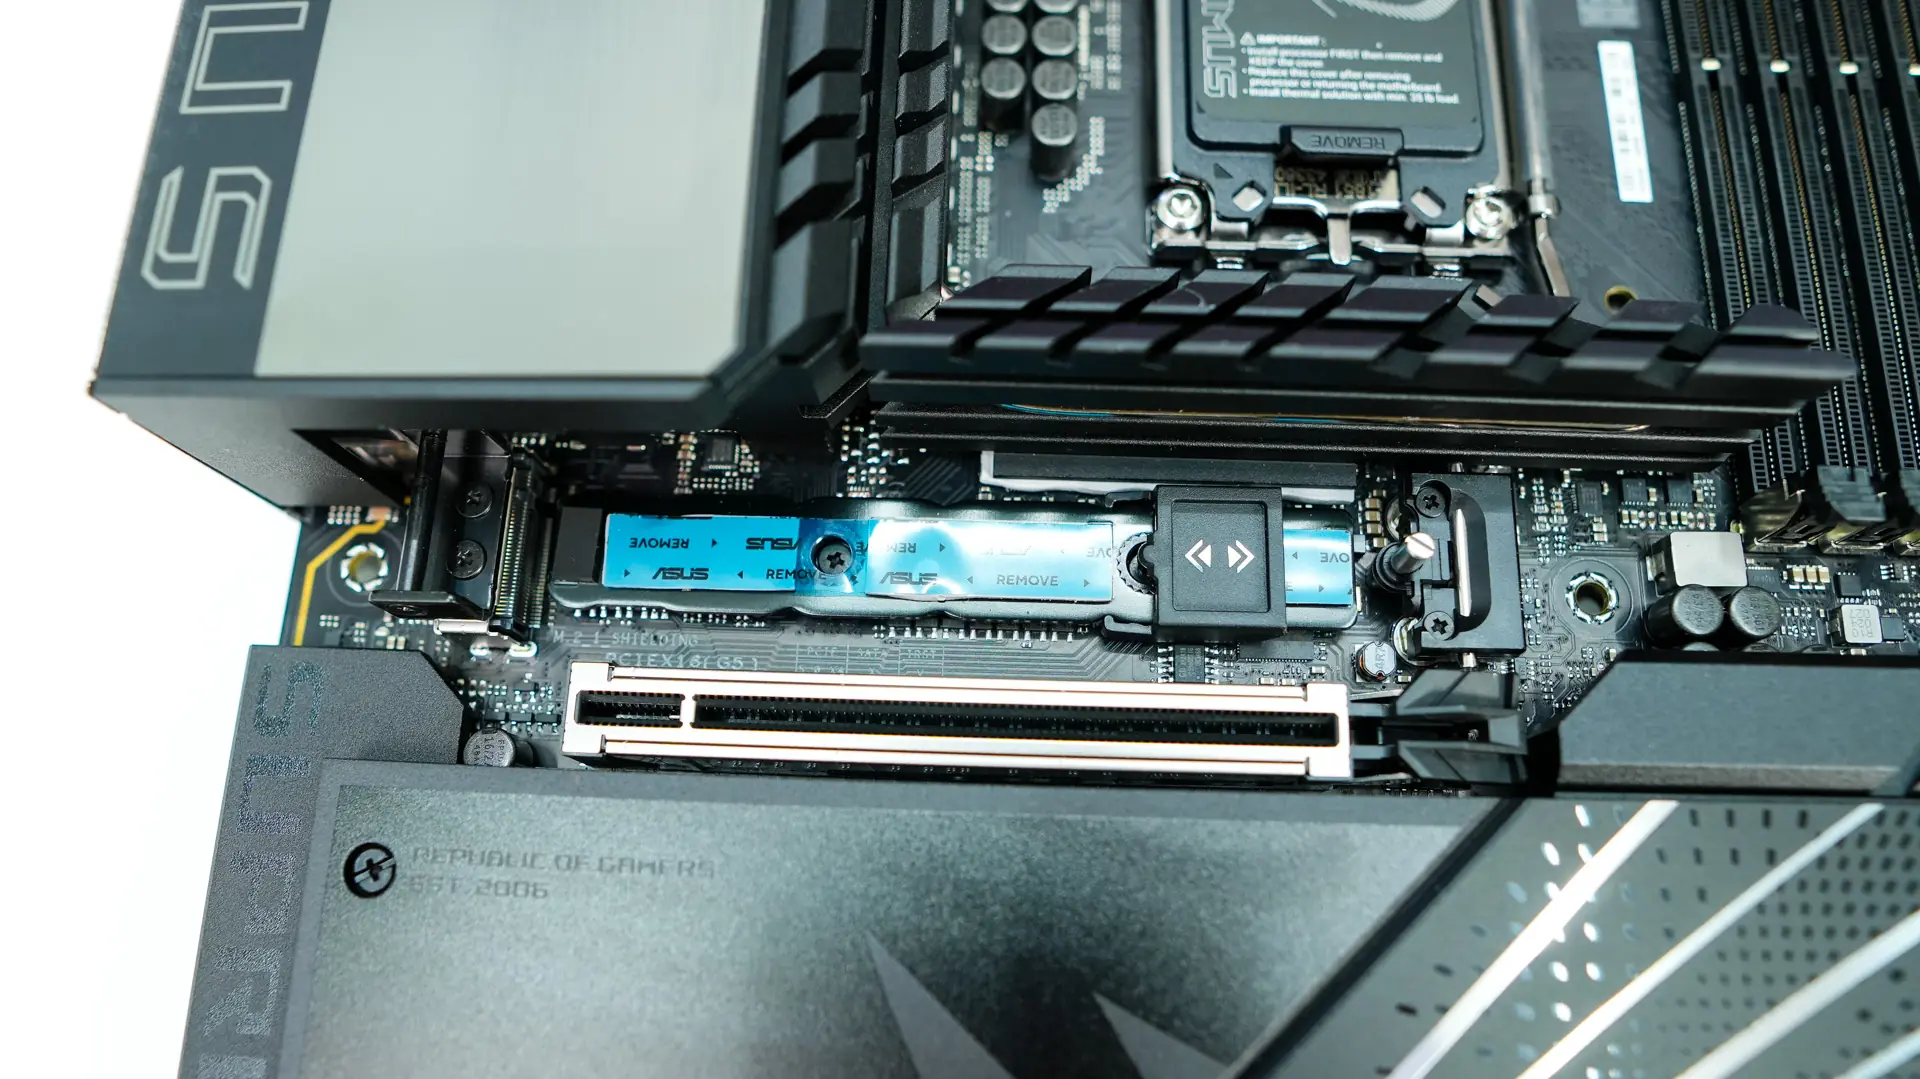
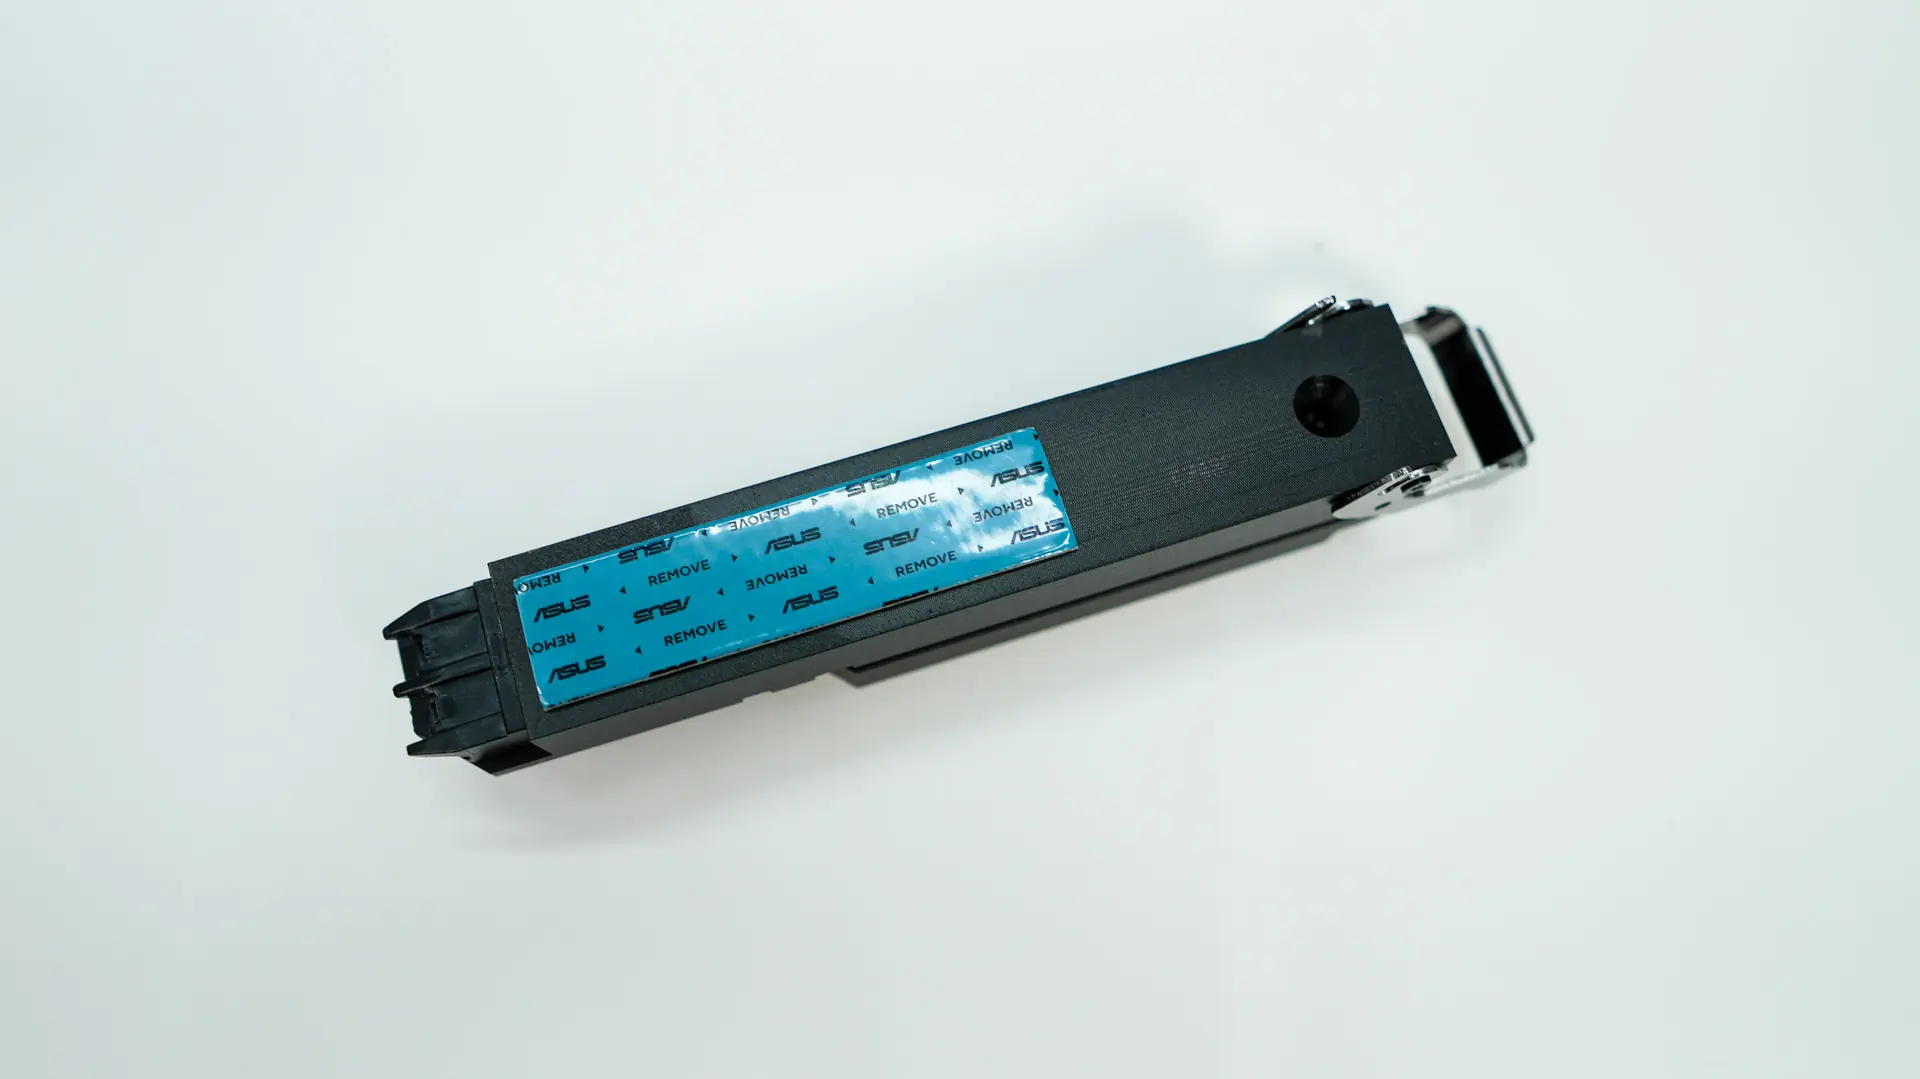
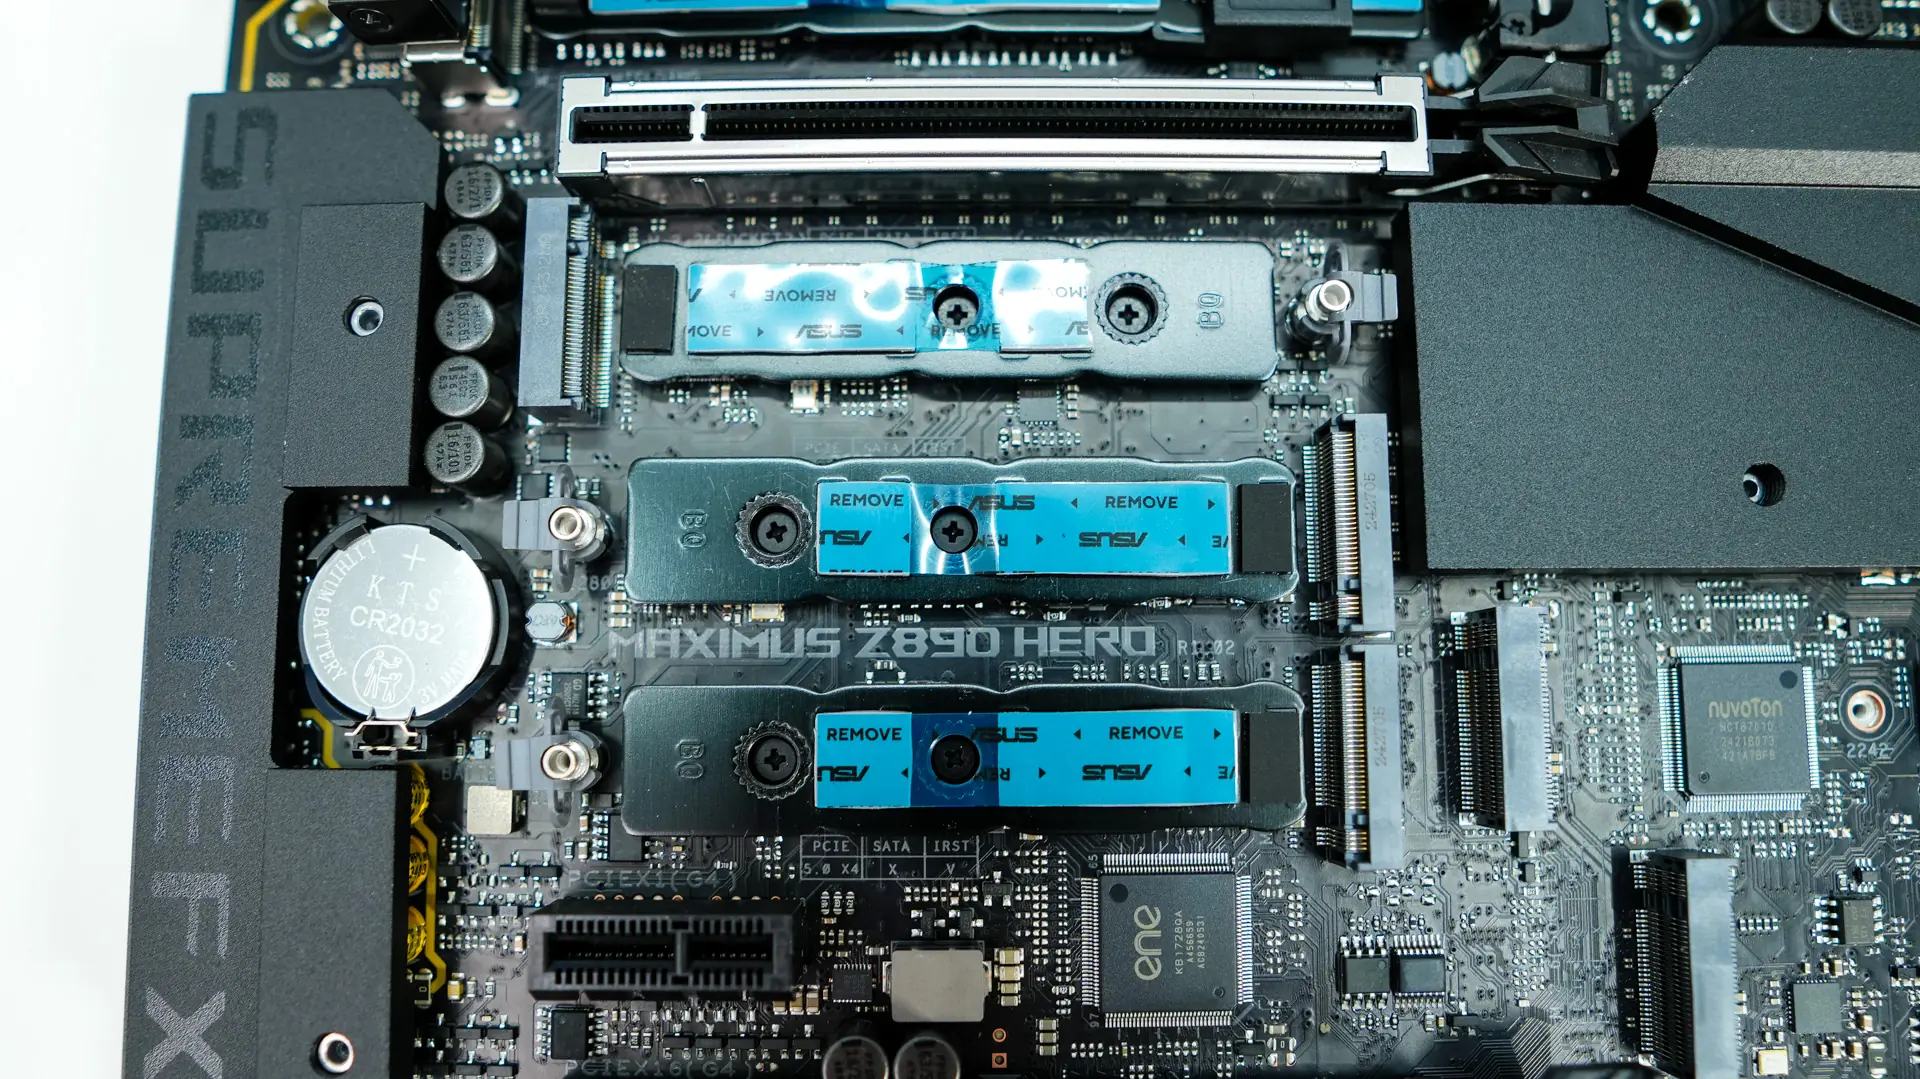
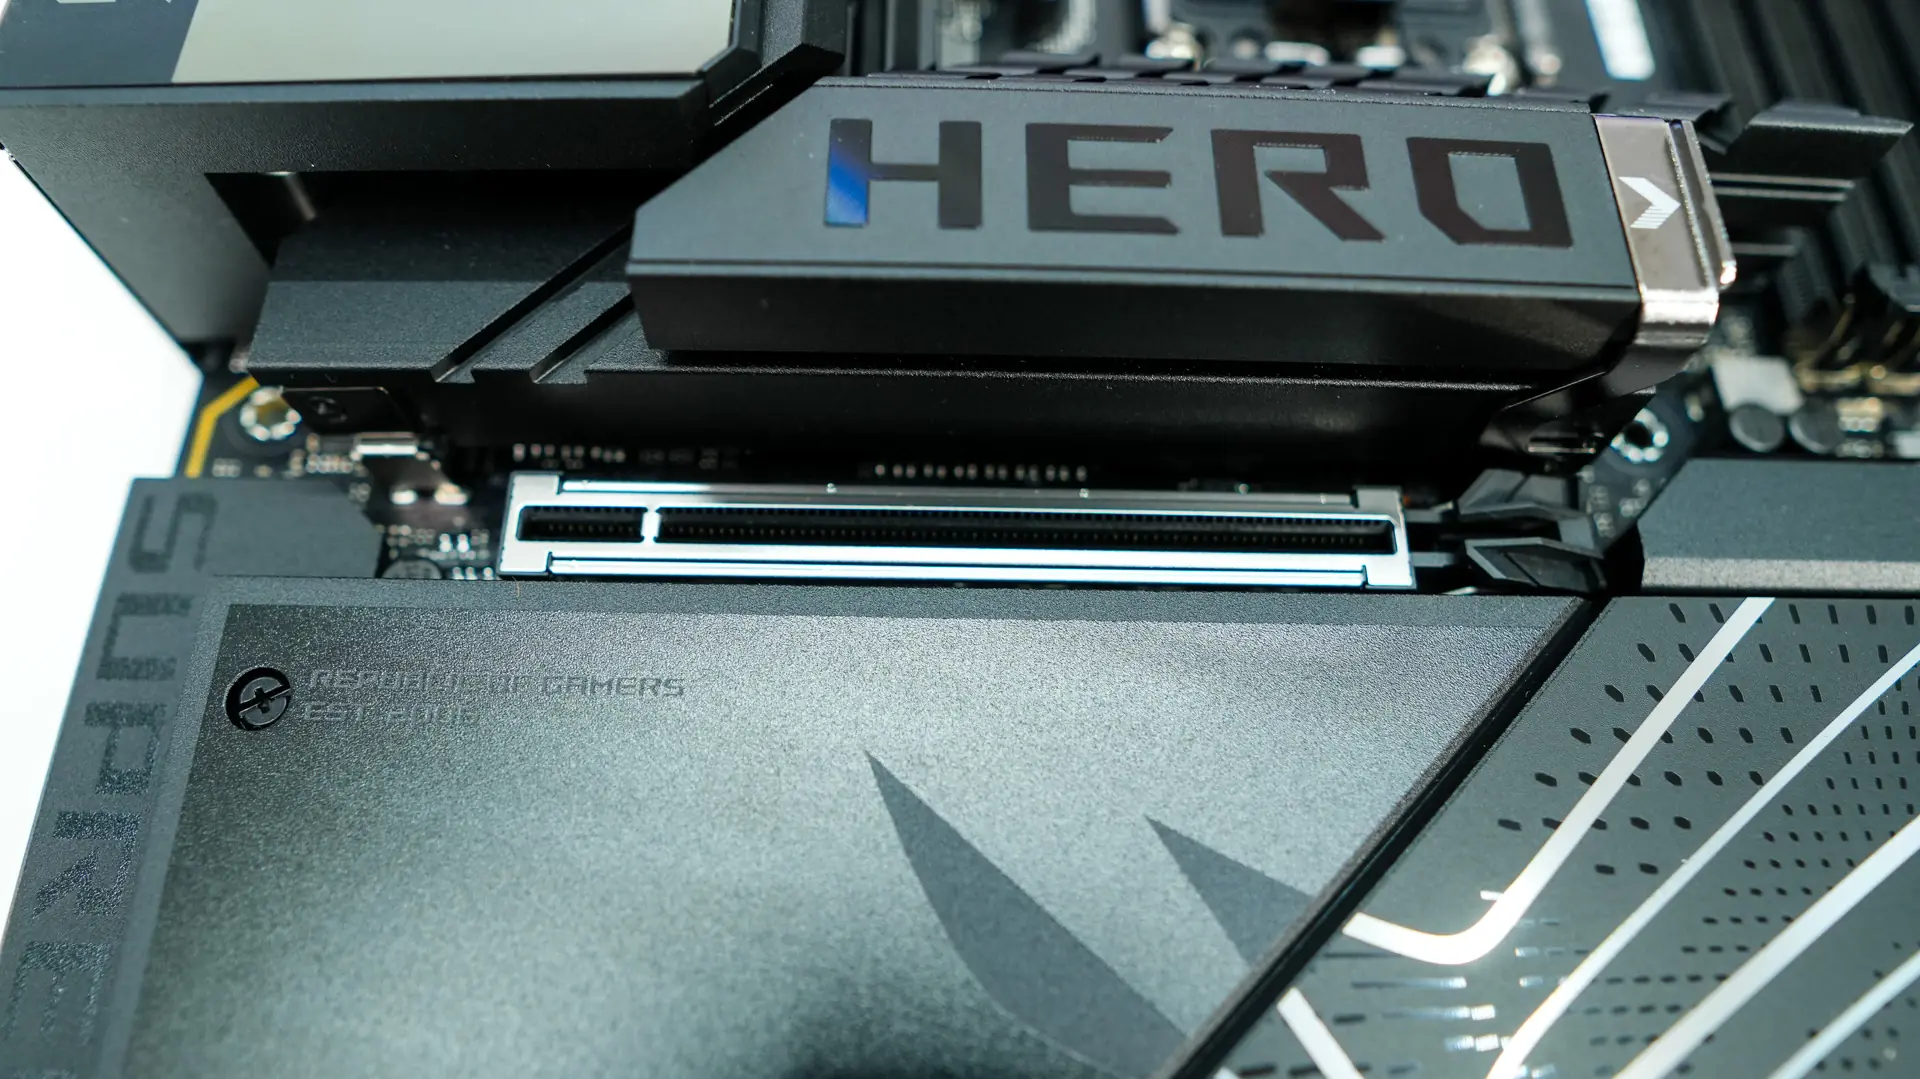
The bottom half of the board is essentially covered by heatsinks. The top heatsink is quite large and is made for cooling off a PCIe 5.0 NVMe SSD. It uses what ASUS is calling M.2 Q-Release. You essentially pull down the silver latch and the entire heatsink comes off. Reinstalling it is as simple as sliding the hinge back into place and locking it. With the heatsink removed we can see our M.2 slot which is a PCIe 5.0 x4 slot. It features the new M.2 Q-Slide, which is a retention bracket that slides
along the M.2 backplate.
Removing 4 screws allows you to remove the larger bottom heatsink that covers most of the board. Once removed we find 5 more M.2 slots. These are a mix of PCIe 5.0 slots and PCIe 4.0 slots. The top slot here is going to be PCIe 4.0, while the middle two slots are PCIe 5.0, and then the two slots that are closer to the edge of the board are PCIe 4.0. All of these slots feature the new M.2 Q-Latch, this tool-less locking mechanism just snaps into place to lock your drive down.
When it comes to expansion slots you have one PCI-Express 5.0 x16 slot, one PCI-Express 4.0 x16 slot (x4 electrical), and one PCI-Express 4.0 x1 slot. The top slot is metal reinforced. You may have noticed there is no PCIe release button on this board. Don’t worry you won’t have to try and get your finger down between that M.2 heatsink and your card to release it. ASUS has outfitted this board with their new PCIe Slot Q-Release Slim, which actually removes the release button entirely. The slot will keep your graphics card in place securely, but hold down the motherboard and pull the card towards the chipset side and it simply releases. I’ve tested this and it works flawlessly!

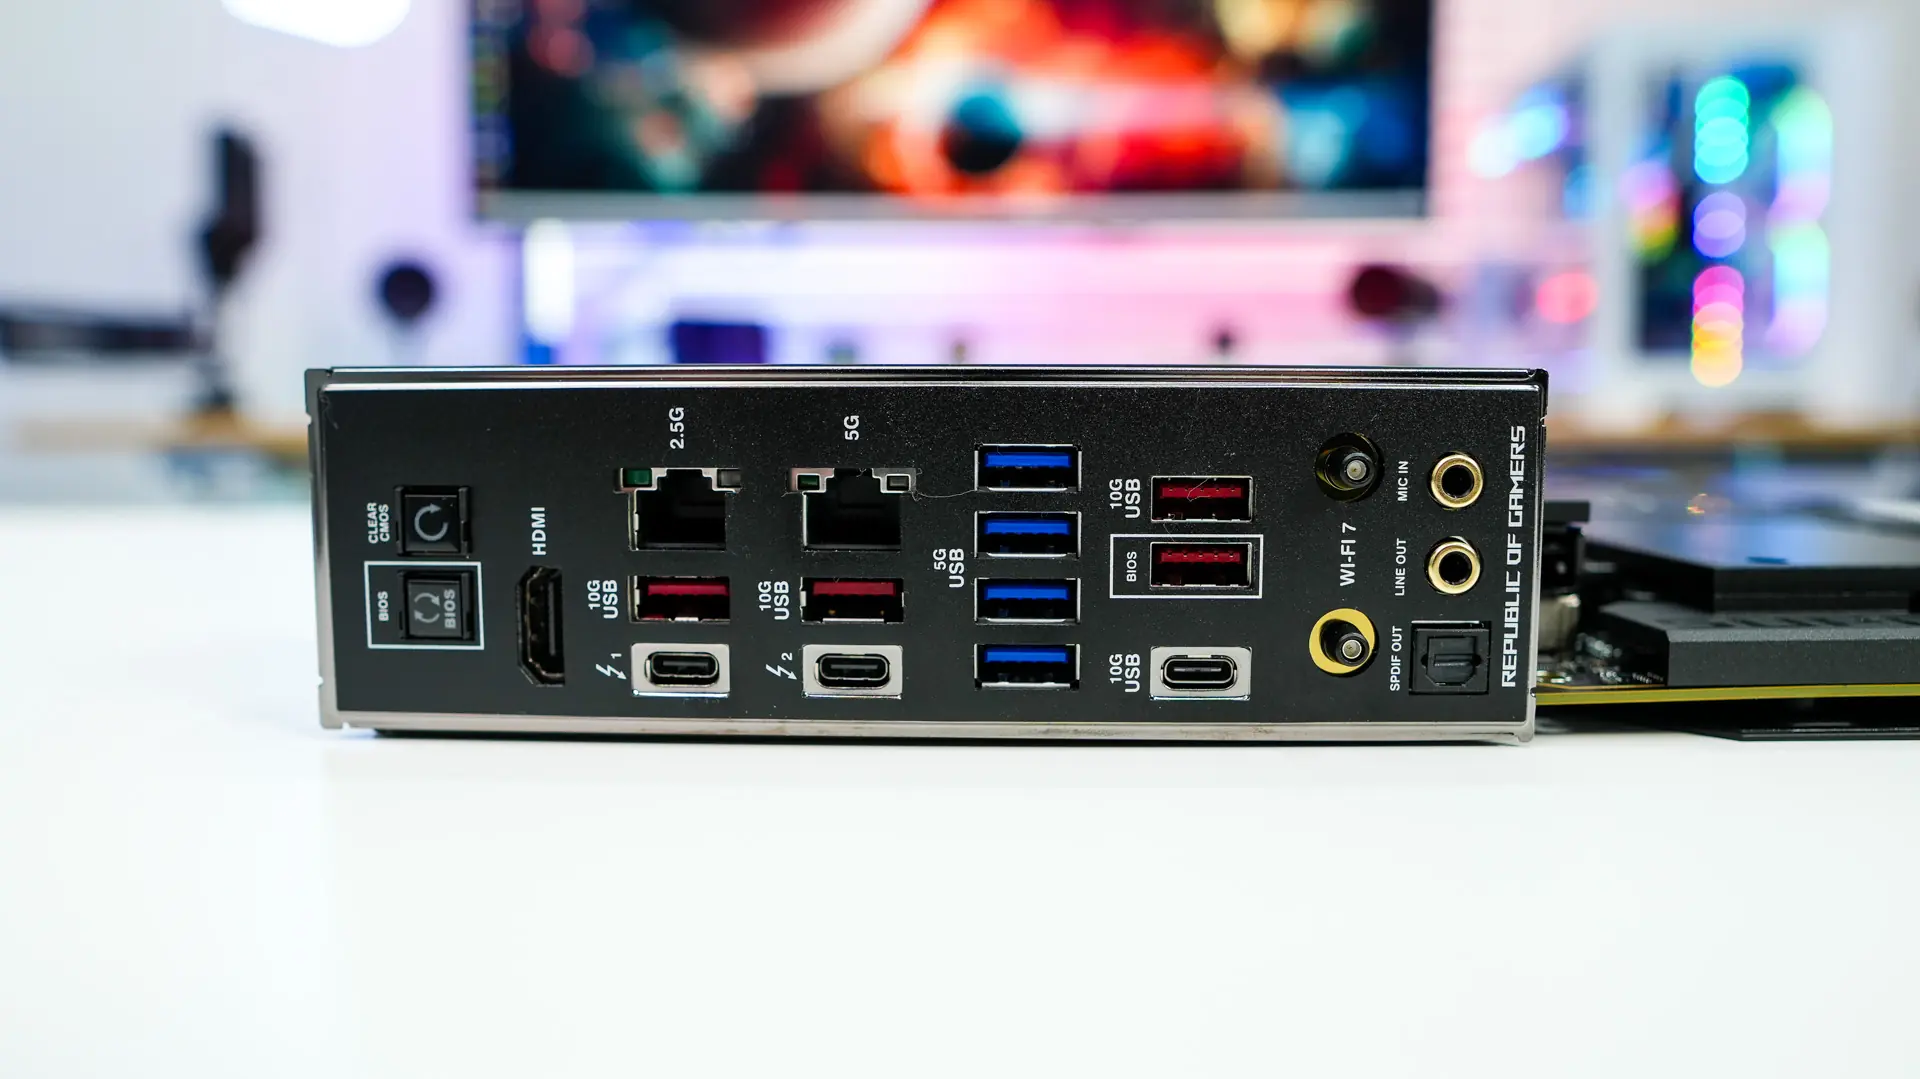
When it comes to the rear I/O we have an integrated I/O shield, which we’ve come to expect these days. When it comes to buttons and connections on the rear I/O we have a clear CMOS button, BIOS Flashback button, HDMI, 2.5G LAN, 5G LAN, two USB 3.2 gen 2 Type-A ports, two Thunderbolt 4 USB-C ports, four USB 3.2 gen 1 Type-A ports, two more USB 3.2 gen 2 Type-A ports, a single USB 3.2 gen 2 Type-C port, WiFi 7 antenna connection, and your audio connections. Talking about those Thunderbolt 4 ports, they support Thunderbolt Share. Thunderbolt Share is quite new and allows super-fast transfers between two devices and much more! Check out this detailed blog post all about it!
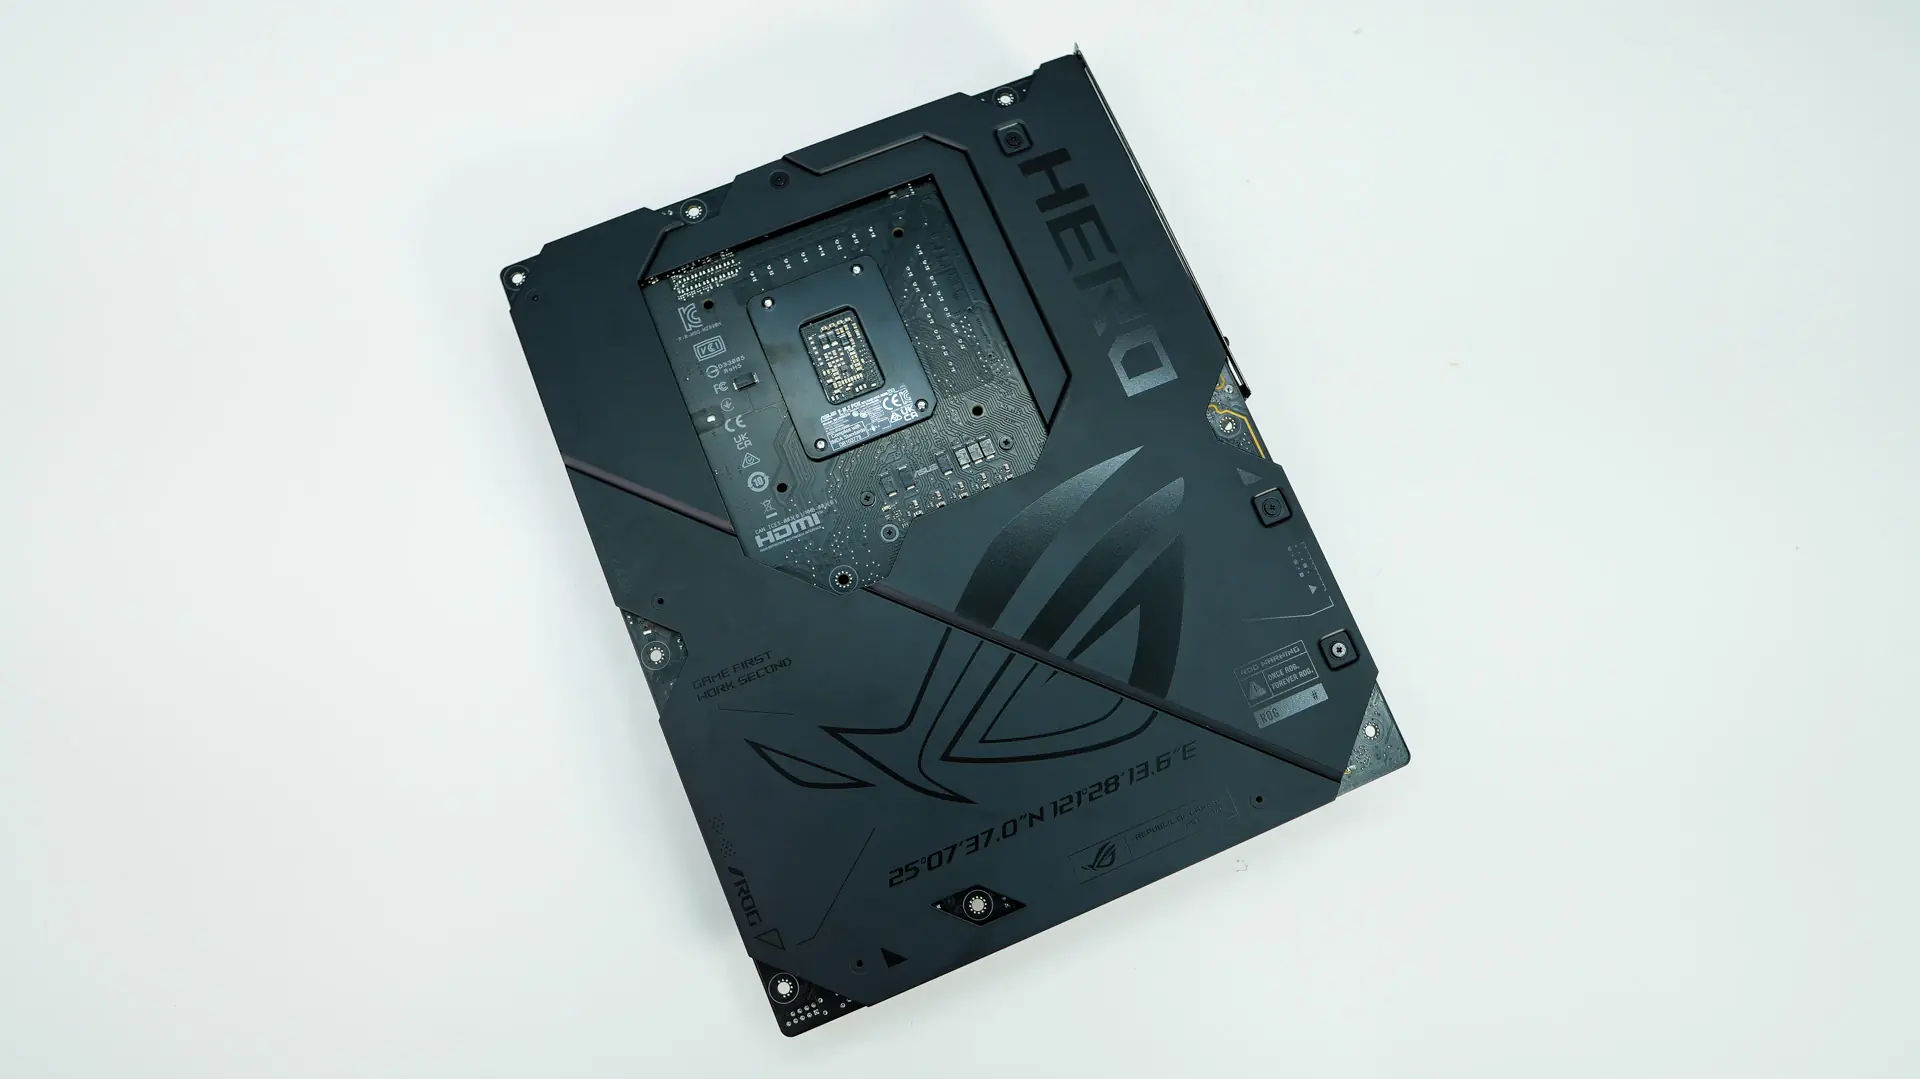
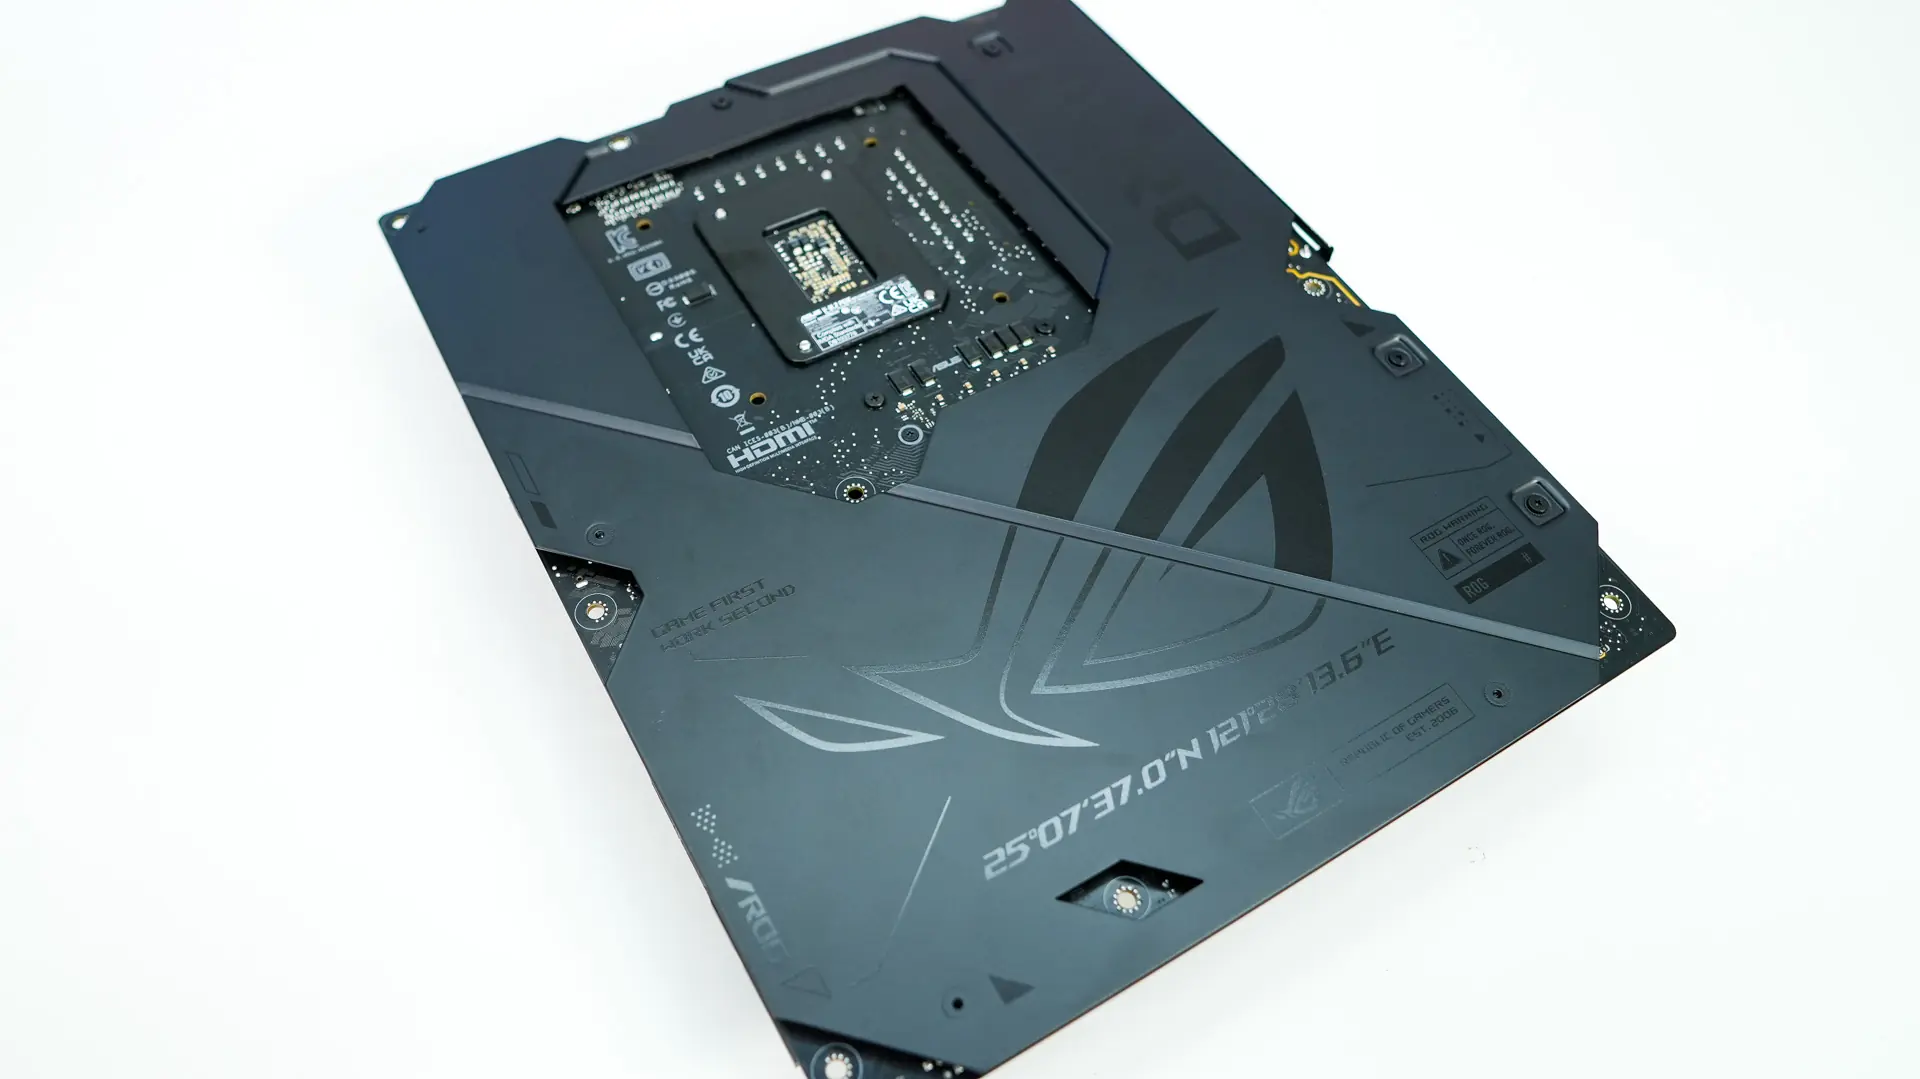
If we flip the board over we can see that ASUS has wrapped it in metal. This not only helps with rigidity of the board, but also helps cool components better.