Scenes, Sources, and Mixer, Oh My!
There are a few keywords that we will use quite a bit in the next section, and now is a good time to define them and their uses. The first up is Source(s). A source is just that, a source of video and audio, a game, an animation, images, etc. This can be thought of as the actual content of your stream. With all sorts of sources available, and many being displayed or used at once, things can get a bit complex. That is where a Scene(s) comes into play. Scenes take one or more sources and organize them into a group. For example, your most used scene might include the following sources: game application, webcam image, microphone input, music playback, and notification sounds. Another scene may use just a single source, like a static image indicating that you are currently AFK or will be right back. For this guide we will utilize a single scene with multiple sources. With those definitions out of the way, it’s now time to add a few sources to our Streamlabs OBS window.
With our single Scene selected on the left, we can now click the “+” icon in the Sources section to add a new source to our scene.

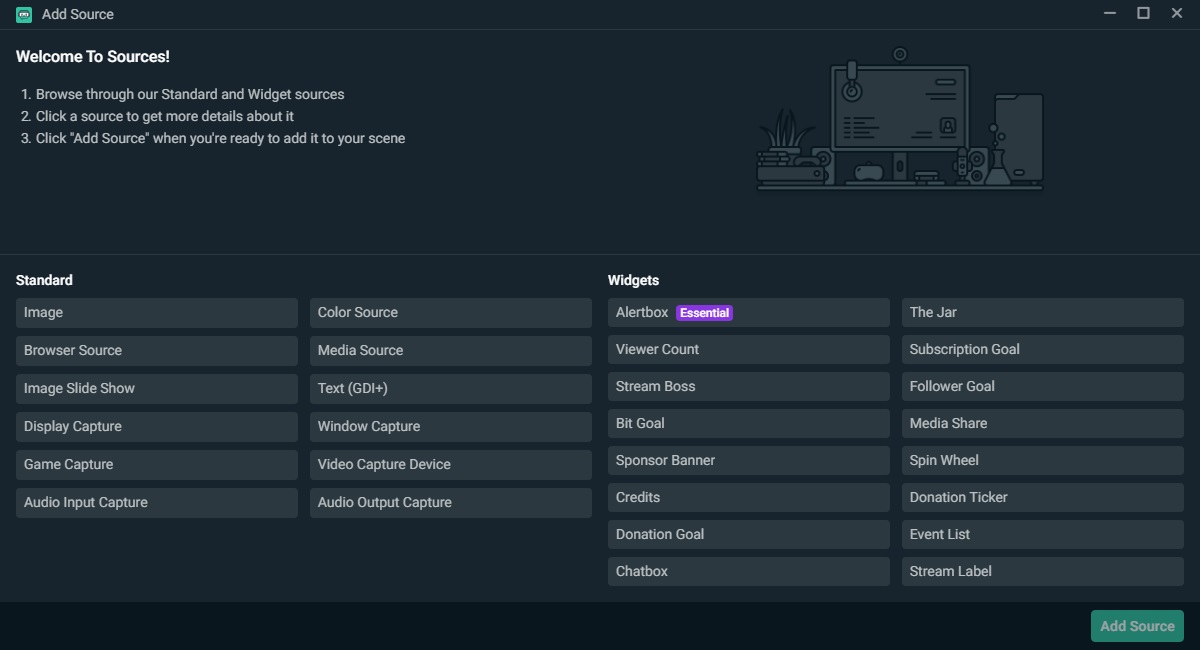
Next, a window will pop up giving us a variety of sources to choose from. This includes everything from static images and browser windows, to game captures, text, and a large assortment of widgets. We want to select the “Game Capture” option and then click “Add Source”.
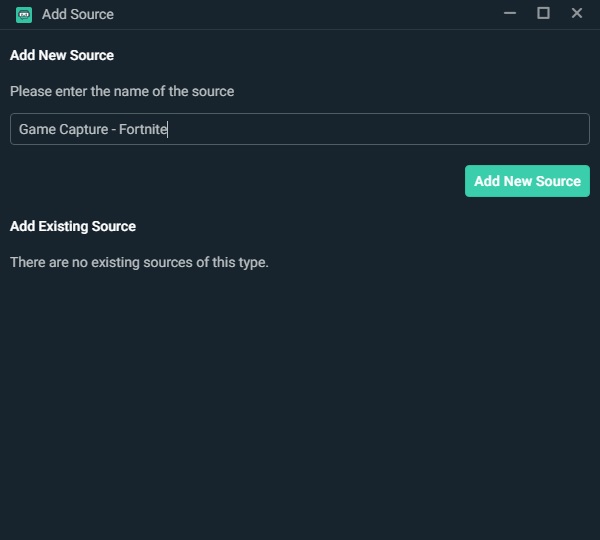
An “Add Source” box will pop up, and this is where we will name our source. I have chosen to stream Fortnite Battle Royale, so I have adjusted the source name to reflect the game’s name. Being descriptive with your source names makes it that much easier when you are trying to organize multiple sources. Once you have named your new source, click the green “Add New Source” button.
This brings us to the Game Capture settings window, where we have a variety of options. Thankfully, we don’t need to utilize or adjust most of these options, but we will change a few settings in this window. First, we will change the Mode setting to “Capture specific window”. This will allow us to select our Fortnite client application in the next drop-down menu. In order for your applications to show up in this menu, they must be running. So if you aren’t seeing the application you want, make sure you have launched it and that it is working properly. We can leave everything else as is, and then click the “Done” button.

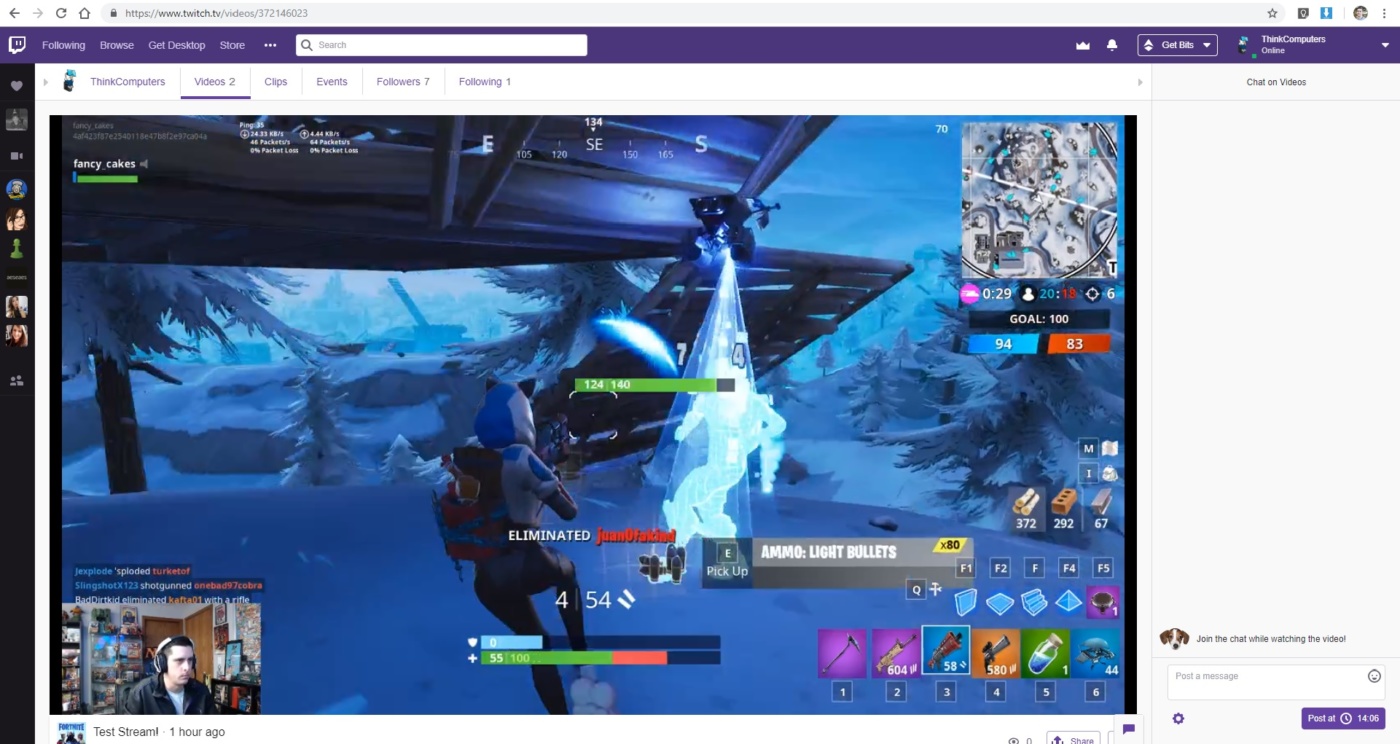
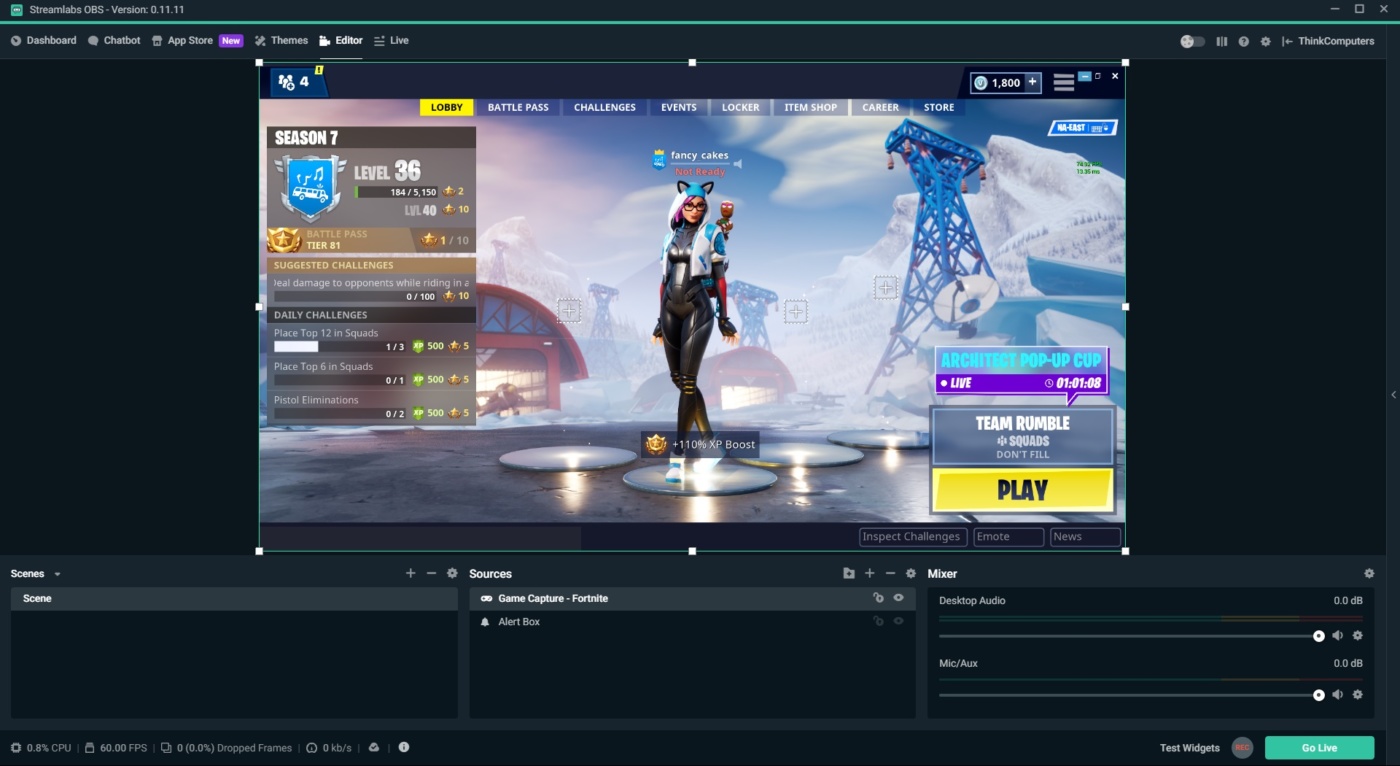
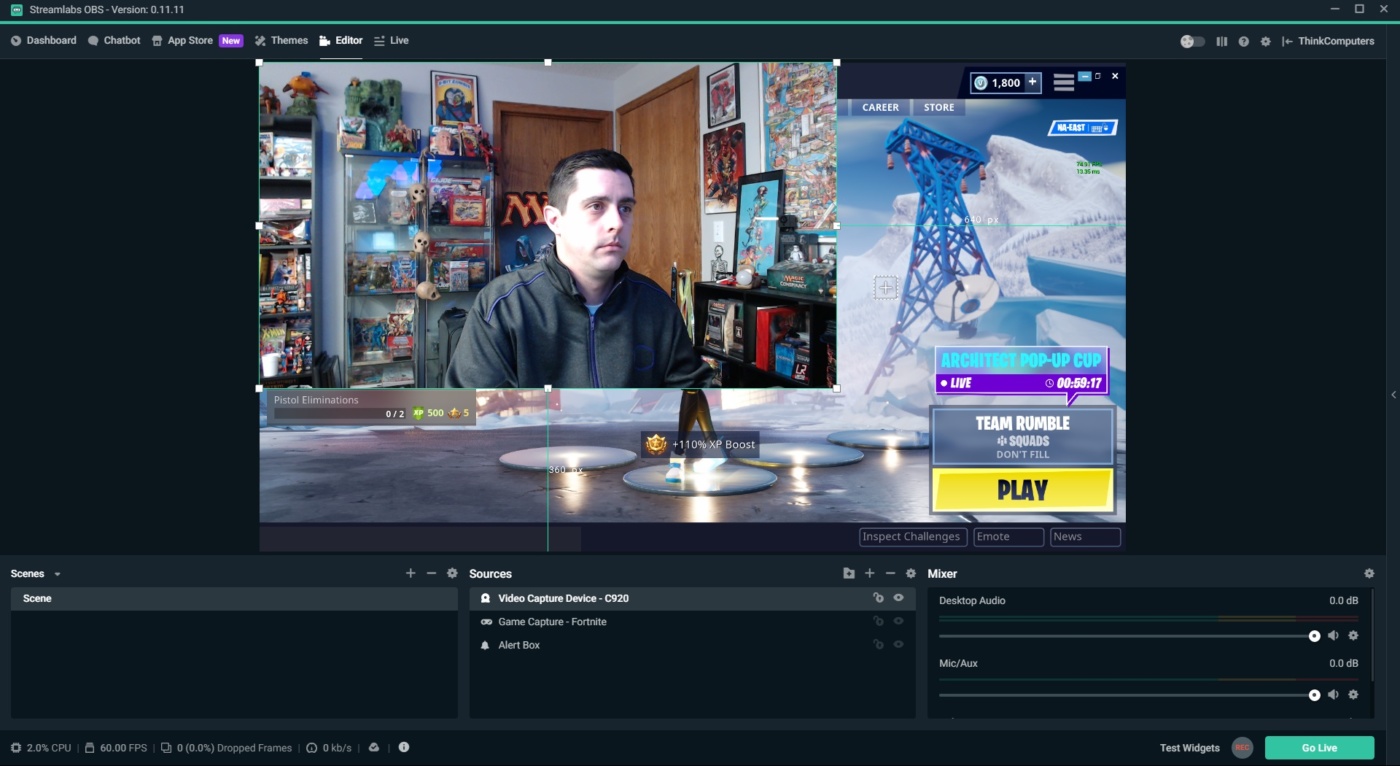
That will take us back to our main Streamlabs OBS window, where you may or may not see your newly added application. In order for our Fortnite display to show, we first had to switch back to the game and then back to Streamlabs OBS, where we were then greeted with a view of our lobby. The game capture source size can then be adjusted if you don’t want it to be full-screen, though we will leave it as is for our configuration.
Next we will be adding our webcam, so we will again click the “+” icon in the Sources section. In the source type selection window we want to choose “Video Capture Device”, and then select “Add Source”.
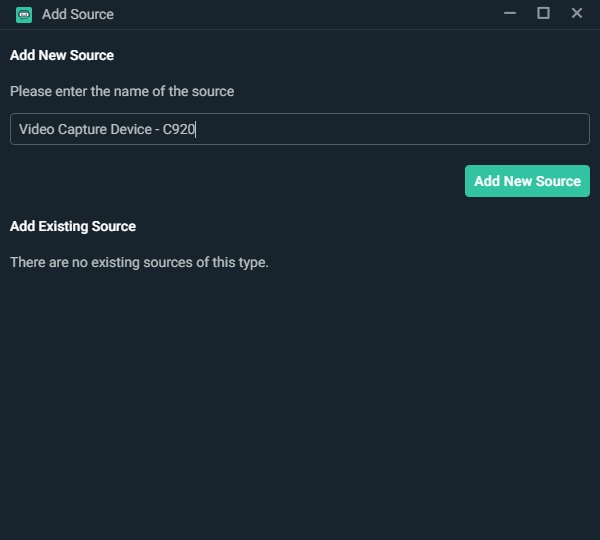
A new Add Source window will appear, and again we will name our source something appropriate. In our case, we added the model of our webcam, the Logitech C920, to the end of the name and then hit “Add New Source”.
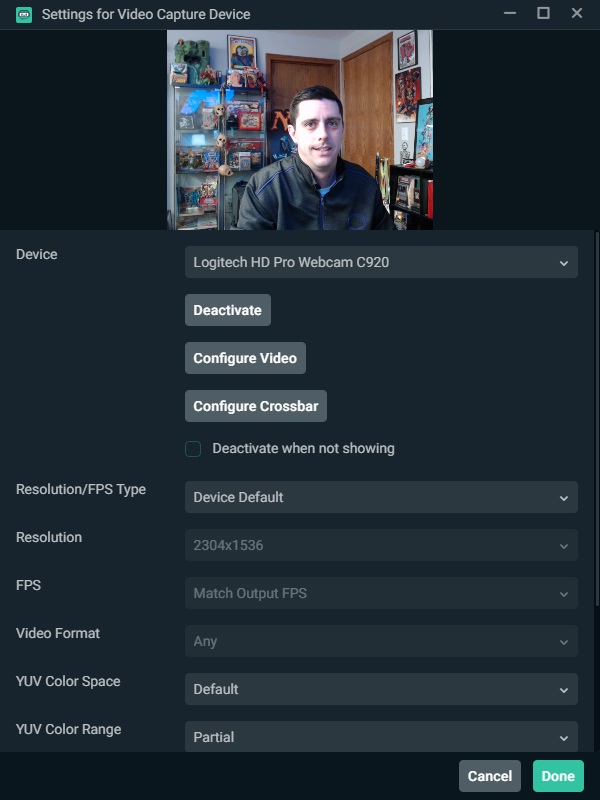
We are then shown the settings window for our Video Capture Device, and it is here where we can select our C920 in the Device drop-down menu. After selecting “Custom” in the Resolution/FPS Type menu, and then setting our Resolution to 1280 x 720, we clicked the “Done” button.
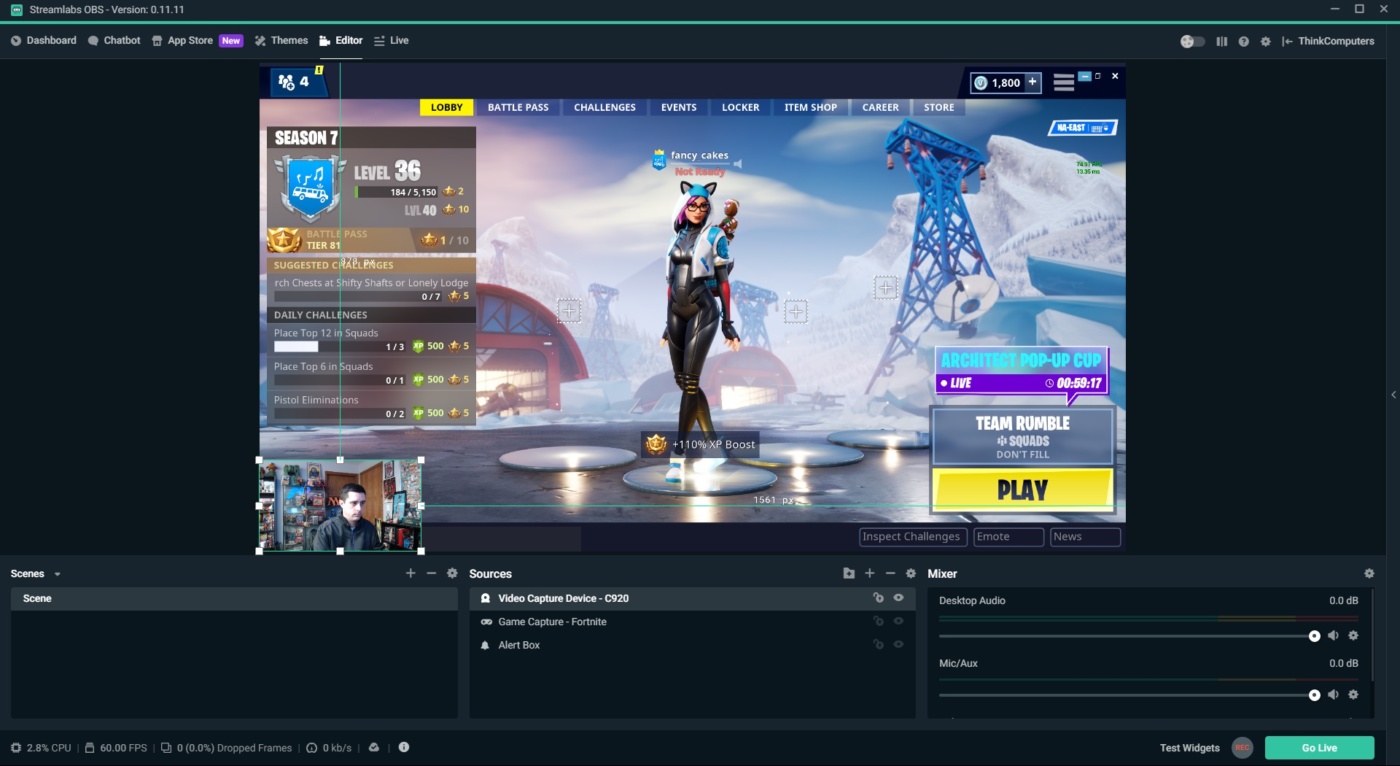
This brings us back to our main Streamlabs OBS window, where we now see our webcam image in it’s full resolution. This is where the sizing squares come in handy, as we can simply resize the webcam image and then drag the view into place. We chose the bottom left corner.
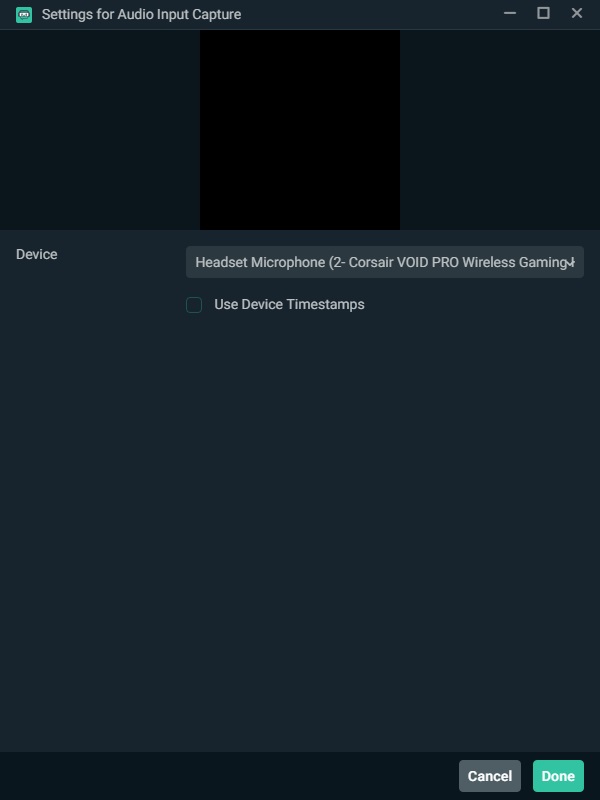
Next we followed the steps to add another source, this time for our headset’s microphone.
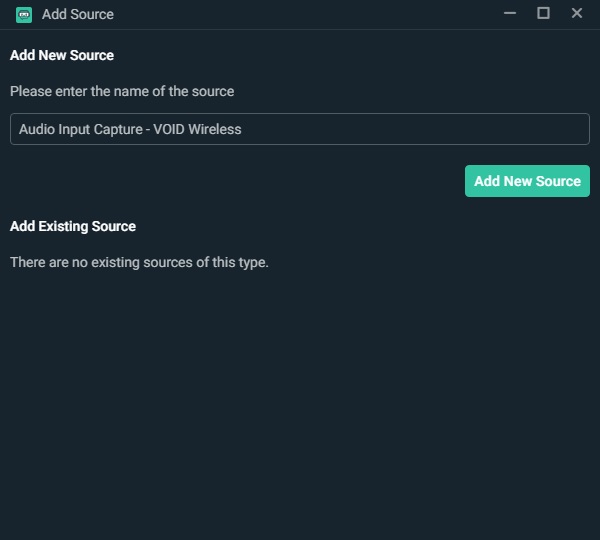
After naming and selecting our device from the Audio Input Capture windows, we clicked “Done”, and were back at our main window, where our Sources list was starting to gain some occupants.
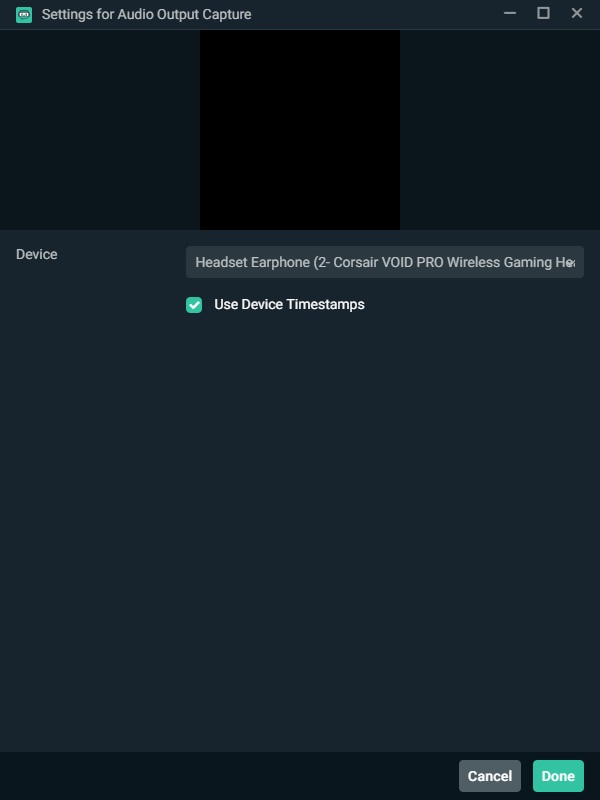
Last, but not least, we wanted to make sure that any sounds we heard on our PC were transmitted to our stream. It is here that we need to go over to the bottom right section of Streamlabs OBS to the Mixer area, where we clicked the gear icon for the “Desktop Audio” option and selected “Properties”.
A new window popped up where we selected our headset to mirror the output to our stream.
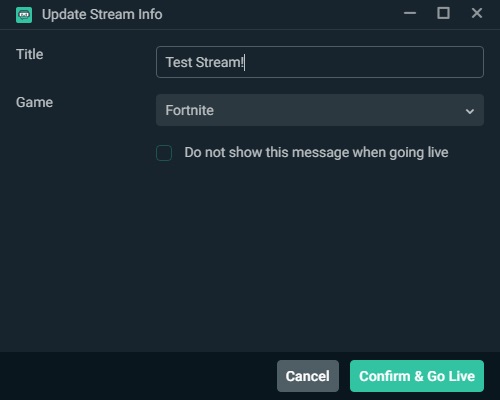
Now that all of our sources are set, we are ready to click that “Go Live” button in the bottom right corner of the Streamlabs OBS window. Clicking this button brings up a small window that allows you to update your stream info, and in our case we titled our stream “Test Stream!”, and selected “Fortnite” in the Game drop-down menu. All that is left is to click the “Confirm & Go Live” button and we are off to the races!
Once the stream is live, you will be brought back to the “Live” section of Streamlabs OBS, where you will see a small preview of your stream in the bottom section of the window. Along the very bottom of the window are some nice status indicators, showing the current CPU usage, the FPS setting, the number of dropped frames if any, and your bitrate settings. This area is also where any warnings regarding stream quality and problems will appear, so keep an eye on this section. Of course, there are other items being displayed in this view, but for now we are going to ignore them, as most of them will not even come into play while you build your channel and presence.
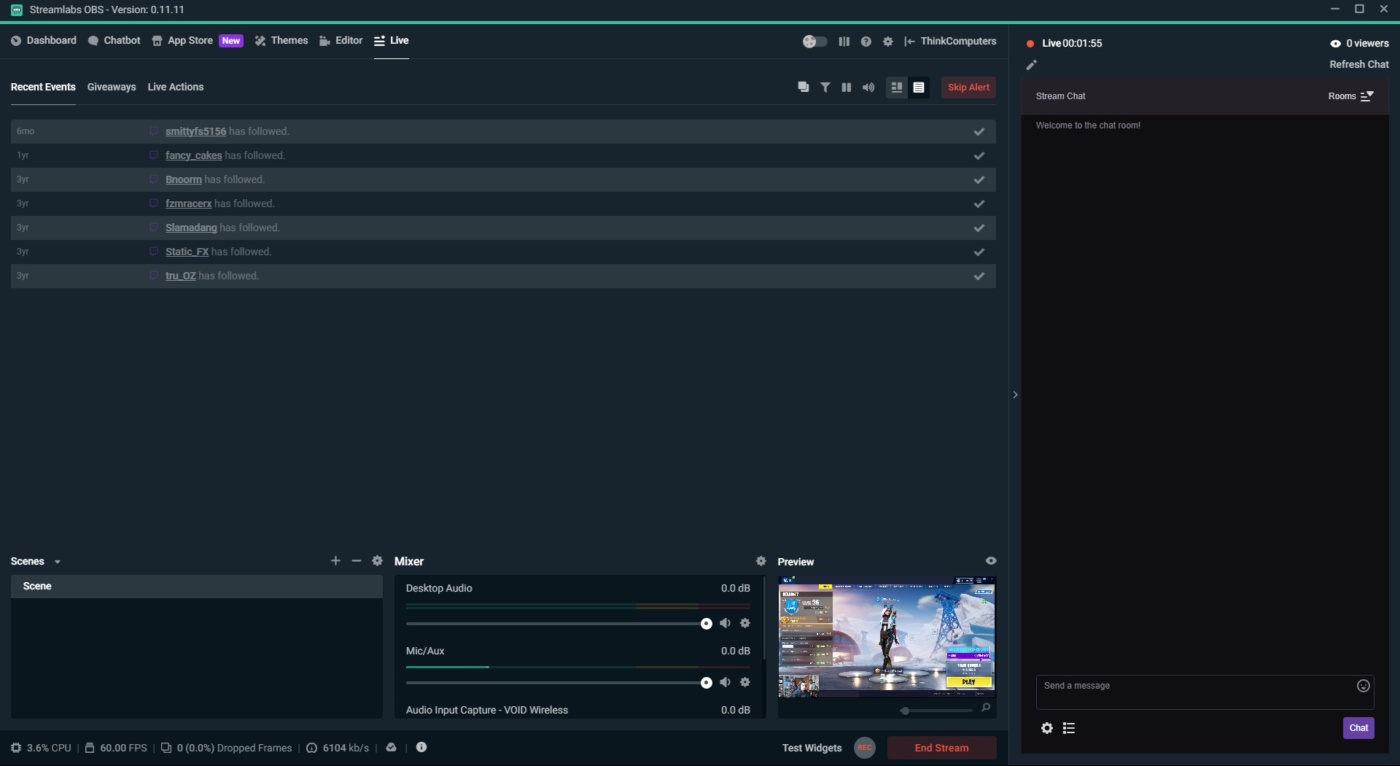
We would like to mention here that the use of two or more monitors makes monitoring and controlling your stream much easier, as you are able to keep an eye on the production while also tending to your game. Being able to see your chat live in the Streamlabs OBS window on one monitor and gaming on the other is invaluable for interacting with your audience, something that is a must for all streamers, especially those just starting out.