Setup and Usage
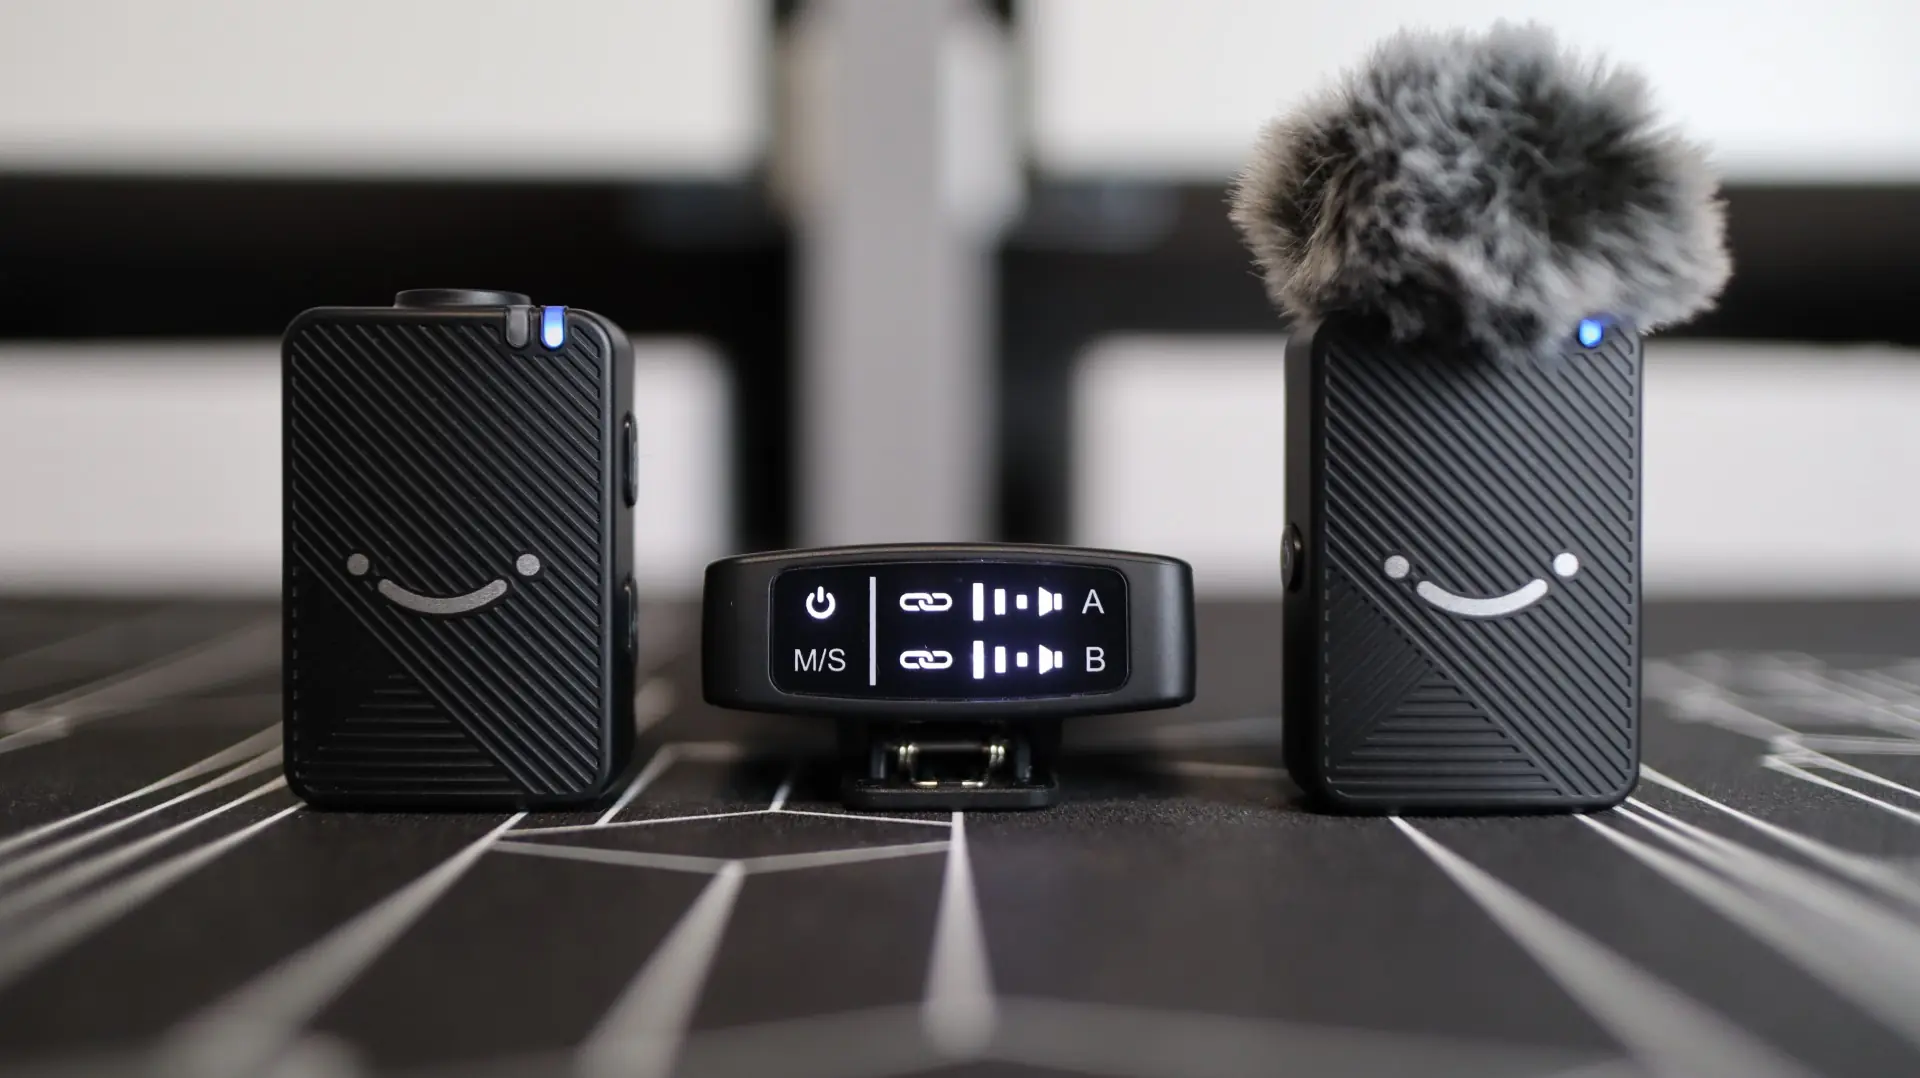
Setting up the FiFine M9 Dual Wireless microphones couldn’t be easier. In fact, all you have to do is make sure the kit is charged up, and then you simply pull out the receiver and transmitter(s). Once removed from the charging case all of the components will power on and pair up automatically.
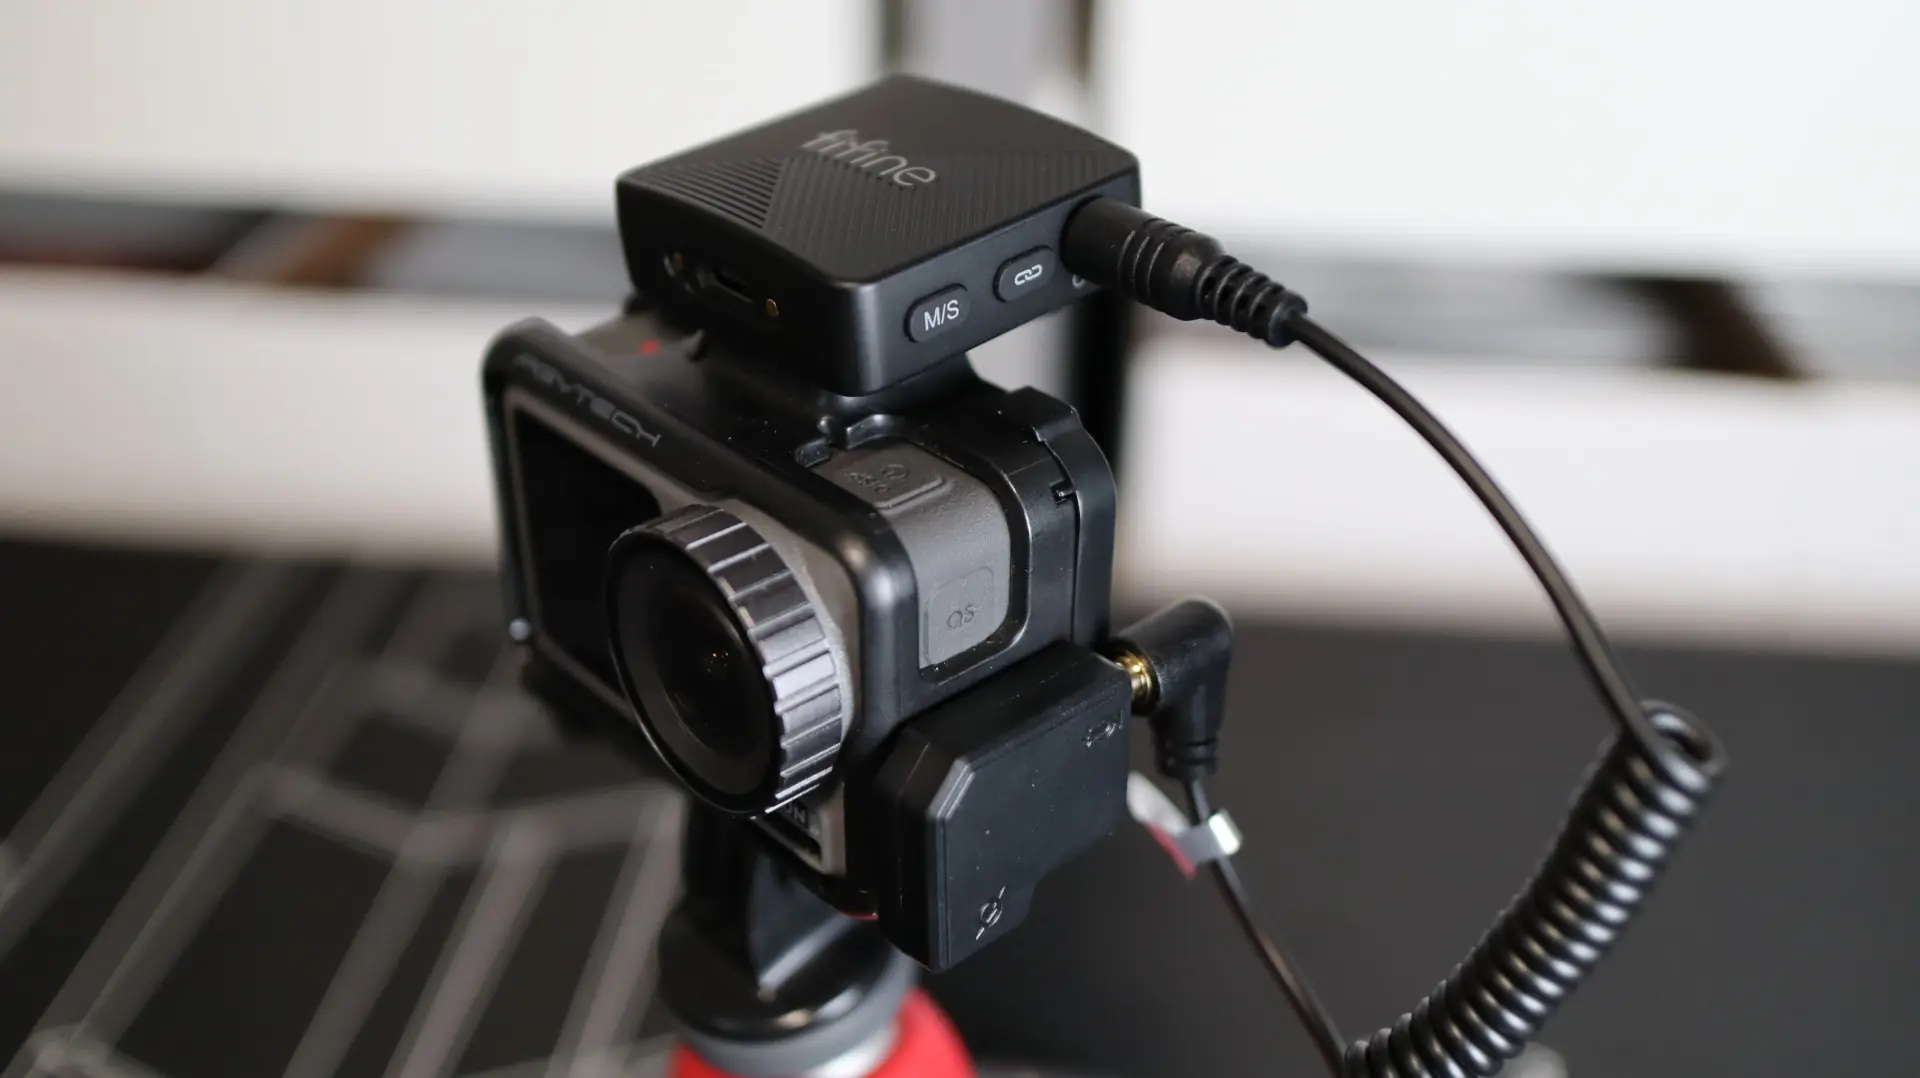
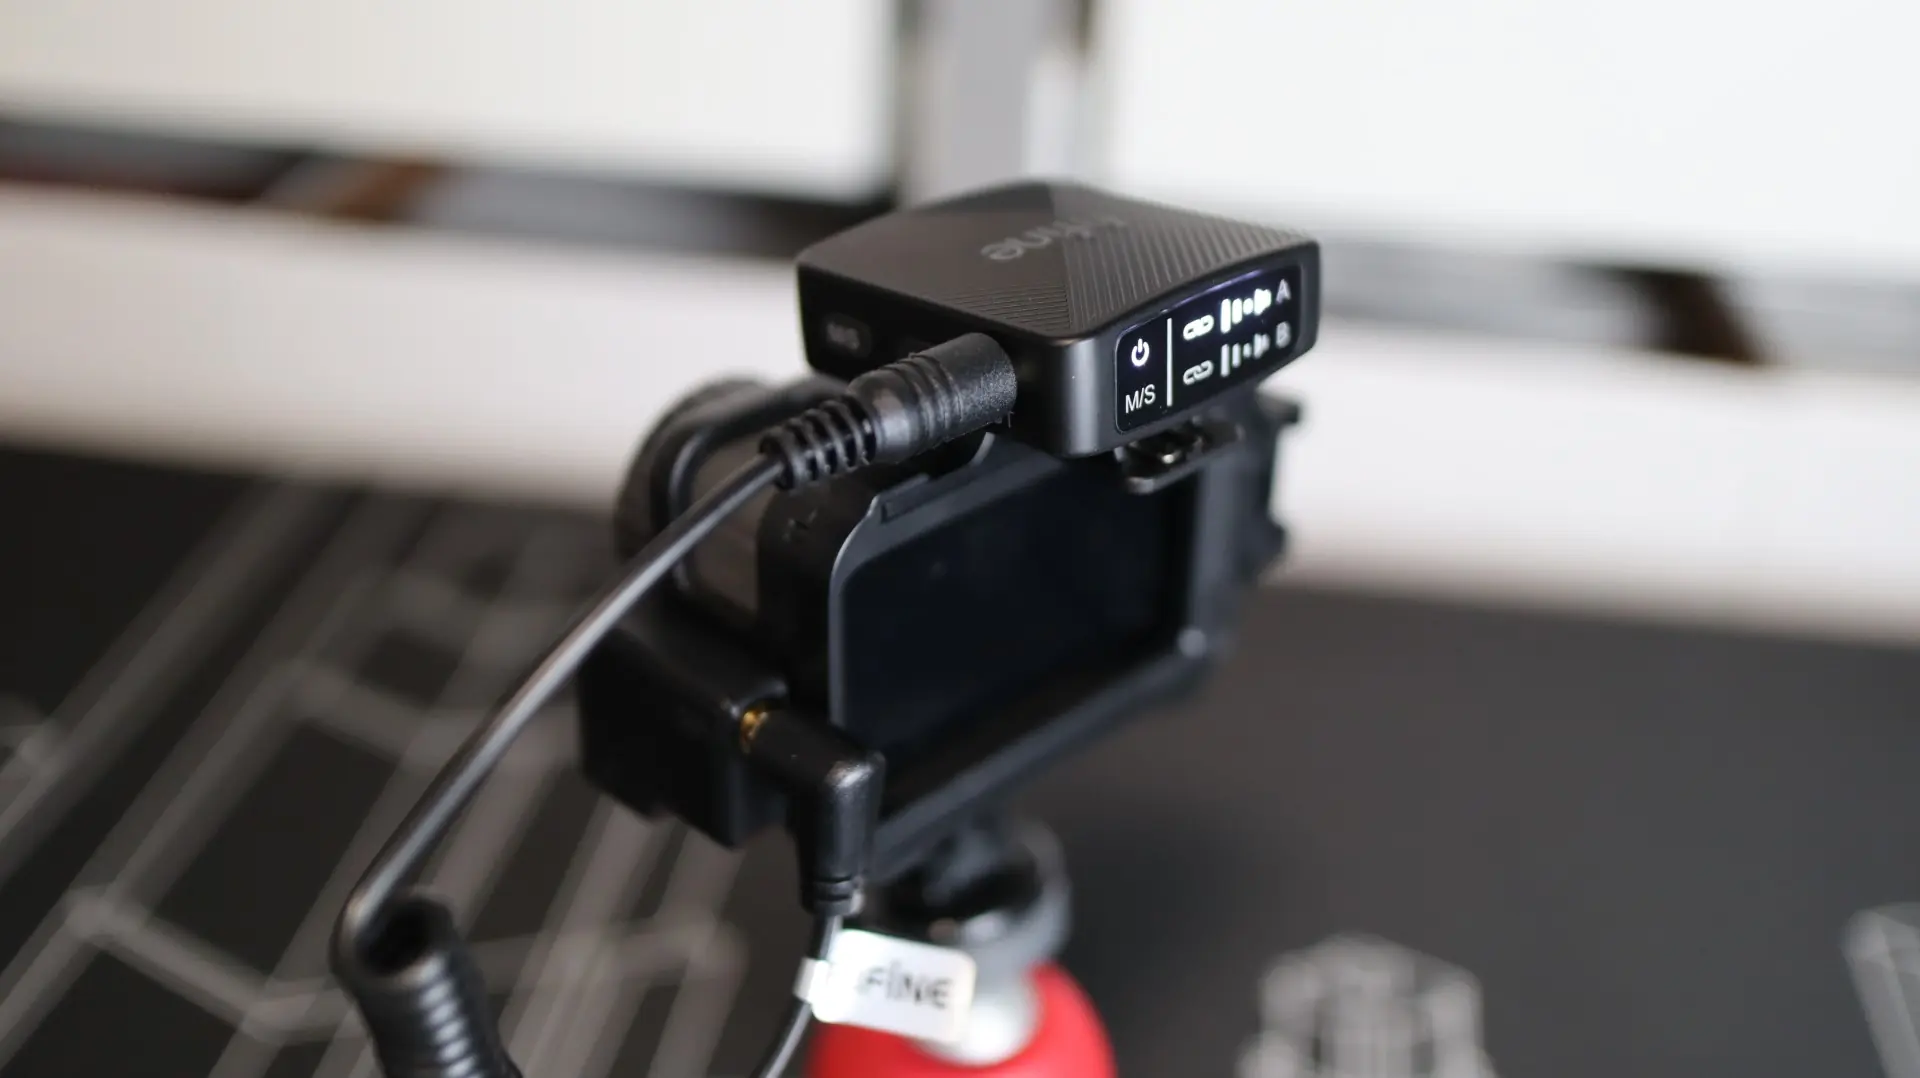
Once everything is paired up, you simply attach the appropriate included cable from the receiver to your device of choice. Then, depending on the device you are using, you may need to select the external microphone to switch over to the correct recording device. Here are a few shots of the M9’s receiver connected to my DJI Osmo Action camera.
As far as the transmitters go, you can simply clip them onto your shirt, hat, or other appropriate location. Now, keep in mind, you will want these to be pretty close to your face in order to get the best performance out of this kit.
With everything powered on and connected, there are a few options you have regarding the settings of the M9 kit. One of the most common settings to adjust will be the Mono/Stereo setup. Mono will treat each channel/receiver as its own when outputting from the receiver, whereas Stereo will bring both channels together into a single track. There are times when stereo makes sense, but most of the time a mono recording is what you will end up wanting. Additionally, each channel can have its volume adjusted via the A and B buttons on the receiver, and each transmitter can enable or disable the noise cancellation feature via their respective buttons.
Below are a few sample recordings from the FiFine M9, along another wireless model for comparison.
FiFine M9 – Mono – Noise Cancellation Off
FiFine M9 – Mono – Noise Cancellation On
Hollyland Lark M1 – Mono – Noise Cancellation Off