A phone warranty always comes in handy when there are problems that need to be fixed. However, when it comes to less modern iPhone models, warranty cover is sometimes not an option. Therefore, if your phone develops a fault or is damaged, the best solution can be to repair it at home. Home repairs can save a lot of money and time as opposed to sending your phone to a repair store or replacing it with new. However, most people fear home repairs, mostly because they are worried that they may end up making the issue worse. In this post, we look at the reasons why fixing your iPhone should not be beyond many people.
Fixing Your iPhone at Home
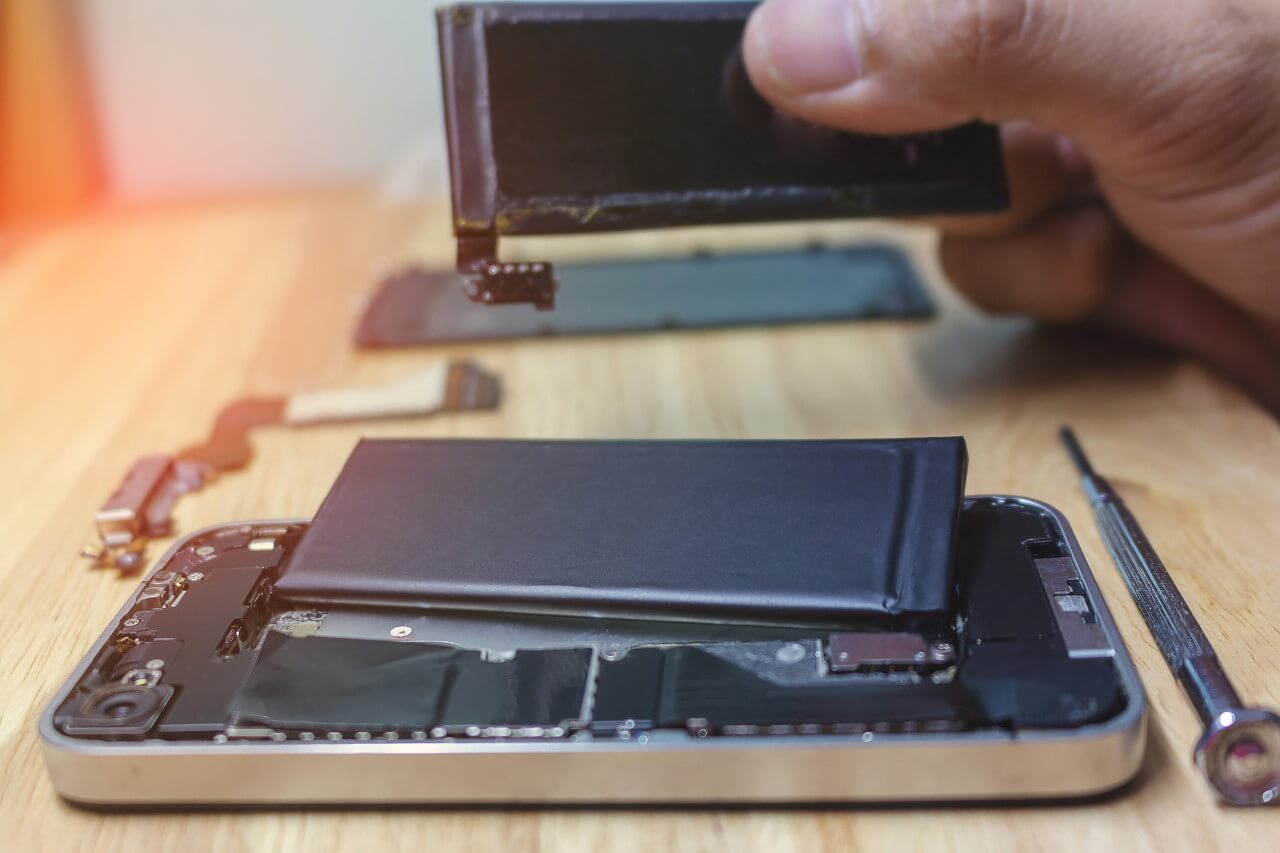
iPhone Batteries
Replacing your battery by yourself is a very viable option for people without a warranty or AppleCare. However, it can be an intimidating process for some people. Note that itis a matter of personal choice whether to take on an iPhone repair project at your own risk.
Instructions for Replacing an iPhone Battery
Repairing the battery should be straightforward following these very general instructions. However, we would strongly recommend finding an online video tutorial for your specific iPhone model as well. Prepare yourself well by reading/watching the online tutorial carefully.
- Turn the phone off
- Take out the bottom screws using a small, suitable screwdriver
- Find a suction cup and use it to lift the screen while using a pry tool, metal or plastic, to lift the metal frame of the screen. Be careful not to bend the screen.
- Remove the screen by taking out the metal plate with five screws, then unsnap the four little ribbon cables that resemble LEGOs. Doing so should loosen the screen from the phone.
- The battery is held down using one little cable underneath a metal plate. Remove the plate by unscrewing the two screws.
- Unclip the battery connector below the plate.
- Note that the battery is glued on the phone. Therefore, to get it out, you may need to warm the phone for a few minutes. Do this from the back and do it for long enough so that the heat gets to the glue. A couple of minutes should be sufficient. Be careful not to let the phone get too hot that you cannot touch it because the heat can damage components of the phone.
- Once the glue is warm, you can pry up the battery. Make sure you don’t pry it against other vital components.
- Try to leave as much glue inside the battery compartment so that you can reuse it when inserting the new battery.
- If the glue is not reusable, you can add some double-sided sticky tape. Make sure it is enough so that the battery fits appropriately.
- From there, you can insert the replacement battery then return the components in the order in which you removed them.
- Re-attach the screen, and you are good to go.
Reasons Why You May Need to Replace Your iPhone Battery
There are several reasons why you may need to replace your battery. They include:
- If the battery doesn’t hold a charge for more than a few hours
- If it causes your phone to overheat
- If it fails to charge
iPhone Screens
It sucks to have an iPhone with a broken screen. A broken screen can be a real problem because it can hinder you from getting a lot of important things done. For instance, it may keep you from checking messages and backing up your data. This means that even if you replace your phone, you still stand to lose a lot of essential data or have a tedious transfer process. So, replacing a screen is a potentially time and cost-saving option. Again, undertake such a repair at your own risk and if you do, prepare well with online tutorials.
How to Replace Your iPhone Screen
You can look over these generalised instructions as a general guide. With the help of a good online video tutorial, you can replace your iPhone screen by yourself.
- Turn the phone off then use a suitable screwdriver to take out the screws at the bottom of the phone. All iPhones have the same type of screws.
- Use a suction cup to lift the screen just enough that you can insert a pry tool under the screen.
- Make sure you use a plastic pry tool so that you can lift the metal frame of the screen.
- At this point, you should see five metal screws on a plate. Take the screws out and remove the plate
- Unsnap each of the little clasps. The clasps almost resemble LEGOS. Use your pry tool to unsnap them.
- When replacing the screen with a new one, you have to remove all individual components from the old screen.
- Start with the earpiece by taking the crews, then remove the little bracket.
- Proceed to pull out the front camera and the component below the earpiece.
- Remove the metal plate under the screen by taking out the screws on each side and the bottom and top. While doing that, make sure to remove the home button as well.
- From here, you can re-attach each component with the new screen then re-attach the new screen.
Be careful not to lose any of the screws or components while detaching the screen. Make sure you get the best iPhone replacement screens for the task from a reputable 3rd-party iPhone parts supplier.
Charge Ports
Now that you know how to remove the screen from your iPhone (see above), you can go ahead and remove the screen first. Follow the instructions above to removal of the screen. From there, you can:
- Disconnect the battery connector. Note that you do not need to take out the battery.
- There are two little connectors on the charging port cable. Take their screws out.
- Take out the vibration motor
- Remove the four crews by the charging port then take out the all the screws around the cable.
- Take the cable out then replace it with a new one and re-attach all the other components from the last ones you removed.
Buttons and SIM Trays
Like with most parts of an iPhone, start by removing the screen from the phone (see above). Make sure you know where the buttons are located as well as the SIM tray. Once you have located the parts, use your screwdriver to detach all components, then pry them out carefully. When taking out the buttons, make sure you keep the plastic trays around them so that you can reuse them.
Getting Good Repair Parts
Today, there are good third-party parts on the market that you can use to fix your phone. The US and UK have a good range of iPhone part vendors that are highly reputable. Most 3rd-party parts are very cost-efficient and very high-quality. Using these parts beats buying them from authorised dealers or the manufacturer.
You may not be able to find genuine iPhone parts from third-party vendors because Apple does not allow them to re-sell original parts (so be cautious if you see them advertised outside of official suppliers). Regardless, 3rd-party vendors still sell high-quality products that are sometimes better and normally cheaper than the original ones.
It is also worth noting that sometimes, you may need special tools to fix your phone. For instance, you need a specific type of screwdriver. Specialist tools will also help make the work easier and keep you from damaging some components on the phone. As noted above, make sure you prepare thoroughly for any repair, identify any necessary tools and ensure you have familiarised yourself with the online tutorials available for your model of phone.
Final Comments
Self-repair is a good, cost-effective alternative to using official repair channels for phones that are out of warranty. Self-repair is convenient and time-efficient ensuring that you won’t be without your mobile for long. Who can afford to be these days?