Building into the Fractal Design Define R5 Computer Case
First I would like to go over the hardware that comes with the Fractal Design DEFINE R5.
The case is not stingy with parts or hardware and I found the hardware intelligently thought out and I used my usual Medium head Phillips head screw driver and my snippy 25 year old “Klein” side cutters for cutting the tales of the wire ties that I used. Below is what the Fractal Design Define R5 comes with.

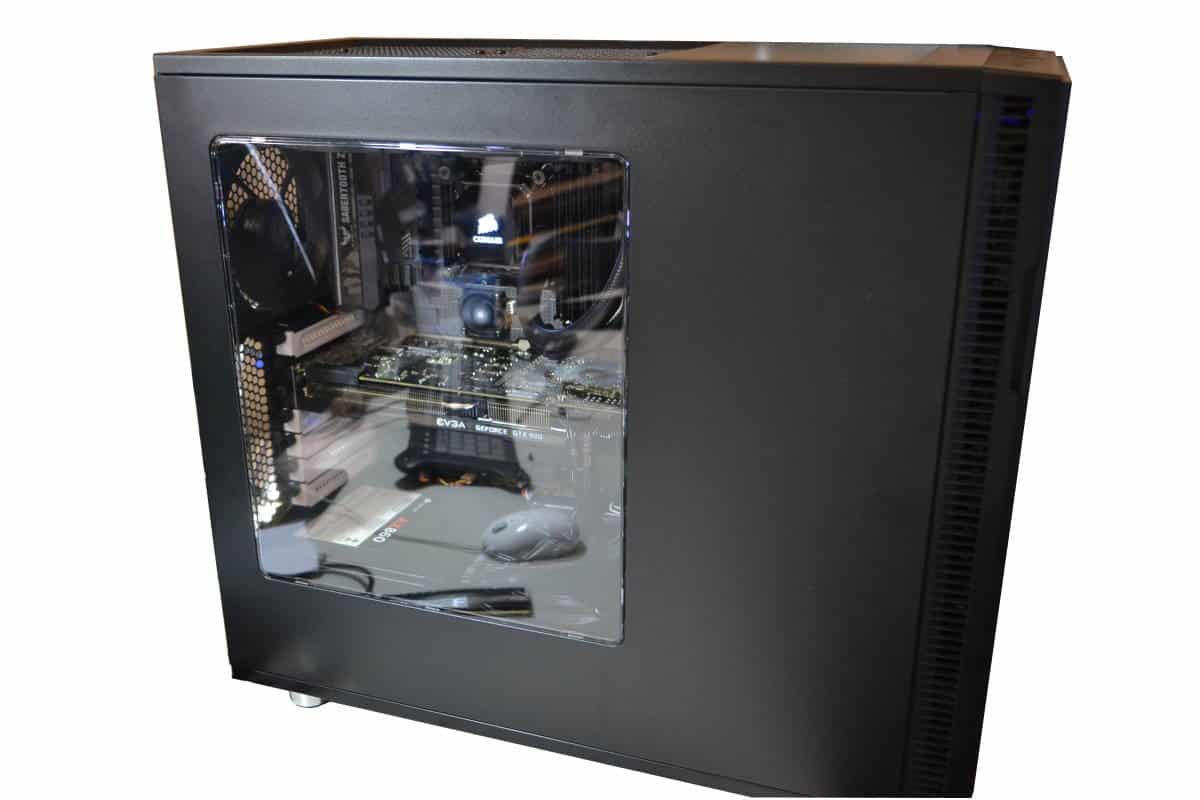
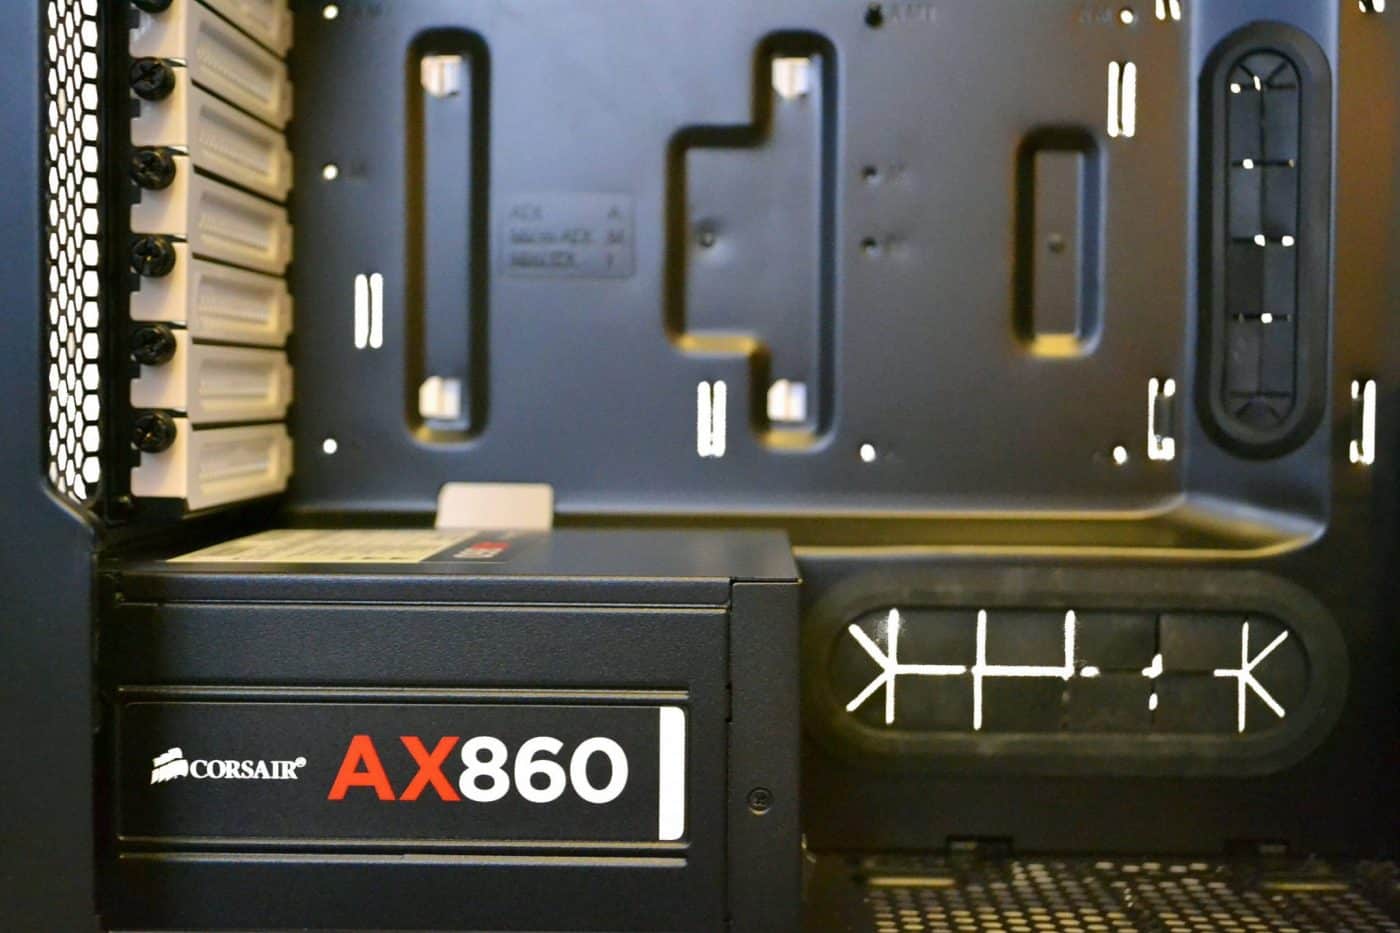
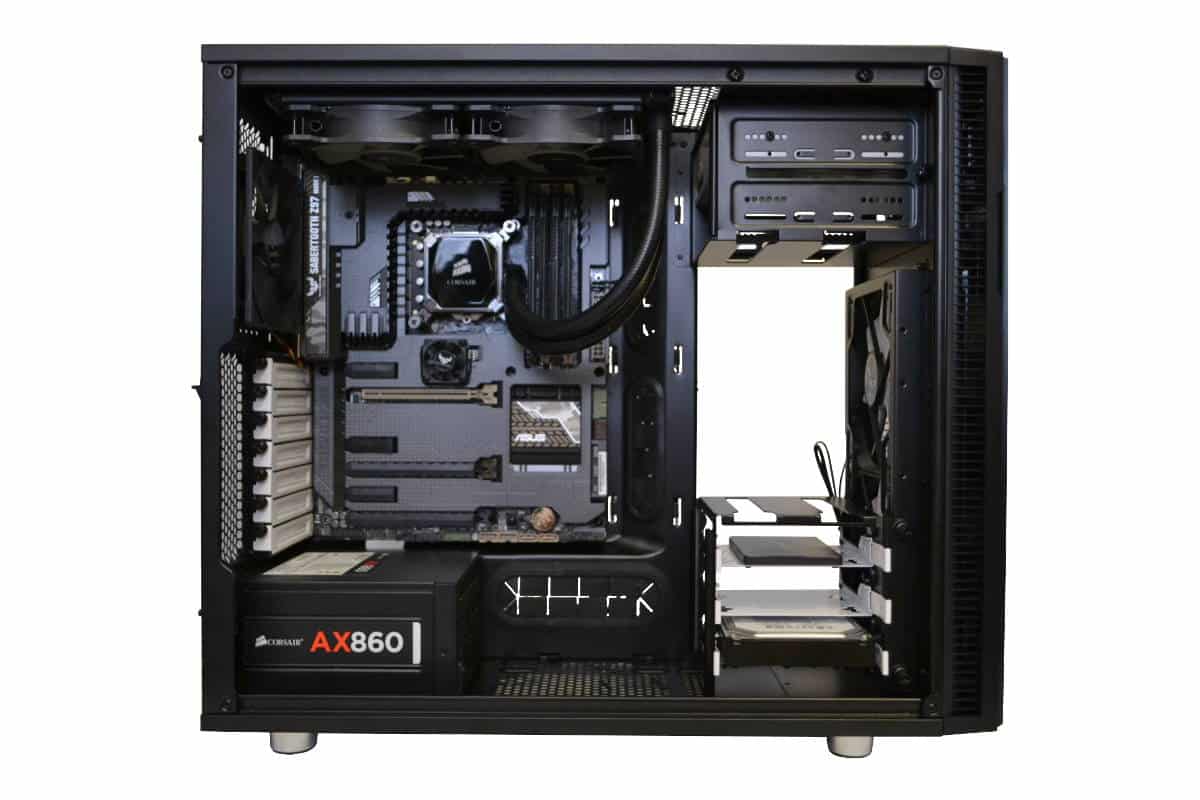
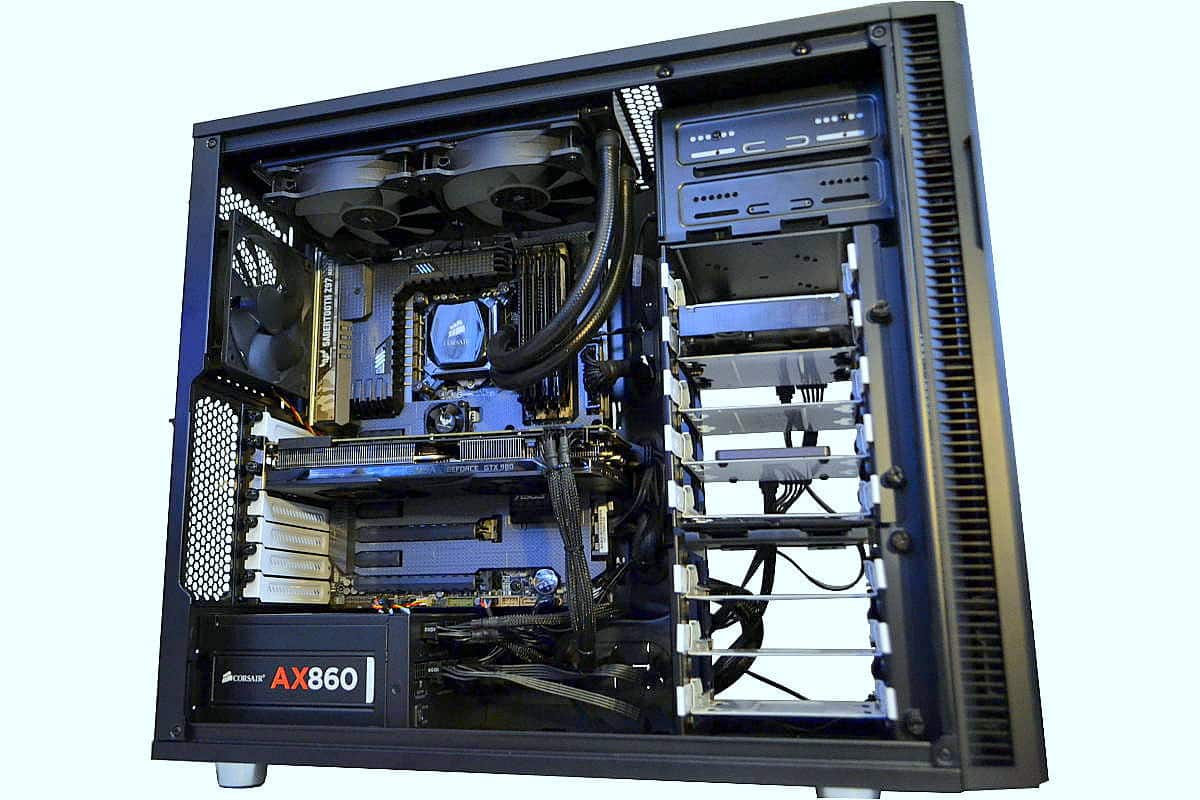
With this case we went with the power supply first since we are going to be using an All in One Water Cooling solution we were going to have to route the CPU power and fan wires as soon as possible at the top of the motherboard before mounting the motherboard into place. I discovered that the shorter Corsair AX 860 fit perfectly into this case. This power unit gives lots of power in a small frame and it’s made by “Seasonic” for Corsair, so lots of juice and the fit was superb. But thinking that not all builders will be using a completely modular like this the Power supply and the CPU wire is first priority for this case build, especially the top CPU power lead that connects to the top of any type of any common AMD or Intel motherboard.
I do have to mention the Fractal Design Newton R3 1000 Watt ALL White version would also look great and Fractal is great at power supplies too. We just are using what the owner had to use.
Here is what I mean. These top holes are great for wire management but here lies a little flaw. It does such a good job hiding the wires at the top, that if you don’t follow the steps like we suggest, you will be removing parts and refitting them again after you make a few connections that you missed.
First and most important is the “Get it now; while you can!” P8 CPU power connector plug. The Fractal Design DEFINE R5 has two different holes at the top for different CPU power motherboard CPU power configurations and I loved that there is a little rubber grommets up there but they did get in the way and came out while I was installing the head of the plug, but popping it back into place later was easy so… (no harm no foul).

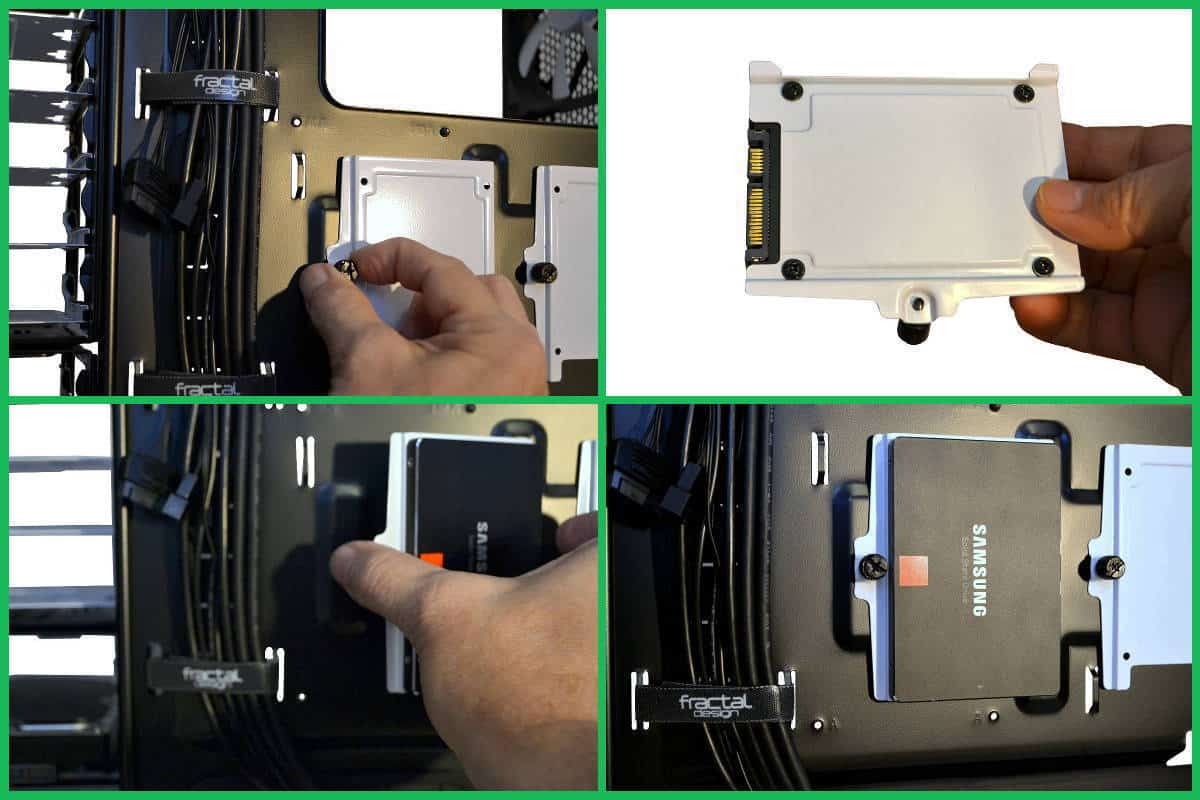
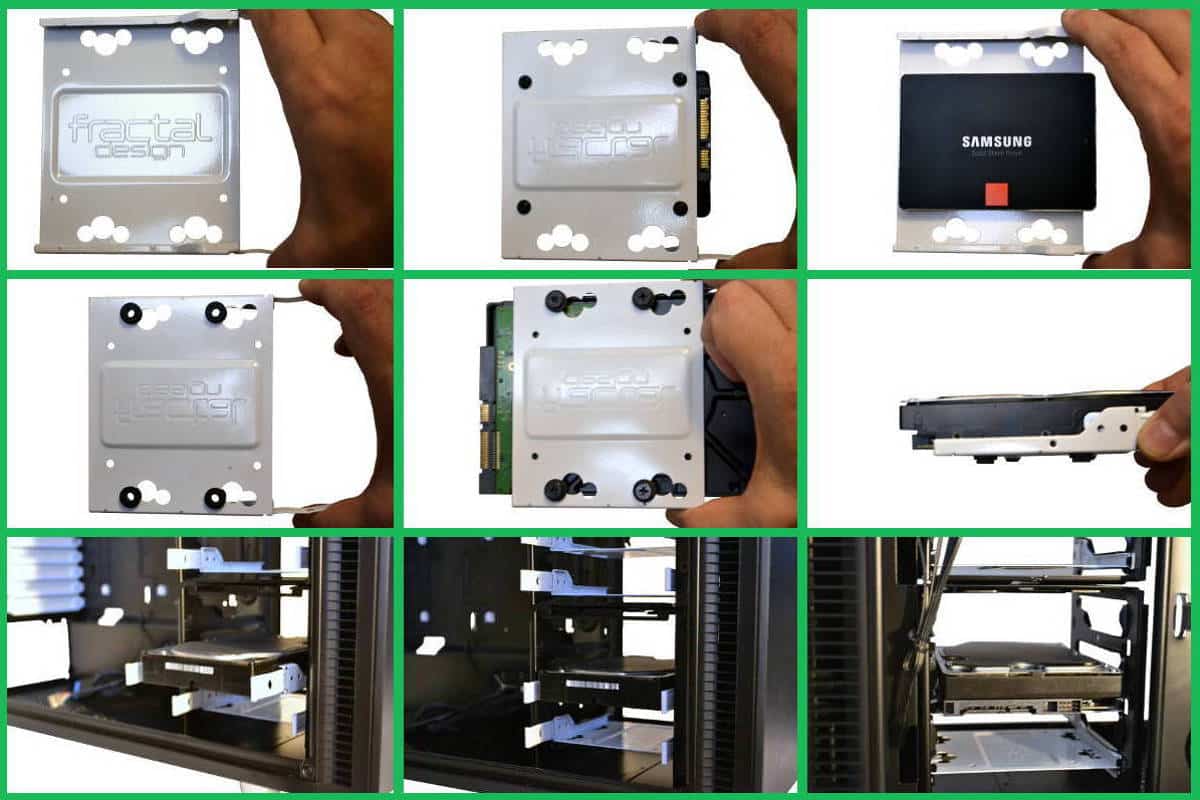
Next priority was to get those drives set up so that the power and SATA wires would fit and also to use the minimum amount of wires for the entire build. This can be a daunting task, but it’s worth it. If you will take your time and get everything fitting right or you could just undo all of it and do it all again or you might be showing off a really spotty looking build, so be slow and think at this time and take your time. The back SSD drive holders were great for this build as we were going for a RAID 0 Configuration between three SAMSUNG 250GB 2.5″ 840 EVO SATA III SSDs which together make 380GB of amazing boot up speed with Windows 8.1.

Here is a look at how to install the Solid State Drives into the back two hideaway placements. All of the hardware screws come colored in anodized black finish and plenty of hardware to spare with 24 of them to allow you to hook up 6 SSD’s with 4 screws each.
We used a single Terabyte Seagate Constellation ES for our data and back up storage. As the owner of this build also has a cloud account with unlimited space this helps from loss of data during fire or mechanical failure. As you can see by the series of pictures below; the drives fit in different ways but the Mechanical drive use rubber mounts to dampen vibration and it does a great job doing just that.
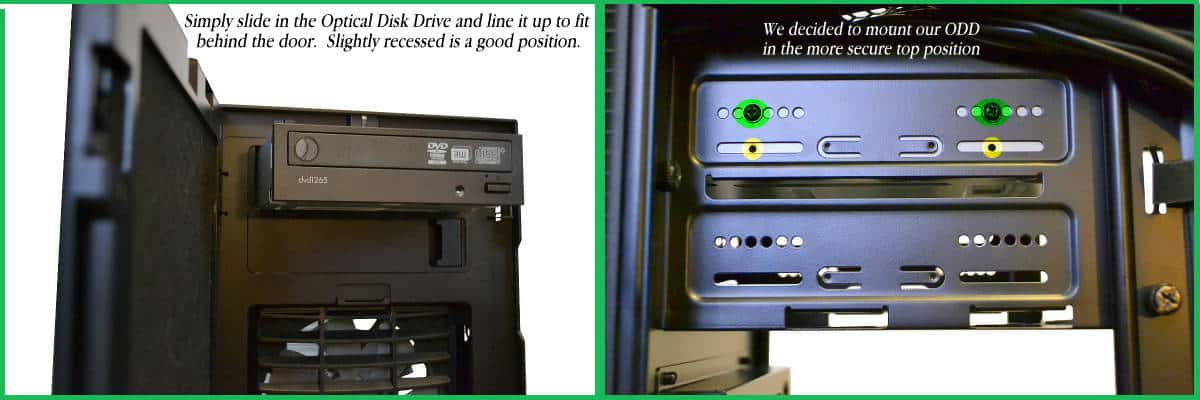
Some builders seldom use a DVD/ODD drive anymore, but for us old schooler’s, it is a still a must have device. There are lots of data that can be stored and archived this way and doing without one is hard to handle for me. So adding a Optical Drive is super simple in this case. Just unlatch the handy bay cover and pull back, and the cover opens the hole immediately. Then just slide the 5.25″ ODD right in and then connect them with the thumb screws provided for it or do it the old school style like we did locking it into place for a flusher mount just in case you later decide to cover the sides with Modding material in a faux cover panel on the top of it. Fortunately hiding drives are not a problem with this case since the window only shows the good stuff anyway and hides the wires and the “uglies”.
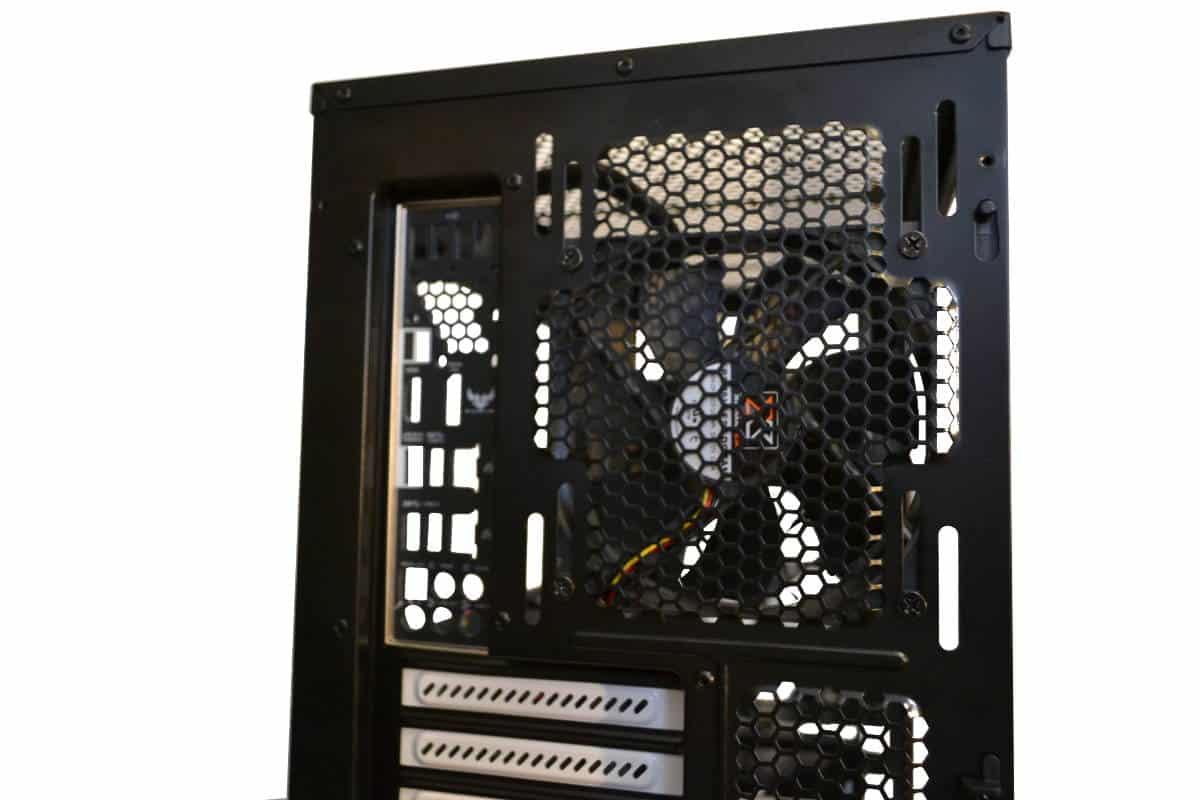
Since the Fractal Design DEFINE R5 only comes with two 140 white fans we took out the exhaust fan and added it into the front of the case to complete the two front fans configuration. We used the long fan screws for securing the second front fan into place and it was so easy to do. The hardest part was deciding the right sleeved baring fan to replacefor the back exhaust fan.
Never forget to install your Motherboard I/O Shield or back plate into place before you install the motherboard. It is one of the easiest mistakes to make for beginner builders so make sure you pop in that back I/O shield early into the build to beat your last record build time.
We examined our board twice, then one more time for good measure to place just the right amount of stand offs in the correct position before the motherboard placement. Never just take for granted and put stand offs in without checking your board first. This has been a big problem for as long as I have been in computing. A stray stand-off can make a person miserable and possibly have a coronary as they power the computer on for the first time for it just to stop again as quick as it started.
We hooked up the CPU Power connector before laying the board on the Motherboard retaining MAP-Pin. The board dropped in perfectly and tightly and the stand-offs lined up easy and I was able to let go of the motherboard while I tightened the standoff screws into place. A very simple install with the mounts of this case from the motherboard to the front fan indention.

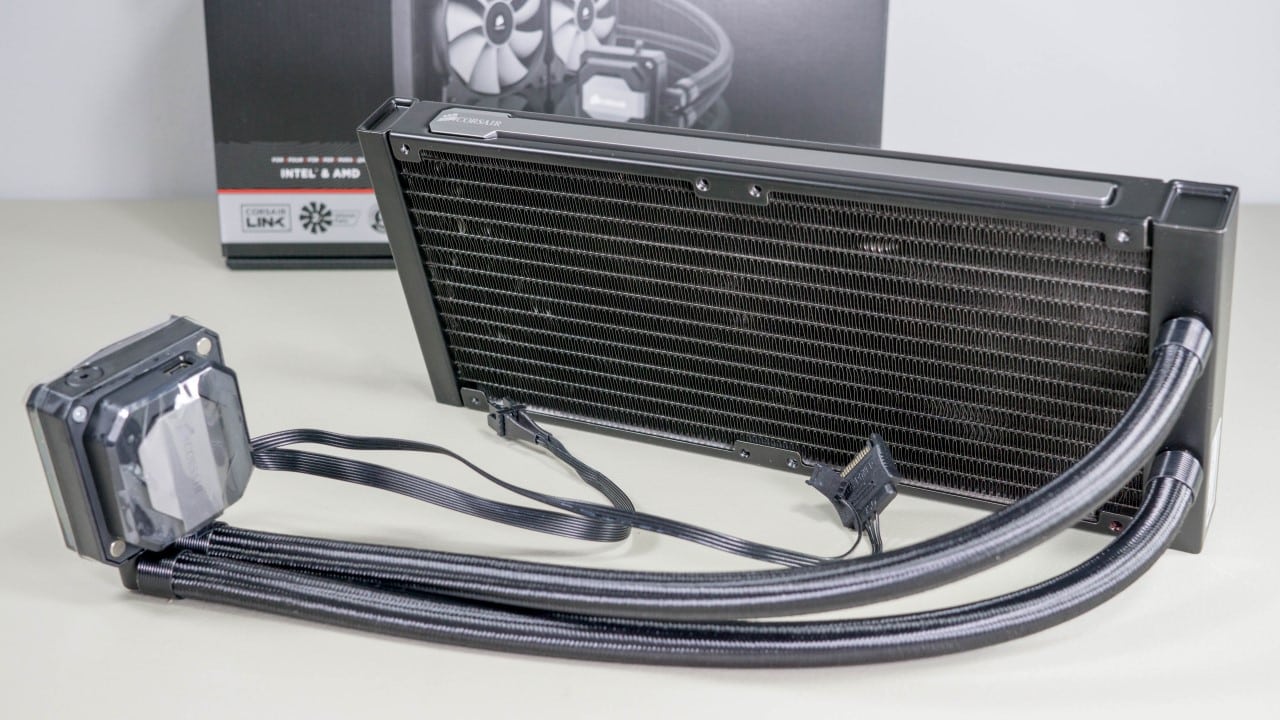
Now came the time to add our “All-in-One” Corsair H100i water cooler on top of our new lga 1150/4790 Intel CPU. We used IC Diamond paste at a half of an “English Pea” sized spot in the very center of the processor. The back plate for the cooler and the stems for holding the pump into place were already installed on the motherboard before mounting the board for easy installation and no need to tie down the head of the cooler unit while installing the radiator to the top because the Fractal Design DEFINE R5‘s placement for the Radiator is so far forward it makes installation of this part easy as well. This is the over engineering that I was talkin about.
Finally connecting the wires and getting them hooked up first is very important for wire management. We did have to move some drives in the end around to use the least amount of wires possible for the build or why use a modular Power Supply at all if you can’t eliminate a few long wires, right?
In the end, we did run into some problems with hooking up things but it was not the cases fault but the AIO cooler’s power leads was not long enough and we had to extend the cooler power lead to make it work and adding the built in triple fan controller into the power branching took some head scratching as well, so I would lengthen that wire or place a Sata power hub somewhere on the back of the case in the future, but this was the toughest part of the build and usually always is, unless you custom make and custom fit your own wires for each individual build. We did not do that for this build.

In the end, hooking up the control wires first and then the USB 2.0 header along with the HD Audio pin outs before finally adding in the new Graphics Card (NVIDIA EVGA 980) and then it was time for some wire routing and fine wire management to tie thing up, as it were. This was also easy as the Fractal Design Define R5 has a recessed area at the bottom just opposite to the power supply for hiding bundles of wires that you don’t need with ease. Another great plus to this very fine case even if you don’t go modular. See they thought of almost everything!
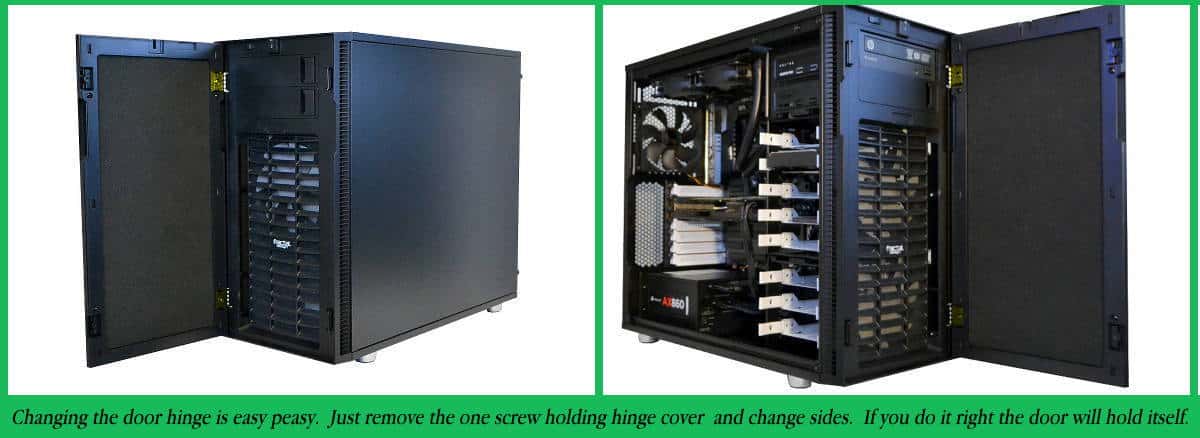
In the end we moved the door to swing the other way and that was easy too. The door holds itself mainly into place like the motherboard alignment pin, when fully opened so I was able to take both hinge retainers off then slowly close the door slightly to free it from the closed loop. Then we just looped the hinge into the opposite side and fully opened the door so the door would hold again for us to reattach the hinge retainer plate. Less than 3 minutes work to change the door swing. Also I will remind you that we did take the back 140 mm exhaust fan out and moved it to the front and then replaced the exhaust with another quiet fan we had tied up around the shop somewhere.
Again, we were very happy with the how easy the build was and how it all went together sweet and fast. Great engineering Fractal Design. It is just amazing the way you guys make simple so darned important. You guys created a semi-quiet case that does all that you engineered it to do and did it well.
For employing the most quiet system possible in your PC talk to my friend at “Acoustic PC” he has all the quietest parts you need in stock to give you the most silent build imaginable.