Locking your keyboard temporarily means that no matter what you press on it, it will generate no output and be considered null.
This is useful if you live with small kids or pets who can accidentally jump or even play with your keyboards.
This can spoil your work or even lead to the loss of vital files and documents. This is why it is essential to know how to lock your keyboard temporarily and unlock it at your convenience and need.

Method 1
If you wish to lock your keyboard temporarily, then you can do this by installing the program called Keyboard Locker.
Originally it was a small AutoHotKey script which was written by an AutoHotKey forum-goer that was named Lexikos.
If you don’t have AutoHotKey pre-installed, you can get the actual hand in the download. This allows you to make changes to it as per your liking.
Steps
- Firstly you have to download Keyboard Locker. The Keyboard Locker folder has to be unzipped wherever you want it to be kept on your hard drive.
- Now you have to open the Keyboard Locker folder. It will have several files inside it. This will include some icon files as well as a readme. The essential files it will consist of are “KeyboardLocker.ahk” and “KeyboardLocker.exe.”
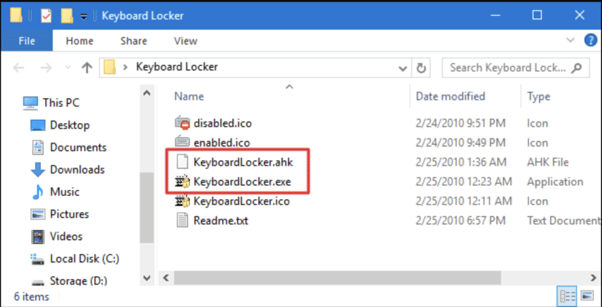
- If you don’t have AutoHotkey installed, you must double-click on “KeyboardLocker.exe” to run it. This file is the script of AutoHotKey script and is compiled for running as a standalone program. This allows you to use it without an AutoHotkey.
- If AutoHotKey is already installed in your system, then you can make use of the “KeyboardLocker.ahk” file for running the script directly.
- After launching the Keyboard Locker, you will find a small keyboard icon that will be present in the notification area.
It will totally lock your keyboard easily. You can check it out by using a keyboard tester like keyboardtester.io.
There is a benefit of using the script version; it allows you to make alterations in your script by yourself by changing the shortcuts for unlocking and locking the keyboard.
Now the tool is all set for use. To lock your keyboard, press Ctrl+Alt+L. After you press this, you will see that the icon of the keyboard will change and indicate that the keyboard is locked.
Method 2
To lock the keyboard with the help of the device manager, follow the steps below.
- Firstly you have to go to the start button and right-click. This will invoke the power user menu.
- After it opens, select the “Device Manager” option.
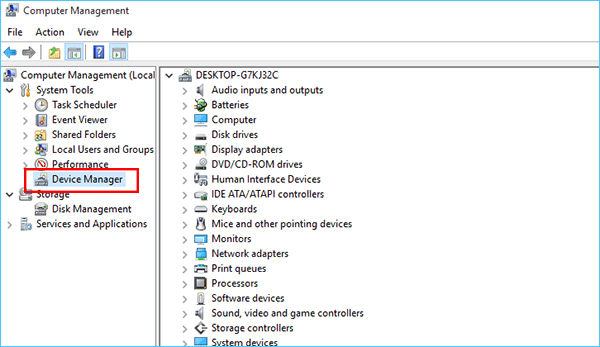
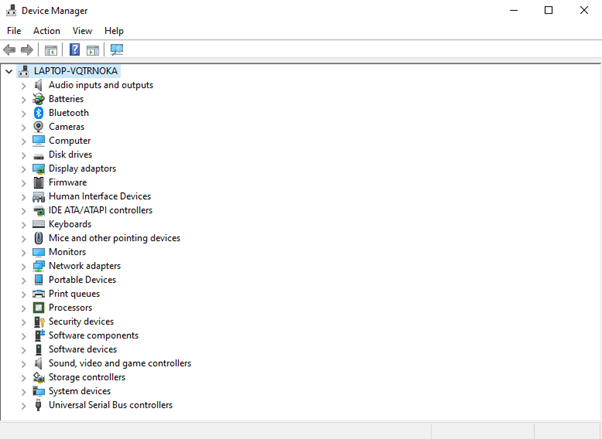
- Your system will display to you a long list of devices that are connected. Now you have to scroll down and expand the “Keyboards” option to see the keyboards joined.
- Now you have to choose the keyboard you want to disable and click on “Uninstall”. In case more than one keyboard is connected, then you will have to lock them one at a time.
- After this, the dialogue box for uninstalling device confirmation will show up. The “Uninstall” button has to be clicked.
If you are prompted to restart your computer or laptop, click on the “Yes” option. You will find that the device has been disabled after restarting your system.
Method 3
You can use a simple tool like BlueLife KeyFreeze for locking your keyboard in Windows 10. This can also be used for locking your mouse.
You can choose to disable one of them or both. You can turn the app on and off with the help of a simple shortcut.
The shortcut is Ctrl+Alt+F as a default setting in your system, and you can alter it as per your wish.
Now all you have to run the tool, giving you five seconds to cancel the locking process. Your mouse and keyboard get disabled by default. To view more options, you can right-click on the icon.
How to See Balloon Notification Reminders?
There is a default setting because the keyboard locker does not show notifications after you lock or unlock your screen.
If you wish to see them, then right-click on the Keyboard Locker icon, which is present in the notification area and select the option “Show Tray Notifications”.

How to Run Keyboard Locker When Windows Starts?
You can run the Keyboard Locker as per your need and convenience. If you want to run it automatically when Windows starts, then you can do so by adding it to the startup folder of Windows.
You can do this by storing the AutoHotKey folder wherever you want it. Now you have to press Windows+R to open the run dialogue box. You must type “shell:startup” in the open box and click on the “Ok” option.
Now you have to create a shortcut of “KeyboardLocker.ahk” or “KeyboardLocker.exe”(as per your need and use) file in the startup file of windows.
This can be done by taking the file and dragging it to the startup folder with the use of your right mouse button and then choosing the ” Create shortcut here” option.
You can also right-click the startup folder and select the New>Shortcut option from the context menu. The keyboard runner will run automatically once you place the shortcut.
Conclusion
In today’s era, where working from home has become a norm, knowing how to manage your work and household simultaneously is a needed skill.
It is essential to find a way to do the household chores and take care of your kids while putting your work on hold for some time without causing any harm to either of them.
This is where knowing how to lock your keyboard comes to save you. You can use the tips and tricks in this article for locking your keyboards and keeping your work-related documents safe.