Applications and Performance
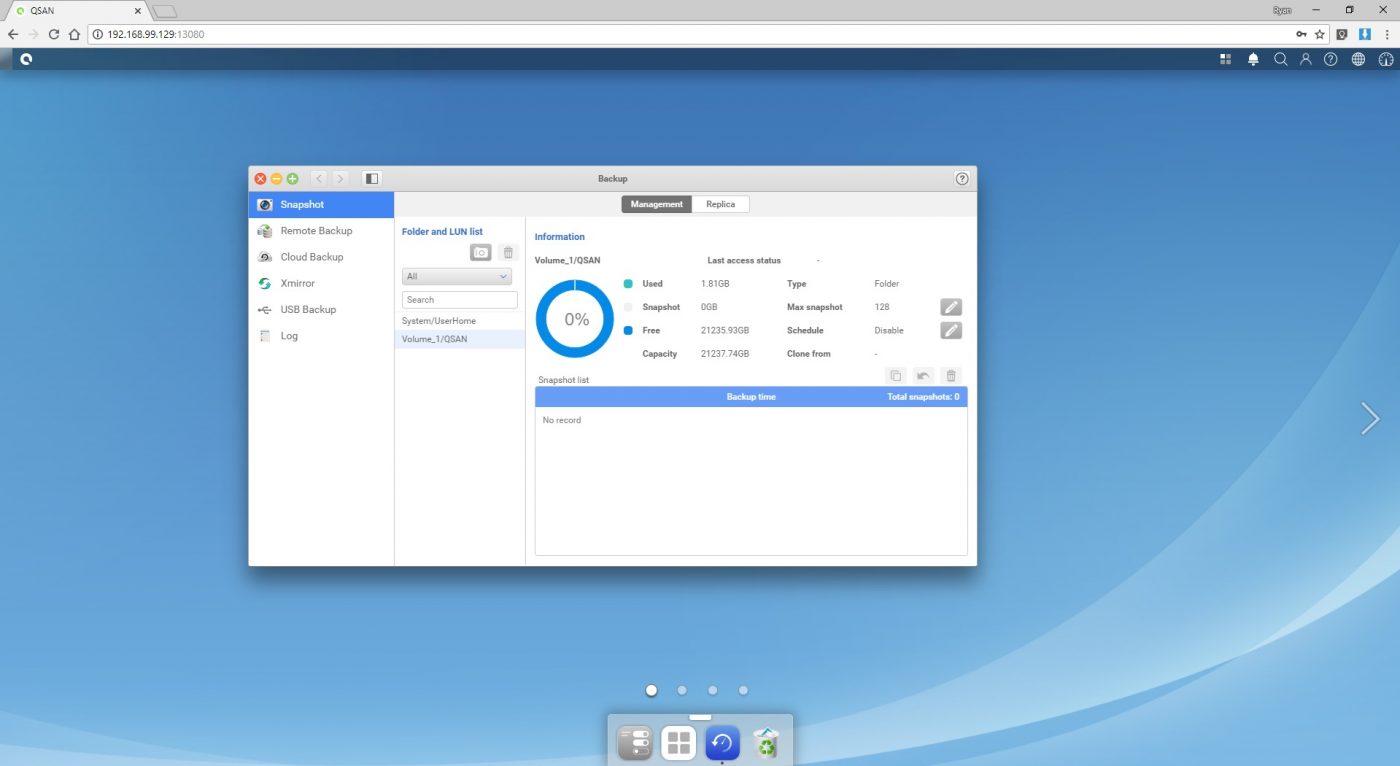
Backup
While file sharing across a network is probably the number one reason users and small businesses utilize NAS devices, a close second is their advanced backup options.The QSAN XCubeNAS XN5004T offers many backup options that will let you choose exactly the solution that works for you. The Snapshot option allows you to take a “snapshot” of a folder or volume at a certain point in time so that you can restore or browse that file structure at a later date if something goes wrong or needs to be restored. Remote Backup gives you the option to connect to another network resource via an rsync process. This is handy for backing up the NAS to another NAS, or other system that supports rsync. Cloud Backup, which differs from Cloud Sync, supports Amazon’s S3 environment for backups. Here you can schedule backup routines and check their status in S3. Xmirror is used to synchronize data between XCubeNAS devices, which is a nice way to keep things simple by only having to utilize a single NAS OS, as opposed to working between vendors and their implementations. USB Backup lets you take advantage of the XN5004T’s front-mounted USB 3.0 port and an external drive. After enabling the one-touch copy option, you can simply plug in an external drive, configure your source and destination, and hit the button for a simple backup. A log is also present so that you can keep an eye on all of your backup jobs to make sure that all of your important information is being backed up successfully. Nothing worse than going to restore from a backup only to see that your backups have been failing and that you are out of luck.
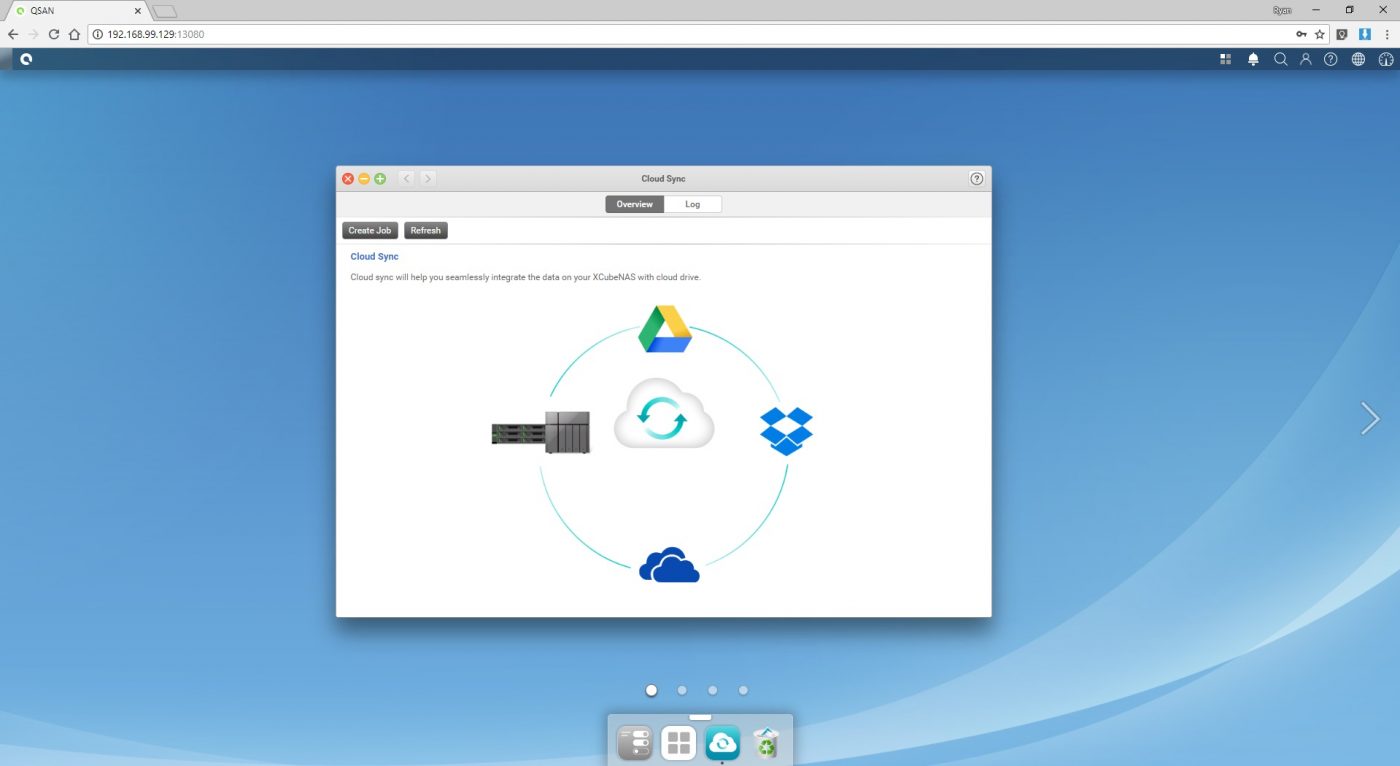
Cloud Sync
As we mentioned during the setup process, the XN5004T can be configured to sync data stored on the NAS with various cloud storage solutions from Google, Microsoft, and Dropbox. After running through a quick setup process, we were able to set up a job that would sync our Google Drive files from the cloud down to our NAS, for a copy that was available locally. In order to keep things simple, we set this to run once a week at 2:00 AM, but you have other options, including real-time synchronization.
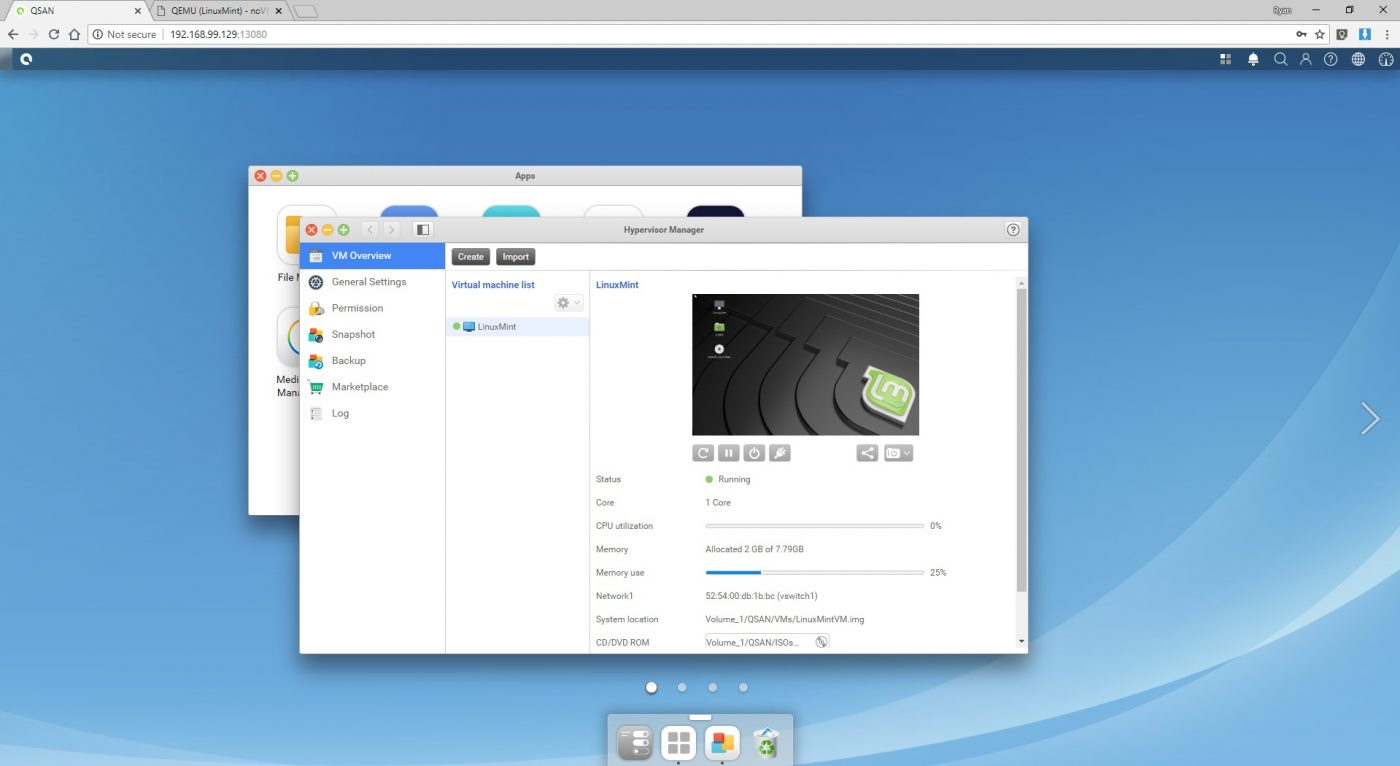
Hypervisor Manager
For those that need their NAS to perform additional duties like server hosting, the XN5004T supports the hosting of virtual machines. Not only can the NAS provide hosting duties for VM data stores via iSCSI, it can also run VMs on the local hardware. We configured a Linux Mint VM with a single CPU core, 2GB of system memory, and a 40GB drive, and the XN5004T was able to host it with no problem. You can either access the VM via a browser tab directly from the NAS’ interface, or you can configure the VM to allow remote access via VNC, etc. With the ability to expand to up to 32GB of RAM, there are quite a few options available for basic VM hosting duties.
Plex
While the QSAN XCubeNAS XN5004T doesn’t have any hardware transcoding capabilities like many consumer-based NAS devices, it can still act as a Plex server storage target, using the local storage to host your video, audio, and image files. In our environment we have a separate VM server hosting our dedicated Plex server, so we were able to simply point that to the XN5004T and use its storage for our multimedia files.
Performance
Our XN5004T was outfitted with four 8TB drives from both Seagate and Western Digital, and using the Quick Setup option placed these drives in a RAID 5 array. We know going into our testing that we will more than likely be up against the NICs bandwidth constraints, but we wanted to show our results nonetheless. Configuring additional NICs and joining them together for additional throughput is definitely an option, and will give you more room to move large amounts of data from multiple devices.
Another great feature of the XN5004T is the ability to utilize an SSD for some additional performance caching. We did however run into an issue where in order to enable a write cache, you have to utilize two SSDs. This was not an option for our testing, so we were only able to test the read cache option, which only requires a single SSD. Setting up the cache couldn’t have been easier, as you simply power the unit down, install your SSD, boot, and then walk through a basic menu, selecting a few options as you go.
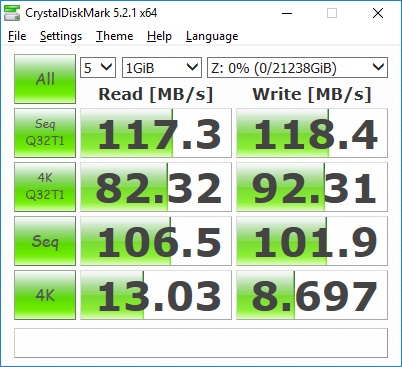
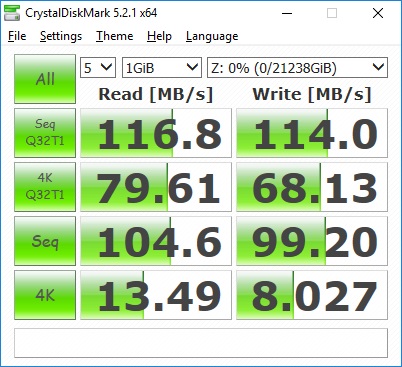
RAID 5 & CrystalDiskMark – Read Cache Disabled
Our RAID 5 CrystalDiskMark results are below, and as we predicted, the NX5004T was able to provide us with enough data to nearly max out the single 1Gbps NIC that we had connected for most tests.
RAID 5 & CrystalDiskMark – Read Cache Enabled
Unfortunately, we didn’t see any performance improvements in CrystalDiskMark with the read cache enabled. That being said, we didn’t really expect to, as we were already up against the limitations of the single connected NIC. Where most users would notice results are after time when the cache has learned exactly what files are accessed most often, and the cache begins to fill itself with those files. By being able to access those files much quicker thanks to the access speed of an SSD vs a spinning disk, users should have quicker response times for cached files, but their transfer speeds will still be limited by the NIC.