Installation
Our installation process for the LD03 wasn’t much different from other cases, though we did find a few challenges along the way. None of them were deal breakers, but working inside a mITX case and trying to keep your build tidy is definitely rewarding when your build turns out looking nice.
The first component we installed was our power supply, the SilverStone SX700-LPT, an SFX-L unit that is fully modular. In order to access all of the screw holes on the power supply bracket, you must first remove said bracket.

A few screws later, and the power supply was mounted to the bracket and then secured to the case frame itself. We definitely recommend a modular power supply for this case, as space is limited, especially if you want a clean looking build.

The internal power supply extension cable has a 90-degree bend to ensure proper fitment, and there is a good deal of extra cable length to support multiple power supply layouts.

Next up in our build was our motherboard, which we had already outfitted with RAM and the CPU cooler. While the LD03 supports CPU cooler heights up to 190mm, we chose to go with the low-profile SilverStone NT06-PRO. This CPU cooler takes up a large area, and covers our RAM slots, so making sure our memory was installed ahead of the cooler installation was required.

This is especially true once the board and cooler are in place, as things get cramped real quick. Other tower coolers will work great in the LD03, and the case even supports the use of 120mm AIO liquid coolers. Aside from our tight clearances, there were no problems getting our motherboard installed, so on to the rest of our components.

This build is taking advantage of a few older 2.5″ SSDs we had in our inventory, and the LD03 had just the spot for them. Along the right side of the case is a removable drive panel that supports either two 2.5″ drives, a single 2.5″ drive and a single 3.5″ drive, or just a single 3.5″ drive. After removing the drive panel, we used the included screws to attach our 2.5″ drives to the panel. With the drives in place, the panel, was reattached to the case. This mounting location would be ideal for a couple RGB 2.5″ SSDs, as they are front and center on the right side of the case.

Moving on, we installed our video card. This process was nothing out of the ordinary, and while our passively-cooled card is quite small, the LD03 supports cards up to 309mm in length, and up to 167mm wide.

These dimensions are independent from one another though, so a card with dimensions matching or exceeding both of those values would not be compatible. Also important is the cooling method of the video card, which we discussed previously. SilverStone’s recommendations will allow for the best cooling and performance if adhered to.

With all of our components in place, the next step was to wire the system up. This was easily the most difficult part, but that was mostly due to us wanting to keep the build as clean as possible; keeping as much cabling hidden as we could. As we mentioned earlier, the use of a fully-modular power supply really helps this process out. Having to use a non-modular unit would have been a recipe for a spaghetti mess of cables, where as our build turned out quite clean in our opinion.

We do wish there was some integrated cable management in the LD03, but with three tempered glass side panels, there really isn’t much room for routing cables in a manner that keeps them out of the way. Our routing and tucking of power, SATA, and various other cables was a lesson in patience, but we are definitely happy with our results.

Take a look at a few shots of our finished build.


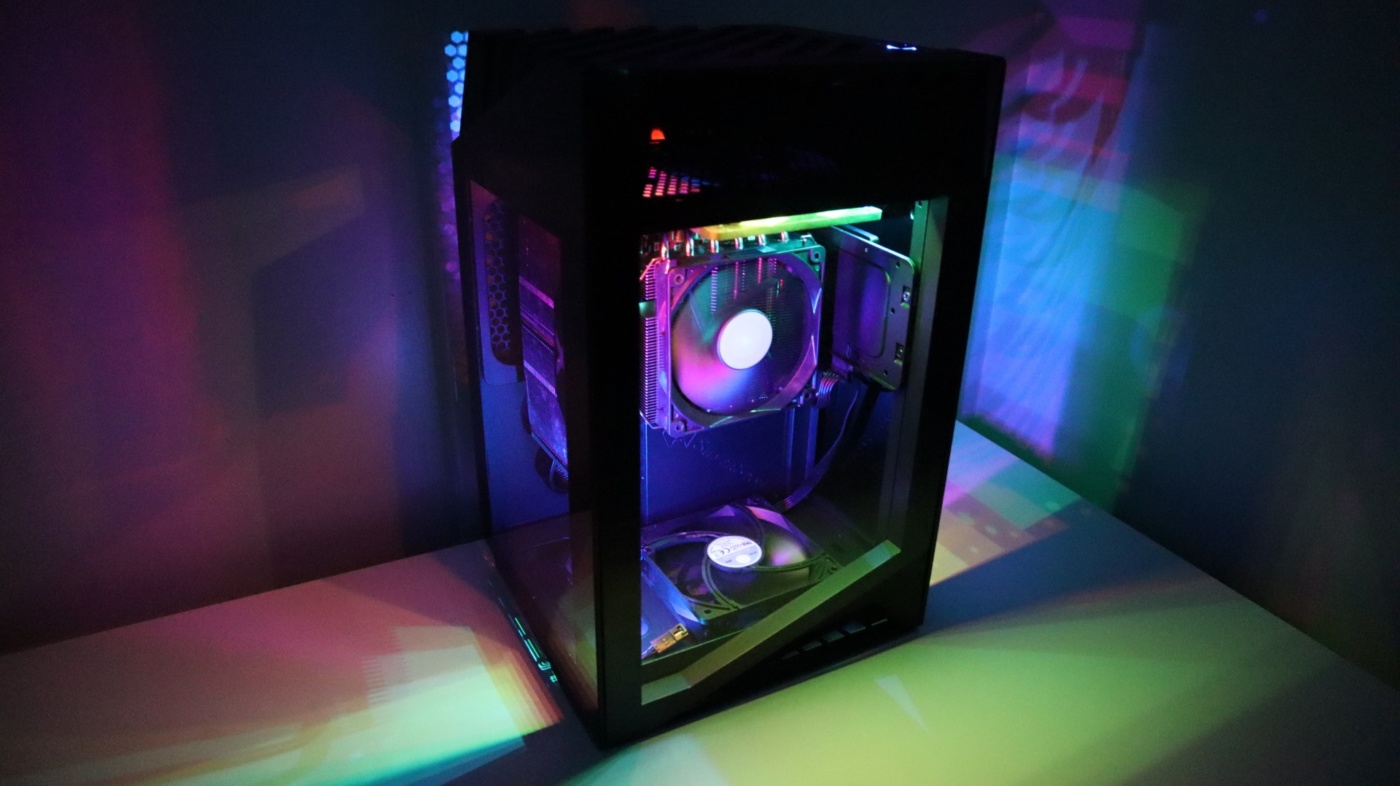
The SilverStone LD03 is a great looking case, but there is just one thing that we wish we could change. The tempered glass panels are pretty heavily tinted, and you really can’t see into the case at all. Instead, you end up with a highly reflective black box with just a hint of components behind.

The use of lighter tinting would have really helped this out, or maybe even better, the inclusion of some RGB fans or integrated light strips.

Thanks to a conveniently timed sale, we picked up an ARGB light strip kit and installed two strips in the case, along with the controller. With this internal lighting in place, we think the results are quite stunning. Check out a few shots below.