A Look Inside
We have previously highlighted the fact that the LD03 has no visible securing mechanisms for the side panels of the case, and the same is true for the front panel. SilverStone has opted to use a tool-less design to keep the front panel in place. Four small pointed tabs on the backside of the front panel snap into small “receivers” in the front of the frame of the case, using friction and grip to keep this panel in place. A firm pull on the front panel will allow the panel to be removed, but at no point were we ever worried that the front panel would come off on its own.

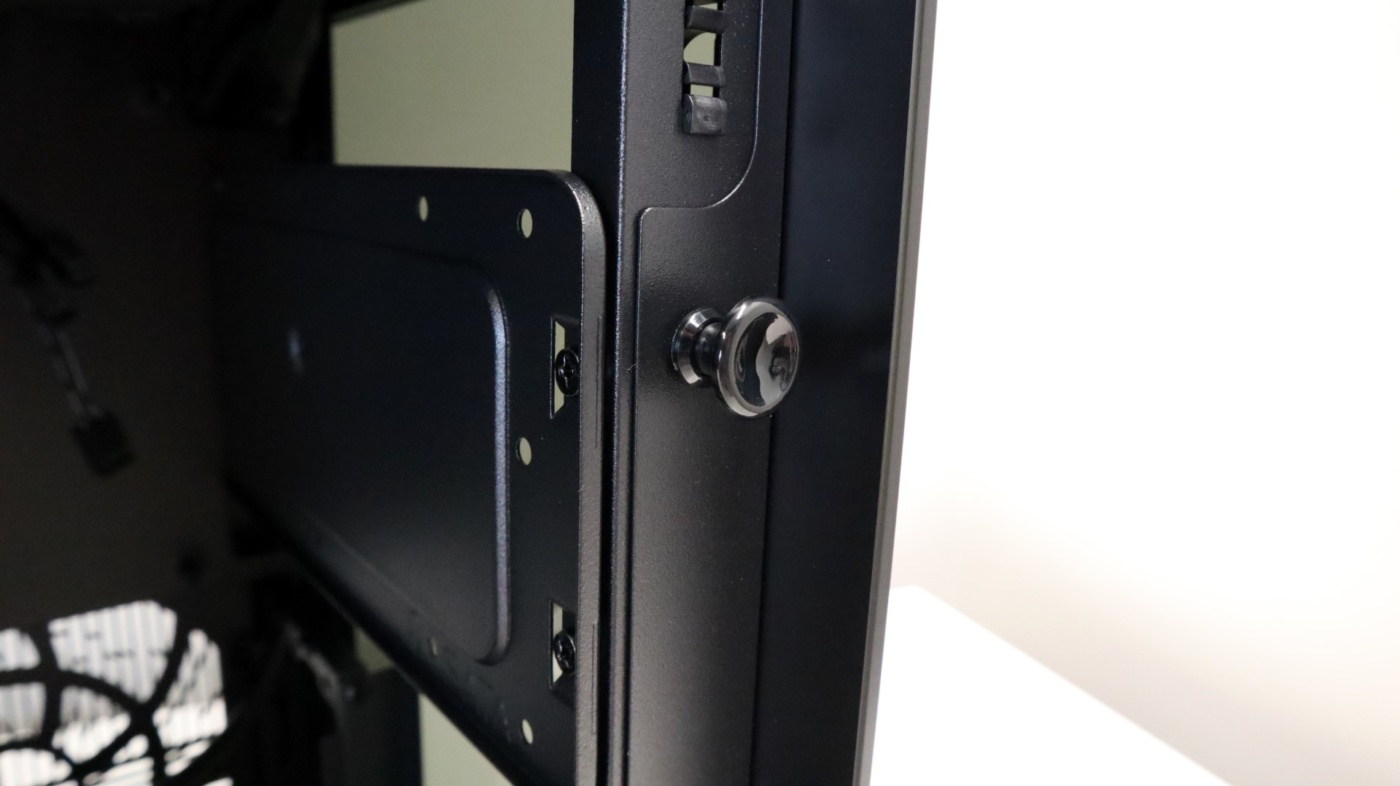
So with the front panel out of the way, we can then see the securing mechanisms for the side panels. Again, SilverStone employed a tool-less design, this time choosing to use a push-button solution that locks the side panels in place. Simply pulling the pins out of their sockets loosens the panels, and they are then easily removed. We really like these stealthy design choices, and commend SilverStone on their design choices here.
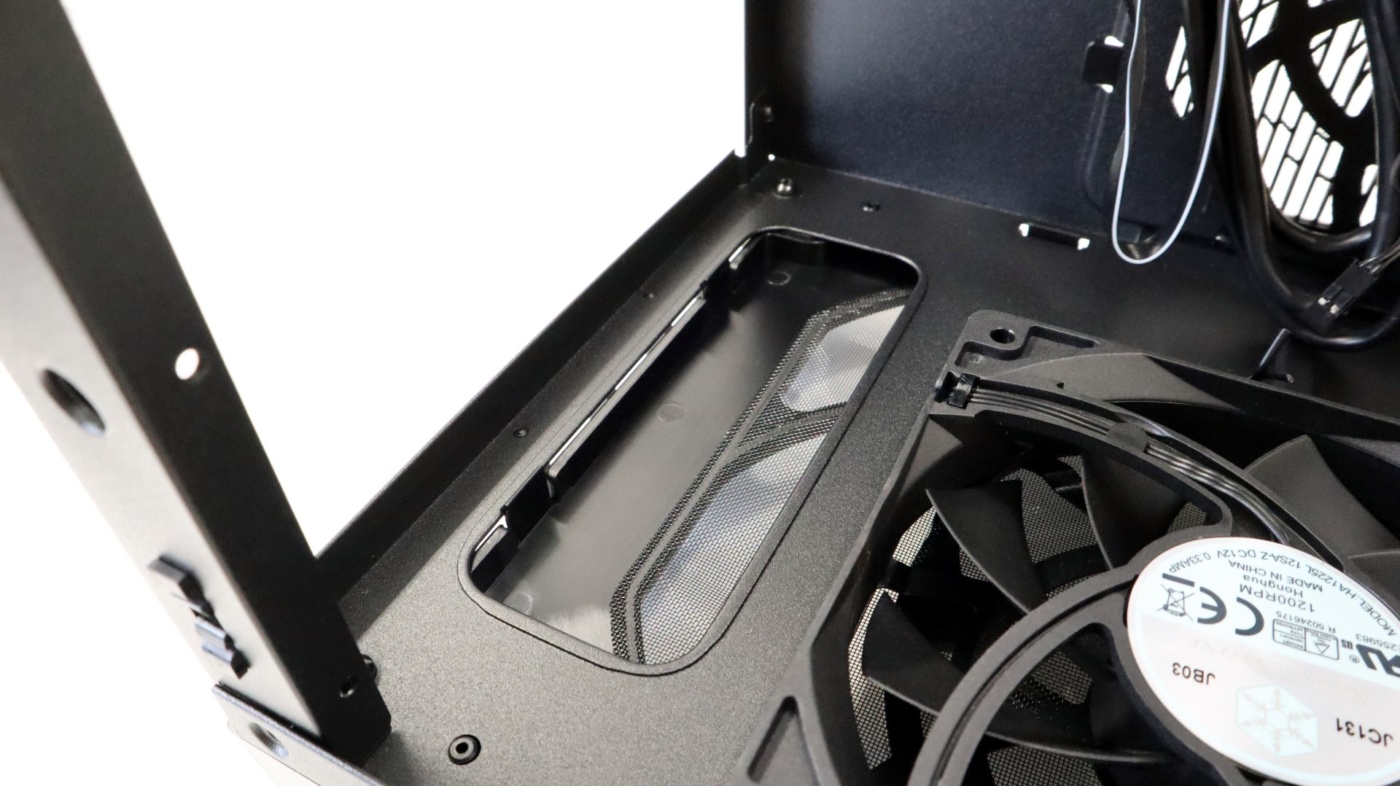
Looking into the front of the LD03, we see a small motherboard tray at the top of the case, with just enough room for a mITX motherboard. And while the LD03 isn’t the first case to feature a rotated motherboard orientation, it is still worth noting. Below the motherboard tray we see straight through to the rear 120mm fan grille that will be covered up once a power supply is installed. To the left of the motherboard area is a rounded cutout that allows for some passive airflow for a vertically-oriented video card, which may be a bit lacking when it comes to breathing room in this case. So much so in-fact, that SilverStone recommends that users should only use open-air cooled cards up to 200 watts in the LD03. Anything between 200 and 300 watts, and SilverStone recommends a blower-style cooler. Above 300 watts should employ a liquid or hybrid cooling solution. With close proximity to a glass side panel, and only two case fans, component selection is important with the LD03, and we appreciate the provided guidelines from SilverStone.
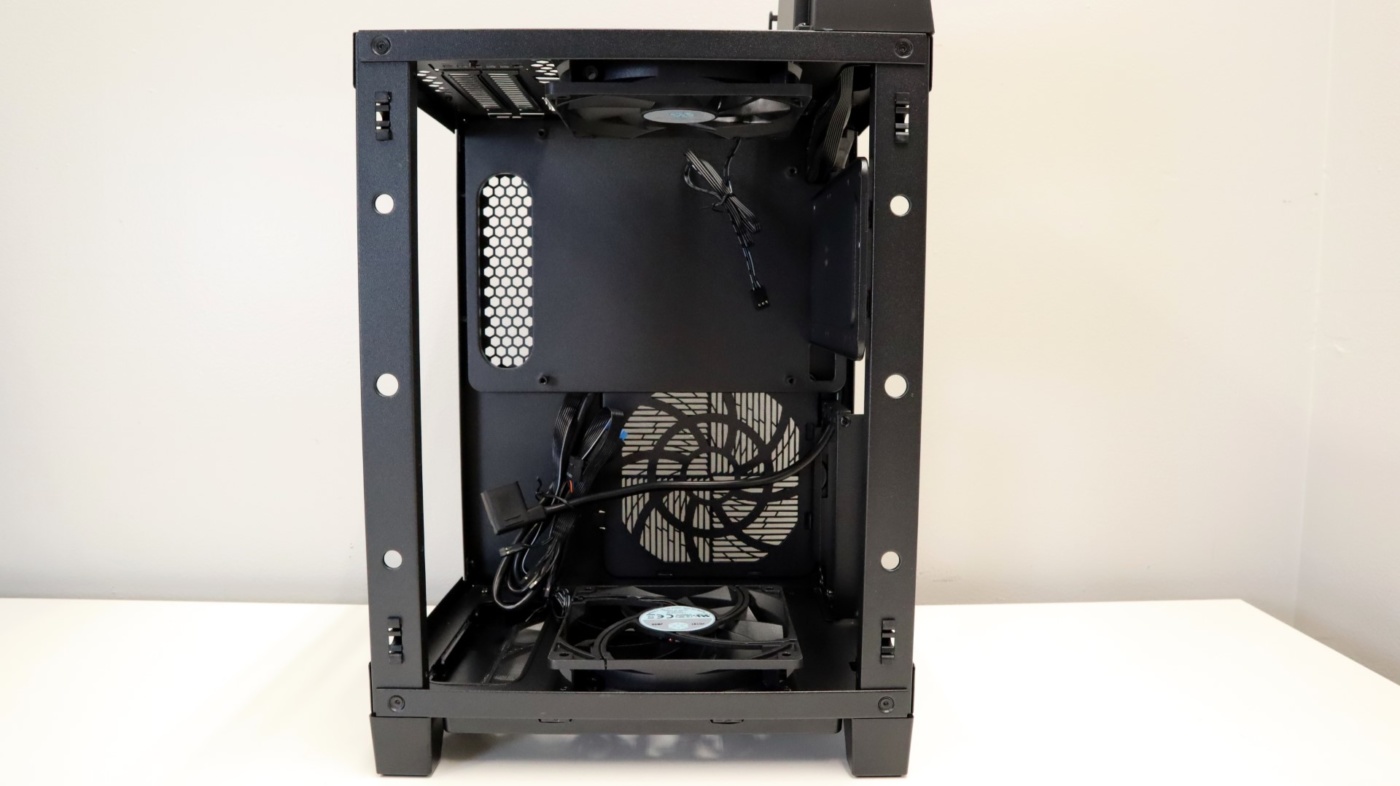
On the bottom panel of the case is a pre-installed 120mm fan that is oriented for air intake, and just to the side of it is the aforementioned cutout to allow for extended length video cards to be installed in the LD03. Between the two front feet of the case, we have a wide opening that leads to the underside of the case, allowing air to pass through the front panel and up into the case.
The view of the case interior from the left side is quite plain, though we can see the large cutouts along the bottom of the case that allow for plenty of air to reach the bottom-mounted fan.
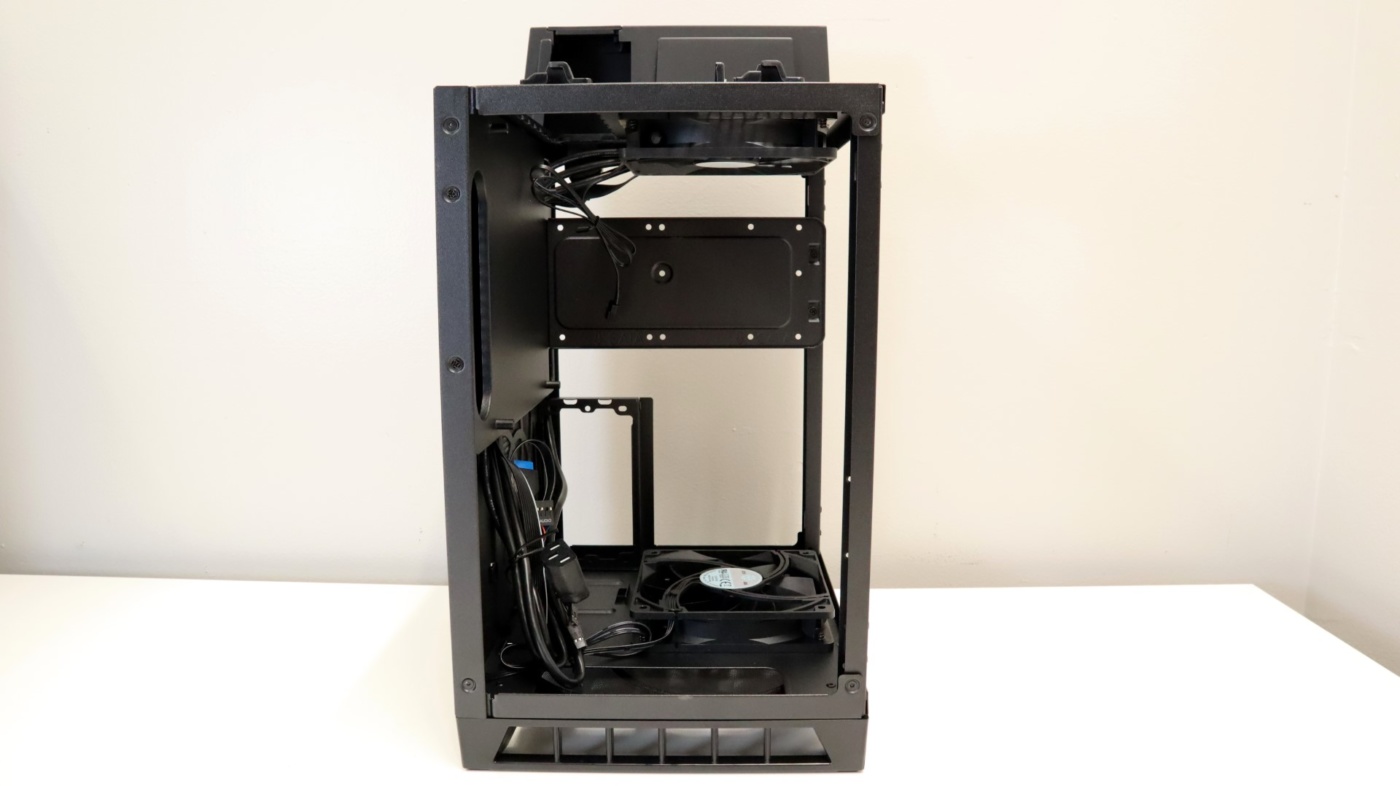
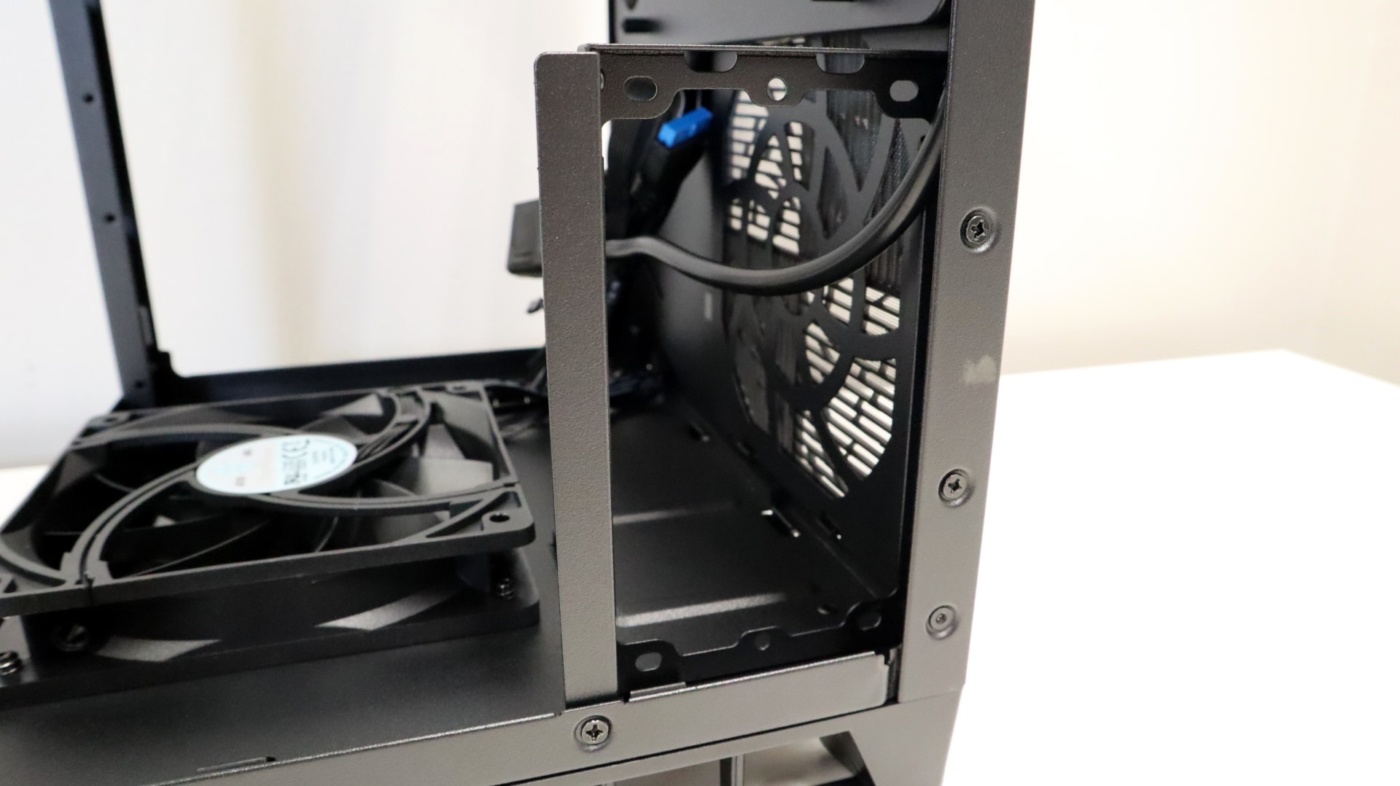
From the right side, we have a bit of an obstruction, as a metal bracket runs along the width of the case interior offering a home to both 2.5″ and 3.5″ drives. While two 2.5″ drives can fit at one time, only a single 3.5″ drive is supported at a time. We think this is a pretty good compromise, especially in a mITX case.
This mounting bracket is removable, and the fact that it is shows that SilverStone did quite a bit of planning with regards to installing components in this small chassis.

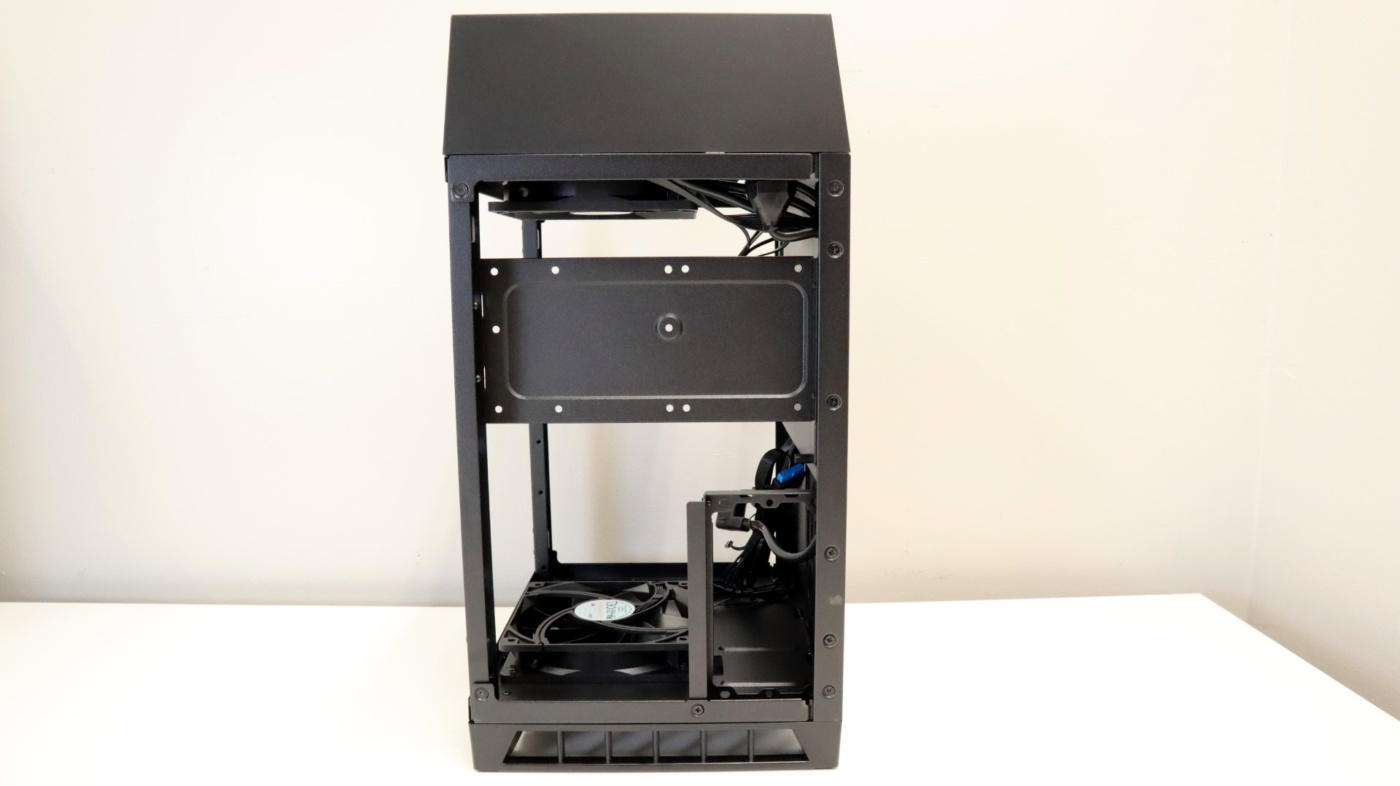
Moving down a bit on the right side is another mounting bracket, this time for the power supply. Both SFX and SFX-L units are supported, and this bracket is also removable to make component installation easier. We also find the same cutouts at the bottom of the case to get as much air as possible to the fan at the bottom.