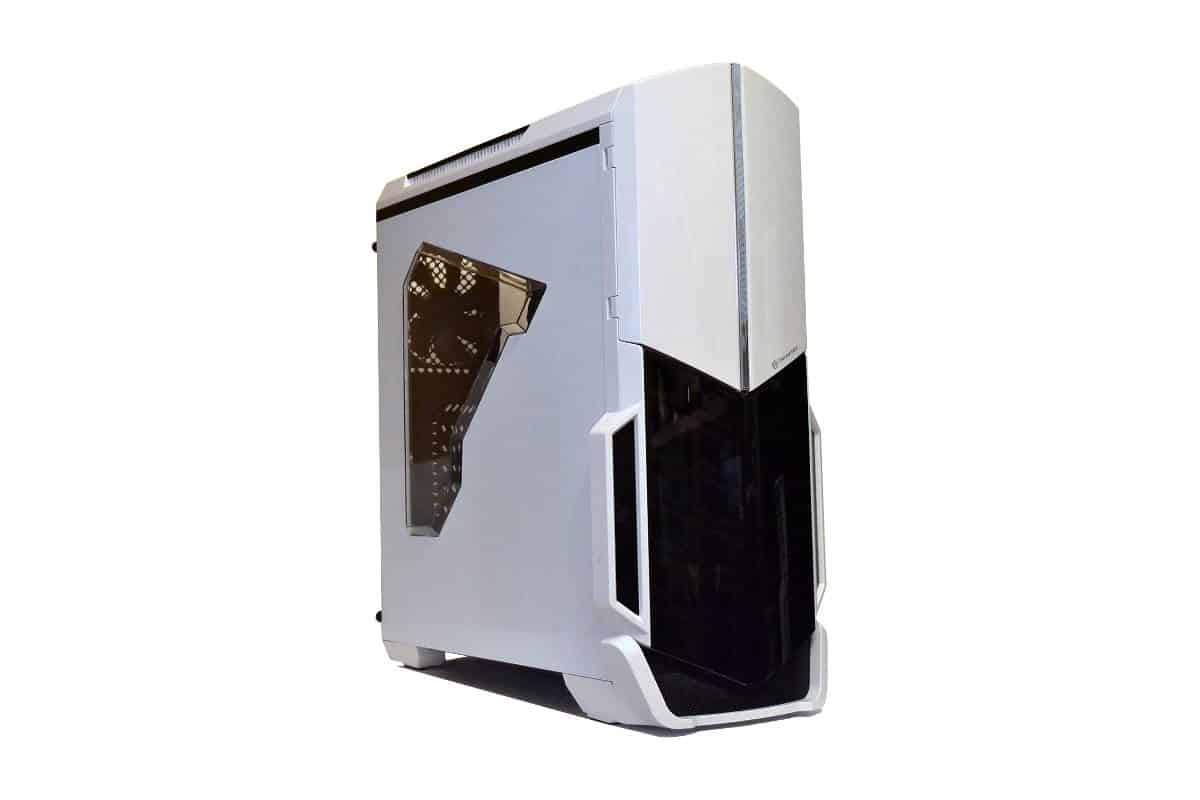
installation in the Thermaltake N21 Mid-tower Case
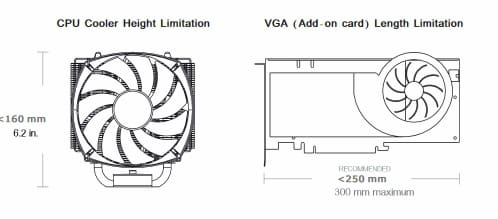
This list of parts are enough for the basic build and the addition of the pointed wood type screw for hard drives is a little strange but there are truly 6 of them and they work well if you don’t mind stripping out the threads in your hard drives precision mechanical windings inside the SSD or Hard drives. Also, the Video Card Length gives a very sparse 250mm spread but I have an oversized card in mine that is 11 inches and there is still a few inches to play with since the center of the Case front is not populated with drive bays or any other obstructions unless you wanted to install a Pump and Reservoir on the top of the base bay cube there is plenty of room. If you don’t plan on doing a custom loop then this case can take any card and thickness you want to put in it.
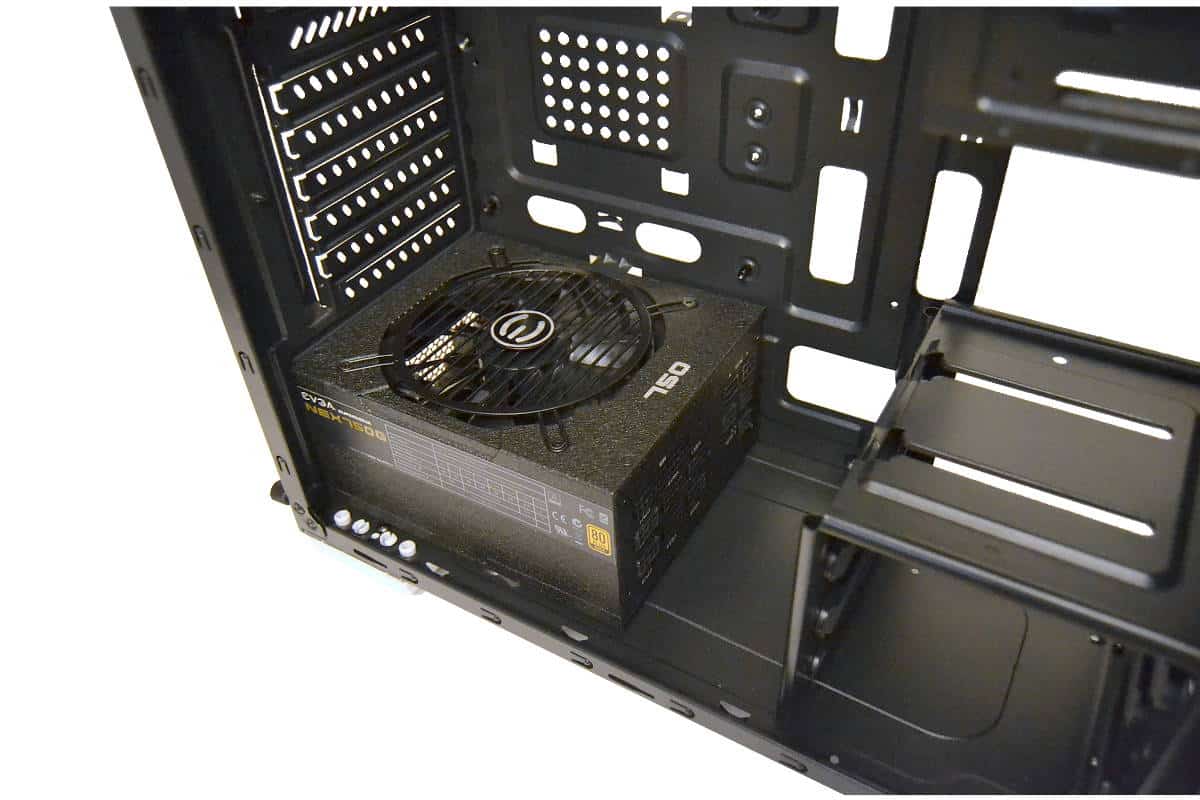
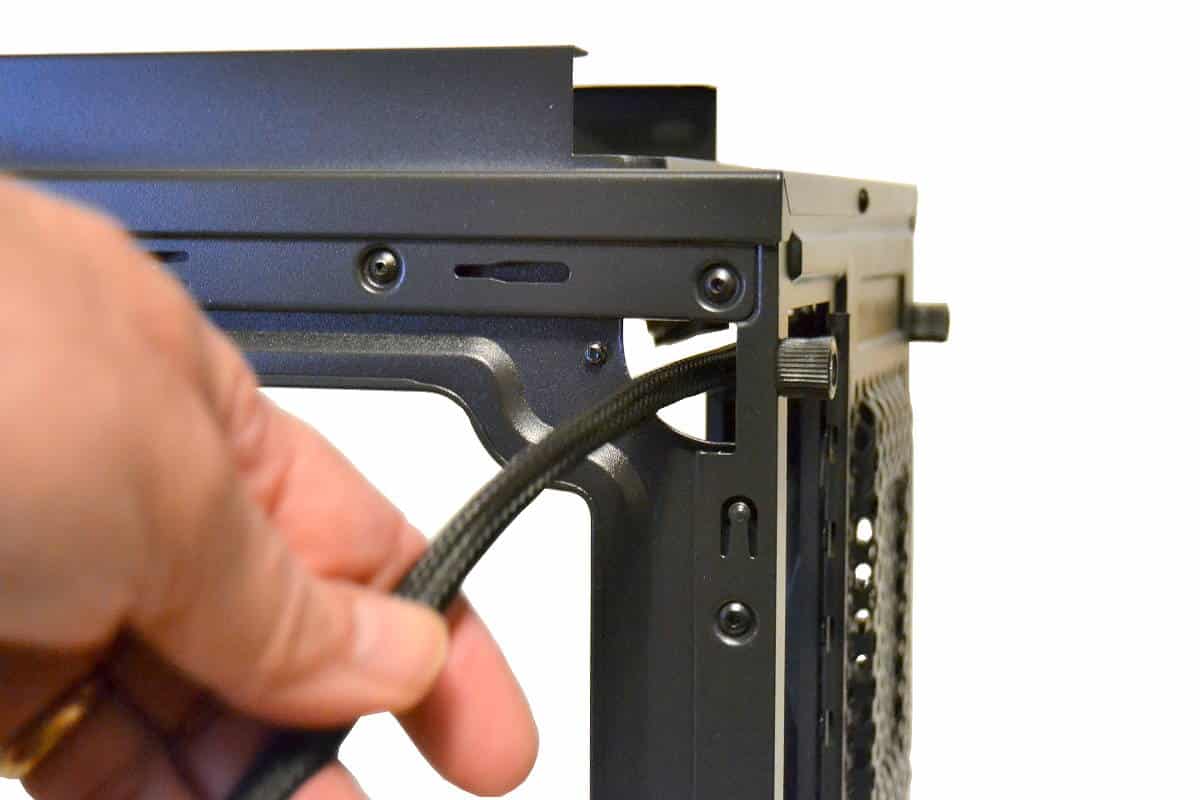
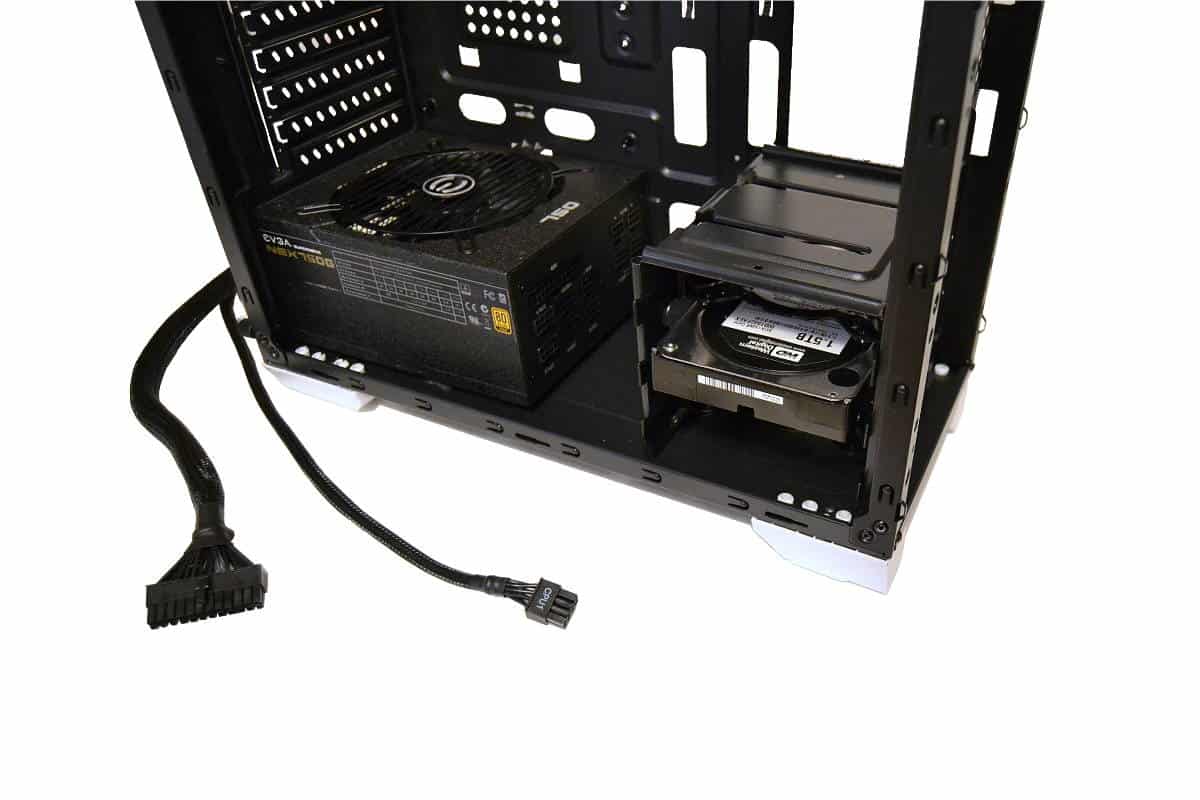
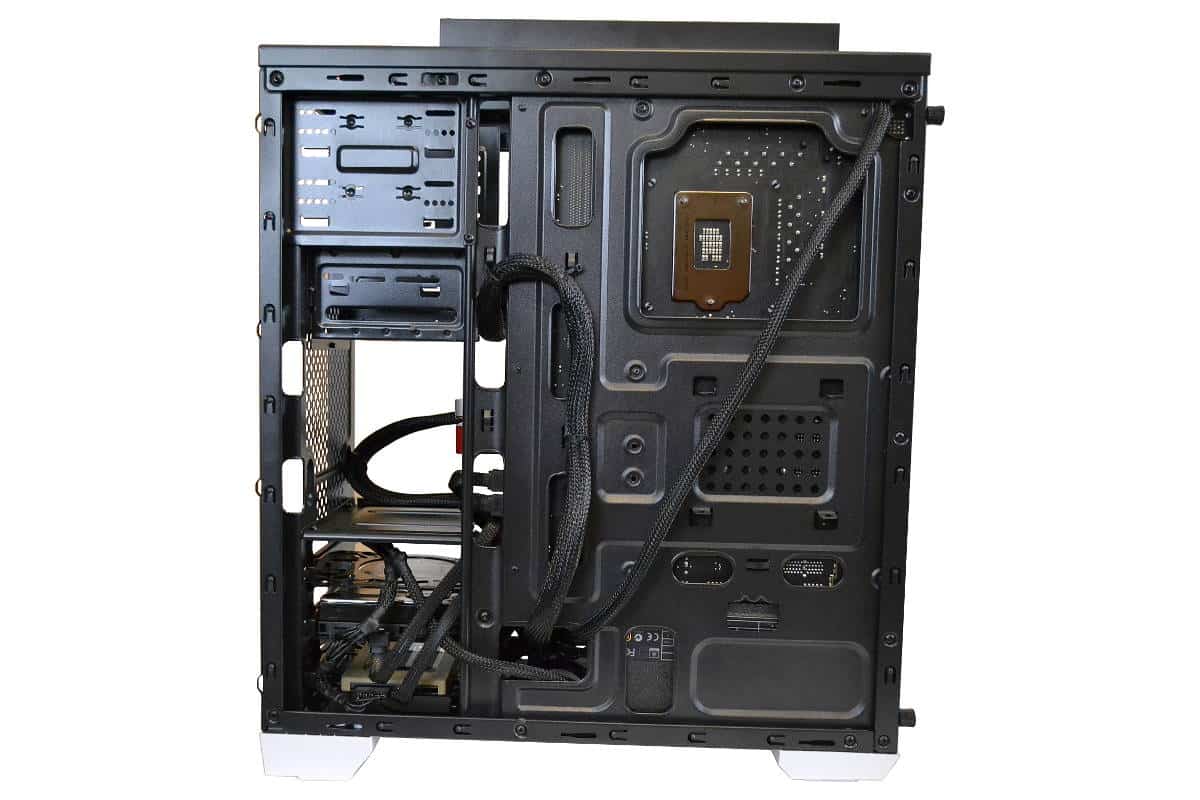
The Power supply went in nicely and is almost airborne from the bottom by about .25mm but the rubber pads make up that difference and the fit is not bad at all. With this particular case it is important to route the CPU Power cord into the case before mounting the Motherboard. If you try to put the wire in after the board has been mounted cuss words and disassembly will be an issue.
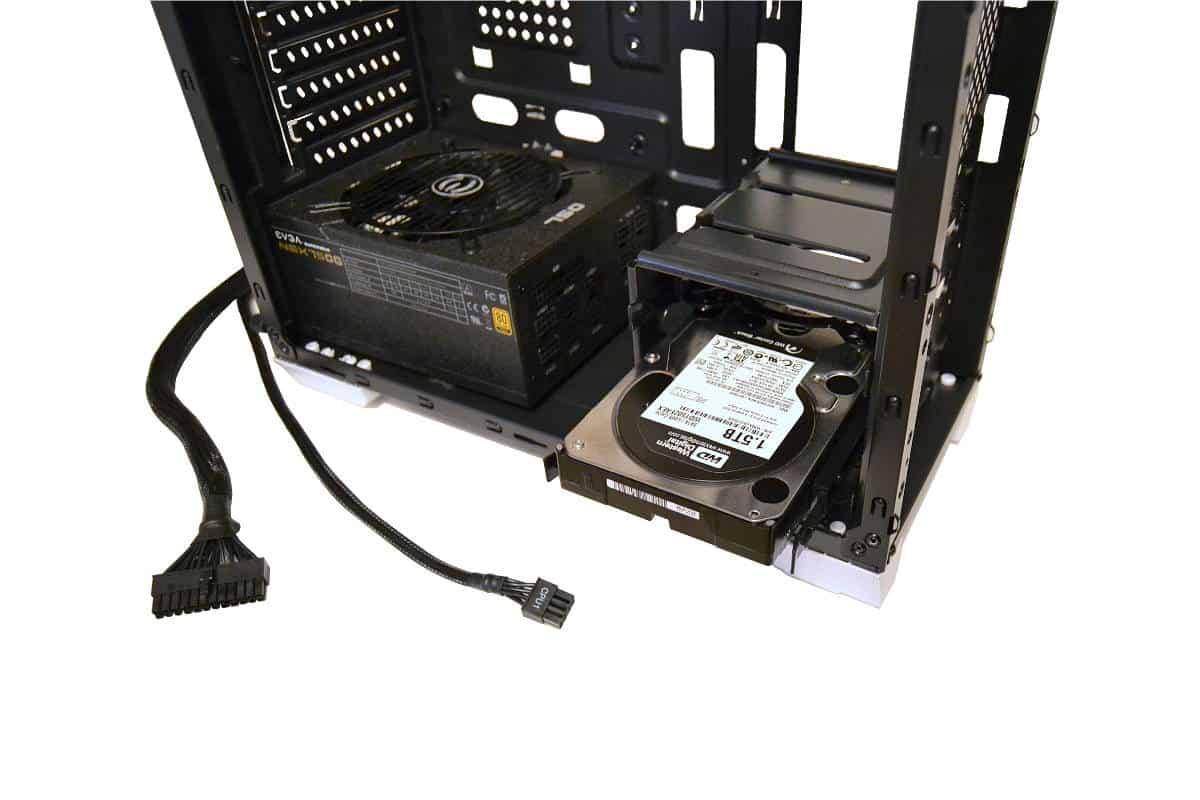
The bottom drive Cube has three Cassette drawers for installing drives. 3.5-inch Mechanical hard drives snap in with no problem and the SSD Mounts perfectly into the tray with screws that are provided.
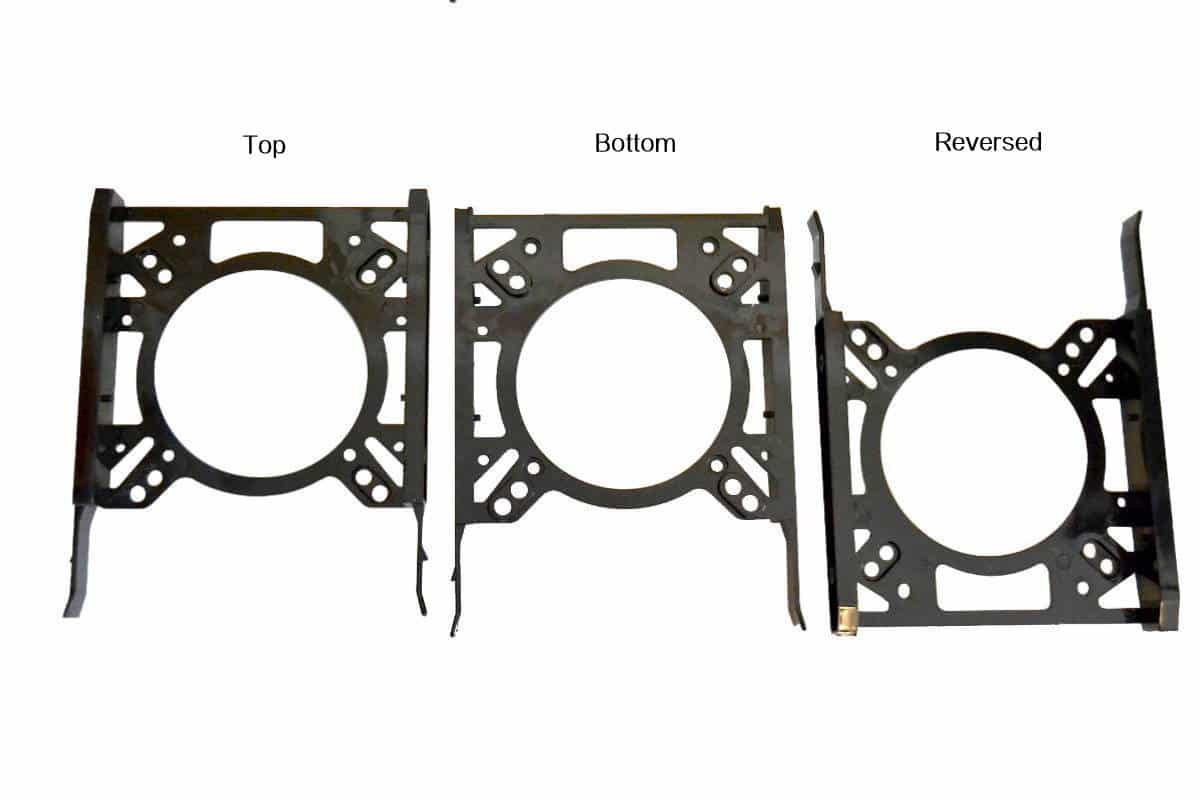
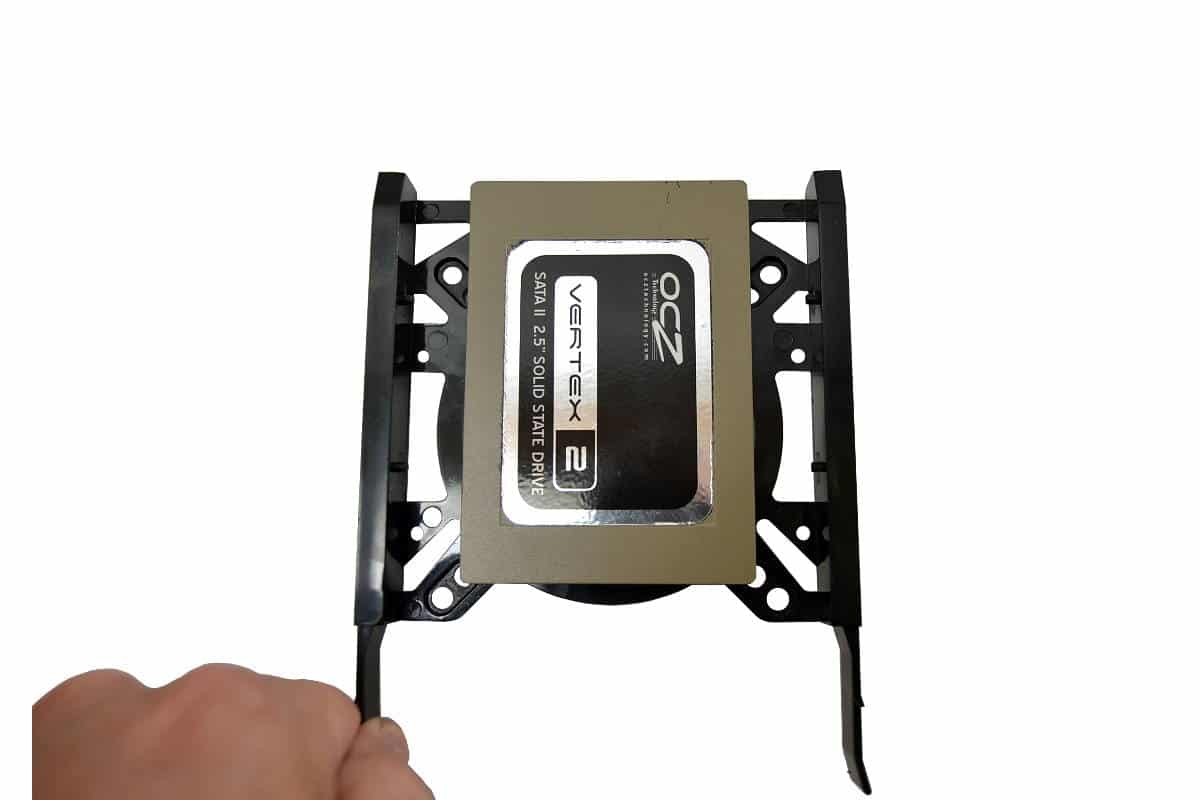
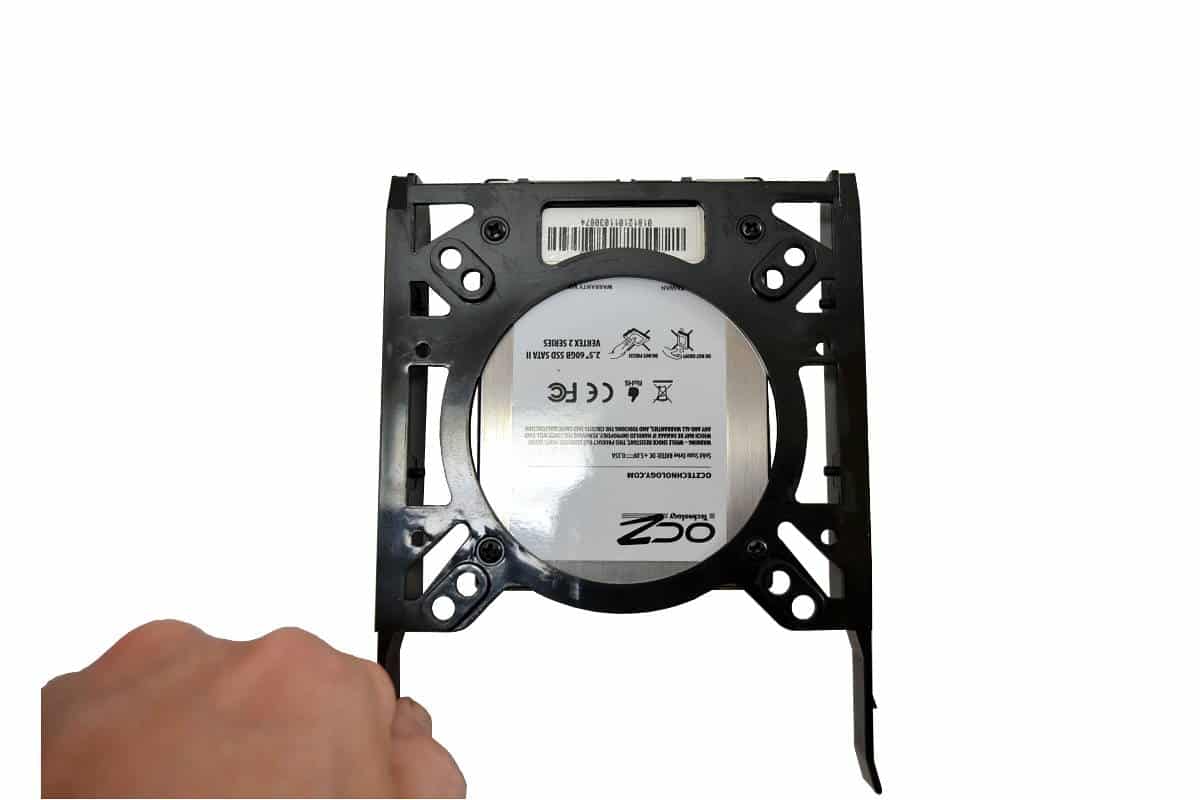
Once the Hard-Drives are installed into the cassettes, the frame of the bay cube allows the cassette slide easily into the slots and then lock once they are fully inserted.
Mounting SSD’s to the back of the motherboard tray was a trick that Modders started and it got picked up by almost every case manufacturer that makes cases these days, but there is a drawback to doing this. If you plan to use one or two SSDs and mount them on the back it works great for freeing up space in the front of the case. If you are mixing Mechanical drives with SSD’s it’s best to use the drive bays because if you are using a Modular power supply and you are conserving space for wire management this placement is not recommended.

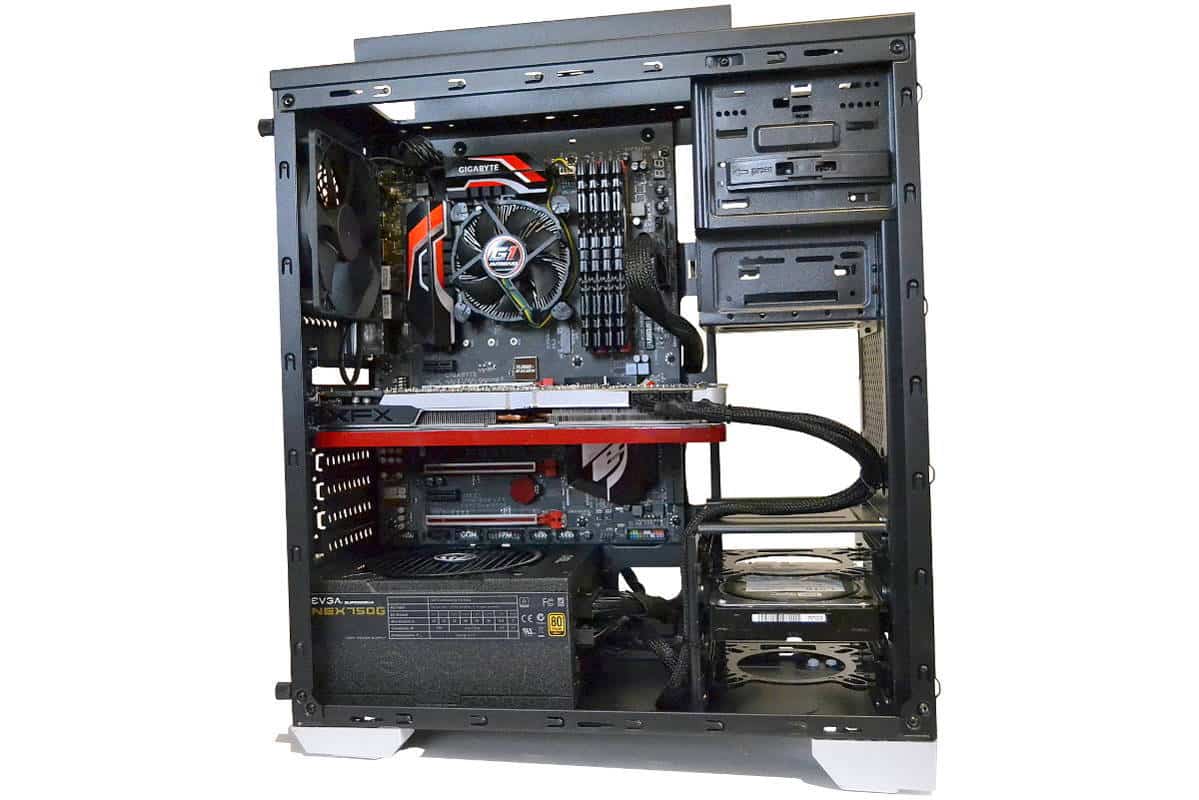
With the Video Card installation, the website and the book that comes with the case tell you that you are limited to a Video Card of less that 250mm. This is not right since I am using a card that is 280-mm long and there is still space for more card. I added 300mm on the data sheet here but I really don’t think there is a card out there that this case cannot hold. The center portion of the inner metal chassis is completely empty and there is plenty of room for Video cards of the Super-Sized Variety unless you are planning a custom loop with large reservoirs and pump assemblies. Also, if you were wondering about the size of the air type CPU Cooler clearance, that 160mm size is from the base of the Motherboard to the edge of the inner metal chassis. The window extends that room if you are on the edge of 160 and it could fit something a few more millimeters larger if you needed it.
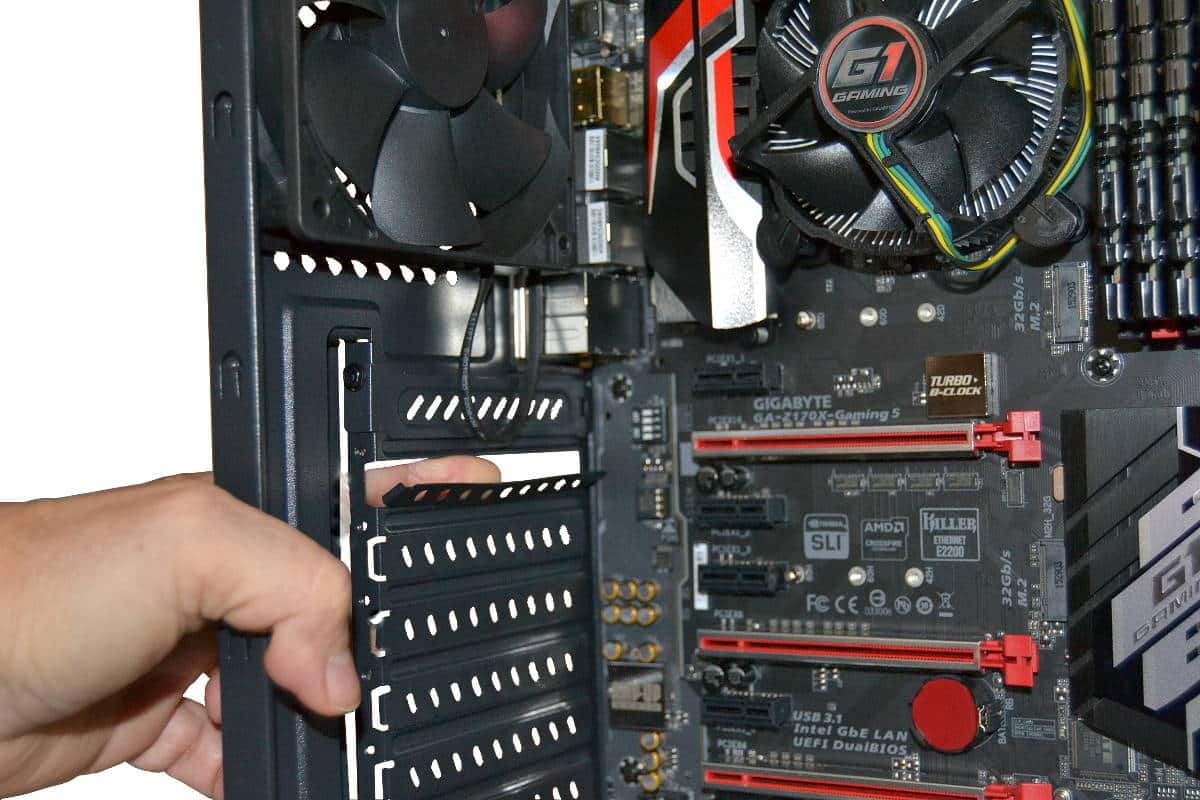
Here is the picture of the Knock-out PCI slot covers. Remember if you are installing a video card the second and the third slot from the top down. Make sure of the slots that you need to use in this type of case is correct or you could end up with an empty slot in the back of your build. The top is normally used for Plugin PCI SSDs or Sound card placement and use the small x2 PCI slot.
The picture below shows the 280MM Video Card installed and the room still available is enough for us to hide some wires in. We utilized this space for wire management so the look from the window is totally clean.
Finishing the wiring is a snap in the back with all the room. Routing the wires has been pretty easy for us and we found that the everything, in this case, works out great. Except for the front air-flow problems and the CPU power cable route. All in all, this is a really easy case to build in if you strip the panels off and build it in the chassis first.
A look at the front of the build before we remount the panels. The Front should be removed first for this build and the top added first when you are replacing the panels back on. There is a lip on the front of the top that the front panel fits to so remember the sequence for putting the top on first then fit the front panel last. The wires for the controls fit into a large slot in the top of the chassis and the wires were all long enough for routing and hiding. I really liked that about the case too.
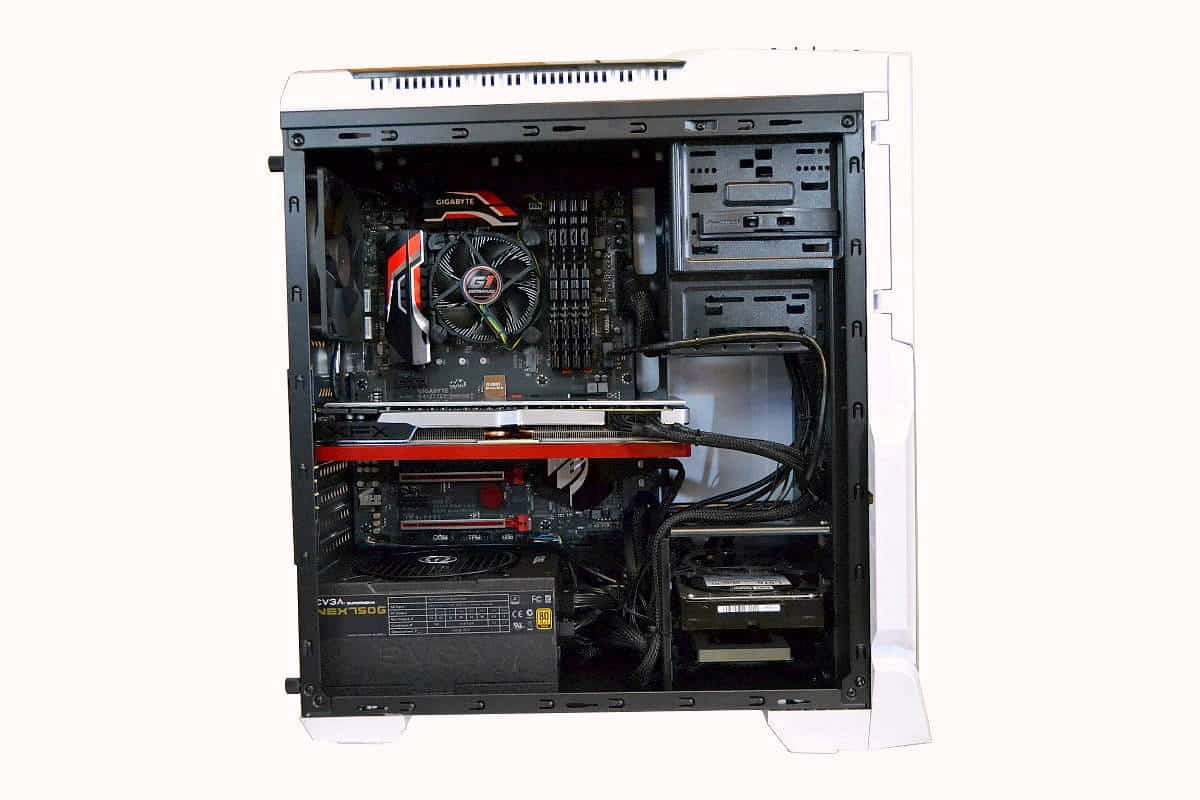
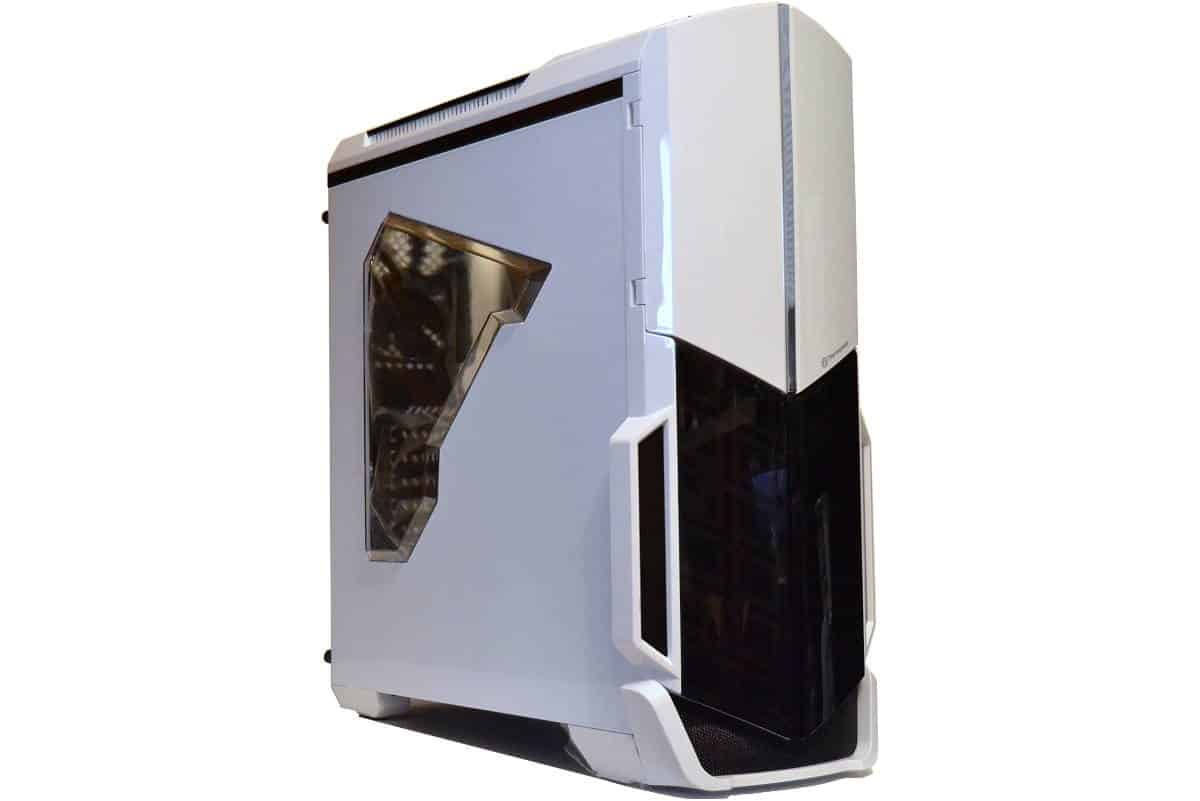
After it was altogether the window was just enough to show the inside parts with class. Not too much but not too little either. The window size allows for a lot of hiding of wires so there is no mess to see through the lighted interior. You can just see the part of the top of the Video card and the cooling over the CPU which for the basic builder is all that is need to look great.


Awesome review man!!! I’m planning on buying this. This helps a lot
Thank you, AdikRahan… It is always nice to get feed back on my work. I appreciate the compliment and I really have a taste of helping builder out with my thoughts of the cases no matter what the price. I think this a really great case for the Price Range and the only reason I gave this case an 8 out of 10 is only because this is not a Premium, High Dollar all aluminum and steel framed work of Art. Those are 10’s for me.
These reviews are awesome! I have been trying to decide on a case and these reviews/build logs are super helpful. I do have a question for you though. Do you think a h100i would fit well it the top of this case with a pull configuration set up and would it sit over the motherboard making ram removal difficult? You did water cooling on your carbide 100r build and that was super insightful. Have any tips?
Is Does the plastic give a cheap feel? I do really love this piece. Want to buy ASAP.
I just got my case in and love it. You can’t visibly tell the difference between the metal and plastic on the case. It looks quite nice. It definitely feels a little cheap and light but I don’t ever move my case.
Hey there looking for a computer case here we listed top10 best computer cases for you make sure to check that out don’t forget to share hope you like it. 🙂
http://bestcomputercaseslist.com
Hello, I really like your Article..If you Are looking for Best Computer Cases Then you should Check http://bestcomputercaseslist.com/ .
Wow… Never had I thought I would see a review of a case this long and enjoy reading to the last words. This is an awesome review!
Have you also taken a look at Thermaltake Versa N24? I want to decide between N21 and N24 but I haven’t seen any review on N24 case. I like N21 for its looks but N24 for its internal layout with space for more larger fans. Can you please share your thoughts on Versa N24 too?