
Setup, Lighting & Software on the Glorious Model O3 Wireless Mouse
Getting the Glorious Model O3 wireless setup is extremely easy. Go ahead and plug in the dongle to the charging base and then plug the charging base into your PC with the included USB cable. Then go ahead and press and hold the button on the bottom of the mouse and it will turn on. You’ll notice all of the LEDs on the charging base light up as well. From here you’ll be good to go.

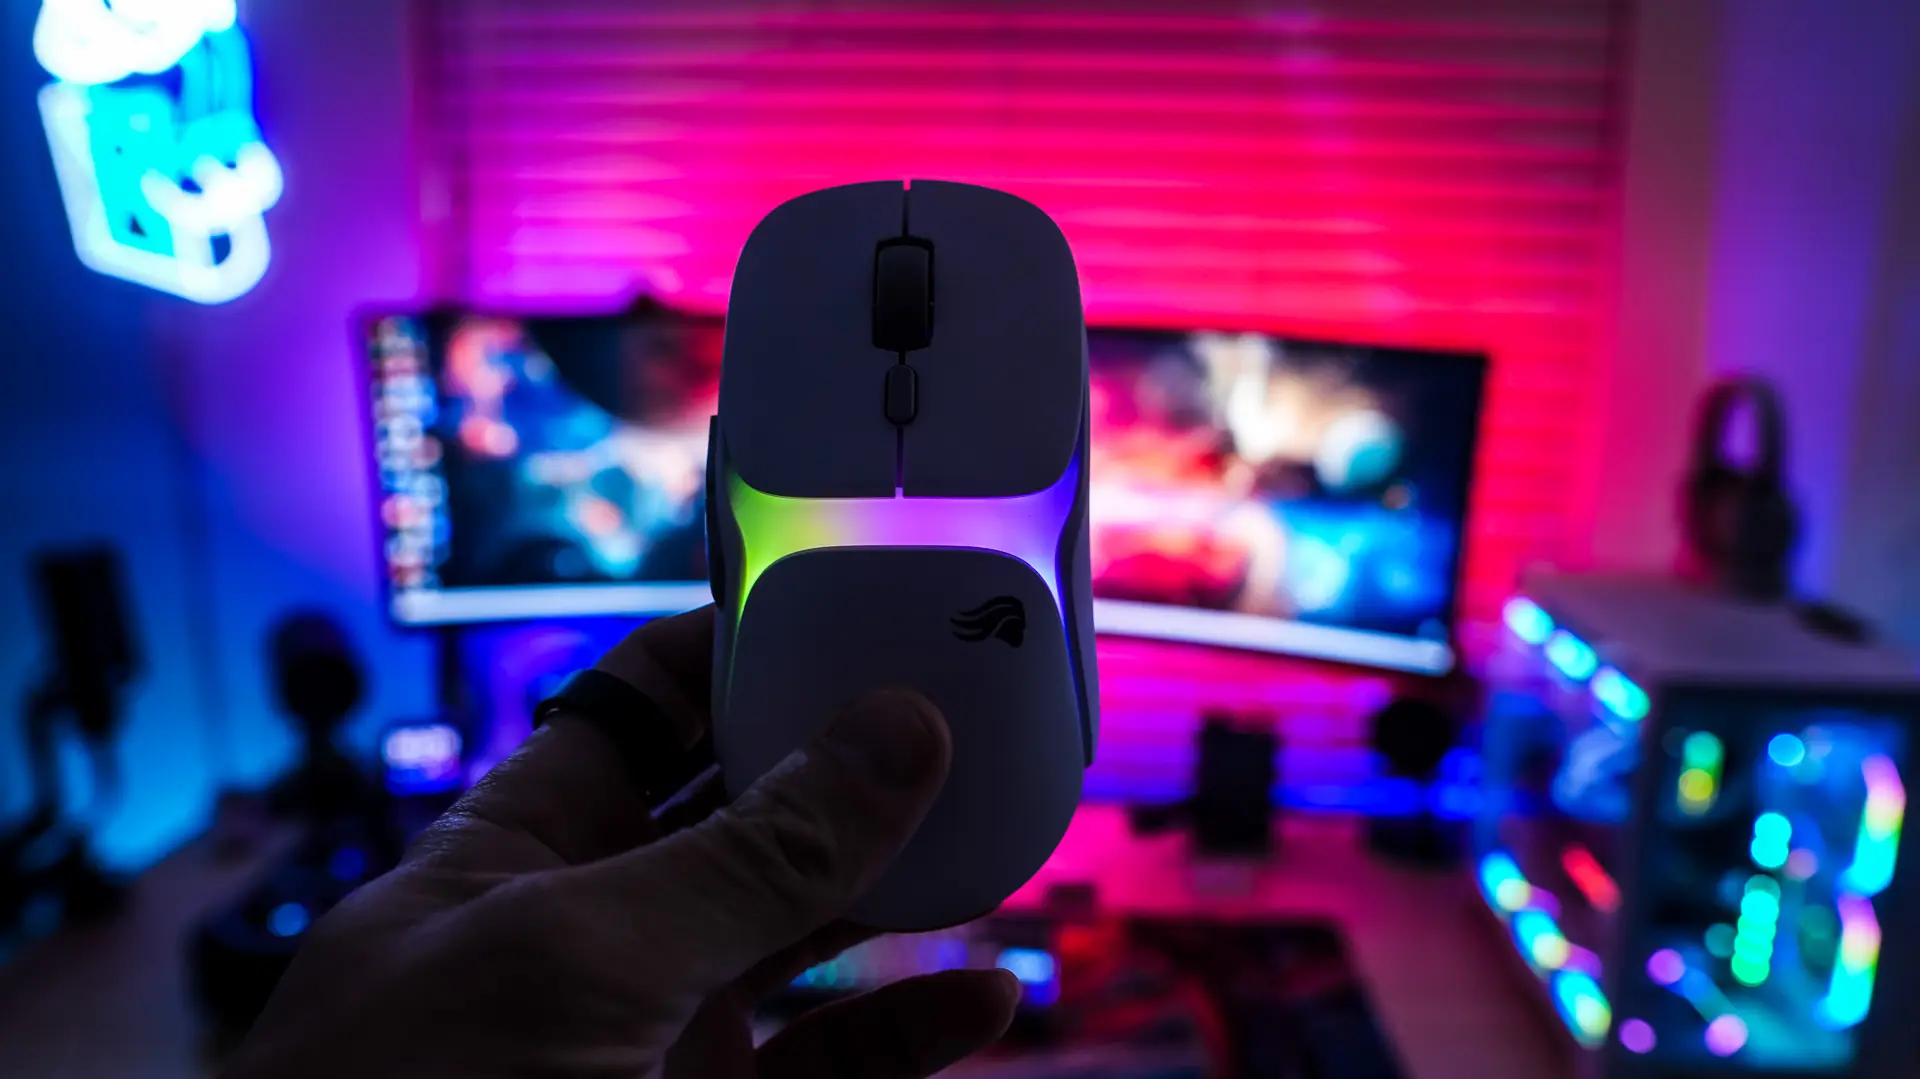
When you do power on the mouse it is going to light up with RGB lighting. There is a single lighting zone which of course can be controlled with the included software.


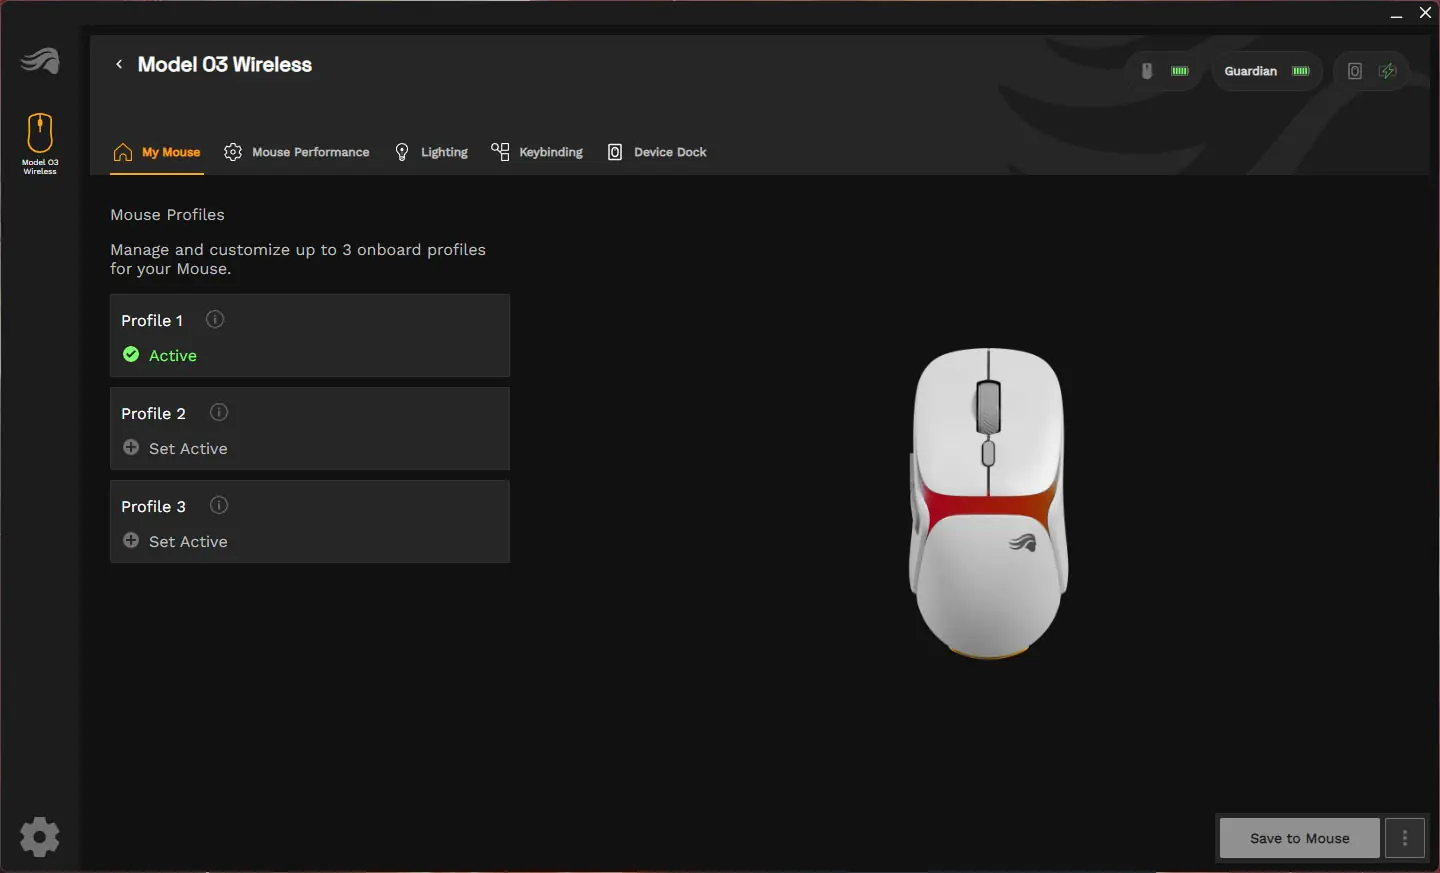
Now you can use the mouse without software, but if you want to do any type of customization you’ll need to download the Glorious CORE software. Opening up the software you’ll see your mouse and when you click in you’ll be able to select between three different profiles.
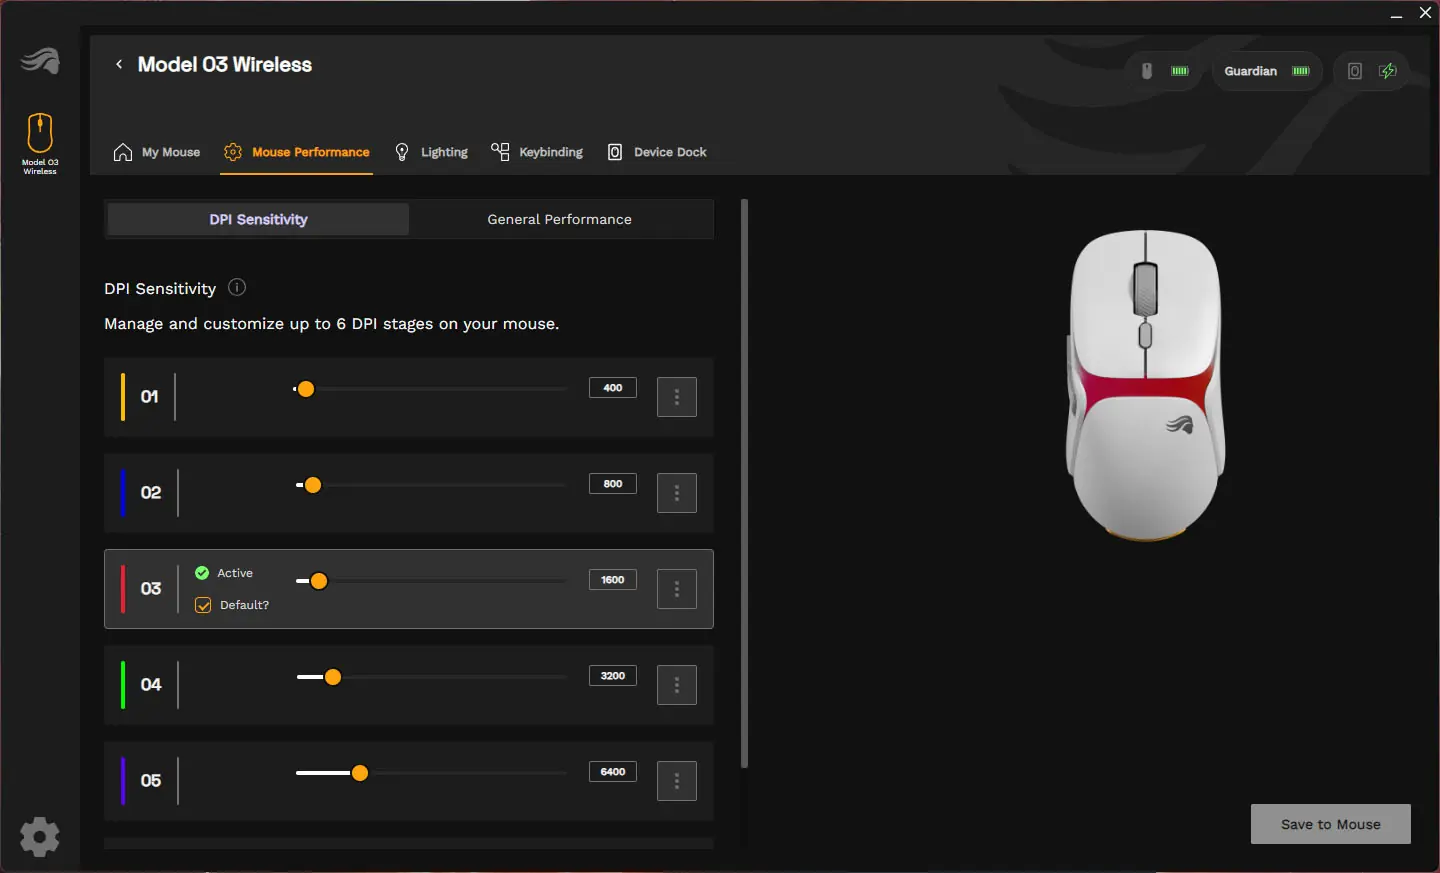
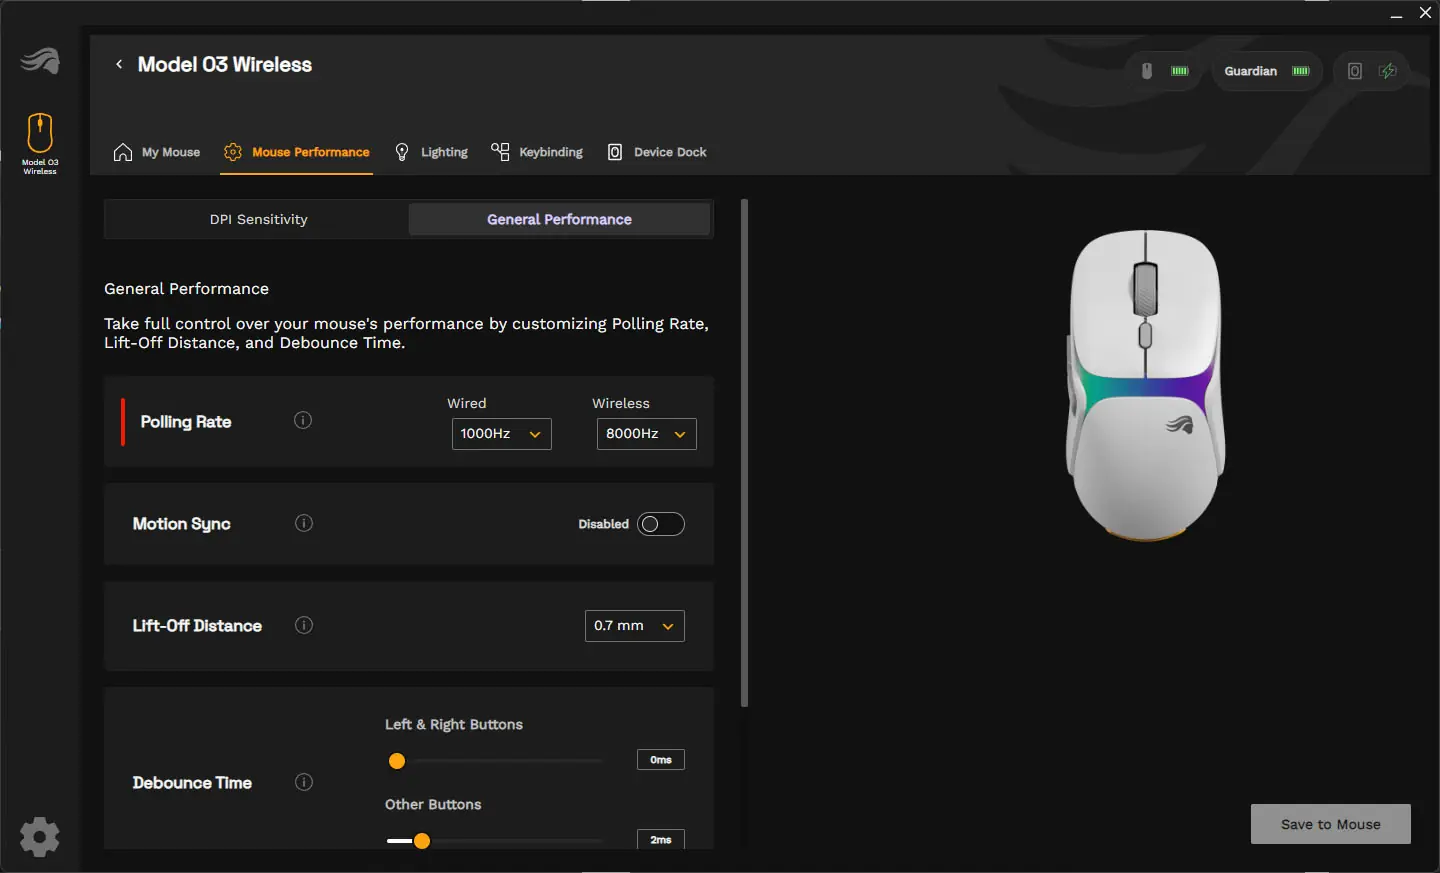
Next we have the Mouse Performance section. Here you can first set up six different mouse DPI levels with corresponding colors that will show on on the bottom of the mouse as well as on the charging station. Under the general performance tab you can change your polling rate, which you are definitely going to want to change to 8000 Hz for the wireless connection. You can also change the lift-off distance, debounce time, and how long till the mouse goes into power saving mode.
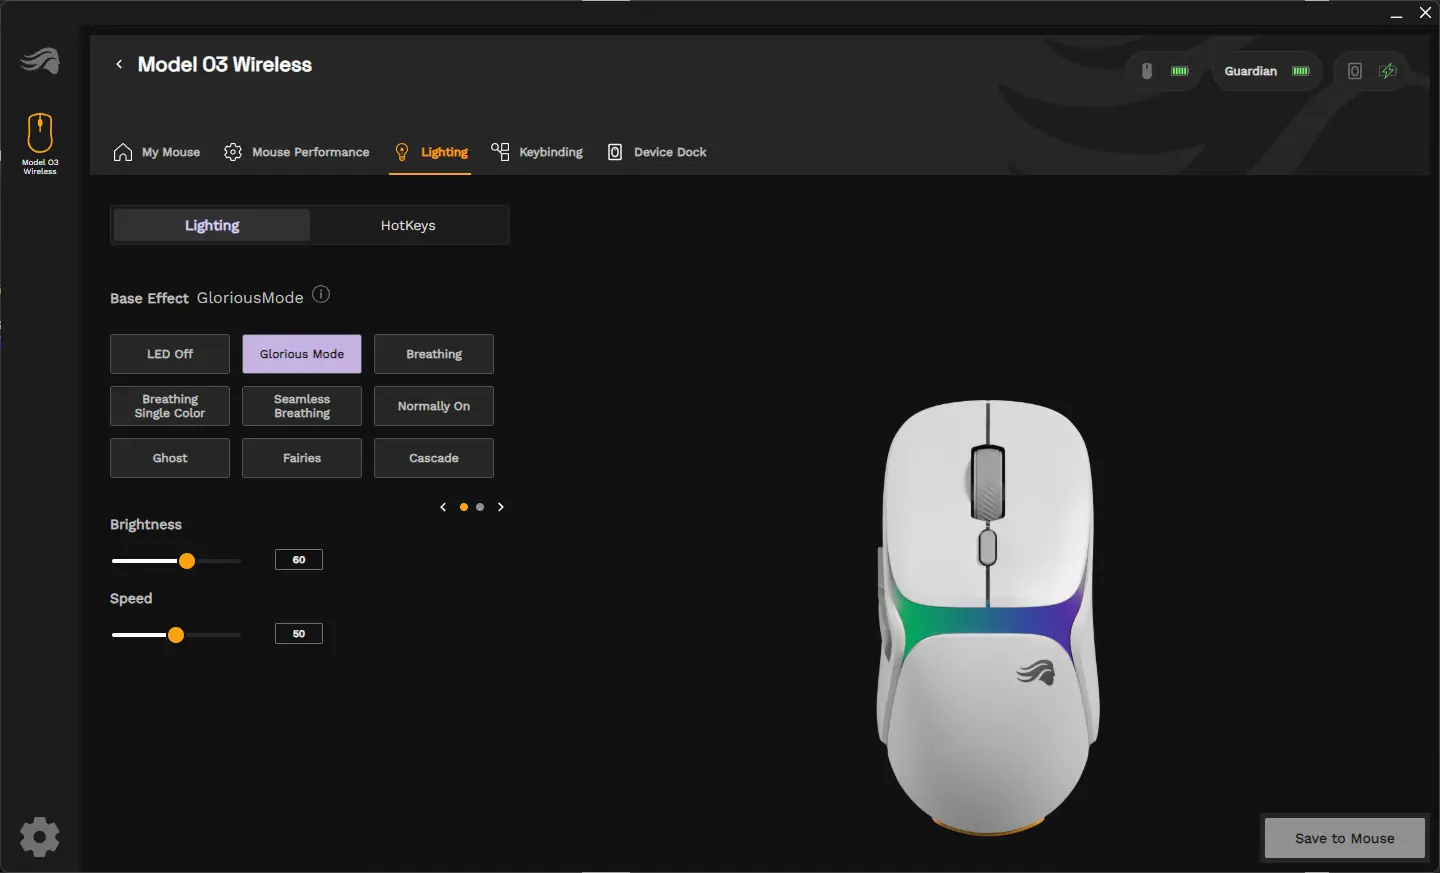
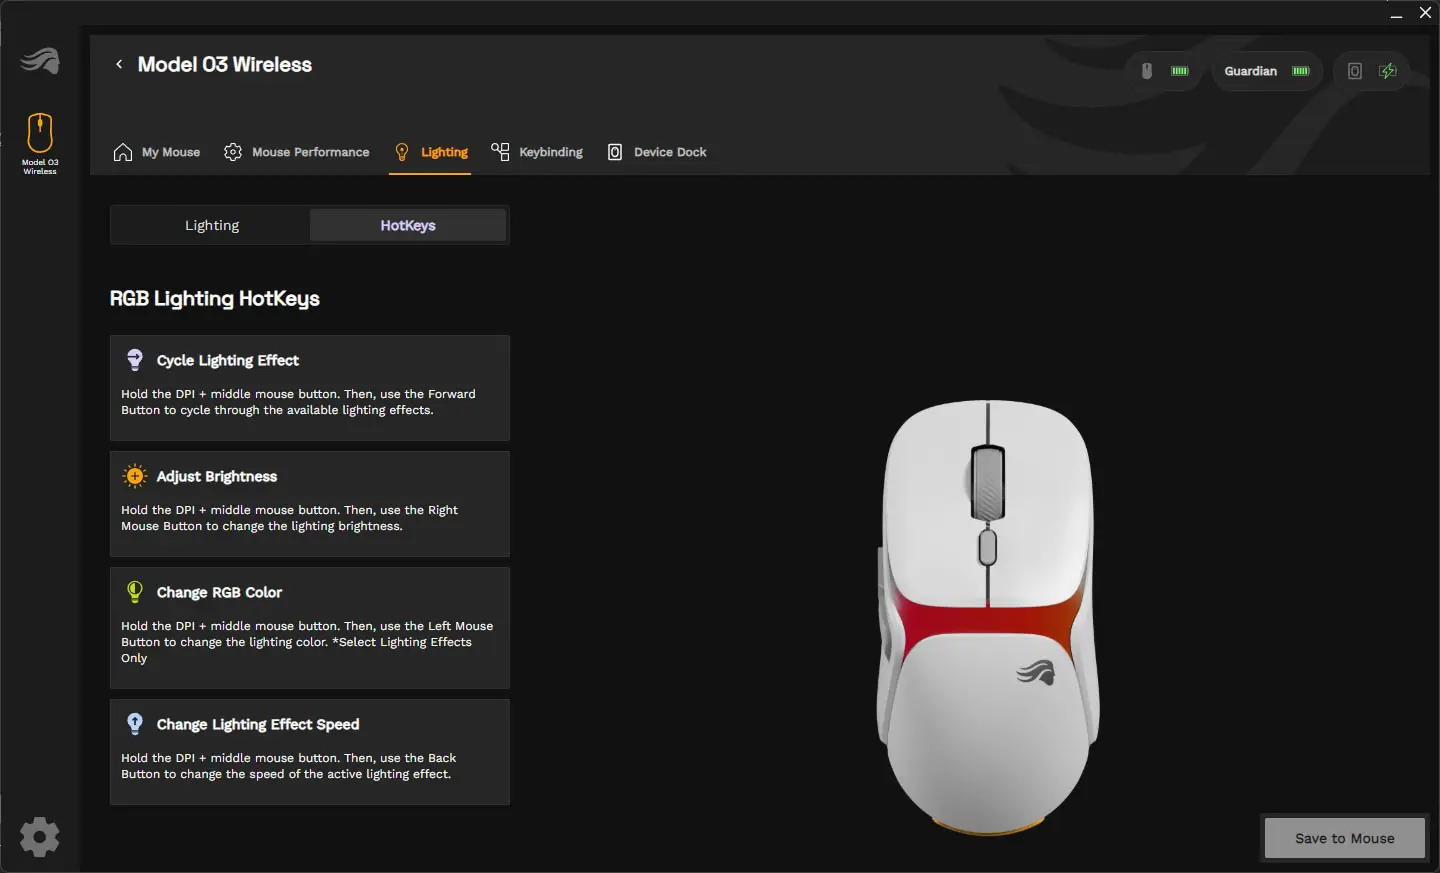
Under lighting we have the ability to choose different lighting effects for the lighting on the mouse. We can also set the brightness and speed of the lighting. There are set hotkeys on the mouse to cycle through different lighting modes too.
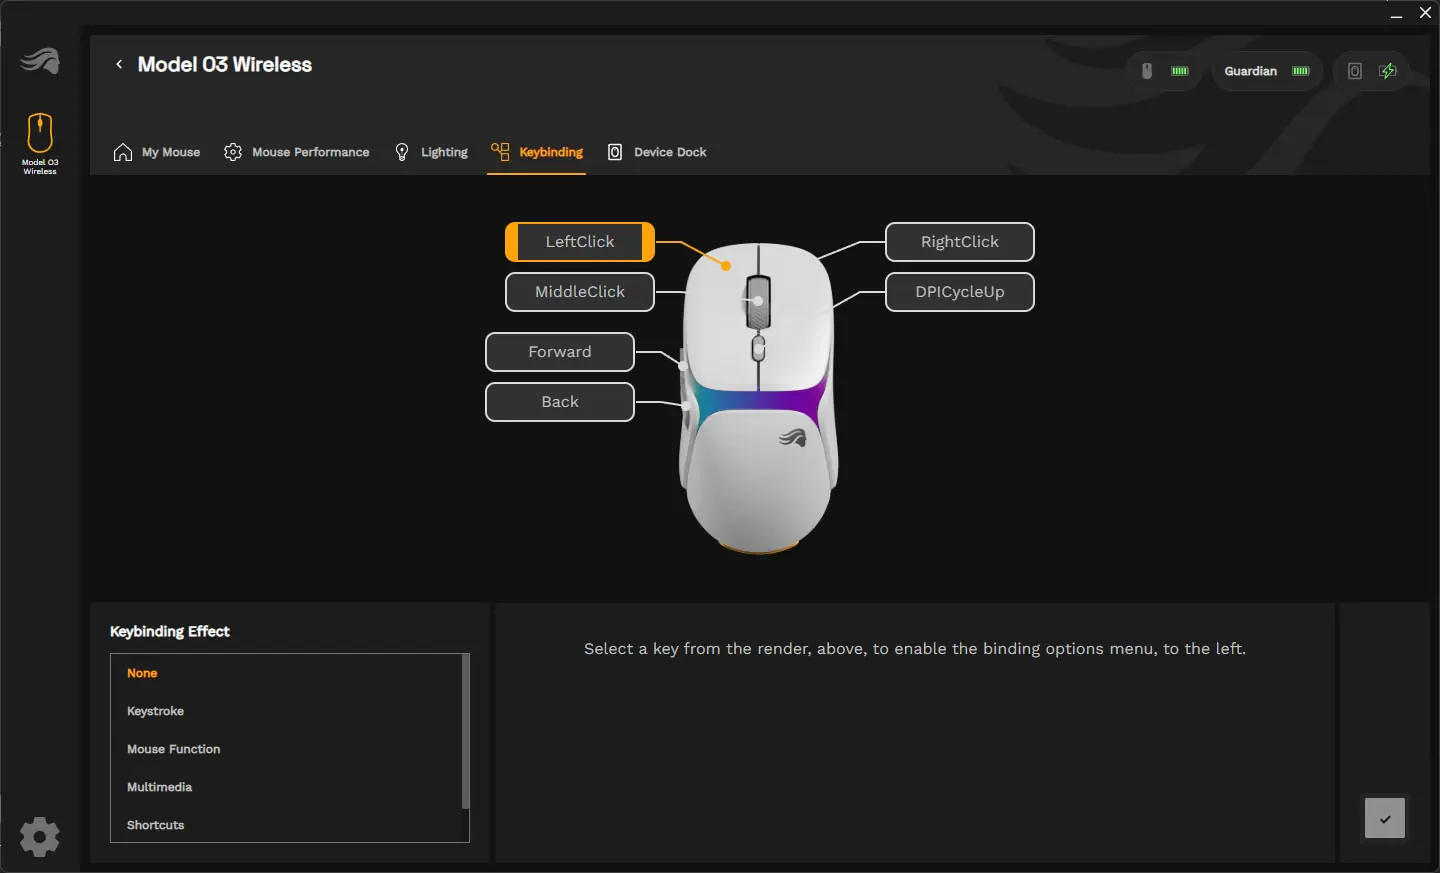
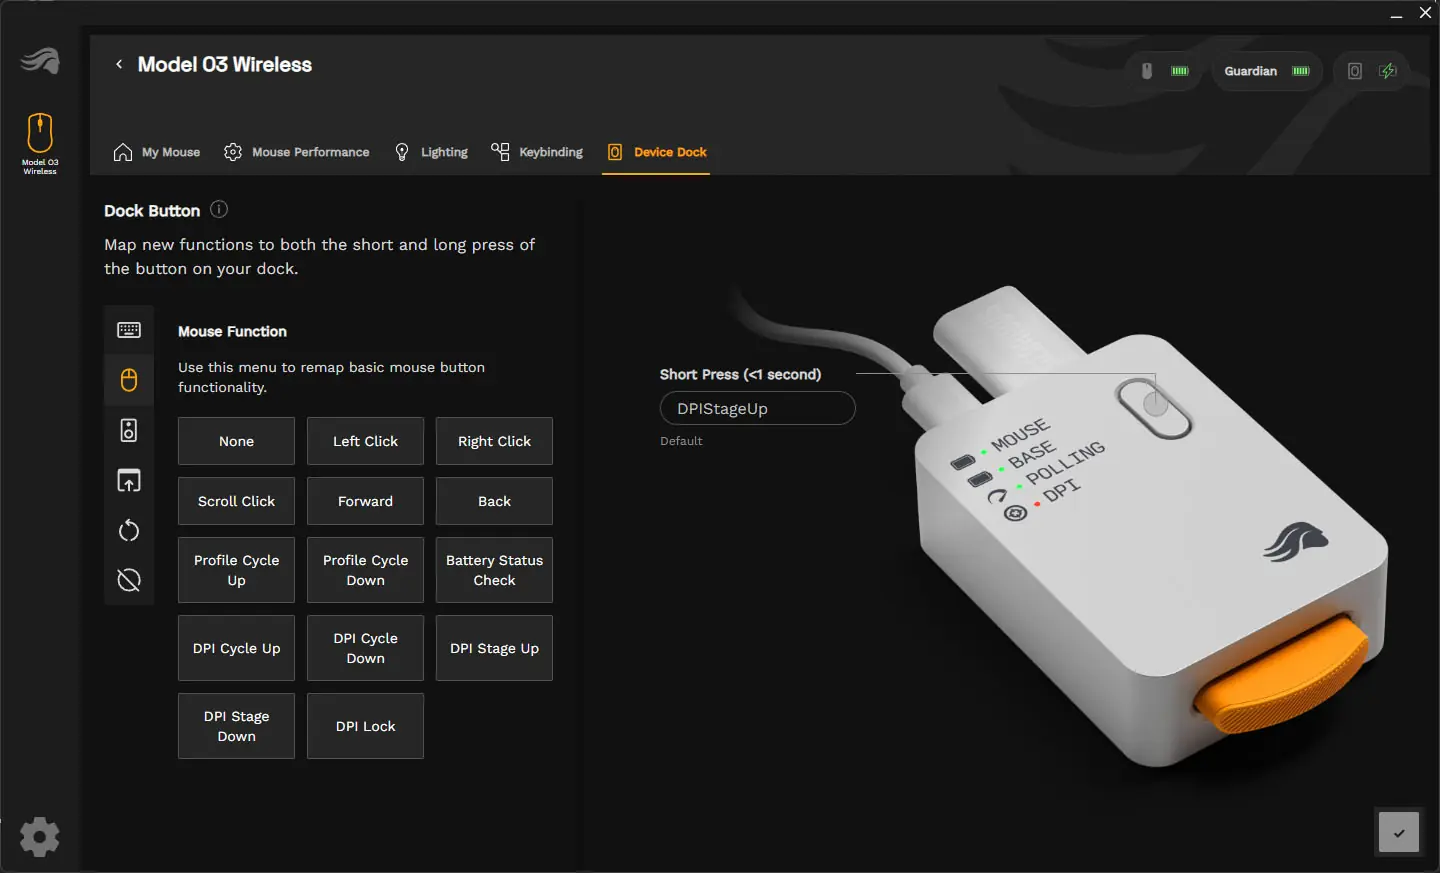
The mouse does have six programmable buttons so we can easily reprogram them in the Keybinding section. Also in the Device Dock section we can change what pressing the button on the charging station does. By default it will cycle through DPI levels, but it is nice that we have the ability to change what it does.