You get maybe a minute of normal use, then the screen goes black, the logo comes back, and you’re staring at the Lock Screen again. Sometimes it’s every few minutes, sometimes a few times a day, and there’s rarely anything on screen to explain it.
An iPhone that keeps restarting still lets you use it between reboots, so you can gather evidence before you change anything. This article explains why an iPhone does so and how to fix it with practical solutions like Dr.Fone iOS System Repair.
Part 1. Why an iPhone Restarts Repeatedly
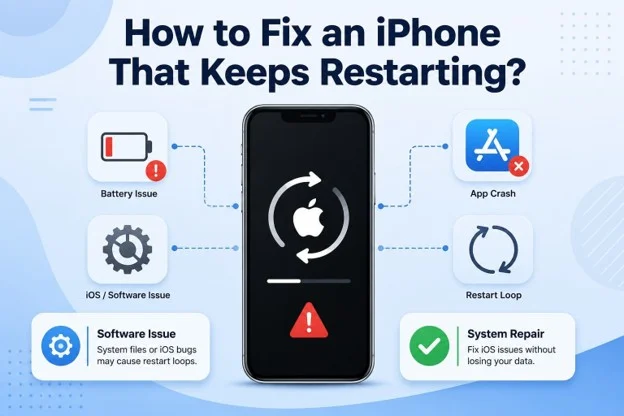
People tend to repair the iOS operating system when an iPhone gets stuck in the restart loop. However, it’s important to know why this happens in the first place to pick the right approach, and the mentioned table uncovers some causes:
| Cause | When Restarts Happen | What Else You’d Notice |
| iOS System Errors | Randomly, with no pattern you can spot. | It began after an update or an install that failed. |
| Not Enough Storage | More often once you open something heavy. | Storage warnings, and apps that take ages to load. |
| A Misbehaving App | Every time you open one particular app. | The loop quiets down when you leave that app alone. |
| A Failing Battery | Under load, in the cold, or at low charge. | Sudden percentage drops and shutdowns above 20%. |
Tip: Watch the pattern for a day before you touch anything. Restarts during active use point to a different cause than restarts that happen while the phone sits idle.
Part 2. Check Apps, Storage, and iOS Updates First
Start by checking your iPhone before using iOS system repair software, and try the following 3 basic solutions first.
Fix 1. Remove the Problematic App
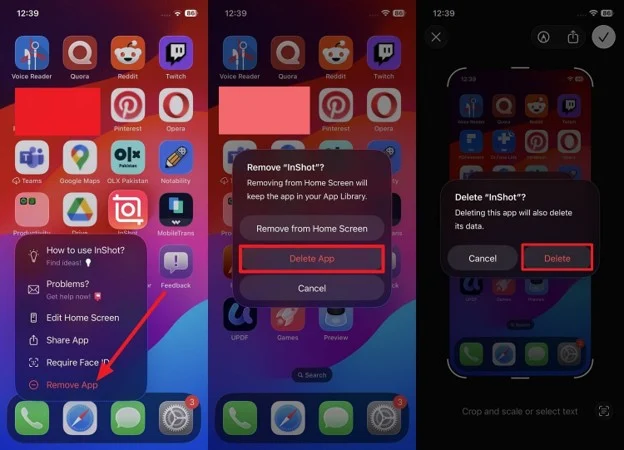
Think back to what was open the last few times your phone rebooted. Delete that app, use the phone normally for a day, and see whether the loop stops. To know how you can delete an application, follow the simple guide given below:
Instructions. Maintain pressure on the problematic app, then select the “Remove App > Delete App > Delete” options.
Fix 2. Free Up Storage
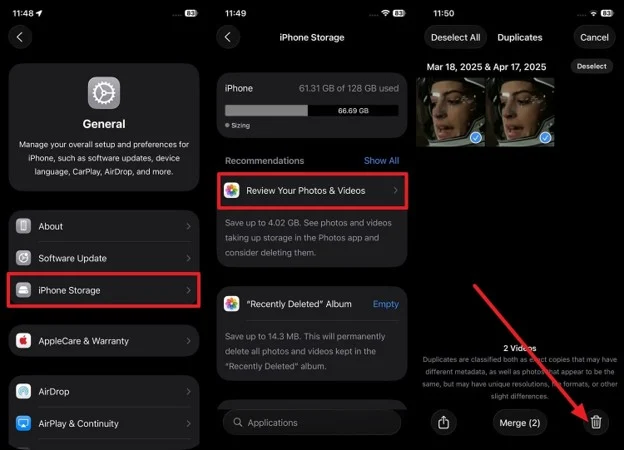
Clear enough to leave a few gigabytes spare; a phone with almost nothing free can’t write the temporary files iOS needs while it’s working. The steps below explain how you can delete large or junk files from the General settings:
Instructions. Go to “General > iPhone Storage > Review Large Photos & Videos (If Appears) > Select data > Delete.”
Fix 3. Install Any Pending Updates
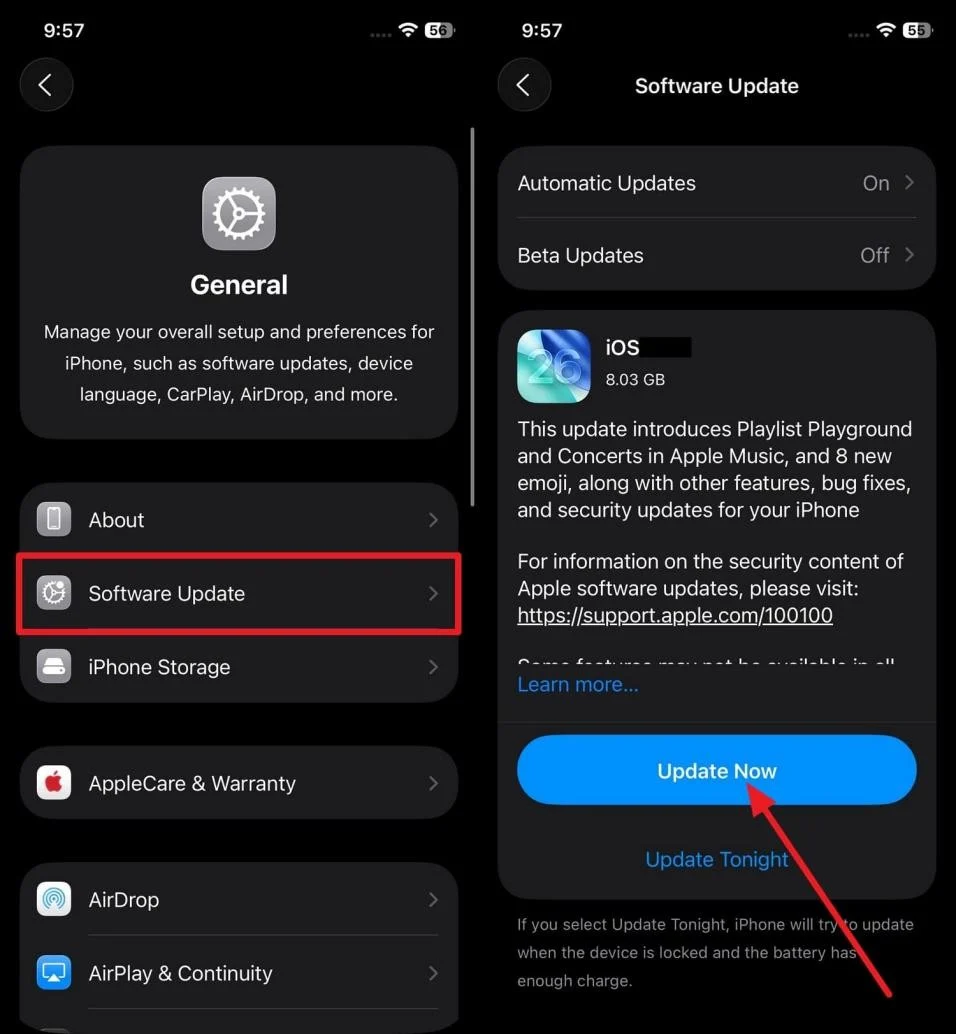
Before the iOS system repair, try to update the pending updates to see if this helps. If your loop started on one particular version, the next one may already have the answer once you update via the given steps:
Instructions. Go to “Settings > General > Software Update” and install any available iOS update. Then, update your apps from the App Store.
Part 3. Is It a Software or Hardware Problem?
Settle this before you spend hours on fixes that will never help. Both look much the same from the outside, but they leave different fingerprints.
| Sign | What It Points To |
| The Loop Began After an iOS Update | Software issue caused by the recent update. |
| It Only Happens in One App | The specific app is triggering the restarts. |
| Battery Health Shows “Service” | Battery hardware issue that may require replacement. |
| The Phone Shuts Down Above 20% Battery | Battery can no longer provide stable power under load. |
| Restarts Continue After a Clean Restore | Hardware issue, as software has already been ruled out. |
Note. Learn more about root causes and fixes in the full guide to iPhone restart problems.
Part 4. Ways to Stop the Restart Loop
If the checks above didn’t hold, work up through these before the iOS system repair. Try these solutions one by one, starting with the least disruptive option before moving to advanced repairs.
Fix 1. Force Restart the iPhone
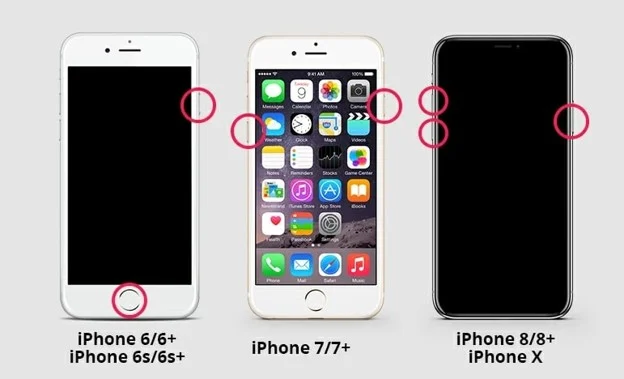
This won’t cure a loop on its own, but it clears whatever process is stuck and gives you a clean starting point for everything. Here are the steps to perform a force restart on every iPhone model:
- iPhone 8 & Later: Press and release the “Volume Up” button, then the “Volume Down” button. Then, hold the “Side” button until the Apple logo appears.
- iPhone 7 & 7 Plus: Hold the “Volume Down + Side” buttons together; release when you see the Apple logo.
- iPhone 6s & Older: Hold “Home + Top/Side” buttons together; let go when the Apple logo appears.
Fix 2. Restore Your iPhone via iTunes/Finder
It reinstalls iOS and erases all content and settings on your iPhone. Use it only if the previous solutions do not resolve the issue. To learn how you can perform it on iTunes, follow the guidelines given below:
Prerequisites:
- Go to Settings > [Your Name] > Find My > Find My [device] and turn it off.
- Update your PC and ensure you have the latest version of iTunes.
Step 1. Tap the “Device” icon on iTunes after you connect the iPhone.
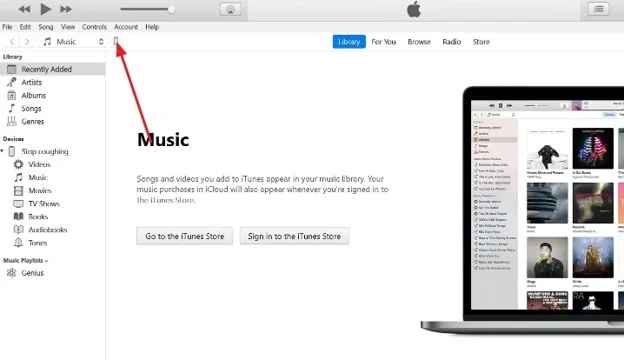
Step 2. Click on “Restore iPhone” in the “Summary” tab and follow the on-screen instructions.
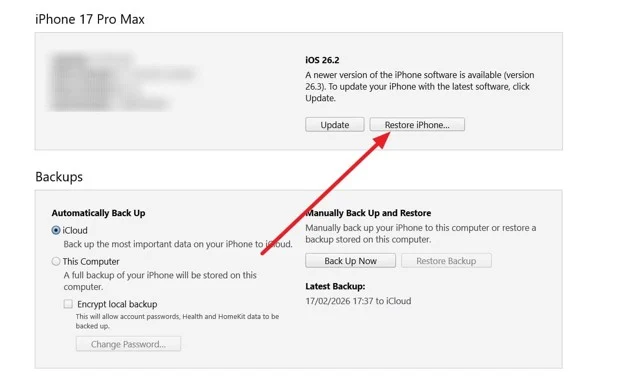
Note: Back up first, because this method erases the entire phone
Part 5. Repair the iPhone Restart Loop with Dr.Fone
Dr.Fone – System Repair (iOS) offers a solution between basic fixes and a complete restore. It rewrites the parts of iOS that drive the loop while your content stays secured in Standard Repair Mode. In addition, it lets you fix 150+ system issues, including the restart loop via firmware installation. For persistent issues, you can also use Advanced or Anti-Recovery modes, but there is a possibility of data loss.
Instead of choosing between a phone that won’t stay on and one that’s been wiped, you get a third way out. Most of all, you can enter Recovery Mode or exit DFU mode for free and with detailed steps. This is another aspect that makes Dr.Fone a safe option for all types of users.
Key Features
- Firmware Version Choice: Lets you confirm which iOS build gets written before the repair begins.
- Single-Cable Setup: Runs from your computer over one USB cable, with nothing to configure on the phone.
- Fix iTunes Errors: It can also resolve 200+ iTunes errors, such as 4013 and 1110, without data loss when you try to update or restore.
Guide to Repair the iOS Operating System with Dr.Fone
To know how you can use this iOS system repair software, here is the simple 3-step guide:
Step 1. Launch the iOS Repair Tool
Access the System Repair for iPhone, click the “Repair Now” button for “iOS Repair” to select the “Standard Repair” mode on Dr.Fone.
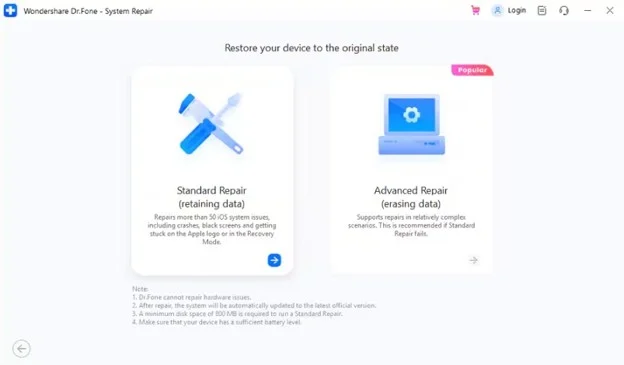
Step 2. Select the Download Option for Firmware
While the iDevice is connected, access Recovery mode via “Guide” and pick the “Download” option when Dr.Fone displays the respective iOS firmware options.
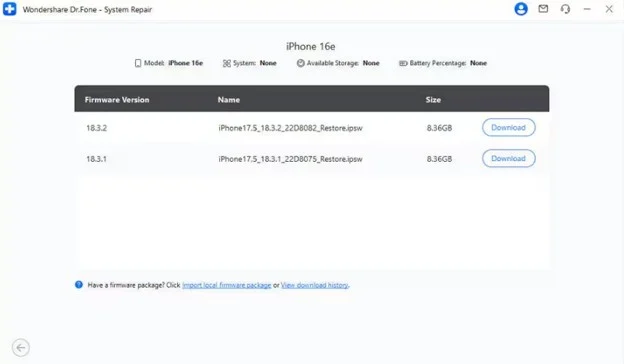
Step 3. Begin the Complete iOS System Repair
Press “Repair Now” once the firmware is installed, then wait 10 minutes for Dr.Fone to fix the restart loop, and click “Done.”
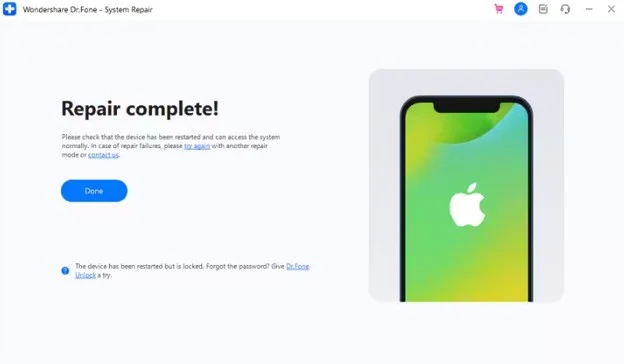
Final Reminder
An iPhone in a restart loop can usually still complete a backup between reboots, so take that window while you have it. A local copy through your computer is quicker to restore from afterward than an iCloud one.
Watch the pattern for a day, clear the obvious suspects, then settle the software-or-hardware question. Before you reach for the wipe option, use Dr.Fone – iOS System Repair, as the Standard Mode keeps the data intact.