HyperX Pulsefire Saga Pro Overview
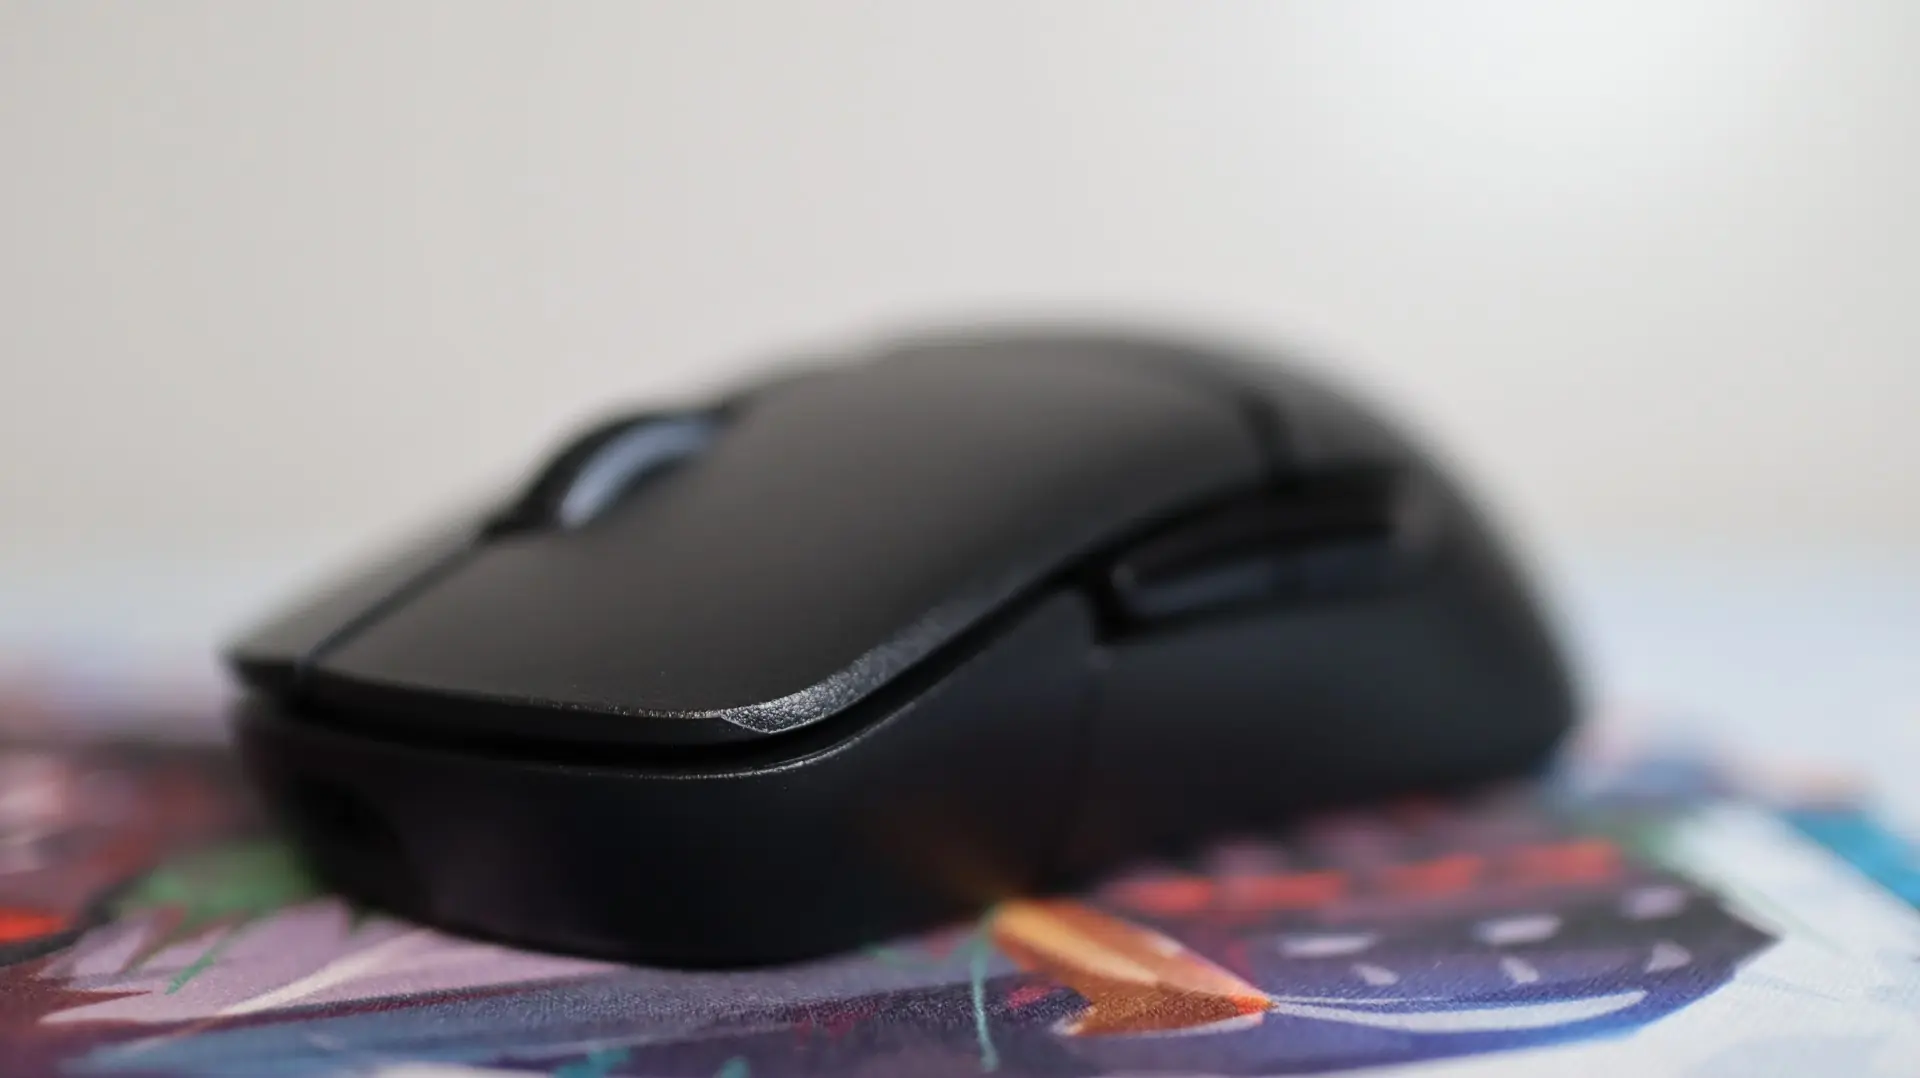
At first glance the Saga Pro looks like your standard right-handed wireless gaming mouse. Now, yes, this is a right-handed mouse by default, but with a bit of Polylactic acid (PLA 3D printer filament), you can turn this thing into a left-handed mouse, or even just a more ambidextrous mouse. But before we jump into customizing the fit and feel of the mouse, let’s take a look at how it comes to us from the factory. Available in an all-black colorway, the Saga Pro is certainly not a flashy mouse. The overall shape of the mouse offers the most comfort for palm-style grips, but claw and fingertip will be able to use this mouse as well.
Both the left and right mouse buttons that come preinstalled on the Saga Pro feature slightly convex surfaces for your fingers to rest on, and just beneath each button are HyperX optical switches. Though we don’t really have much technical information about these switches, they should offer improved accuracy of click registrations due to the lack of debounce that you can experience with traditional switches.
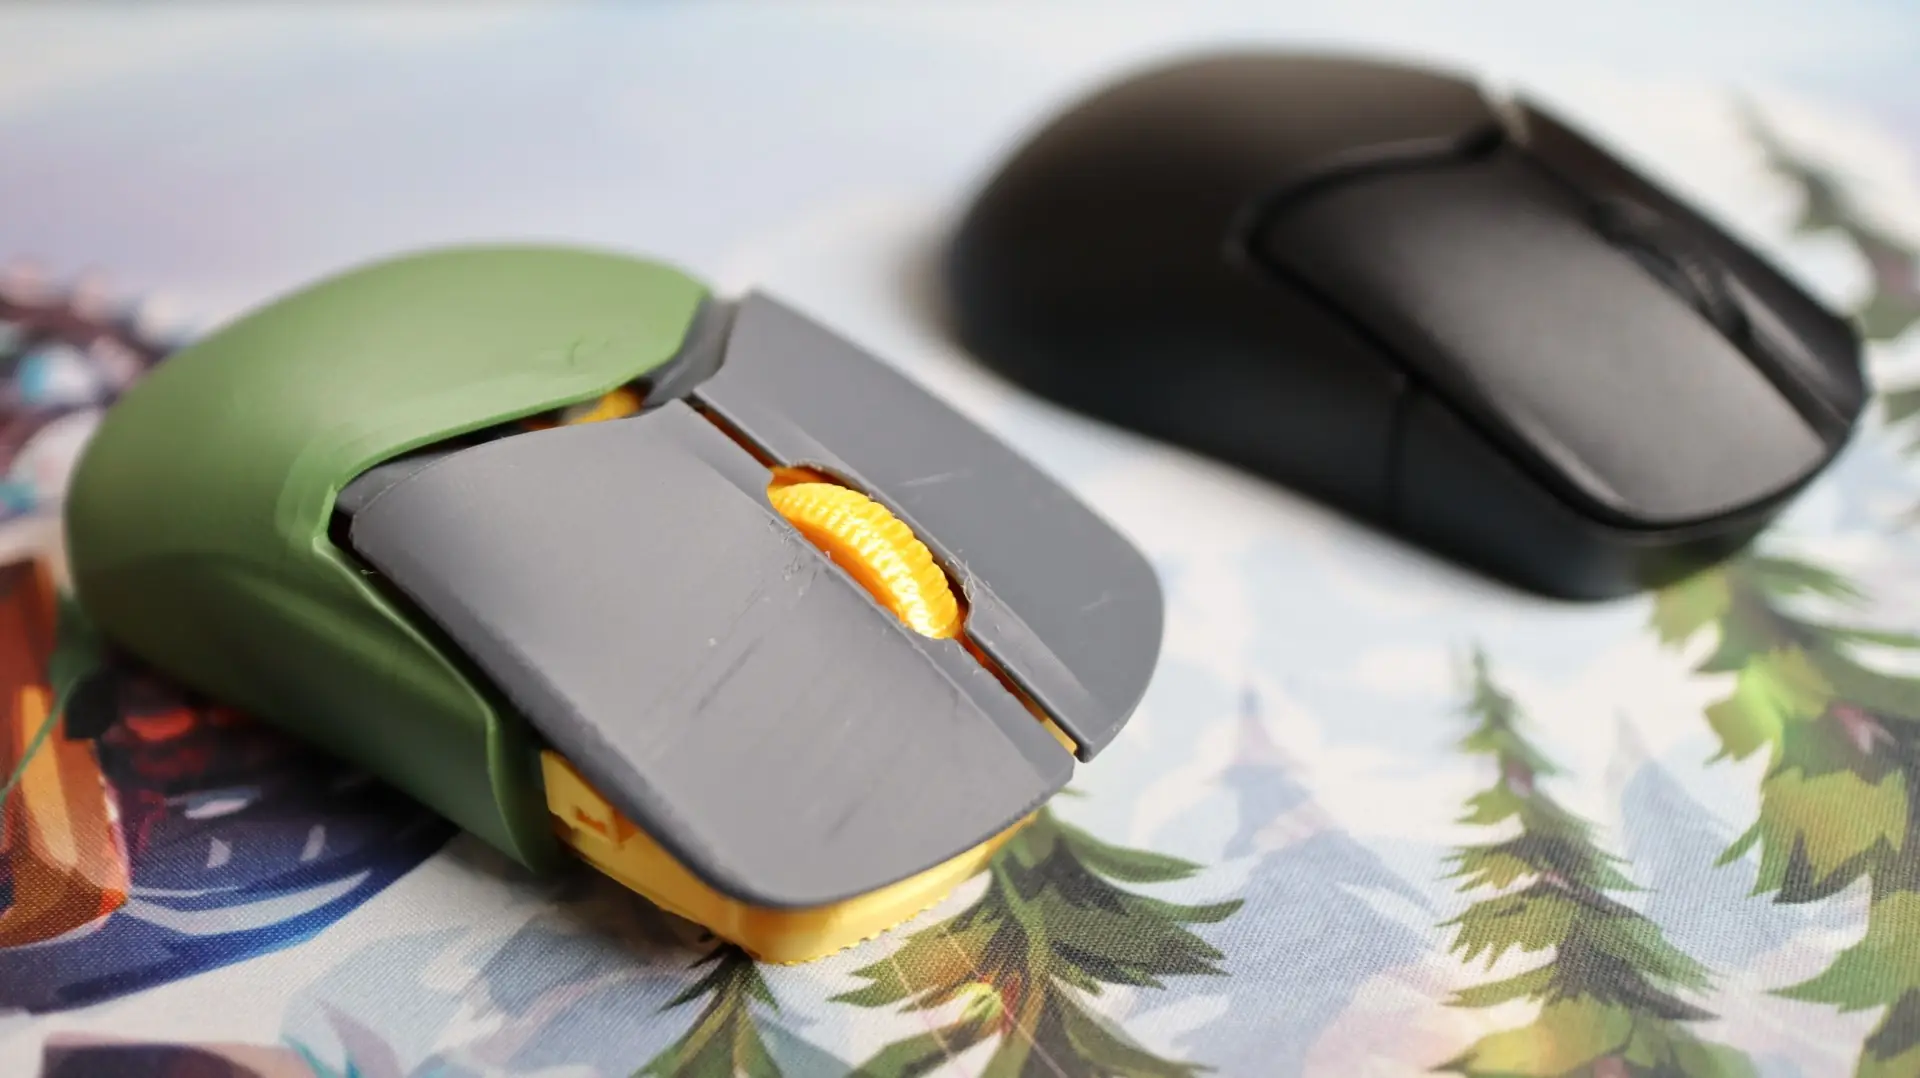
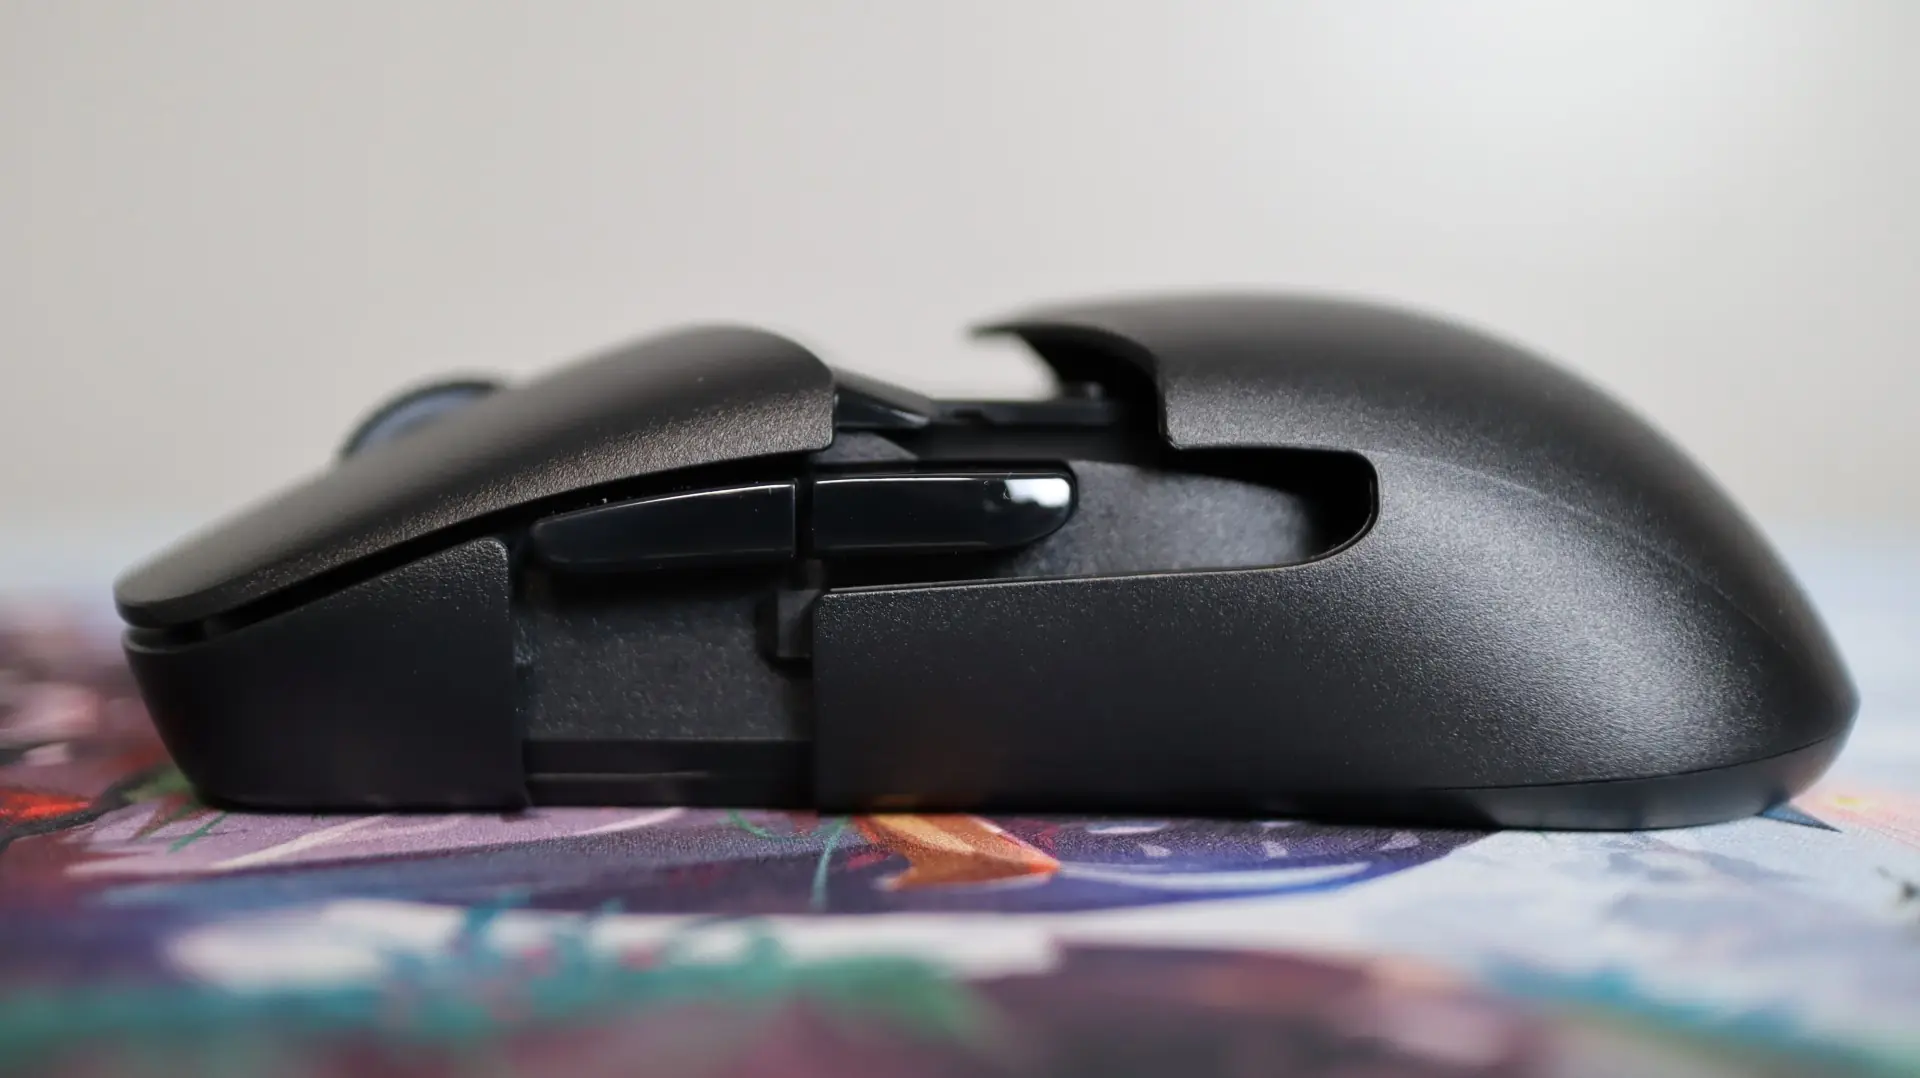
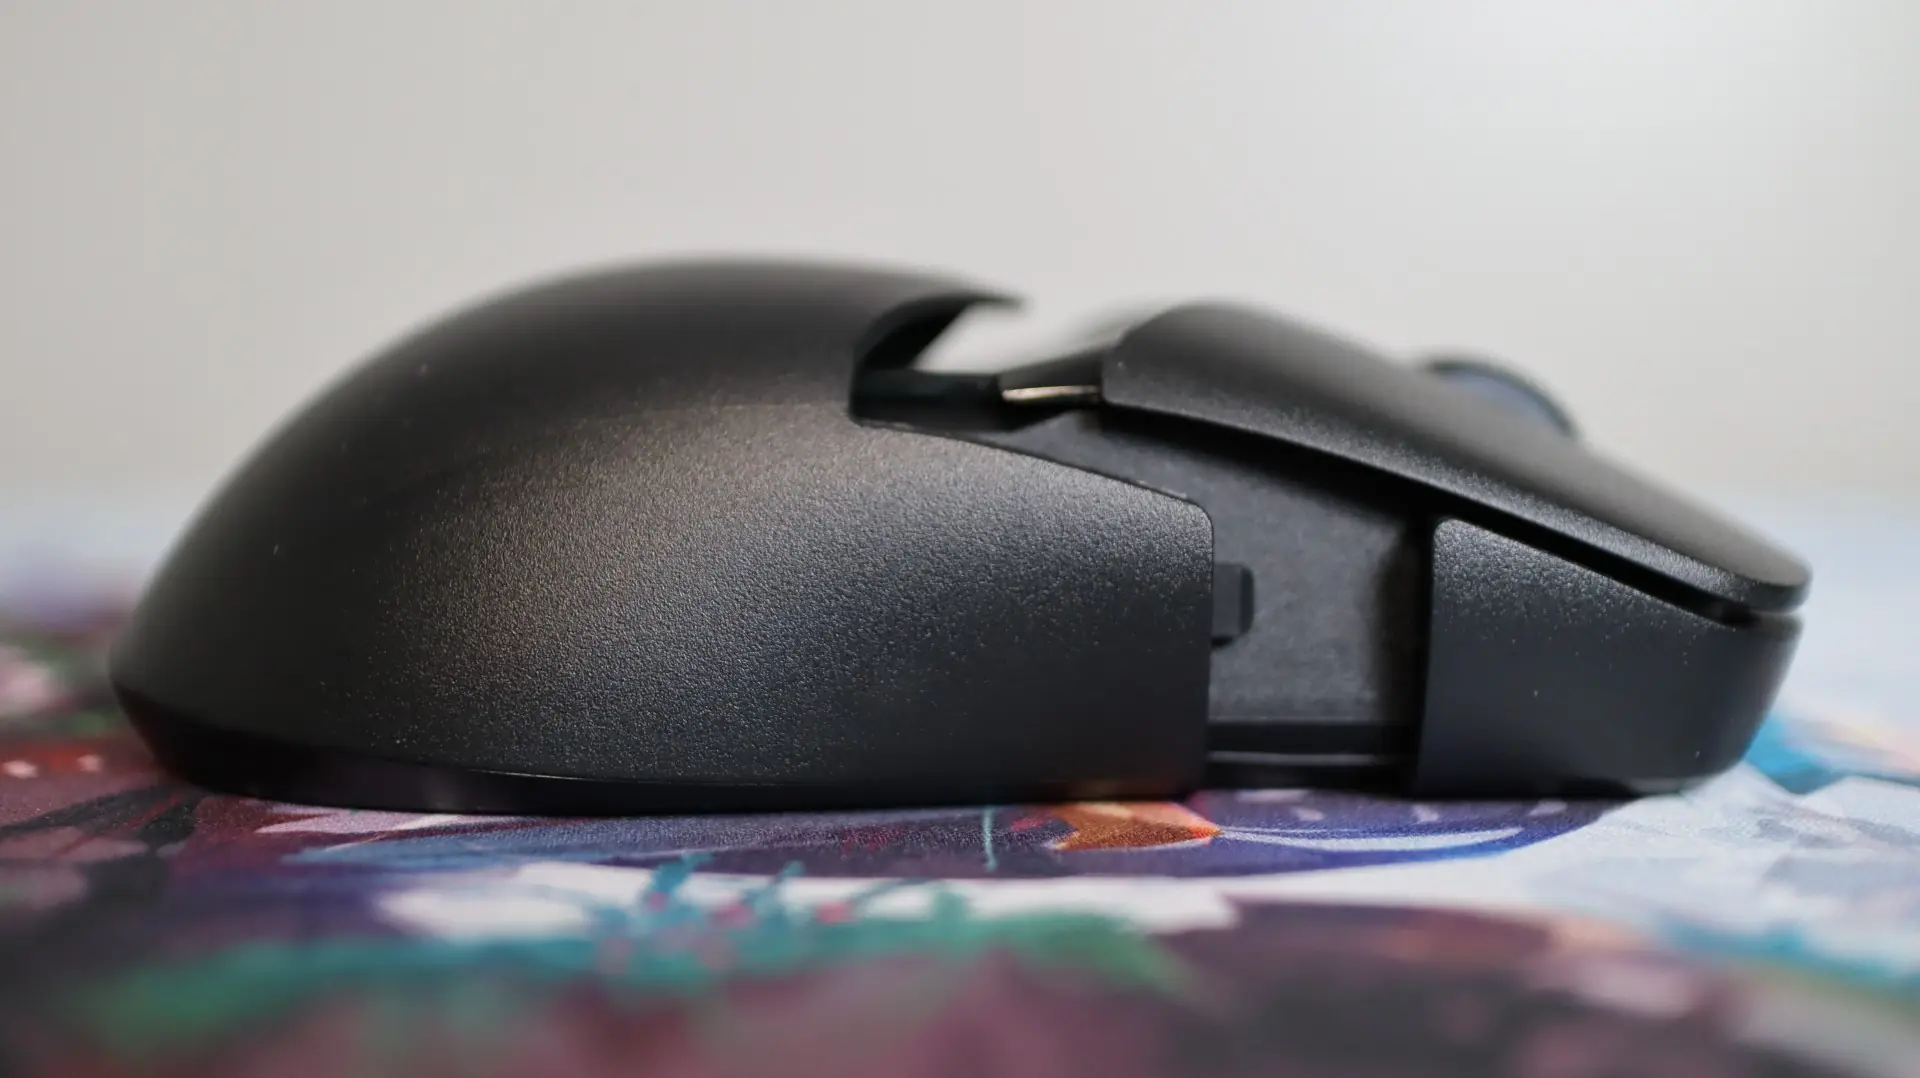
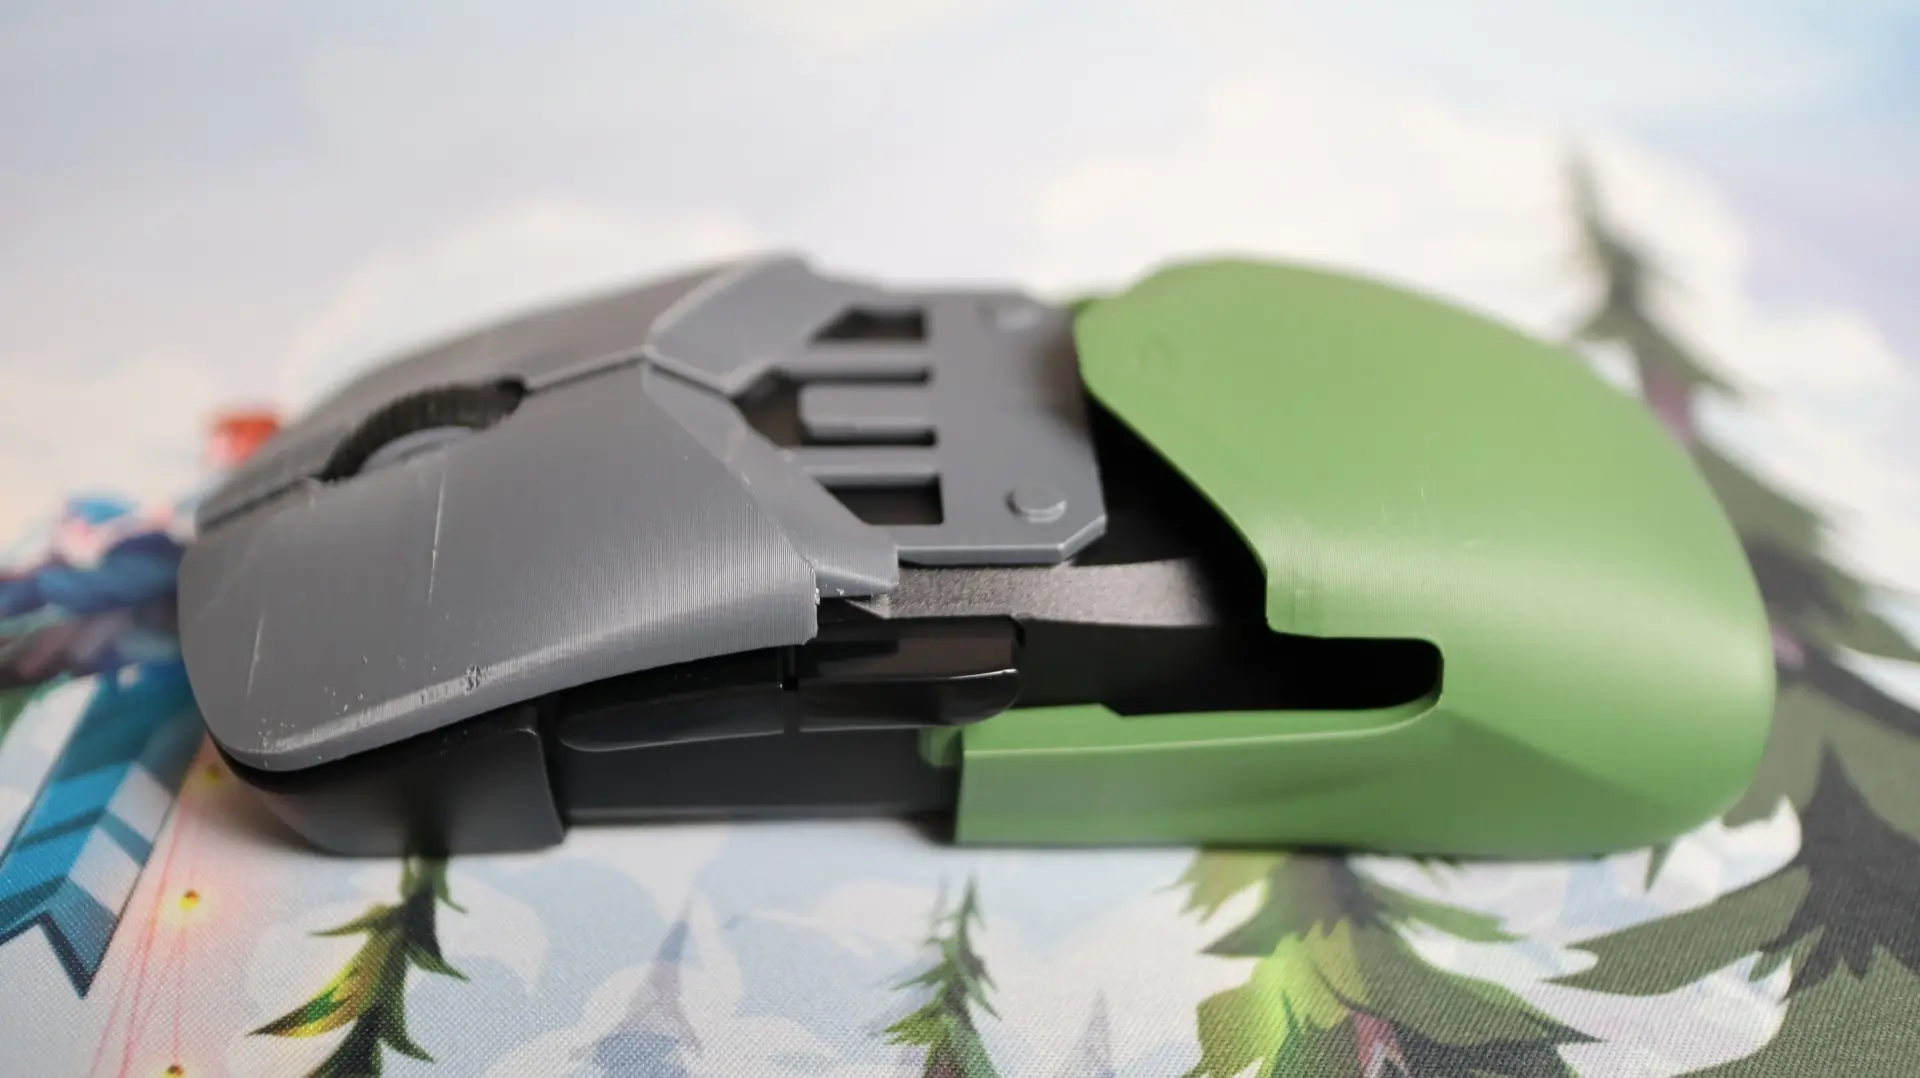
Looking at the left side of the mouse, we see a pretty standard layout, with a plain plastic side and two thumb buttons. What does set the sides of the Saga Pro apart from other Pulsefire mice is the distinct seam just in front of the thumb buttons. This is where the largest portion of the mouse body is split from the front portion, allowing the rear section to slide off and be replaced with either the other included body, or one of your own design.
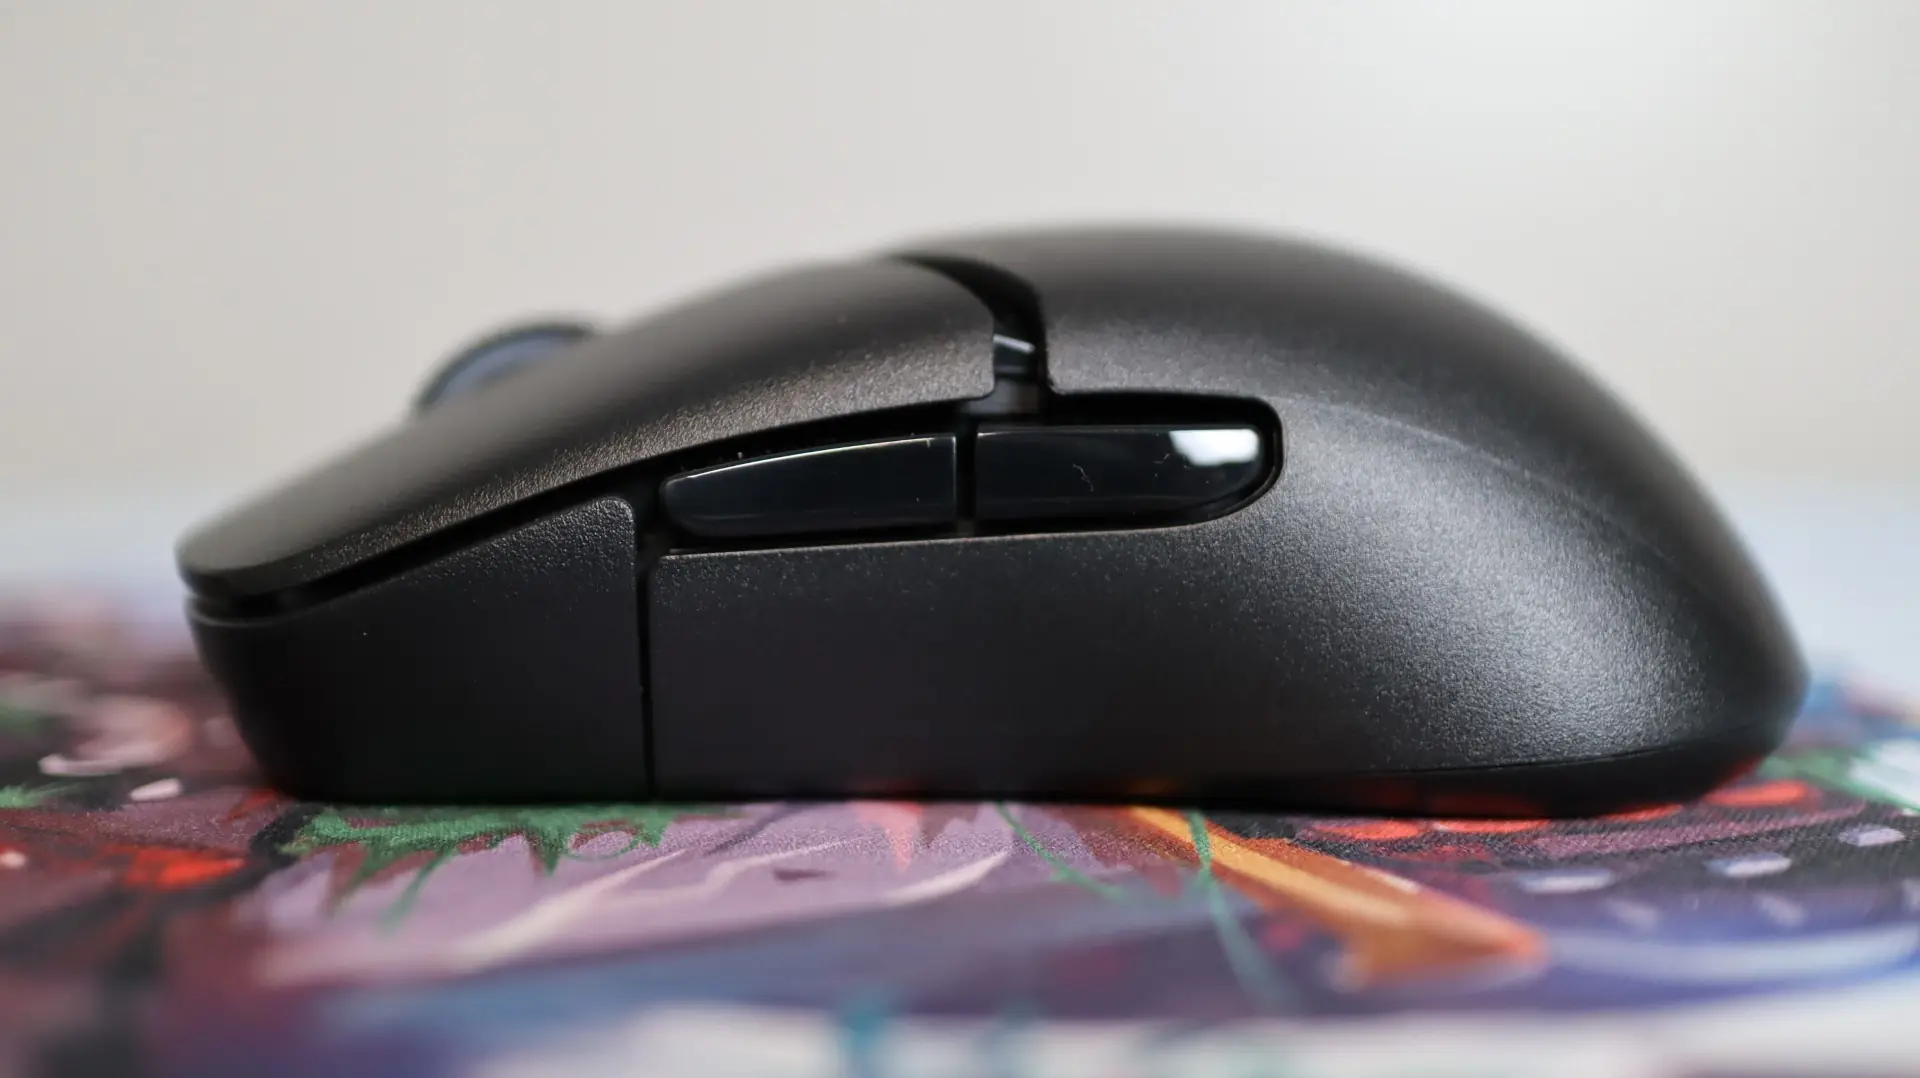
A similar setup is found on the right side of the mouse, though there are no side buttons here. And while you can print a body that would be more comfortable for a left-handed user, the lack of side buttons here will be a bit of a disadvantage. Again we see the distinct seam between the main shell of the mouse and the front section.

From the top down you can see a bit of the curved body design that lends the Saga Pro to being a right-handed mouse. Additionally we find a rubberized mouse wheel, similar to that found on other Pulsefire mice, centered between the left and right mouse buttons. A noticeable gap is present between the back of the left and right mouse buttons and the body of the mouse, but in my testing of the Saga Pro I was never bothered by this larger-than-normal spacing.
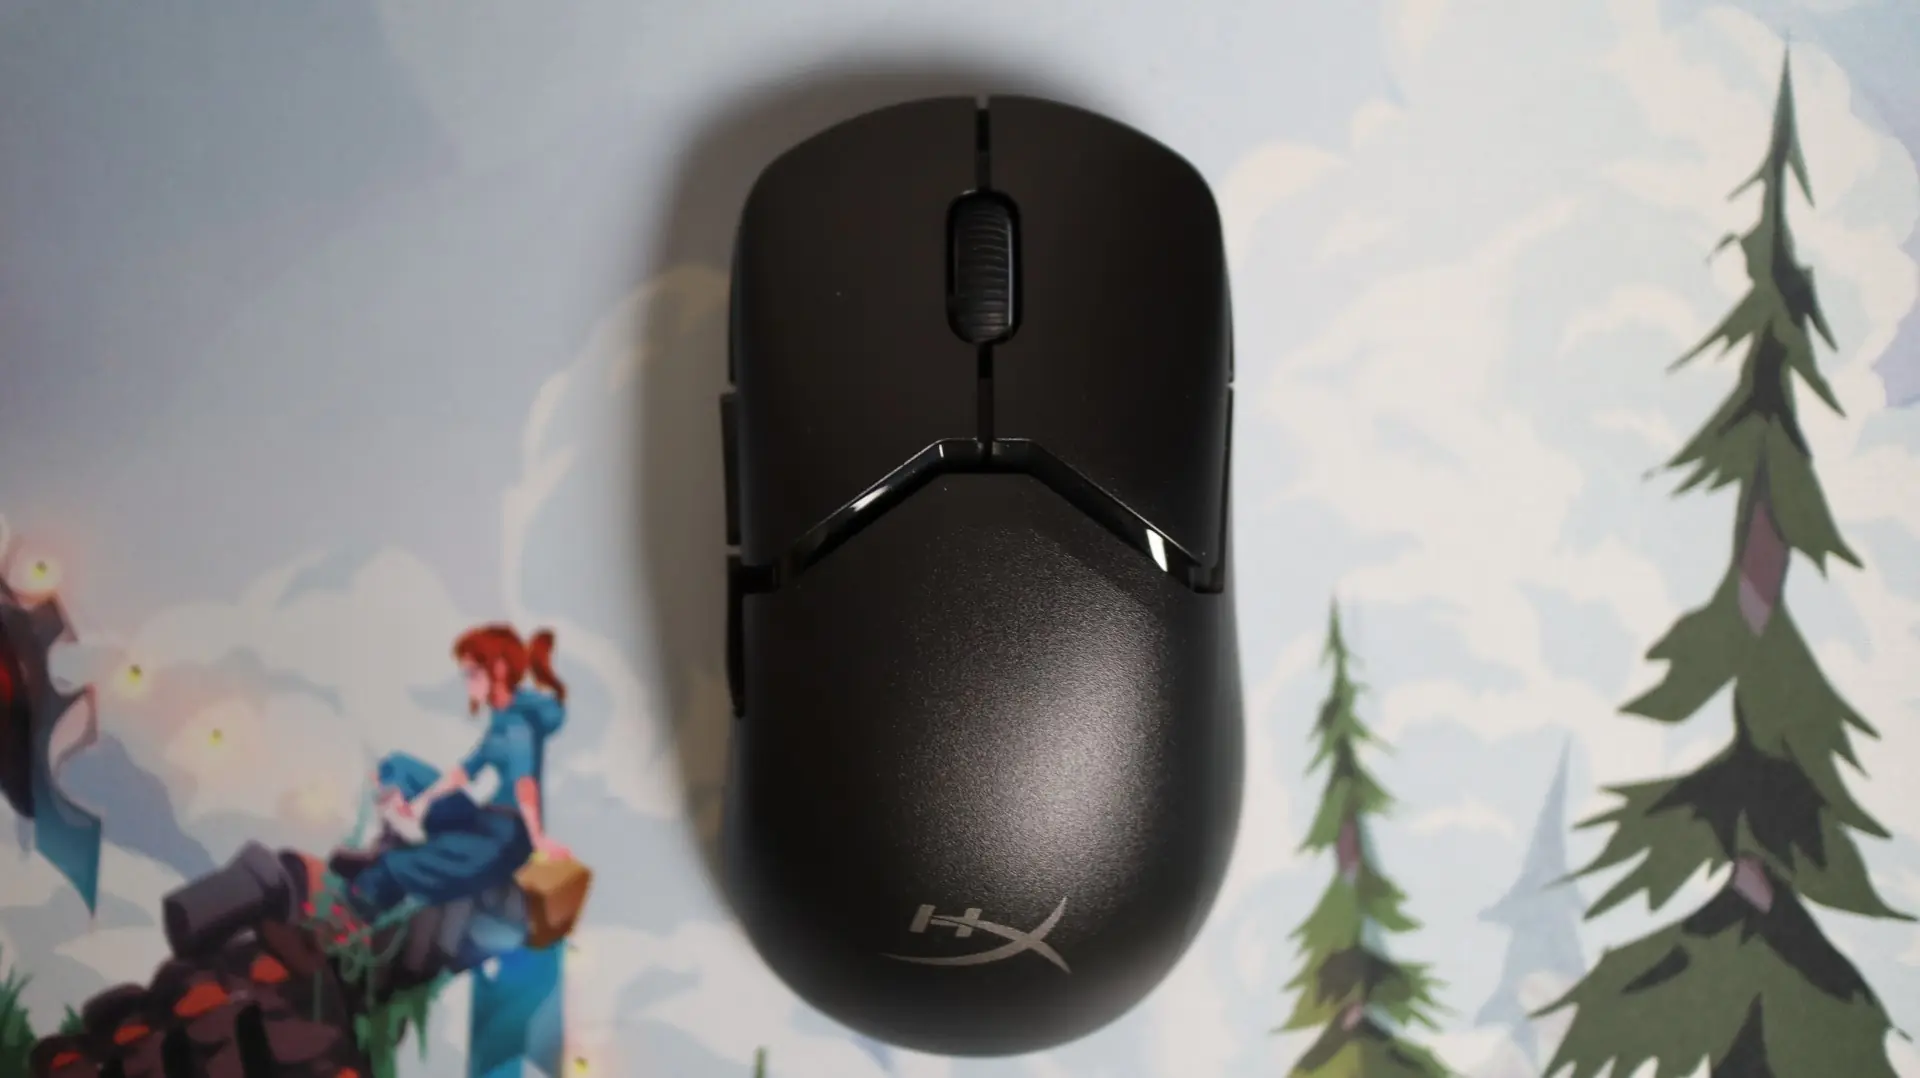
The mouse wheel has a slightly textured pattern to it, and each side is trimmed in a semi-transparent ring, illuminated by the mouse’s only RGB lighting. There is no DPI button found on the top of the Saga Pro – that function has been moved to the bottom side of the mouse.
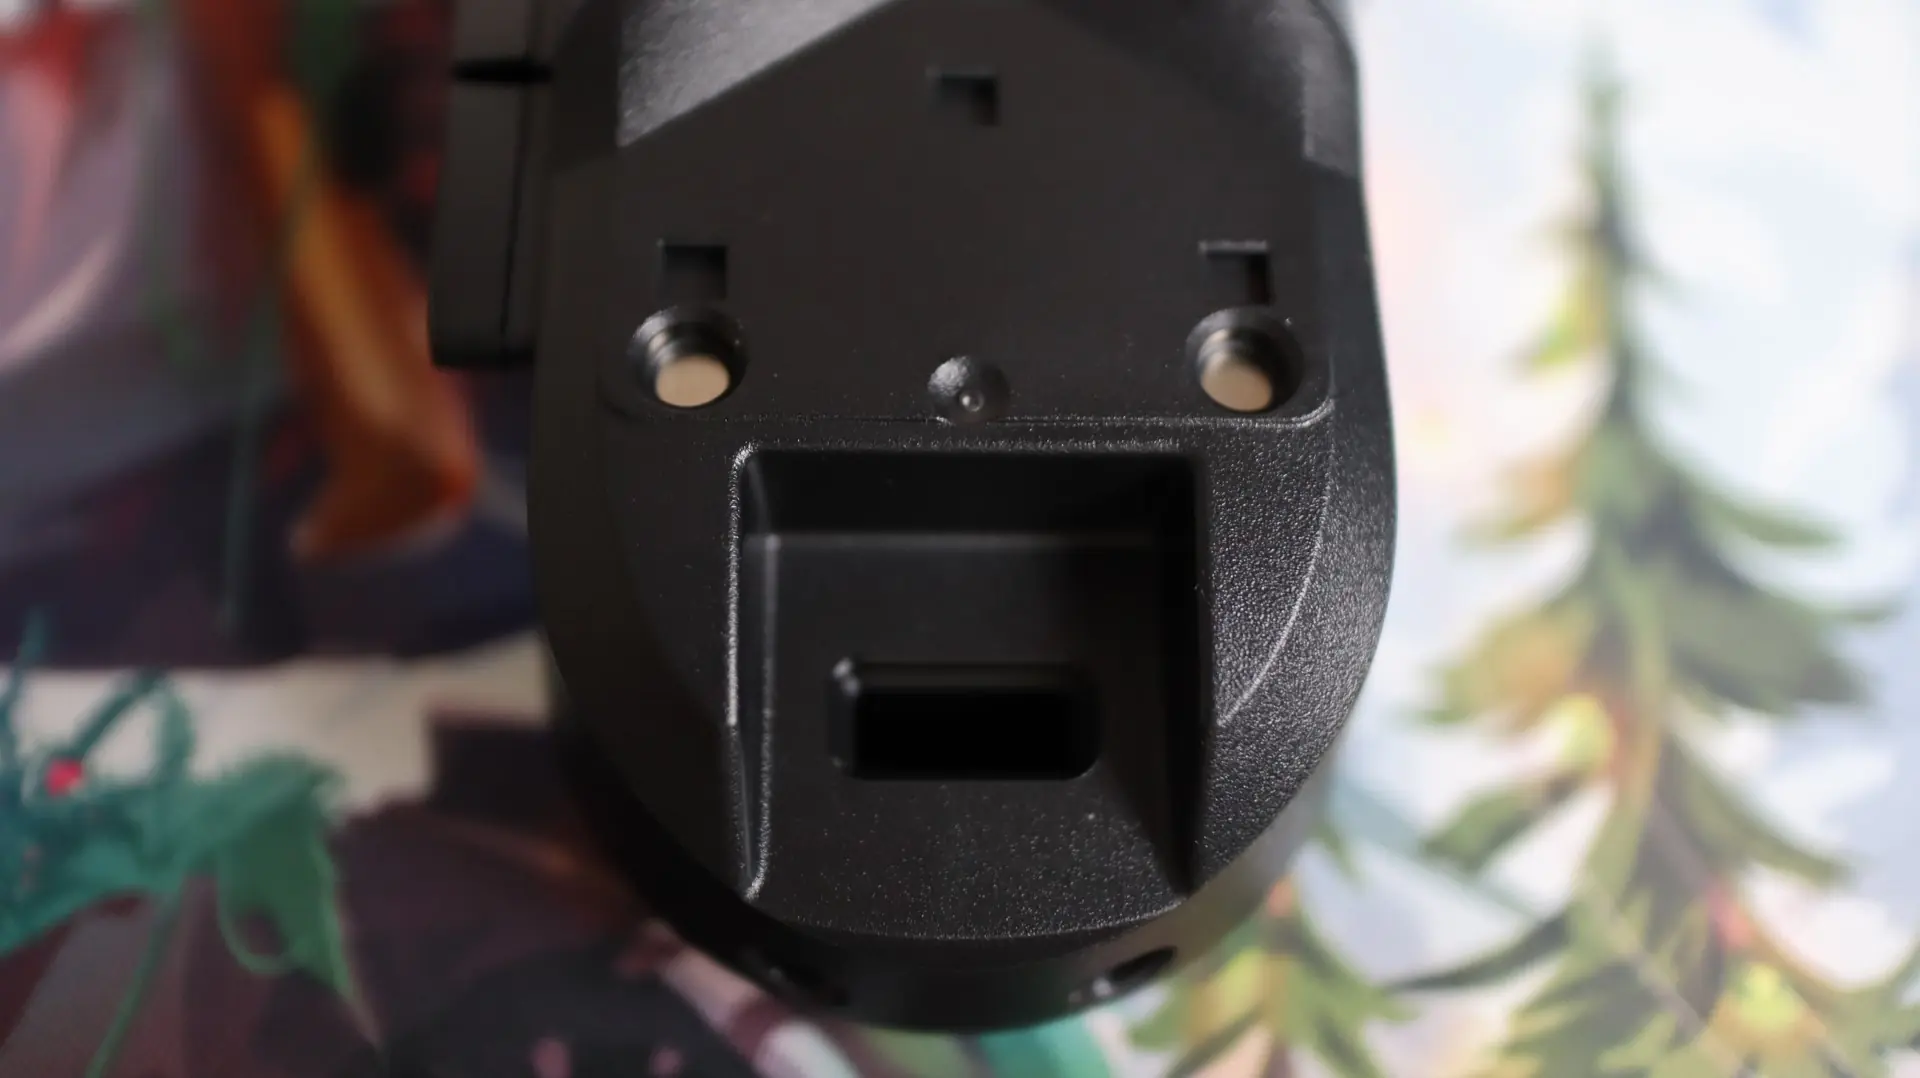
Speaking of the bottom side, with the Saga Pro flipped over, we can see tow large PTFE pads at the front and rear of the mouse, as well as an oval-shaped center pad surrounding the 26K DPI HyperX sensor (most likely a rebranded PixArt 3395), and a few circular pads attached to the removable body shell. Also found on the bottom is the three-way switch to select between Bluetooth, USB, or 2.4GHz wireless operation, as well as the aforementioned DPI button.

There is also a nice nook under the body shell to tuck the 2.4GHz USB dongle into for safe keeping while transporting the mouse.
At the front of the mouse we find a USB Type-C connection which allows for the included lightweight HyperFlex 2 USB cable to connect to the Saga Pro for charging and wired use. The HyperFlex 2 cabling found on the Pulsefire Saga Pro is just like the cable found on other models in the Pulsefire lineup, and the HyperFlex 2 cable is so light weight and flexible that it almost feels like you are using a wireless mouse when it is plugged in. One of my biggest pet peeves is having my mouse cord snagging or bumping into an object on my desk, and having that interfere with my gaming. This cable takes away all of that trouble during those times when you are using the mouse with the cable because you forgot to charge it.

Now, before we go into any testing and use of the mouse, we have to cover the included optional body and button components, as well as the ability to 3D print your own designs. As previously mentioned, HyperX includes an additional body shell, button cover, and pair of forward and back thumb buttons with the Saga Pro. The most noticeable difference in these items compared to what comes on the Saga Pro is that the left and right mouse buttons feature concave surfaces as opposed to convex surfaces. This is my personal preference, and I was glad to see that both options were included with the Saga Pro. Additionally, the secondary body shell gives another option for palm comfort, and the slightly different profile of the extra thumb buttons allows you to mix and match parts to fit your comfort needs.
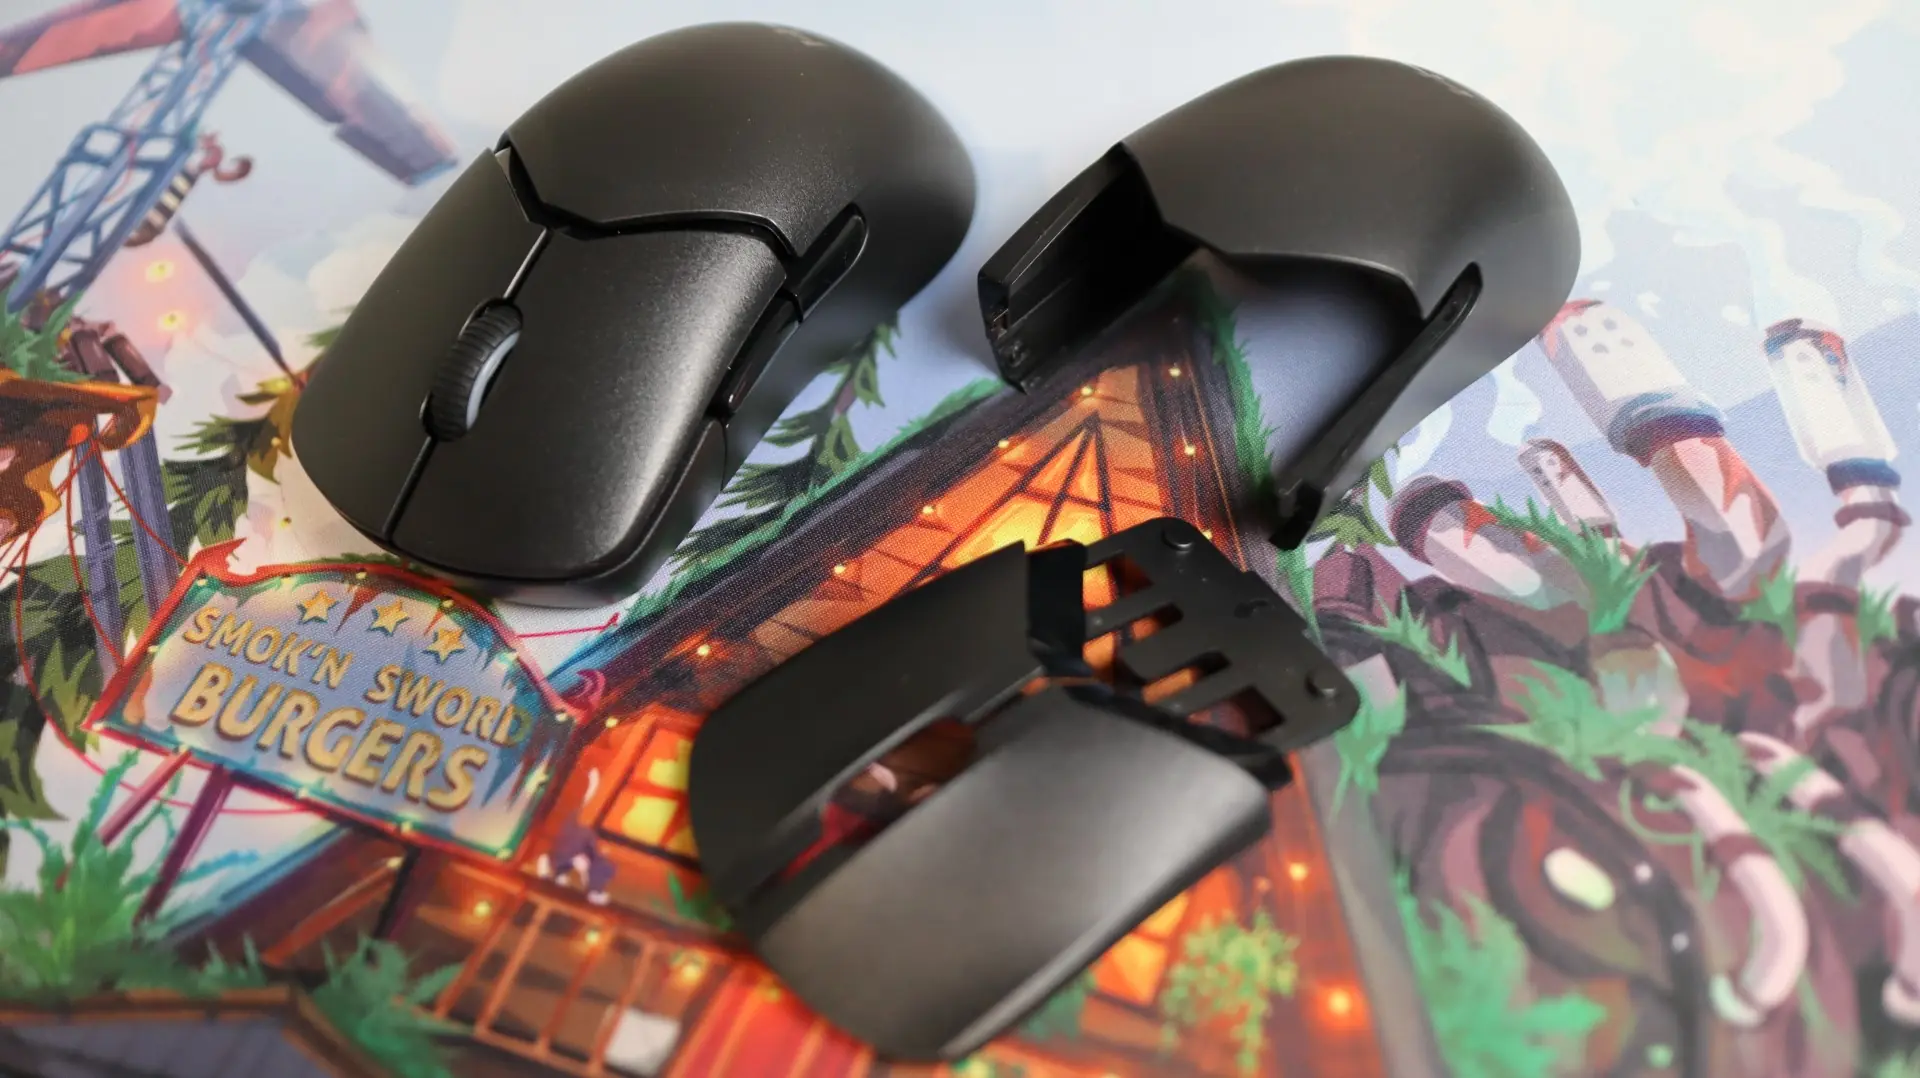
HyperX has made swapping out these components really easy too. The body components simply slide off the back of the mouse with a bit of a pull, and the magnets used to hold the body shell in place are just the right amount to do their job, but not impede removal of this shell. The same can be said for the magnets used for the mouse button covers. With the body shell off of the mouse body, you can easily lift up on the button cover to swap it out. The same is true of the thumb buttons.
Now, when it comes to customizing the Saga Pro even further, HyperX has provided over 30 official files that can be downloaded from Printables. If you aren’t familiar with the 3D printing, Prusa is one of the most well-known manufacturers of 3D printers and designs, and Printables is their online community where you can find countless files just waiting to be printed. In addition to practical files that can be printed and used right away, HyperX also provides reference pieces so that you can do some designing and fitting of your own if you don’t have a Saga or Saga Pro mouse. They even have information about how to modify the provided files so that you can go to town with your imagination and come up with your own unique design. Unfortunately, I’m not that well versed in 3D design software just yet, but I was able to find a few files to print, and have been using one of the body shells with the Saga Pro ever since I put it on the mouse.
There are a ton of files directly from HyperX on Printables, but the site also featured the Saga in one of their recent contests, and there are many additional files that can be found there to turn your mouse into a beetle, give it a more ergonomic shape, or even turn it into a Back to the Future-style Delorean. You can check out the contest designs here – Shape Your Saga: HyperX Mouse (Finished)