Installation
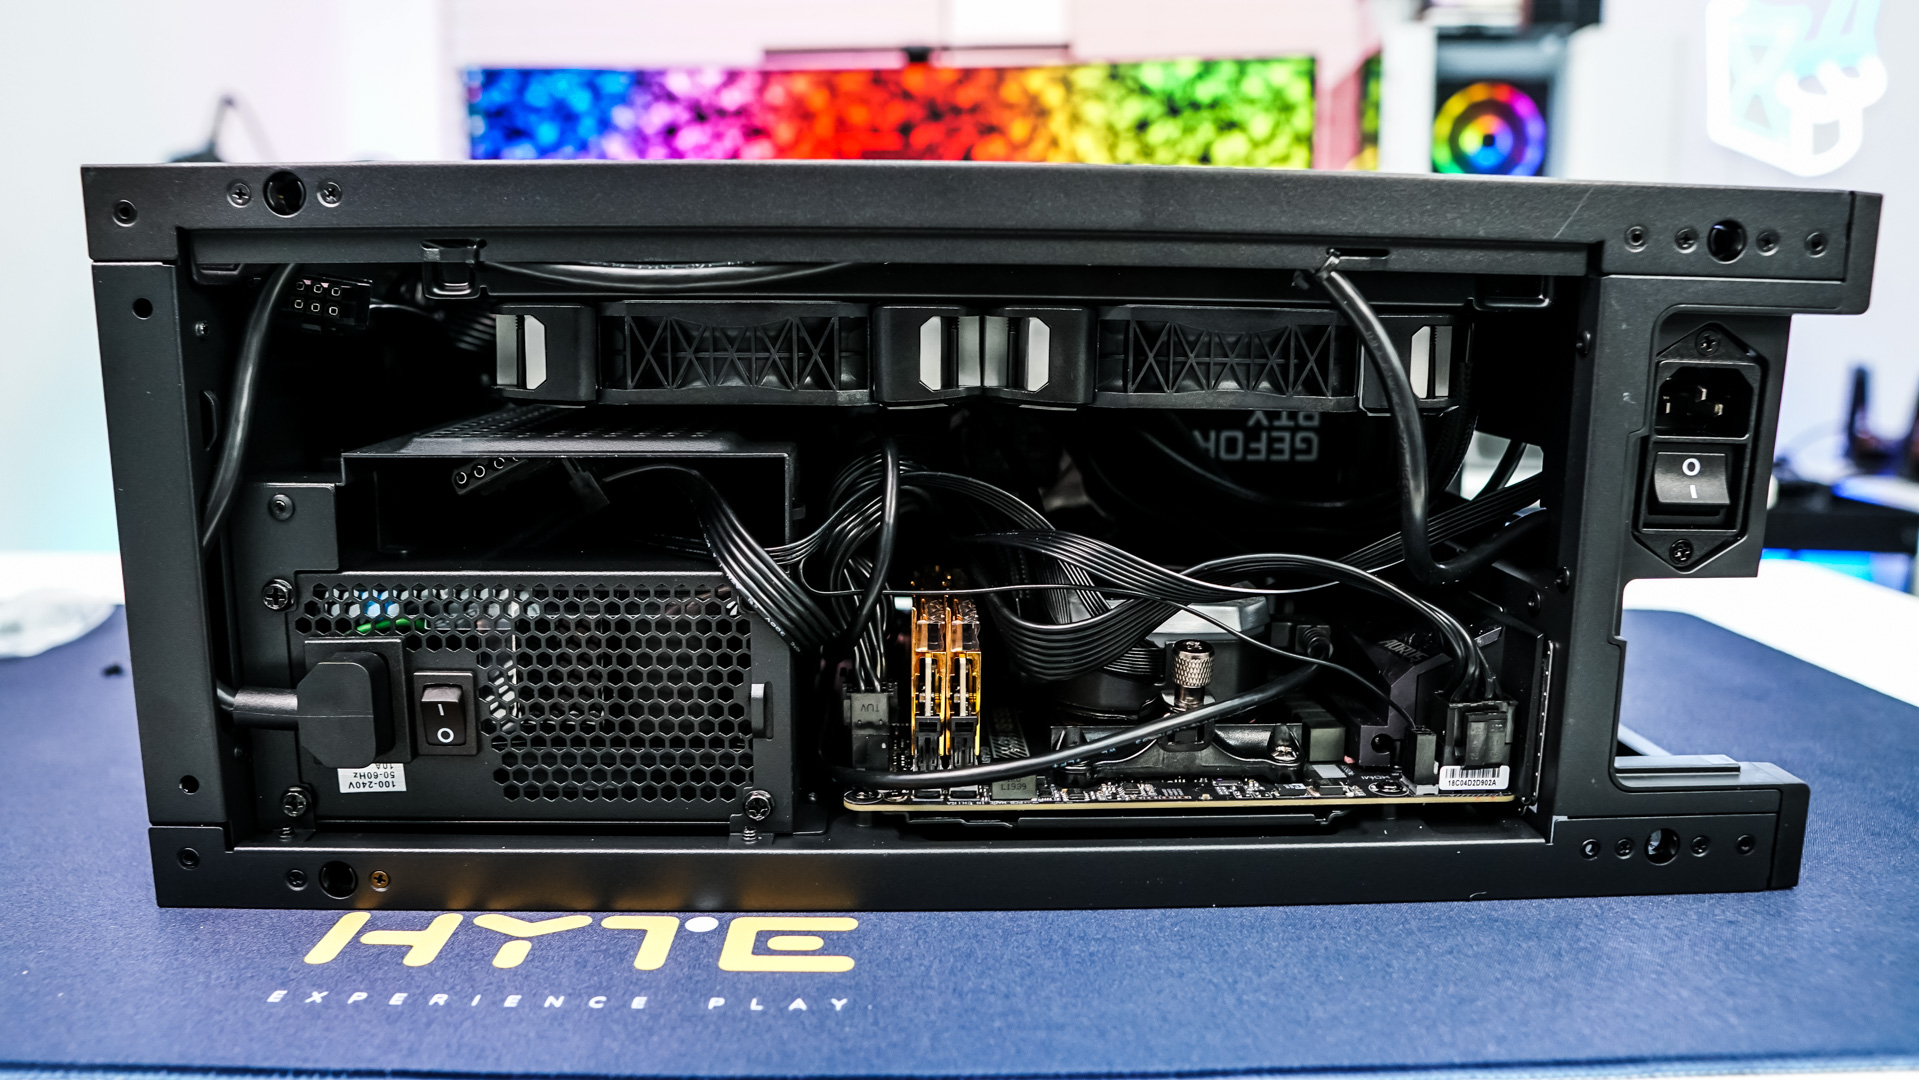
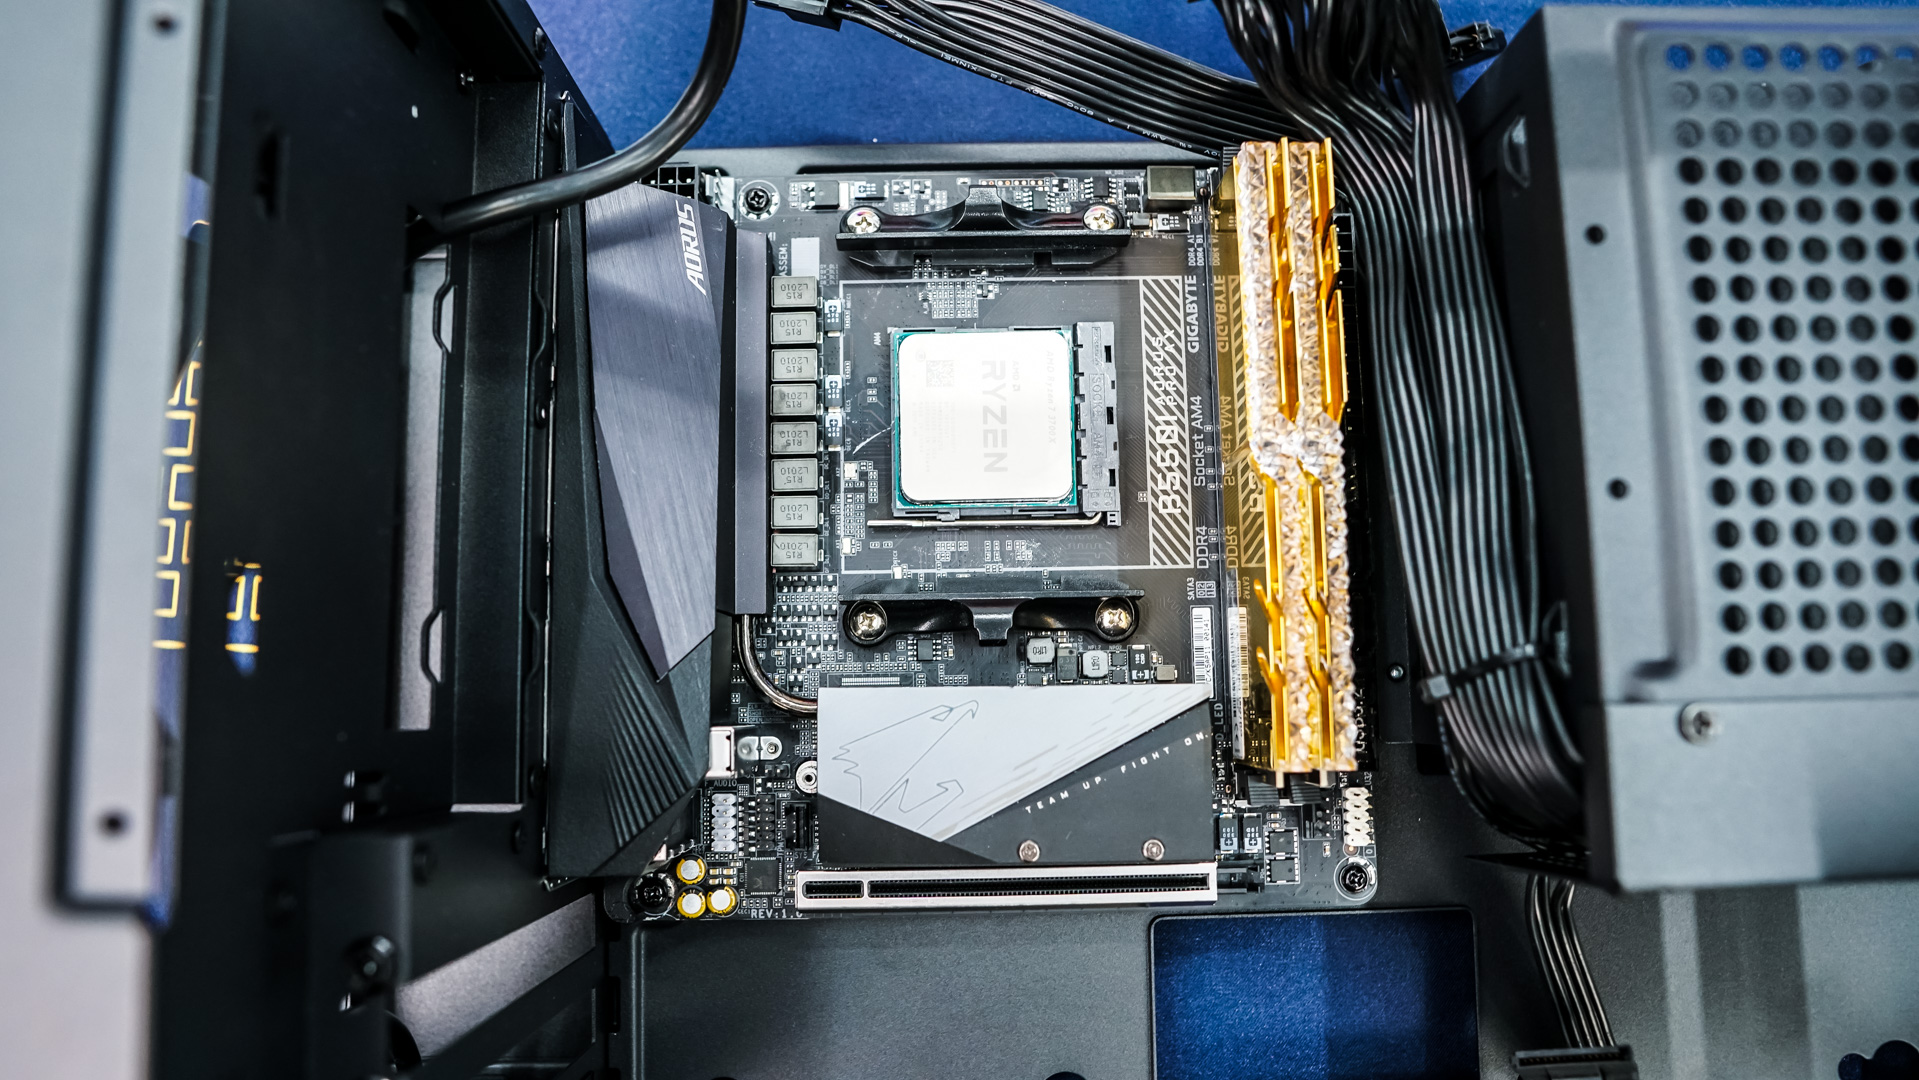
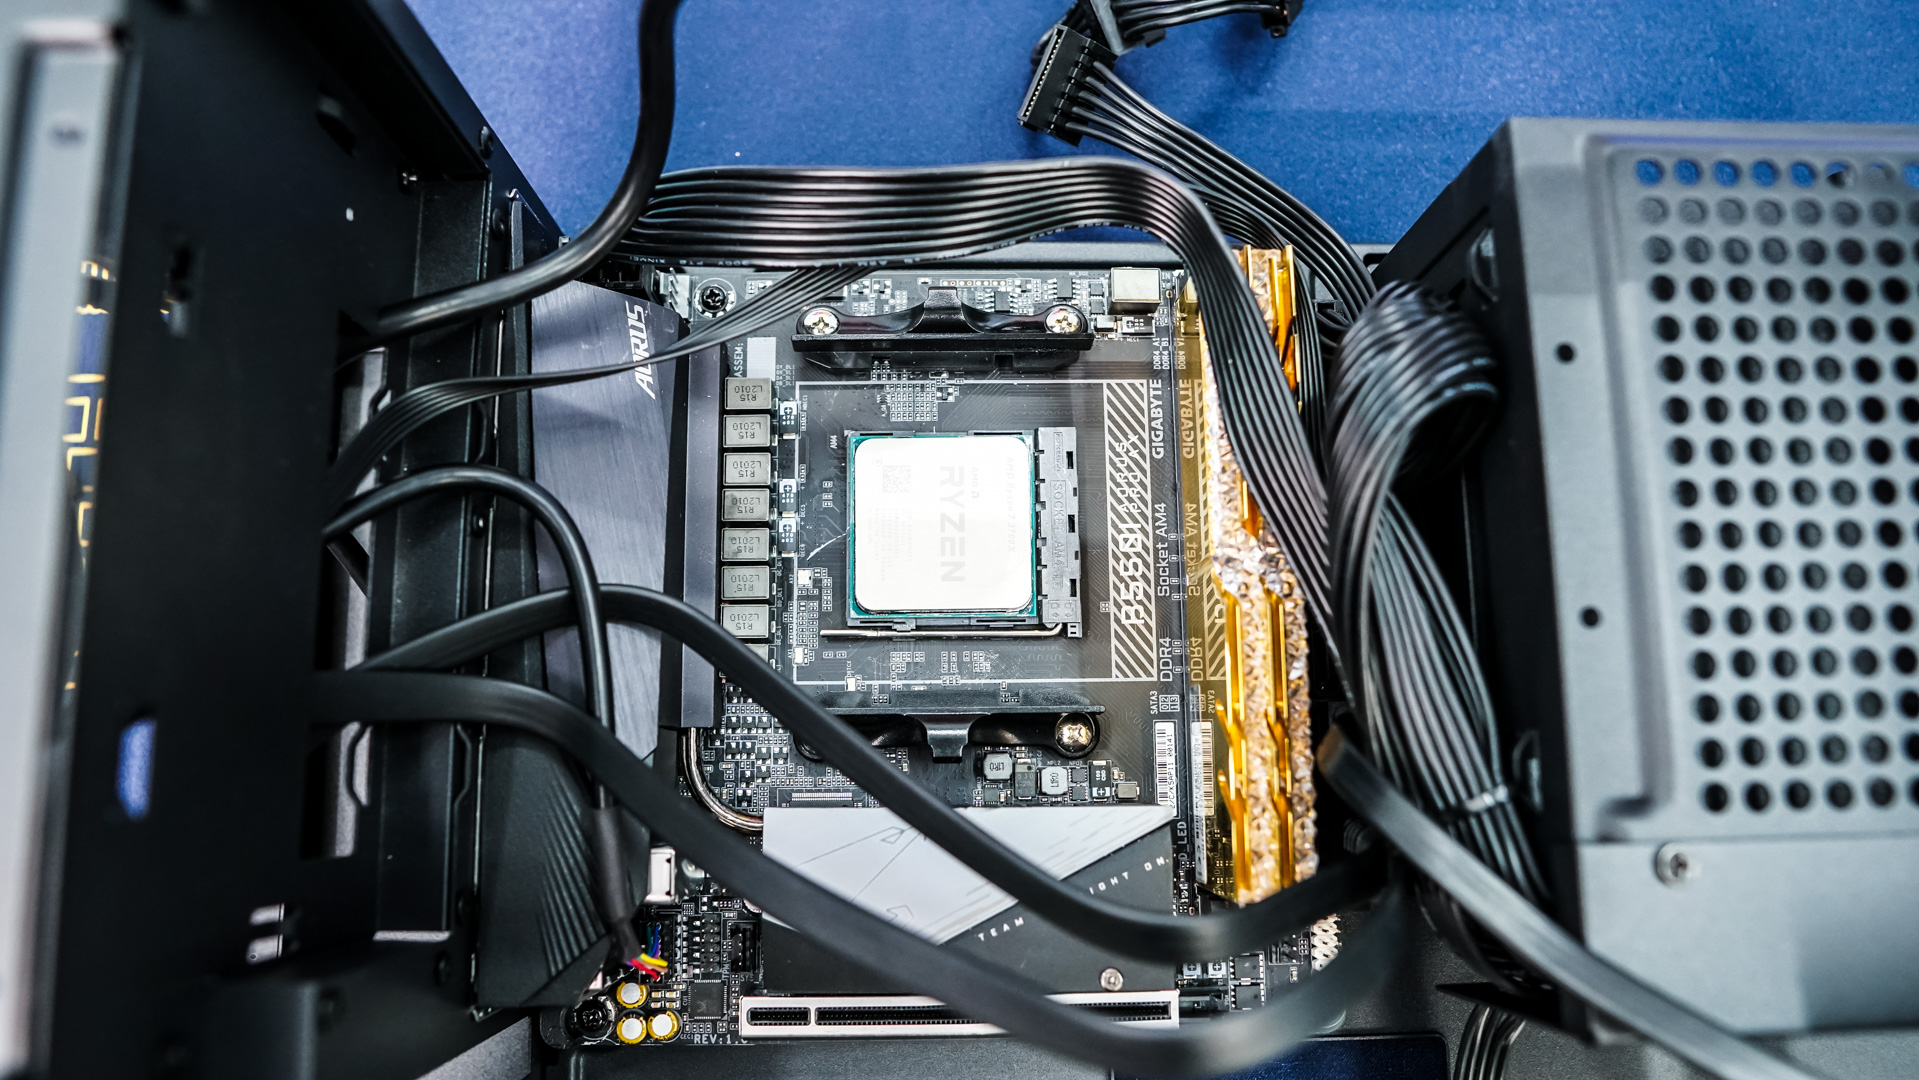
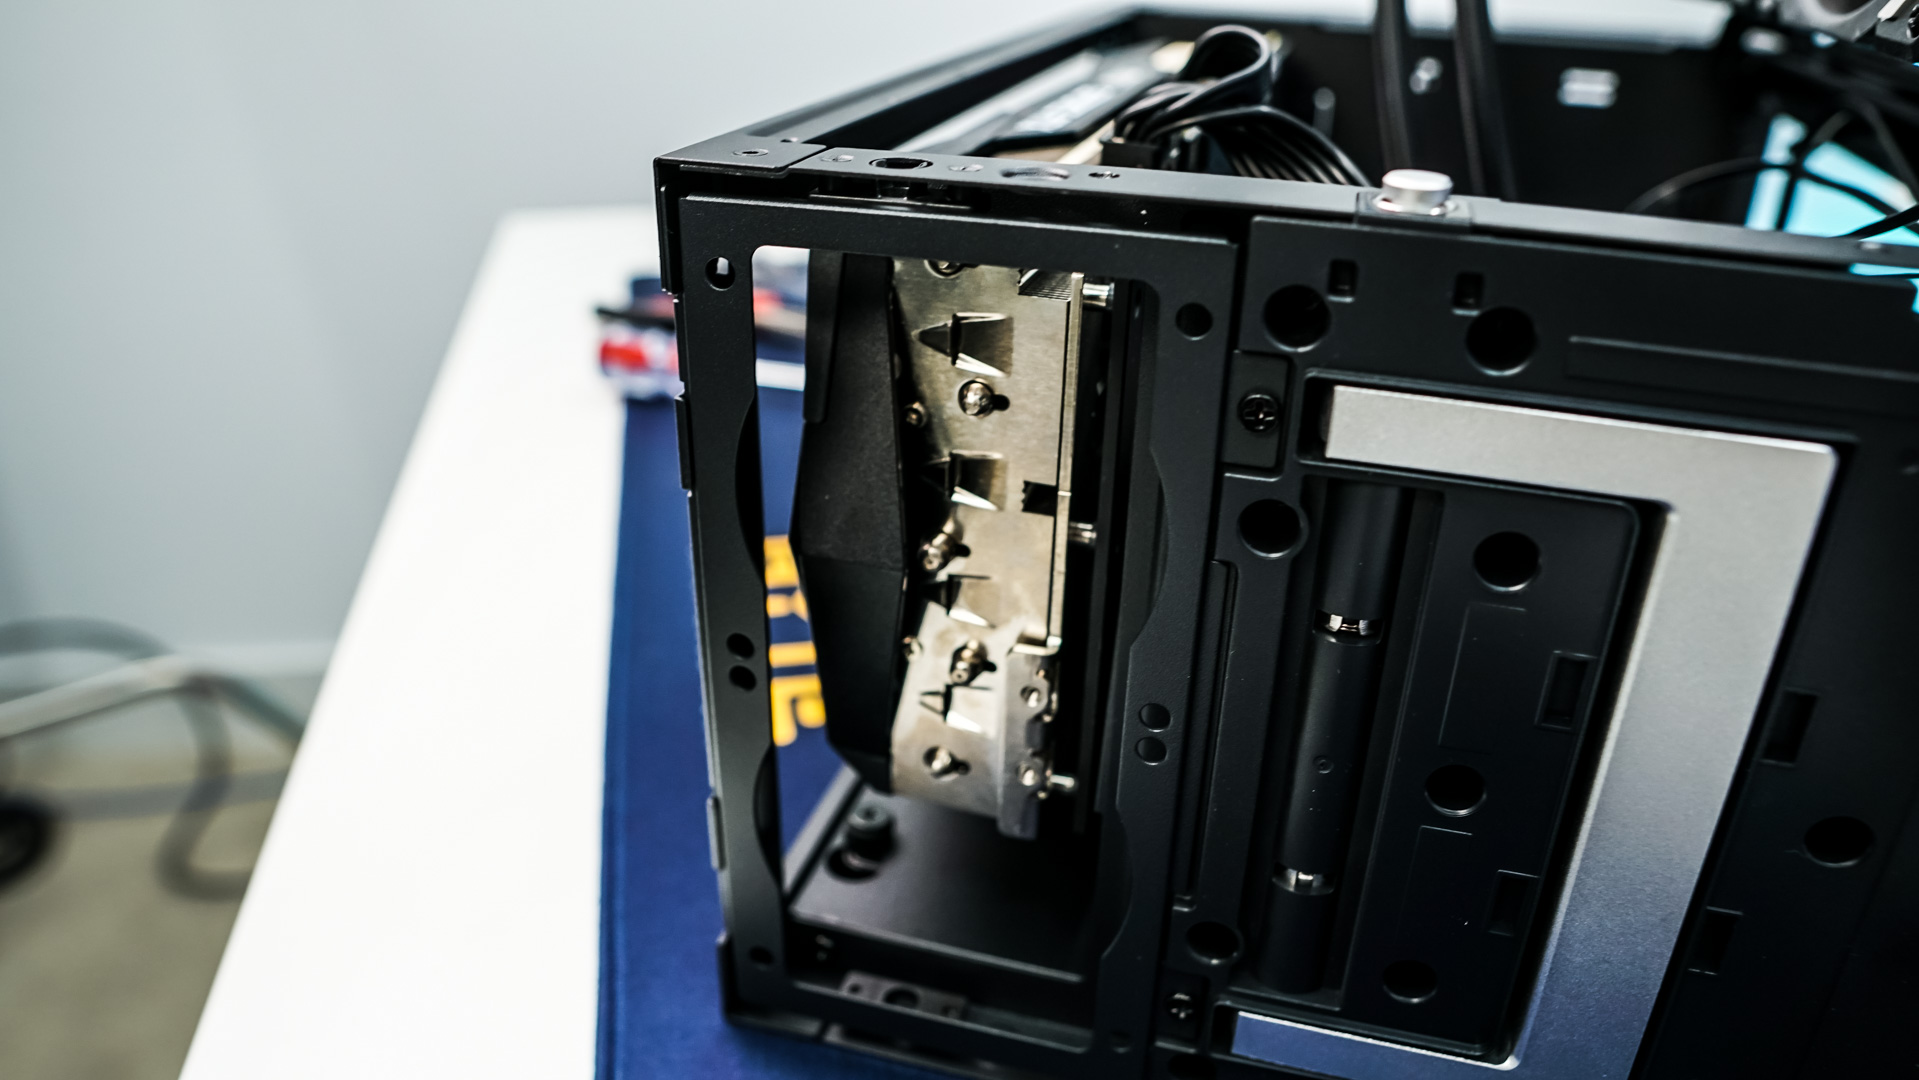
To start off installation you are going to want to make sure you have all of the panels off the case, it will just make things easier. The first thing you are going to want to do is install your motherboard. Our mini-ITX motherboard went in to problem and with the panels removed there is more than enough room to get to the screw holes and connections. Be sure to connect your 24-pin ATX and 8-pin EPS connectors. I did notice that the 8-pin cables was just long enough to connect, it would have been nice if it was slightly longer so we didn’t have to fenagle it so much.
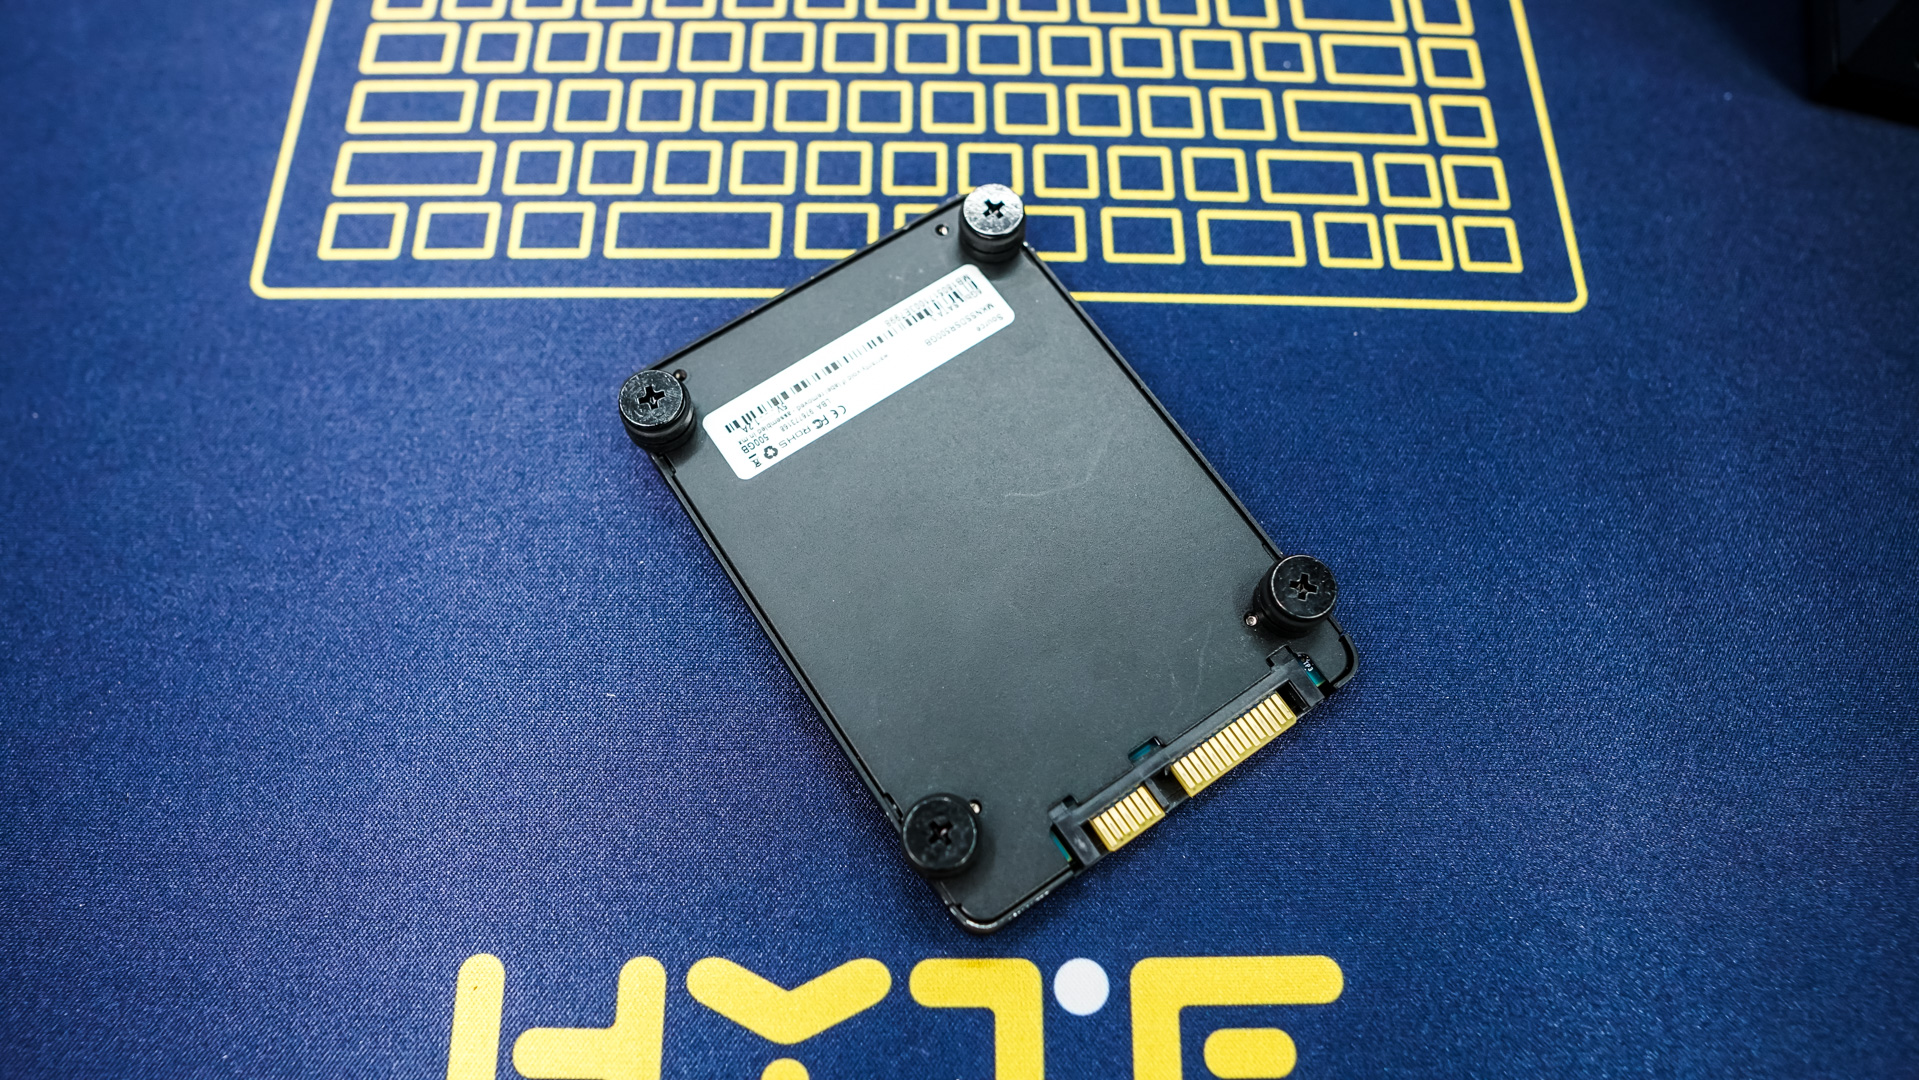
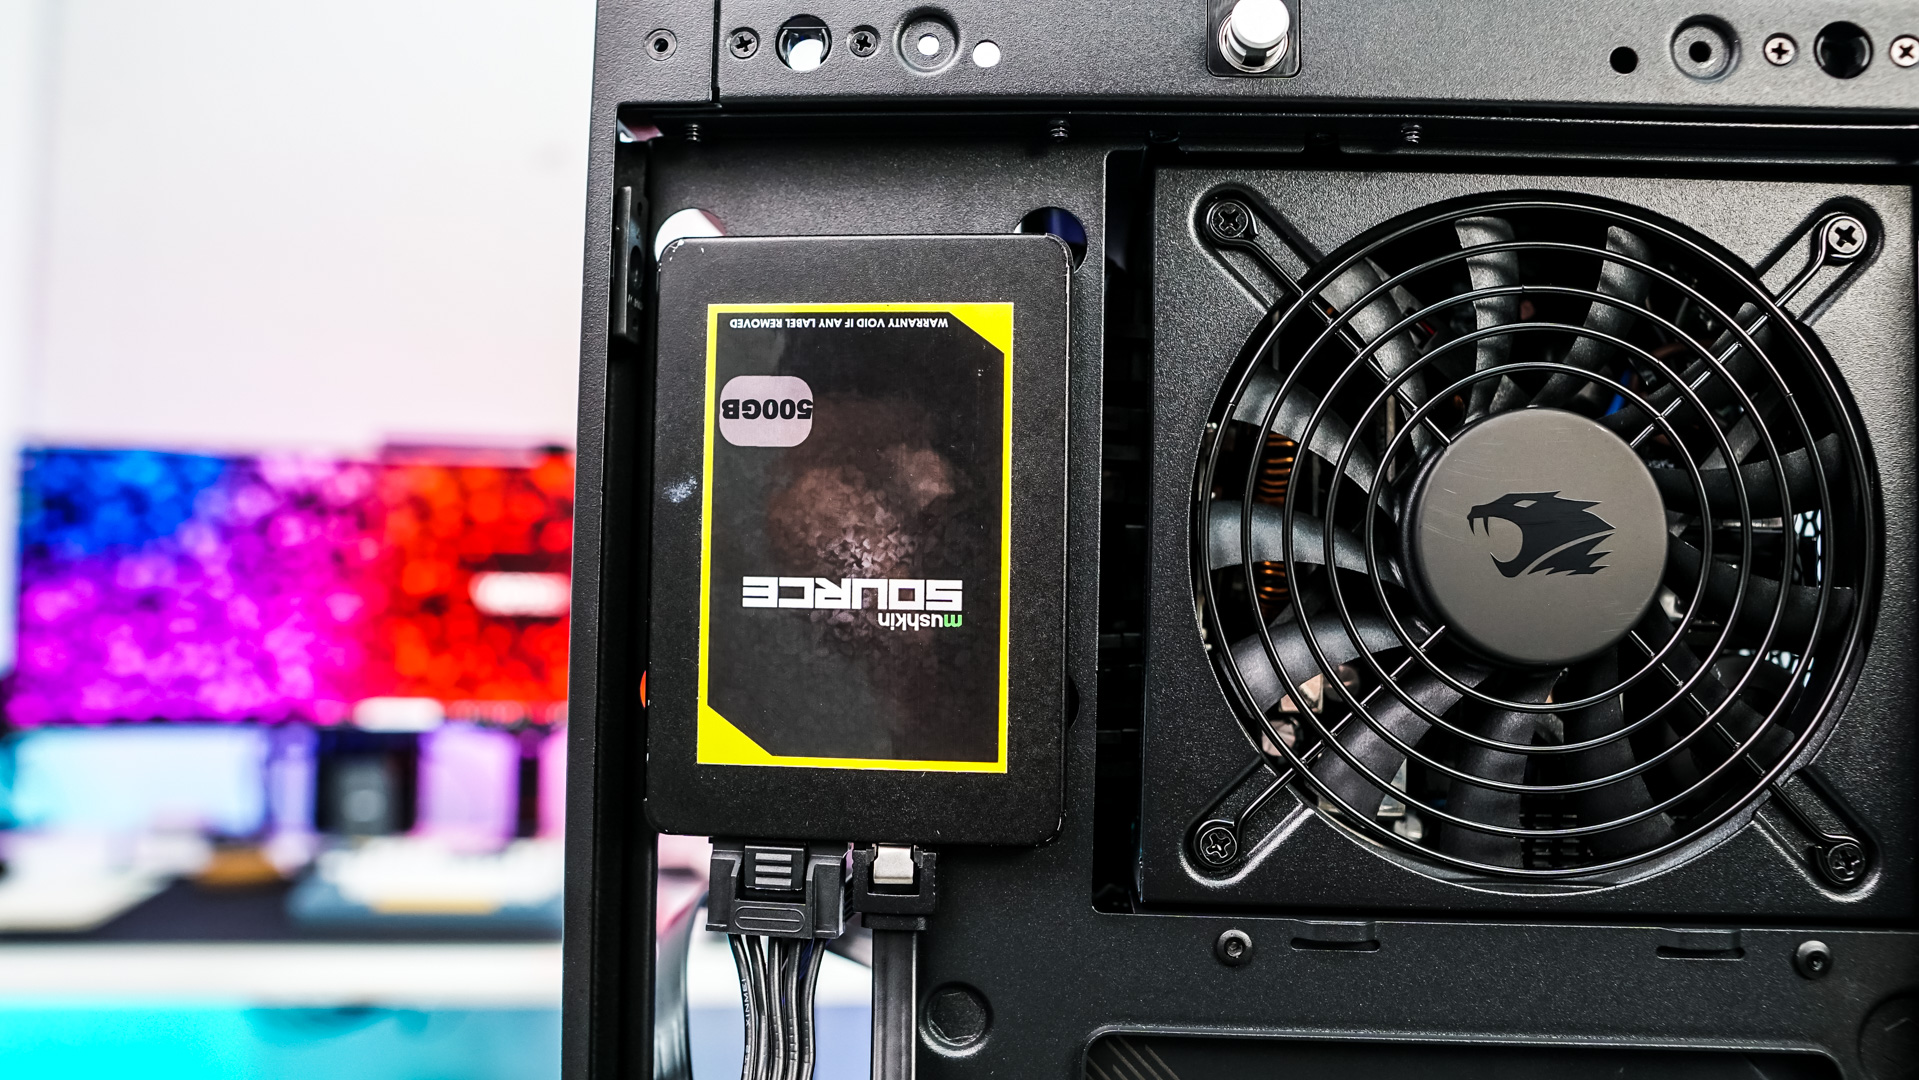
The next thing is our 2.5-inch hard drive. To get it installed you install the screws with the rubber standoffs on the back and then simply slide it into place on one of the internal panels. Remember there are two 2.5-inch placements so you can install 3 hard drives (2x 2.5, 1x 3.5) in the case out of the box and that does not even include M.2 slots on your motherboard.
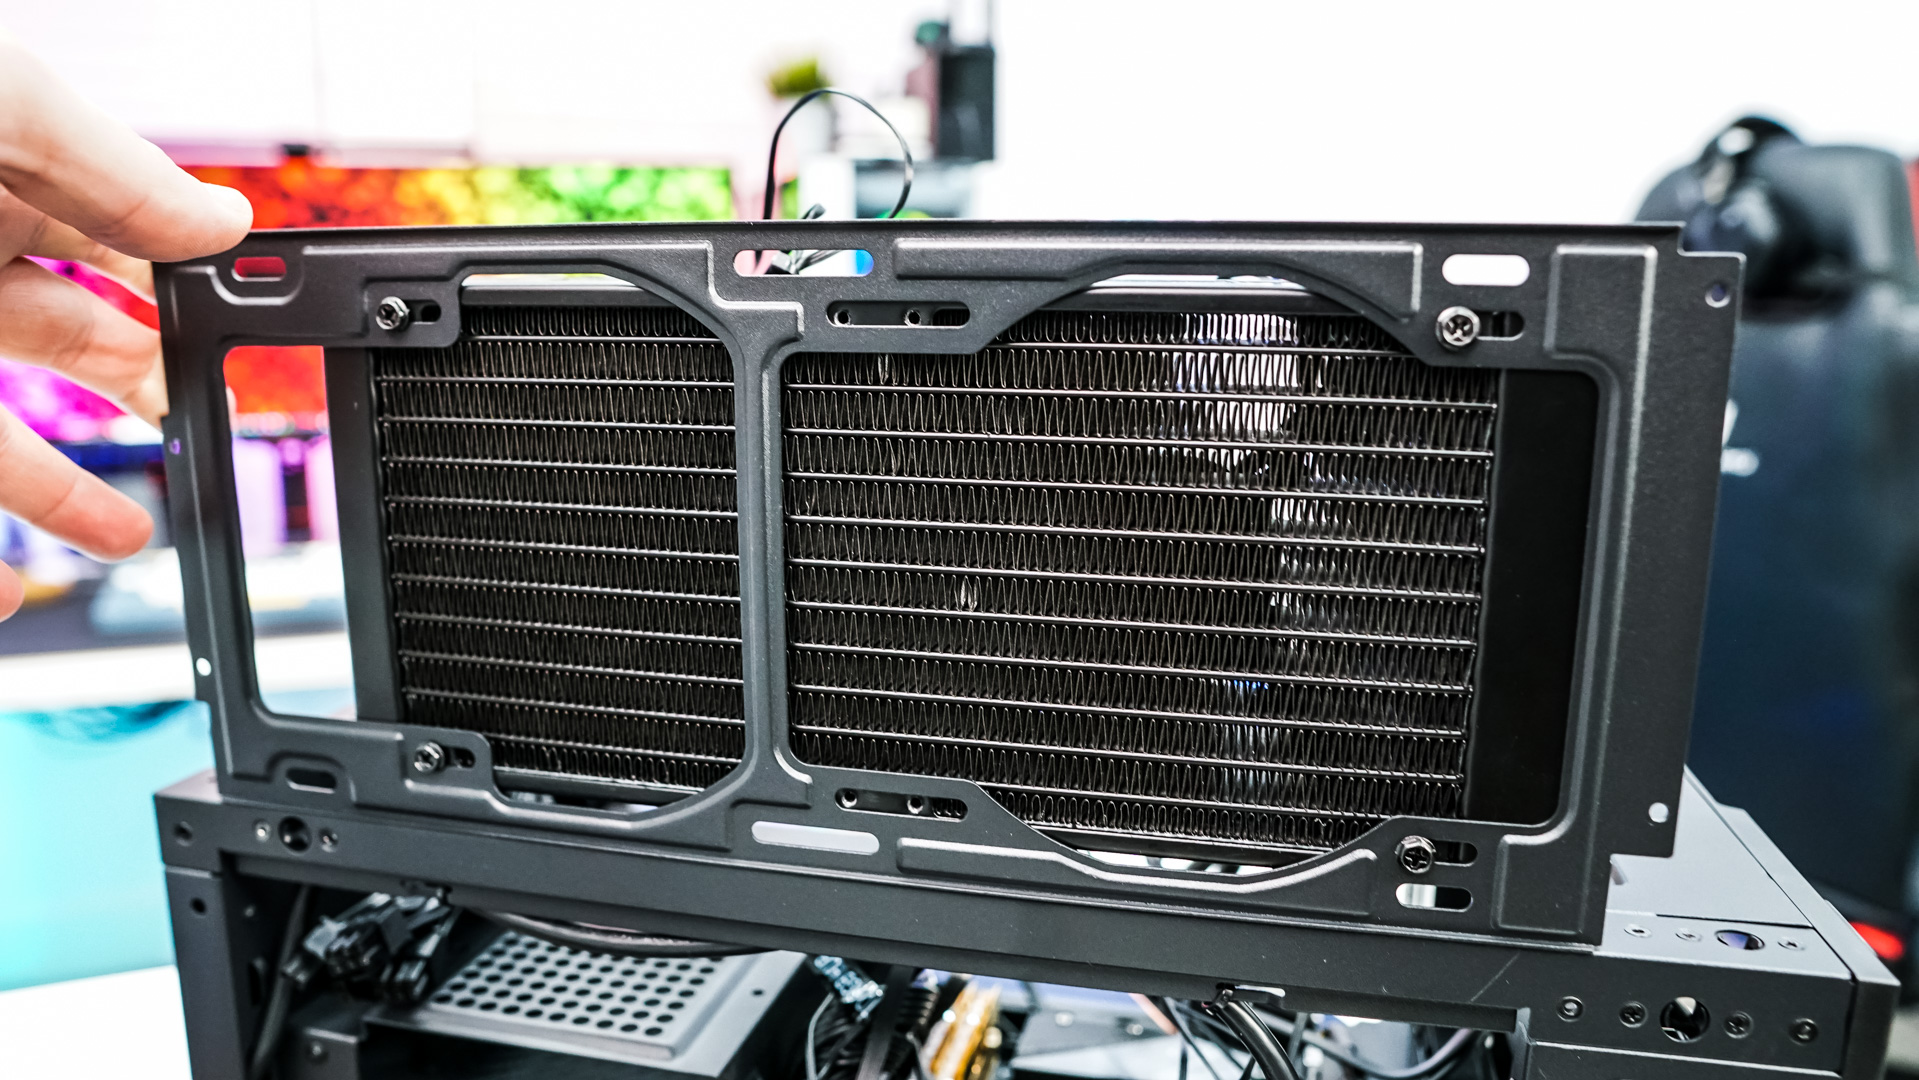
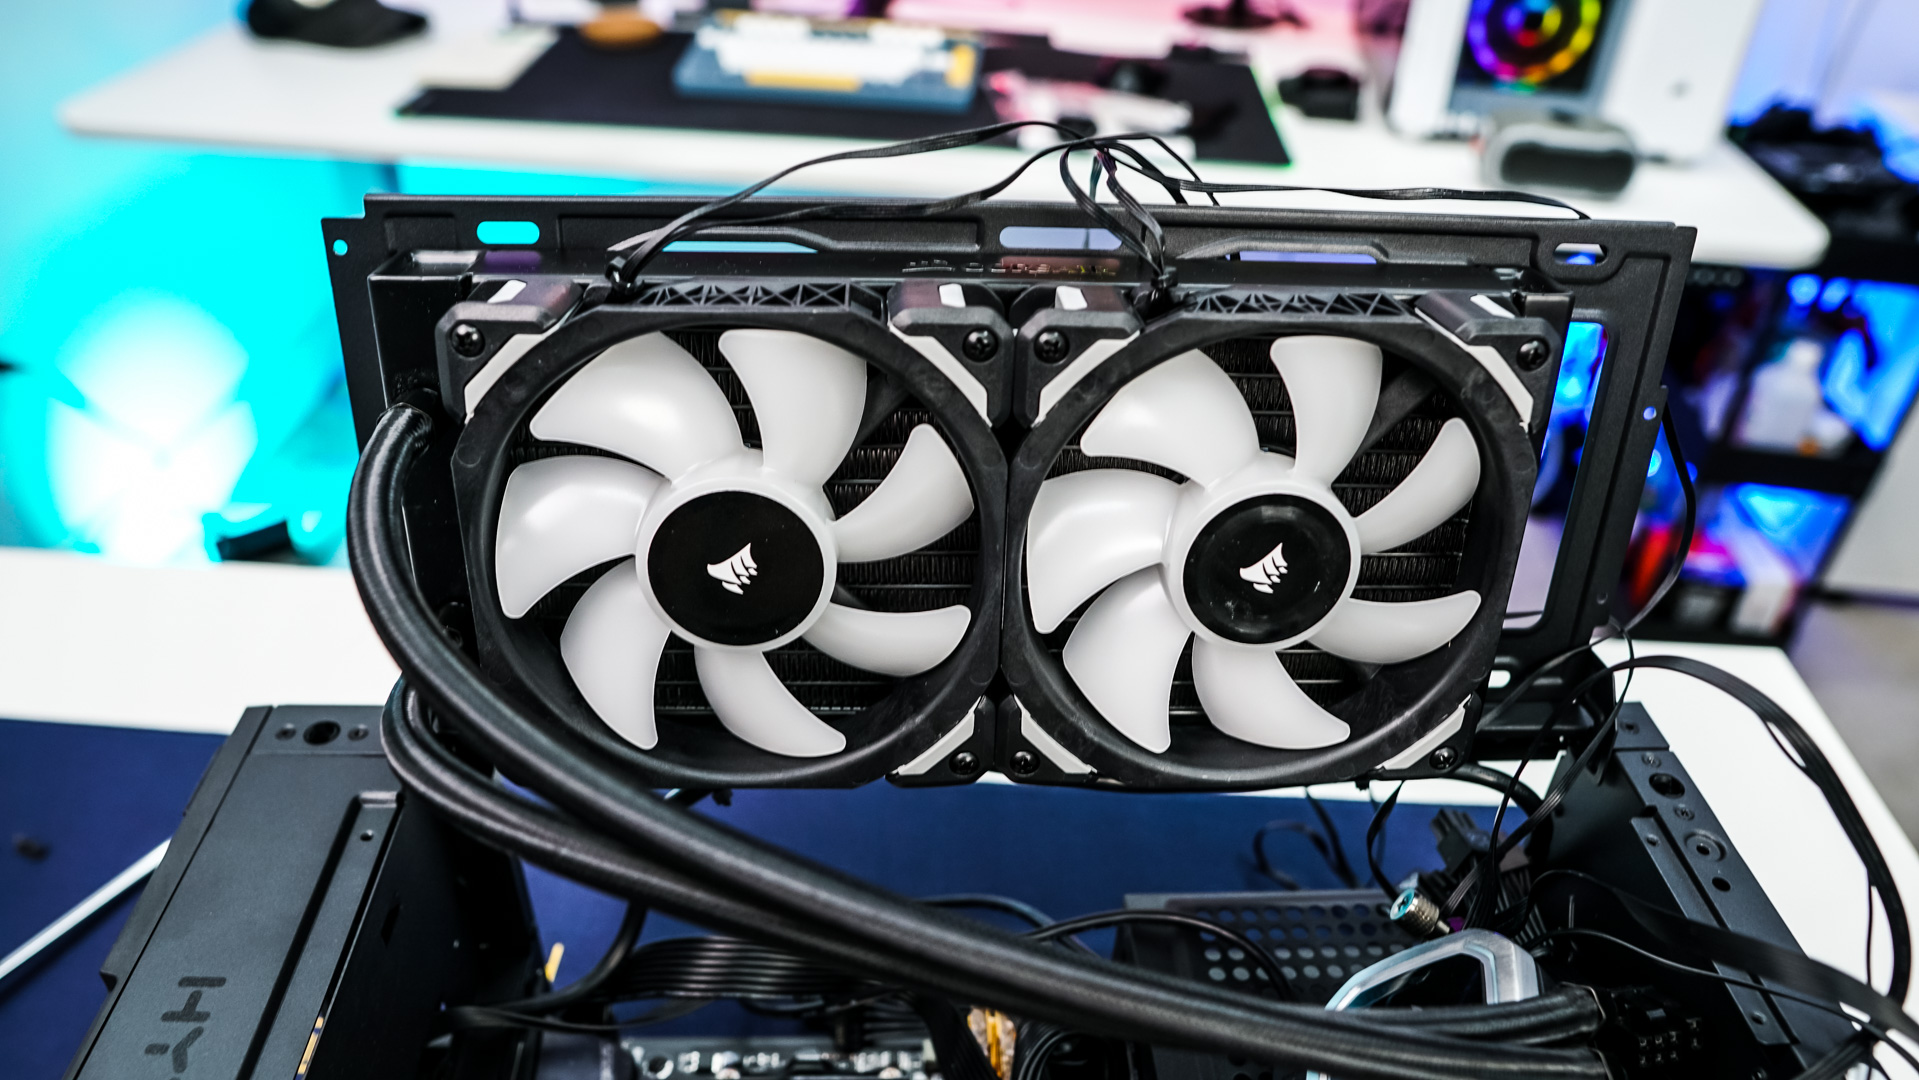
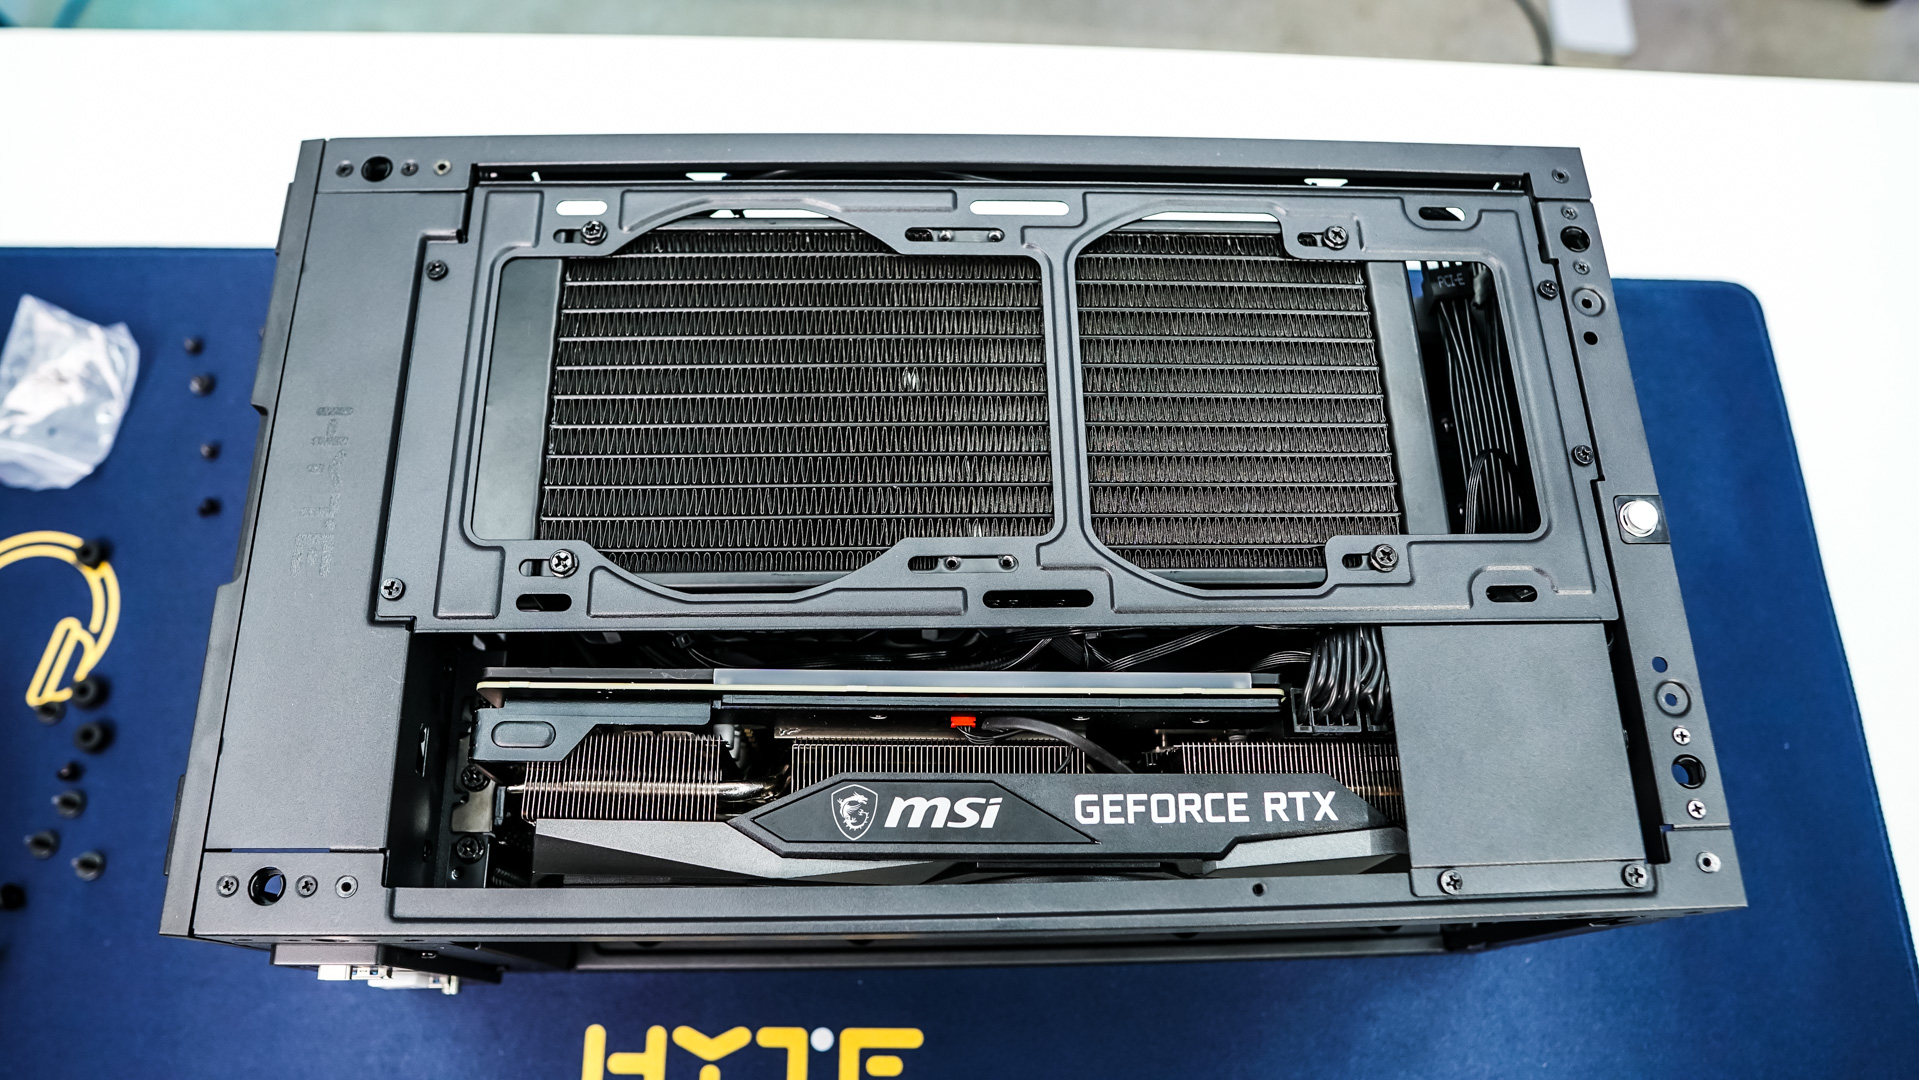
One of the more unique things about this case is that it does support up to a 280 mm all-in-one liquid cooler. With that in mind we went ahead and installed a Corsair H100i RGB Platinum cooler. The radiator door really makes this installation so easy as you can simply lift it open and install your radiator. Make sure you install your radiator with the tubes coming out the end that sits over your motherboard like you see in the photos below.
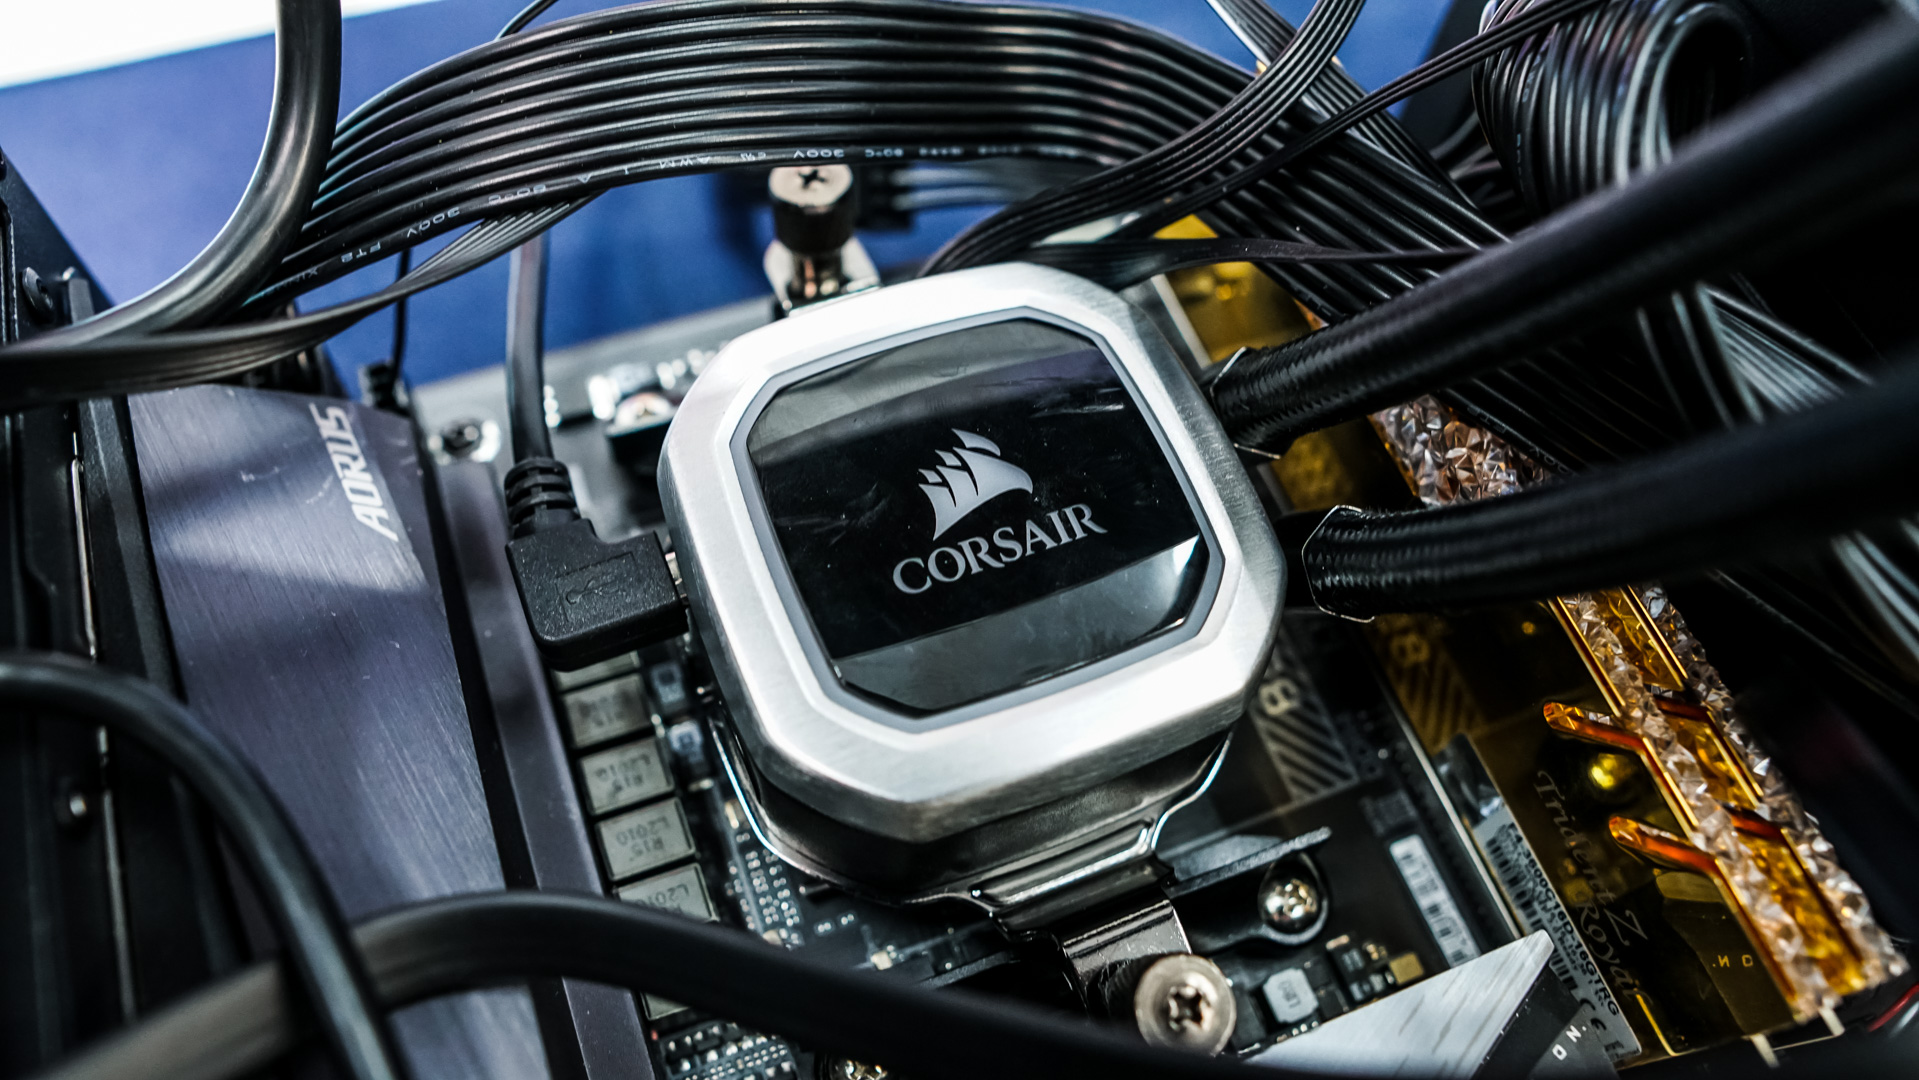
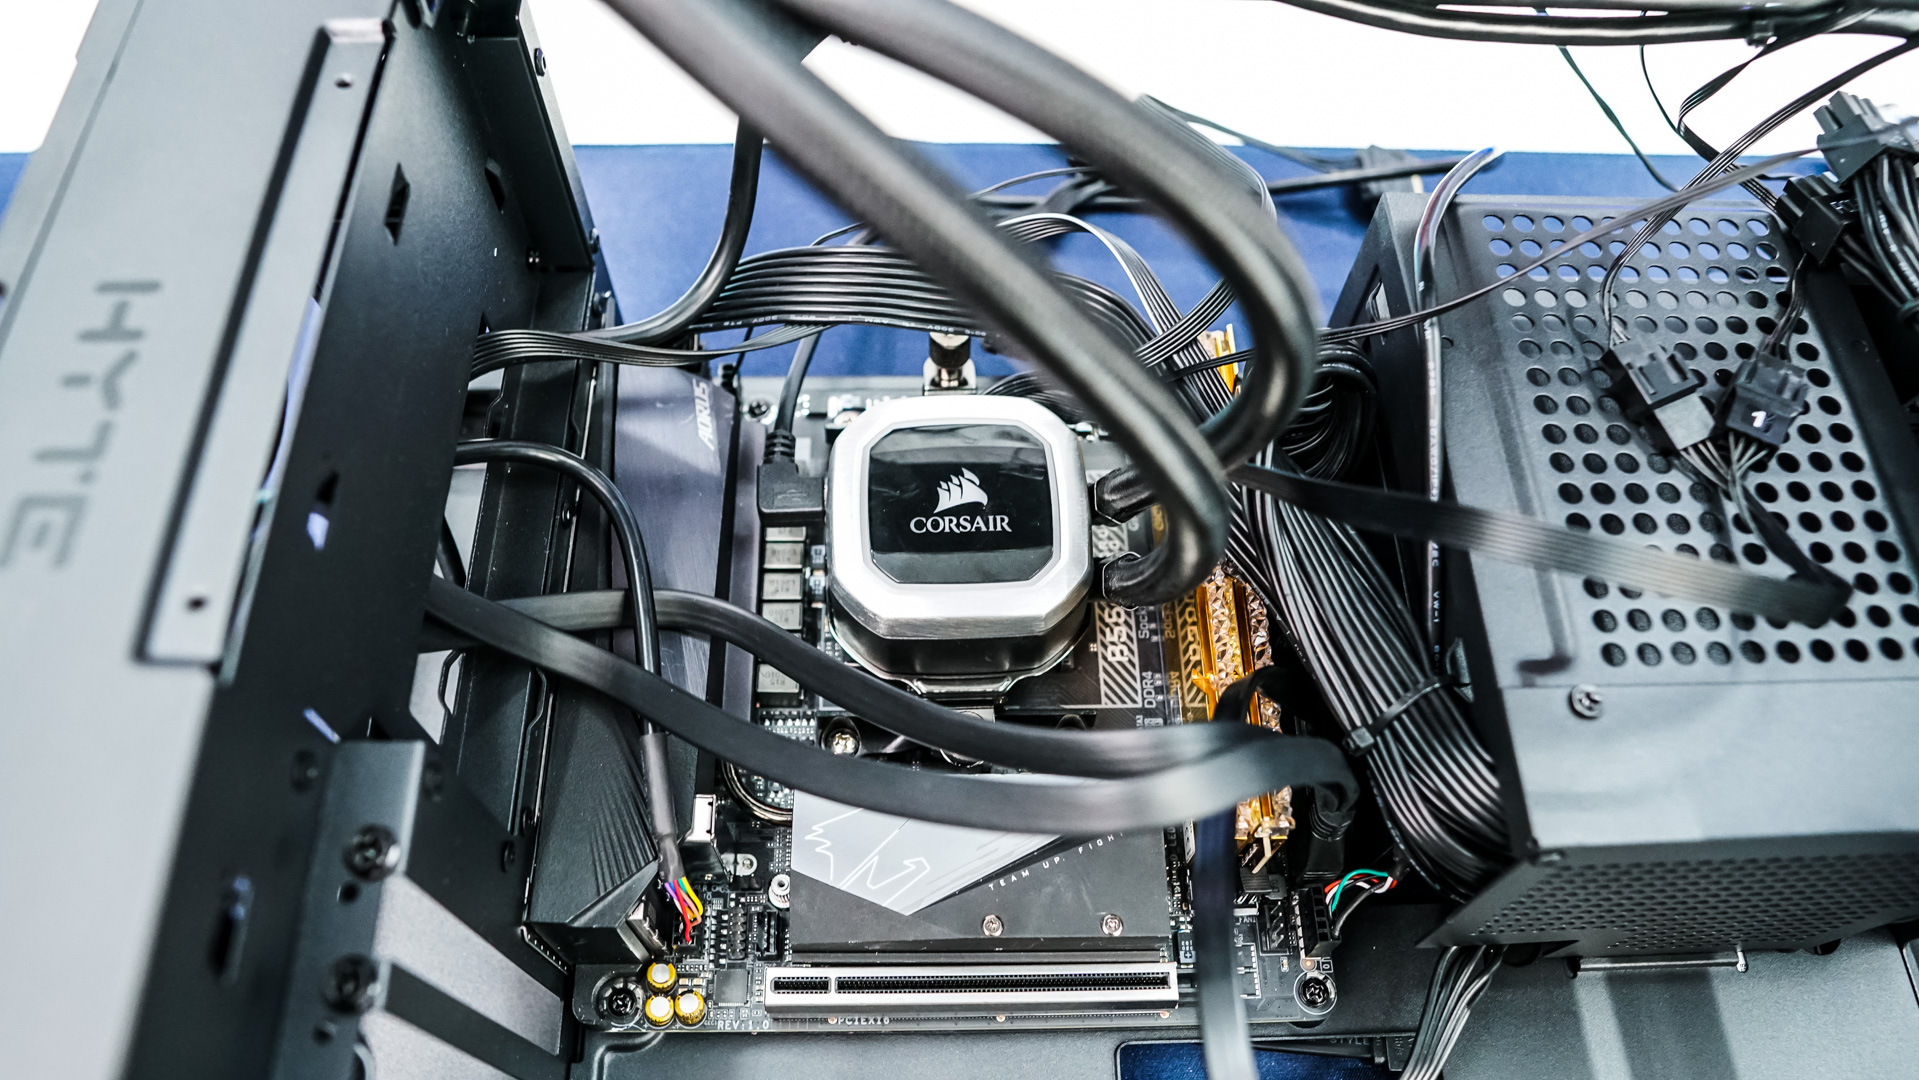
With our radiator installed we can now secure our CPU block. Again with that radiator door open we have easy access to our motherboard. This is not only great for our initial install, but if you ever need to swap out memory or say install another SATA cable things are much easier than other mini-ITX cases.
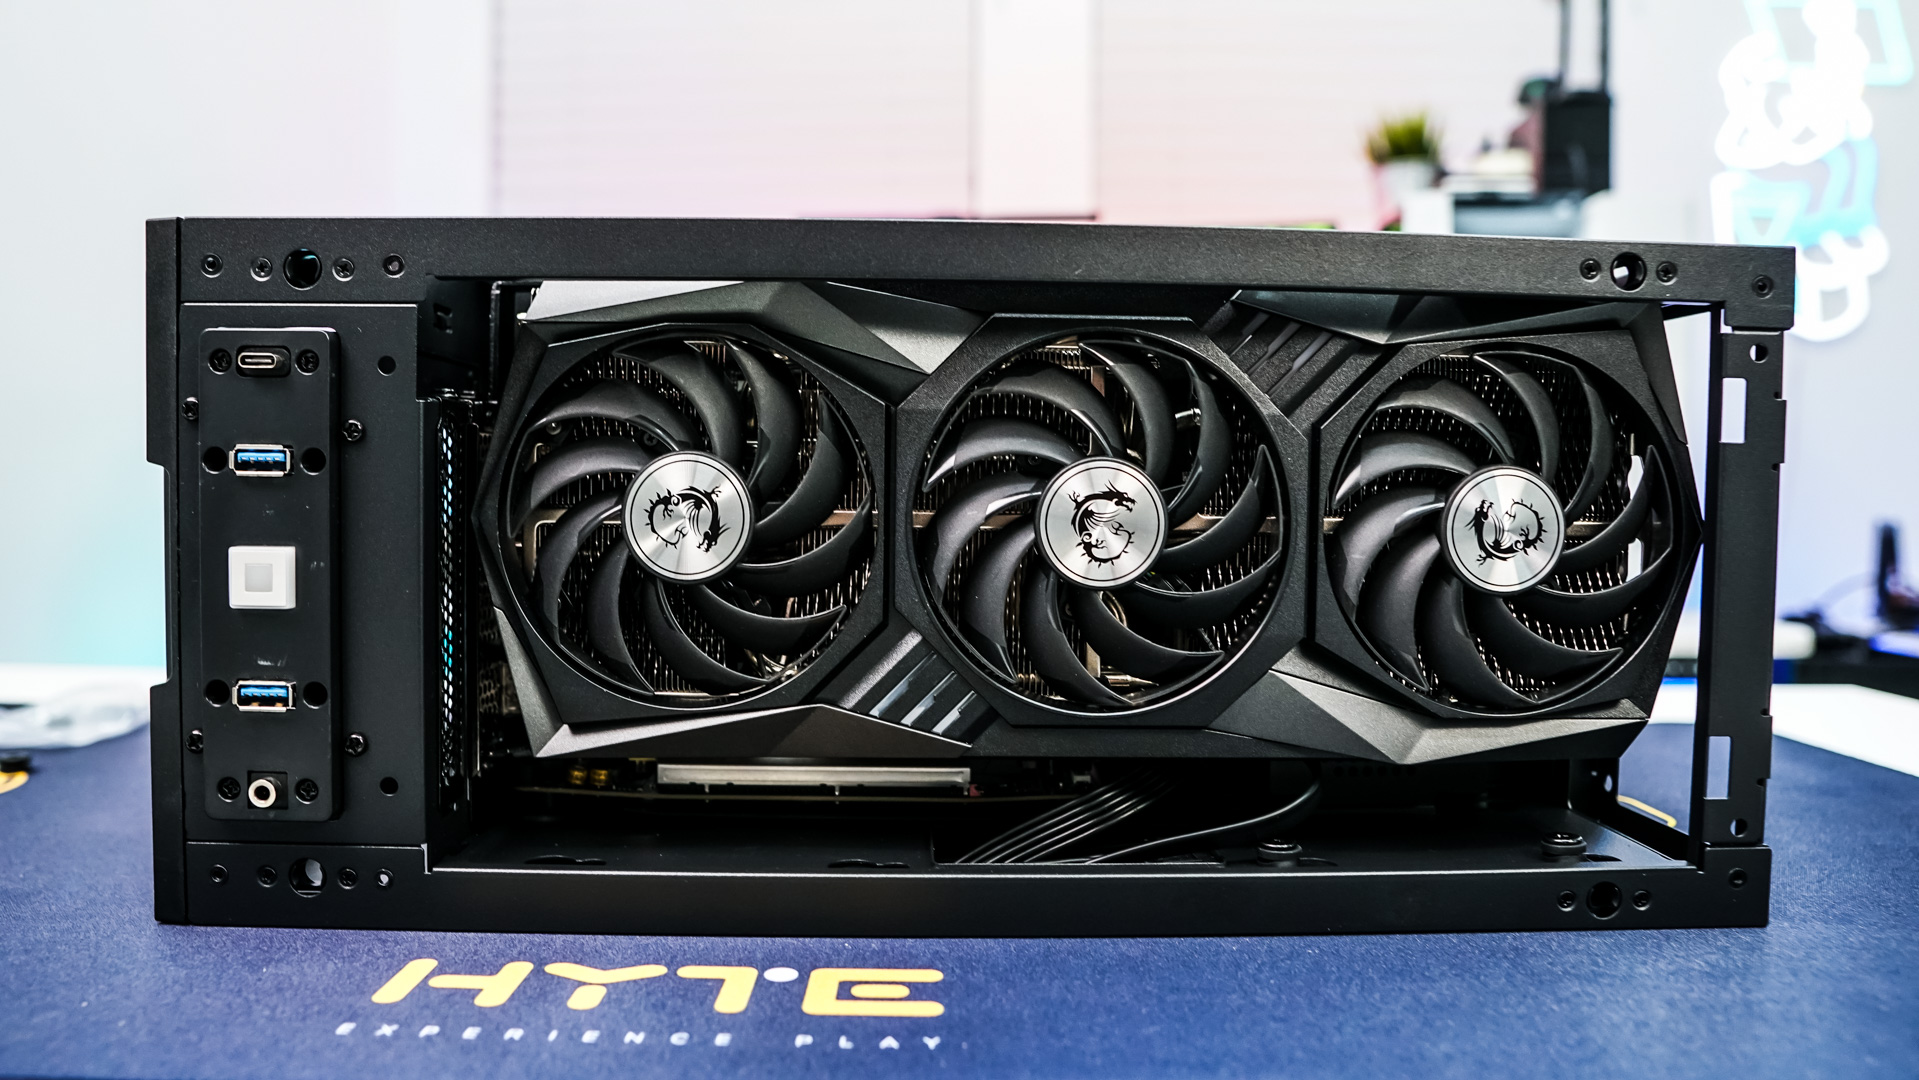
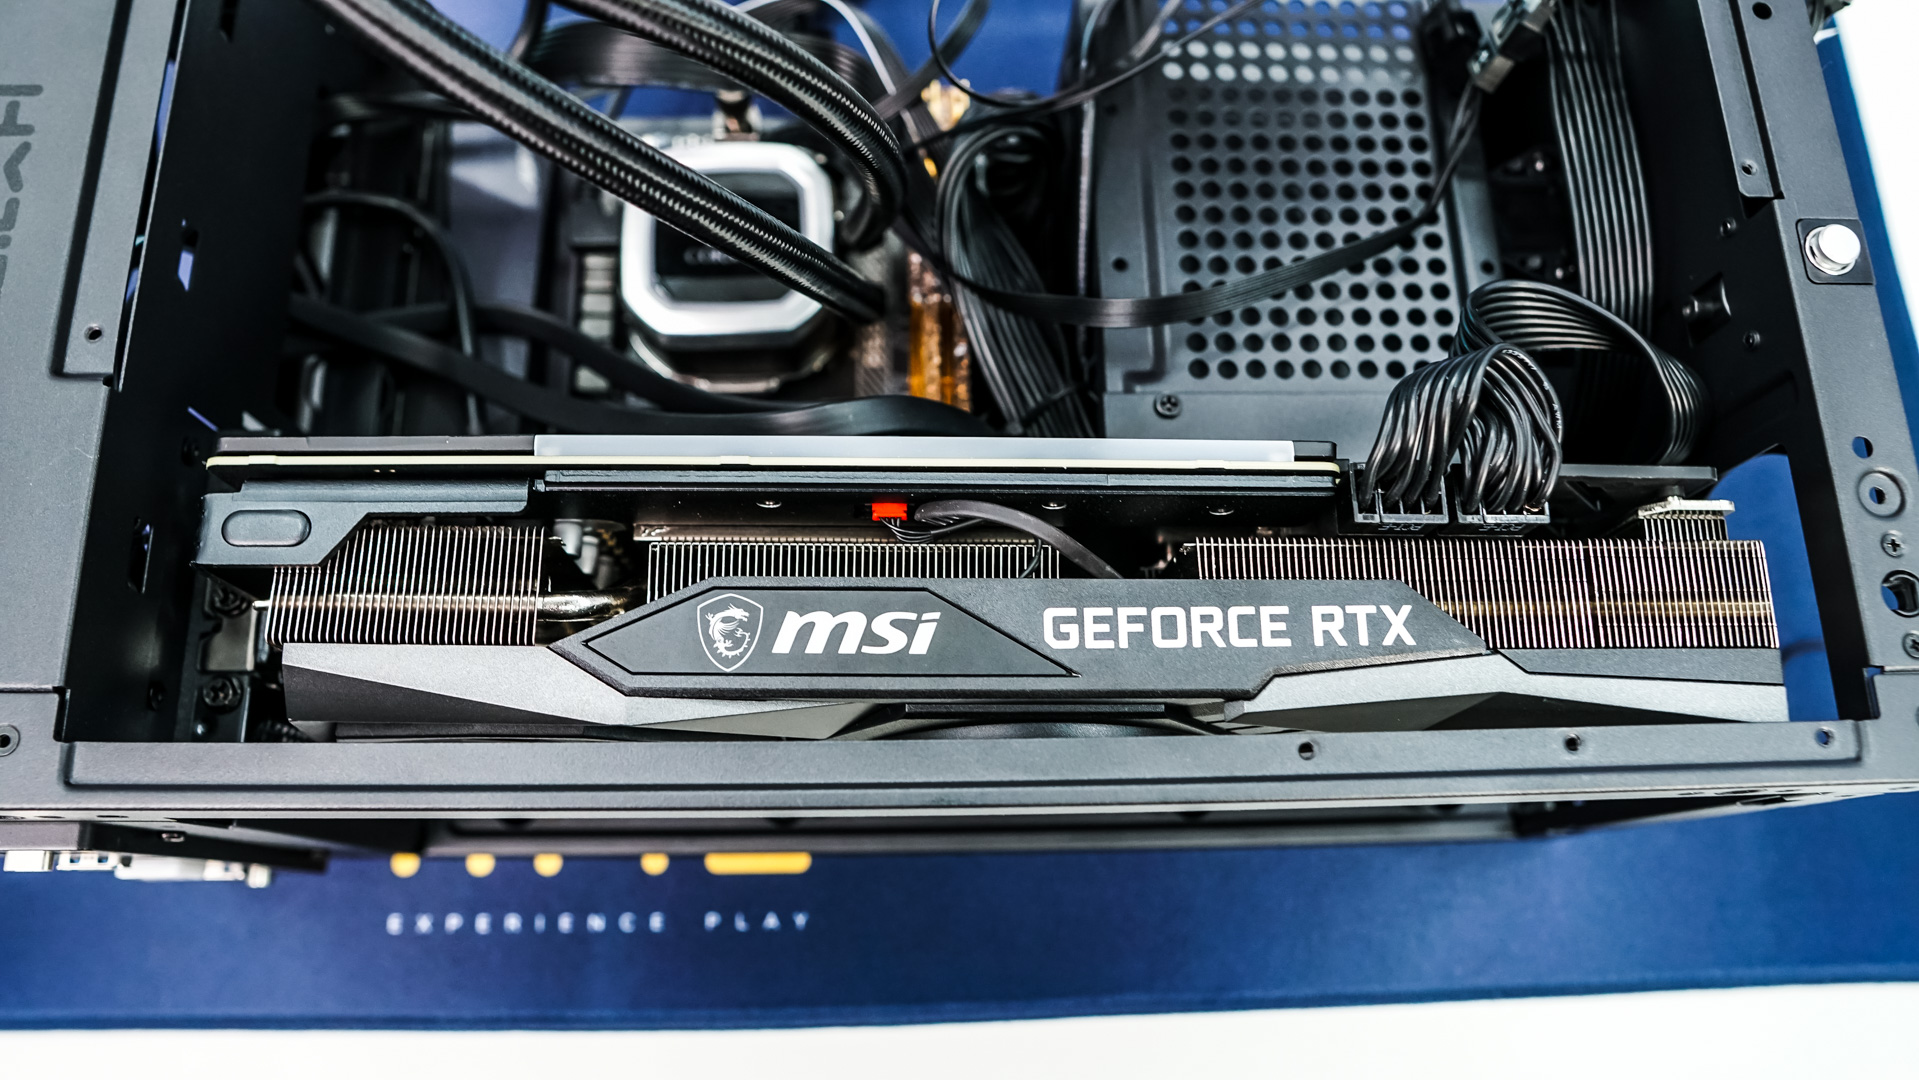
The last thing we need to install is our graphics card, which is the MSI GeForce RTX 3060 Gaming X Trio. This card has the same cooling solution as MSI’s RTX 3080 and RTX 3090 so let’s just say it is a pretty large card. I did have the angle it in there, but it went in no issue. There is a small section of case that you will have to remove, it is used to keep your PCIe power cables from popping off the side panel.
With our graphics card installed it is time to close the radiator door and make sure all of our cables are connected.
Here is what the case looks like from the sides, while it does seem pretty compact it was quite easy to build in.