The inner workings of the NZXT 440 “Razer” Edition, Exposed
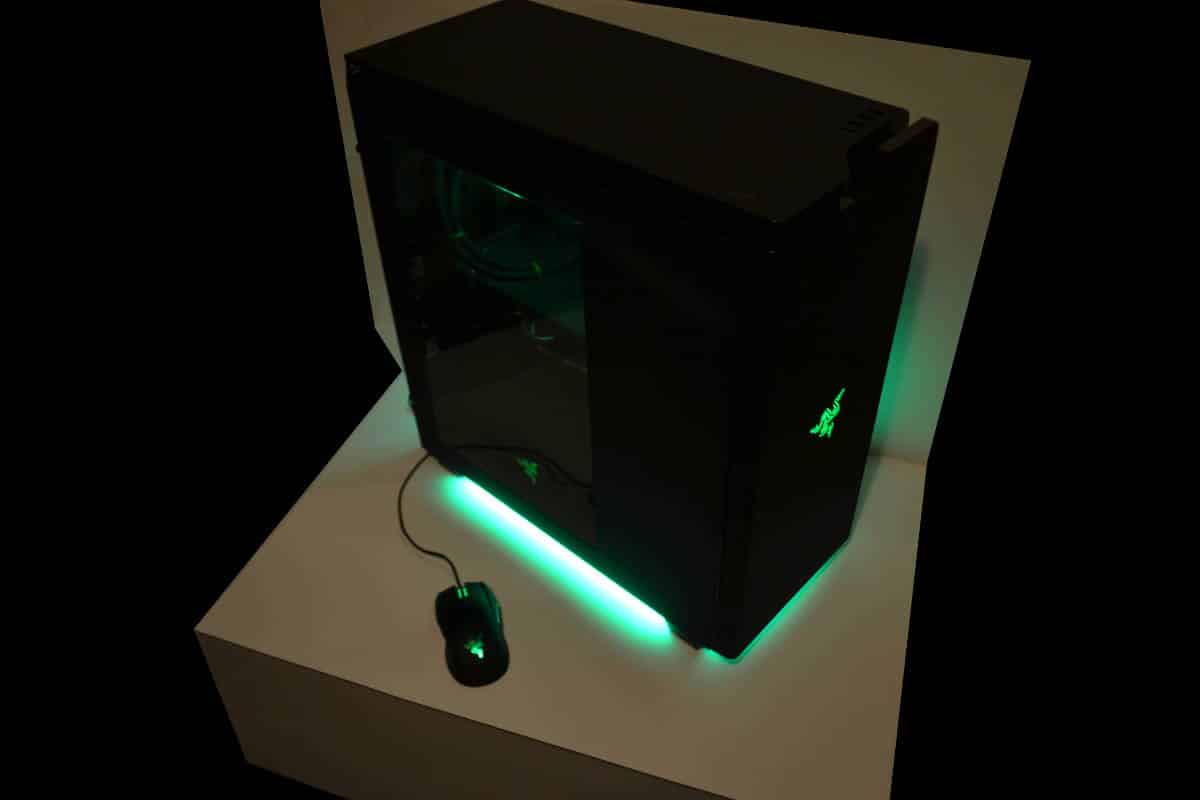
First I would like to apologize for some of the dark photographic shots of my pictures. The NZXT H440 “Razer Edition” is painted with such a matte black color that it’s like a black hole case. At one time I had 8 lights on this case to get the shot and still the cameral could not focus on the finish or get a bright shot of it. It’s like a light sponge trapping all the like somewhere. It’s impossible to get a reflection on of anything but dark on this case so it’s unlike any case I have ever had to photo-shoot. It’s a total absence of color which is a matte black that has to be seen in person to be appreciated.
That said the inside of the NZXT H440 “Razer Edition case is carefully packaged as well. This should have been part of the packaging page but it would have given away the inside so I waited for this page to reveal the plastic covering that is on the Lighted “Razer” logo showing through the tinted acrylic side panel. NZXT made lots of effort to cover each part of the shiny surfaces with cling plastic covering to protect the high reflective lighting effects all over the case.
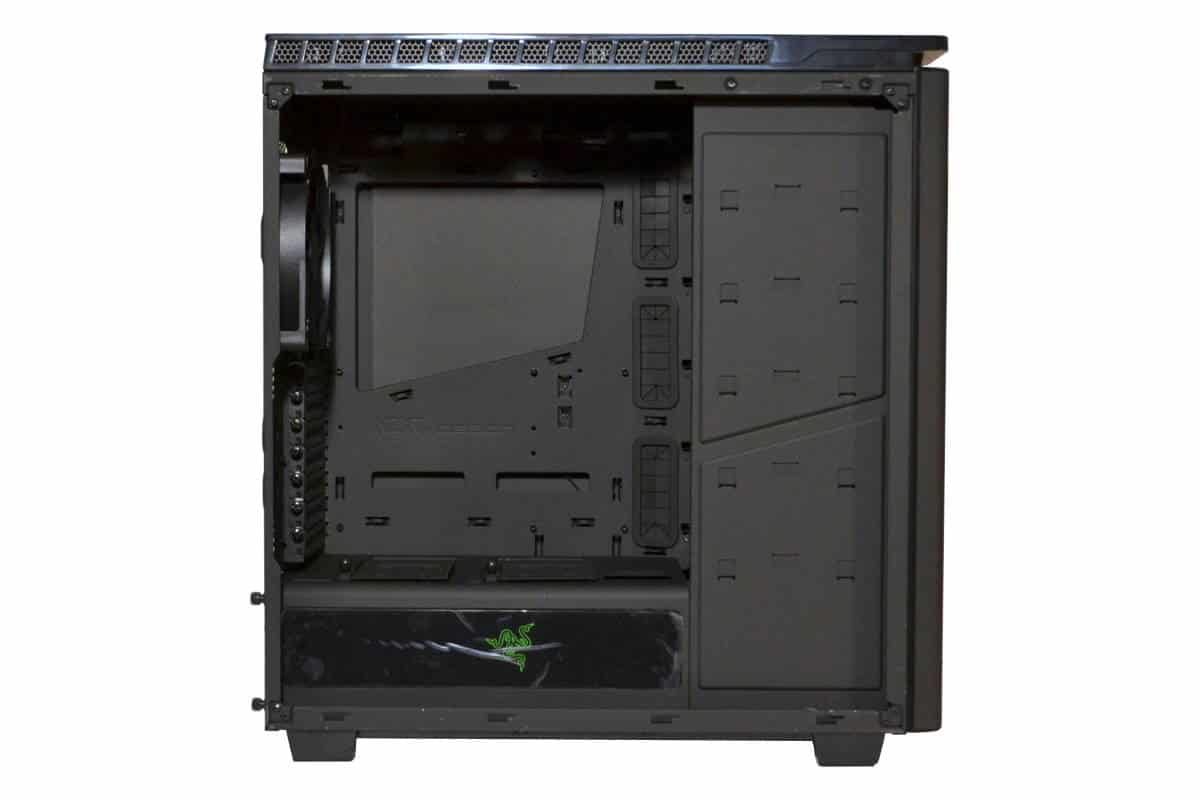
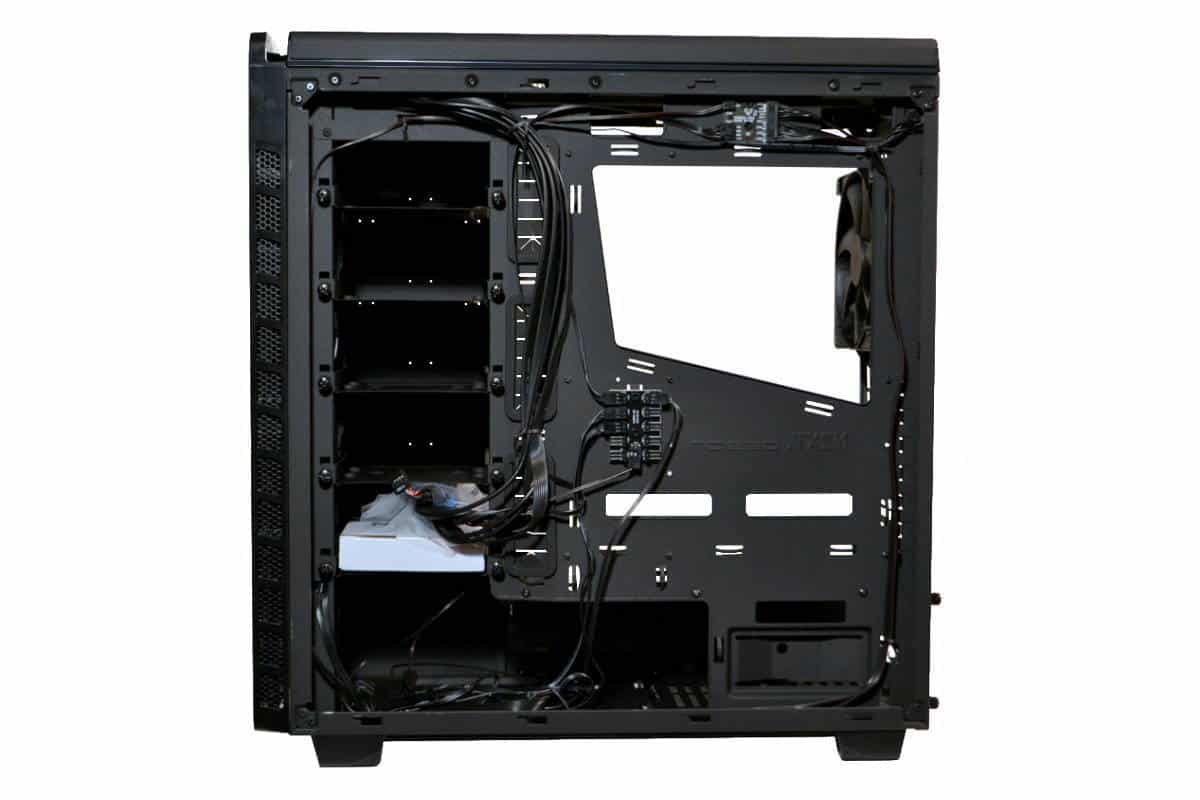
Notice that the motherboard size that fits the best in this case is the very popular ATX size, but you can use anything smaller all the way down to m-ITX which might look a little silly with this case but still It will work fine and I don’t think you could ever make this case look silly even if you put an old Slot 1 Pentium 3 board into it with an old Nvidia NV15 (GeForce 2 GTS). The regular sized ATX will fit perfectly with seven PCI Slots and the adjustable exhaust fan can set this build up any way you want it. The covered area below the Motherboard hides the power supply and the wiring that comes out from it, just like the PRO MODDER’s do it. Also there are two SSD trays right at the bottom and a special hole for the Video card wires to come straight up adding a more professional feel to the build. The rubber grommets only expose some of what is behind the scenes and plenty of other P8 holes up top and wire tie down points to tame any amount of wires that have to roam in the build.
One thing you get to learn early about the building inside the NZXT H440 case is that you can actually mount a mechanical hard drive from the bottom four holes in them all. Maybe the builder never noticed that it could be done that way but as it is the only thing I would change about that is to put some small Rubber mounts in the holes to hold the mount away from the hard drive drawer type slot mounts. There is also a very cleverly arranged central fan bus that can handle six more fans more than the four that are already plugged into it so a push/pull 360 X 120 Radiator would fit plug in fine and also hide all the wires well too.
There is even an indention down low to hide a Molex connection that would usually get in the way for lesser cases.
Also this is how the accessories box and the loose wires are packed so that there are no flying interior parts to mar up the case finish or it the Acrylic window while in transit to its new home.
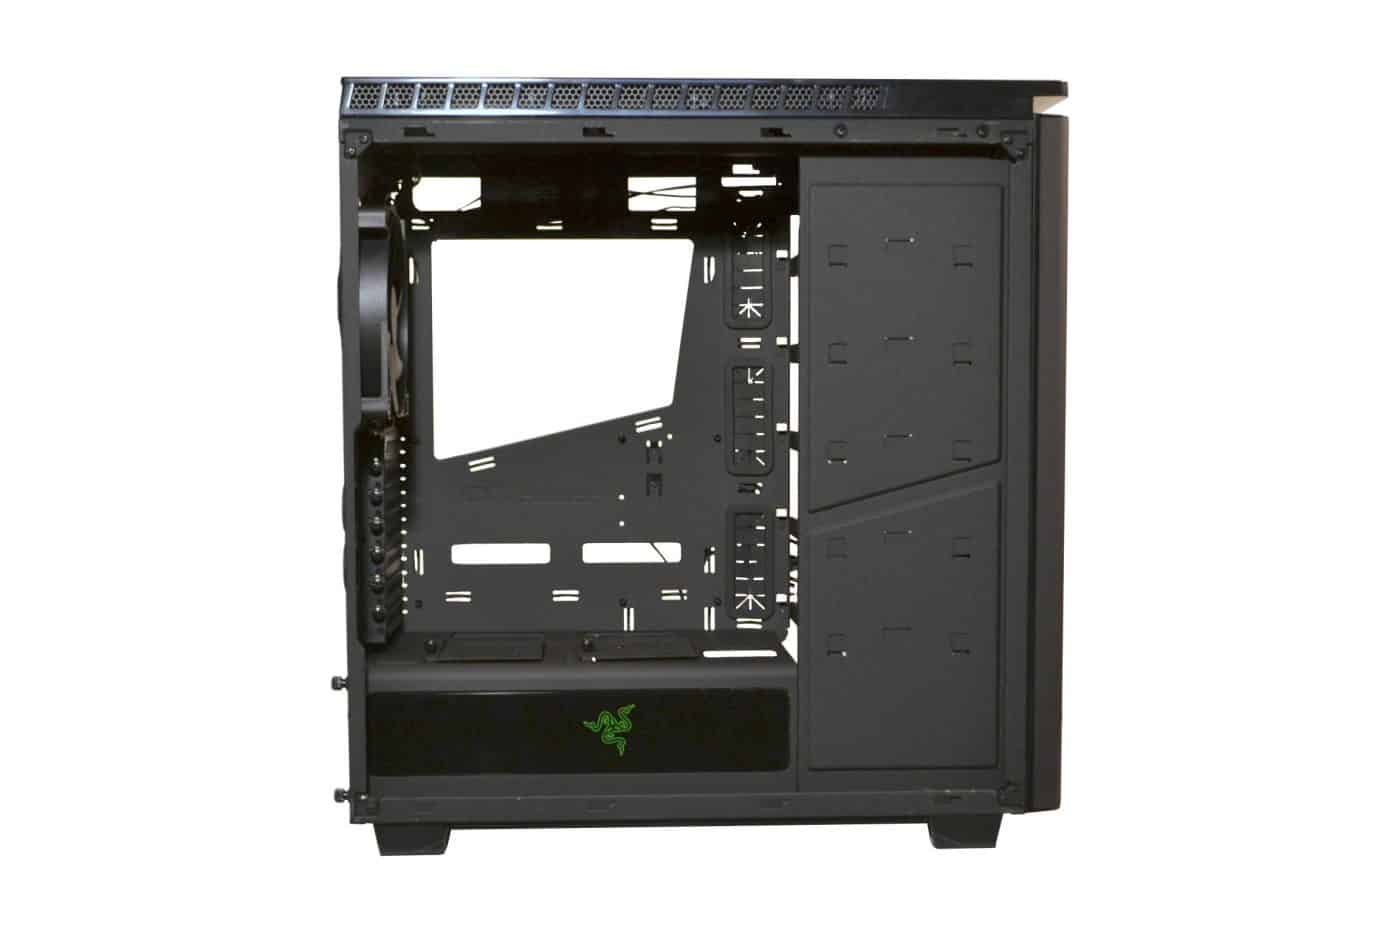
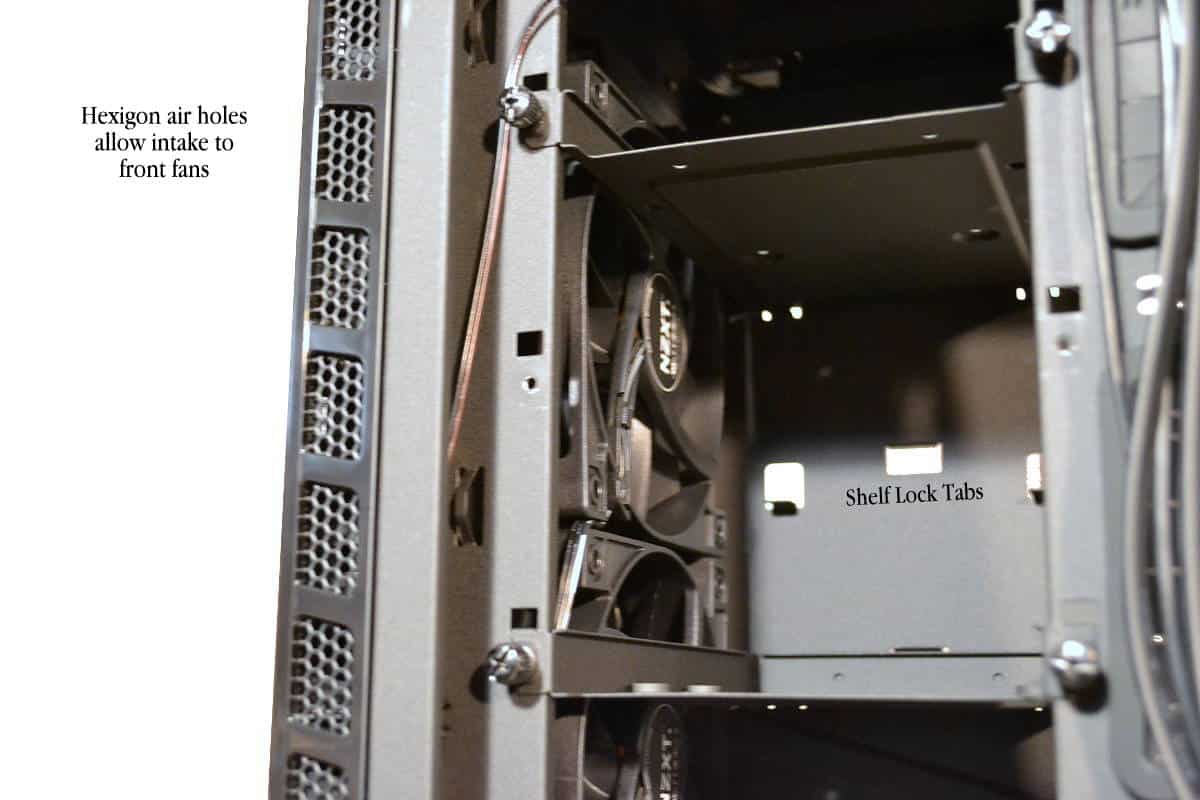
I removed one of the drive slots to show more of how it’s made. Also in this shot you can see how the Modder’s mesh on the sides is hexagon shaped holes which is scientifically proven to have the best air to noise coefficient. Just ask any Honey Bee, they will tell you I am right. The wire riding up the left side is to light the front mounted “Razer” Three headed logo. Beside that are the perfectly mounted triple fans of the front to cool off the drives before going on into the case and going back through the upper 360 radiator and the rear exhaust fan so this is very efficient way of killing about 3 birds with one stone. The Hard drive shelf uses seven mounting points to hold it tightly into the case. There are 3 mounting points on the back and 4 on the front including the two thumb screws that tighten it all into place it is tight and not going to vibrate at all.
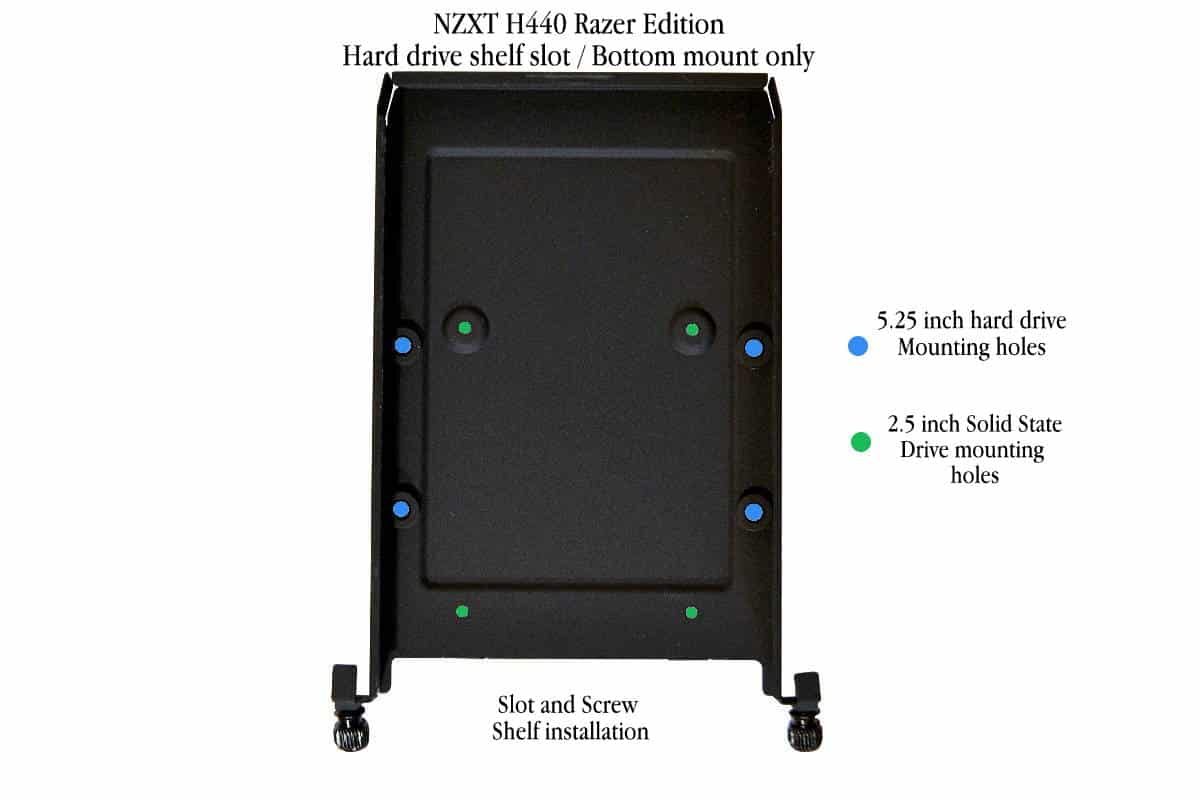
Here is a better look at the Drive bay install shelf that fits into that seven point interior mount. The green colored holes show the SSD mounting holes and the Blue colored holes are for the traditionally sized 3.5 inch mechanical hard drives installation. There are no mounting points for side mounting screws but just the four for the bottom of both types of drive to cut down on mechanical vibration. This case was made to be silent.
The Accessories box is tied down with a long plastic covered wire tie to keep it all safe and secure inside the case until it makes it to its final destination. I dare say you might not ever grow out of having this case once you button it all up and start using this silent case.
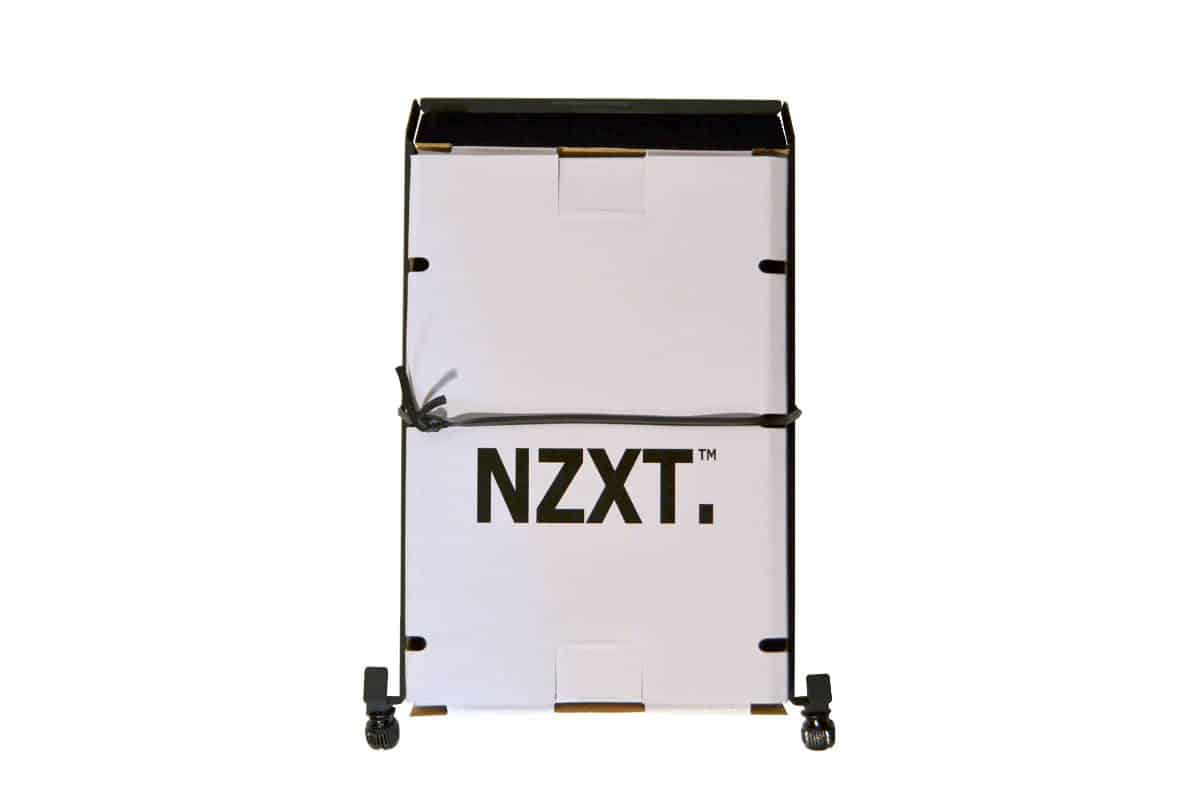
The box totally freed from its confines is just a white thin corrugated box with the NZXT Logo on the front.
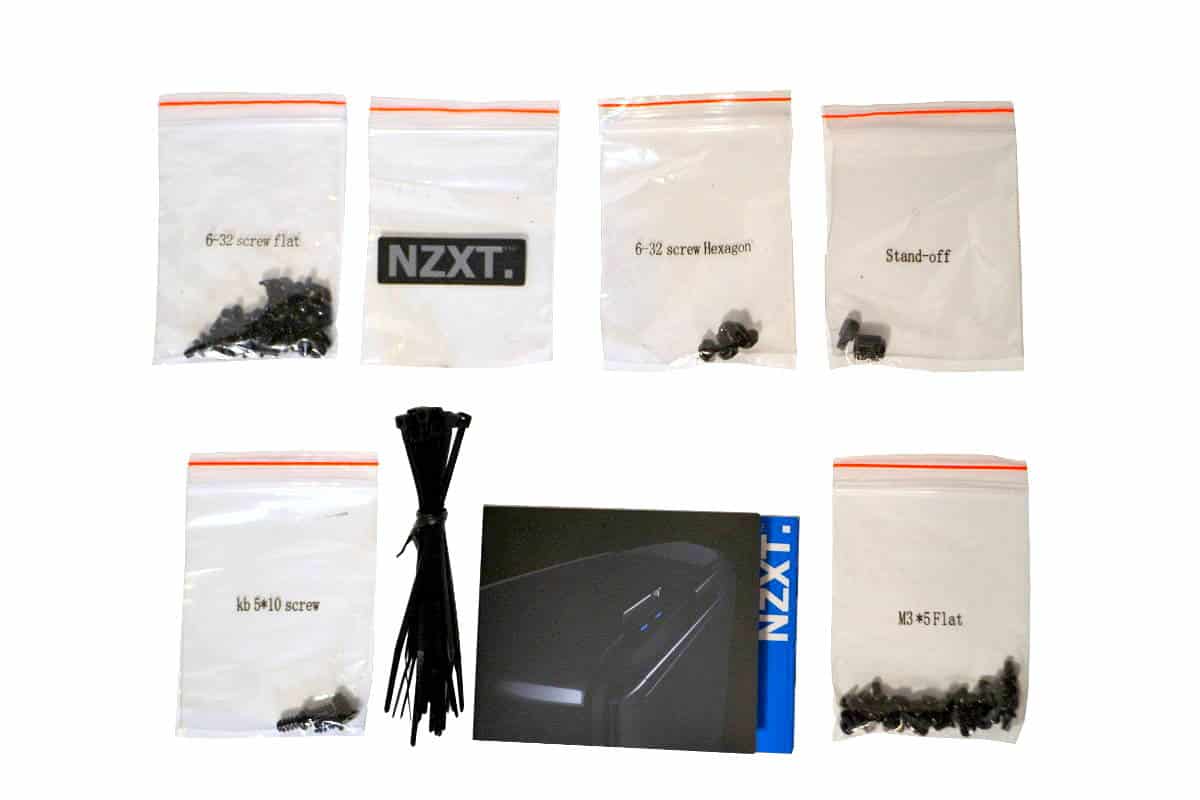
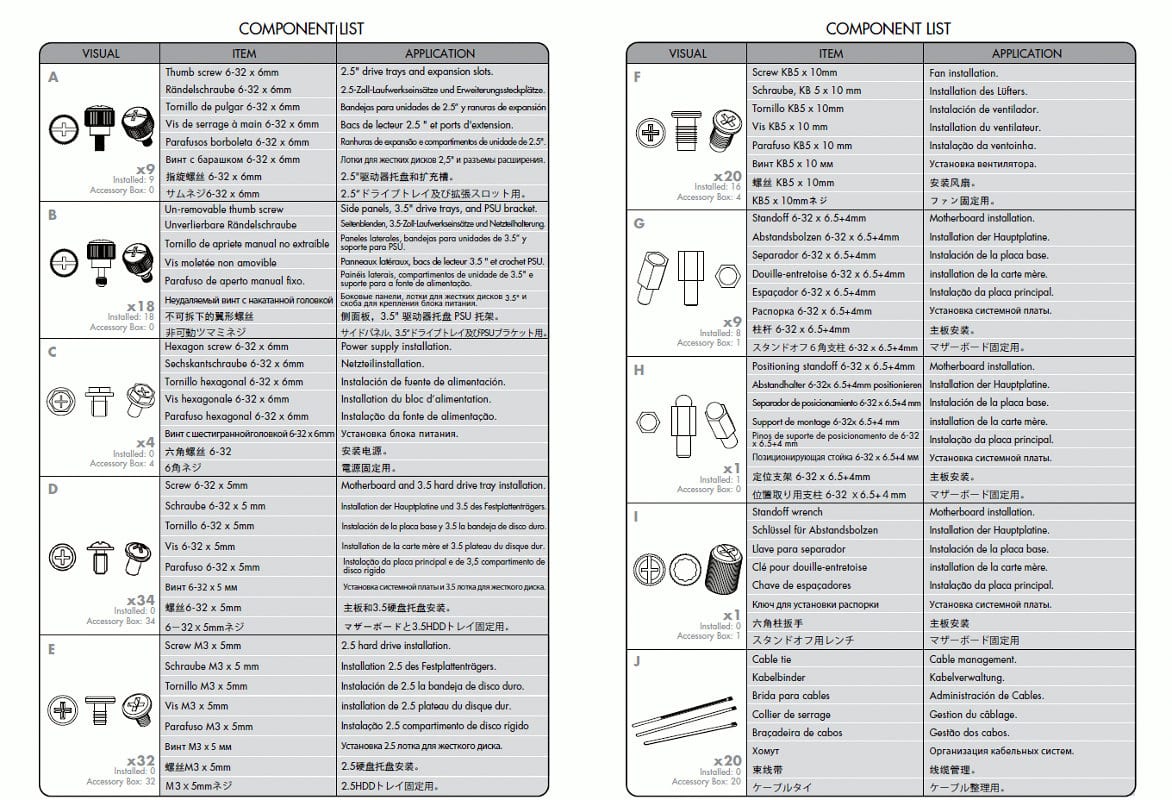
Here is a picture of the Accessories in the box but better is the picture below that actually give you the official count and type that can best be understood in that format. The booklet is a nice picture book of other NZXT model cases and products.
Contents Manual
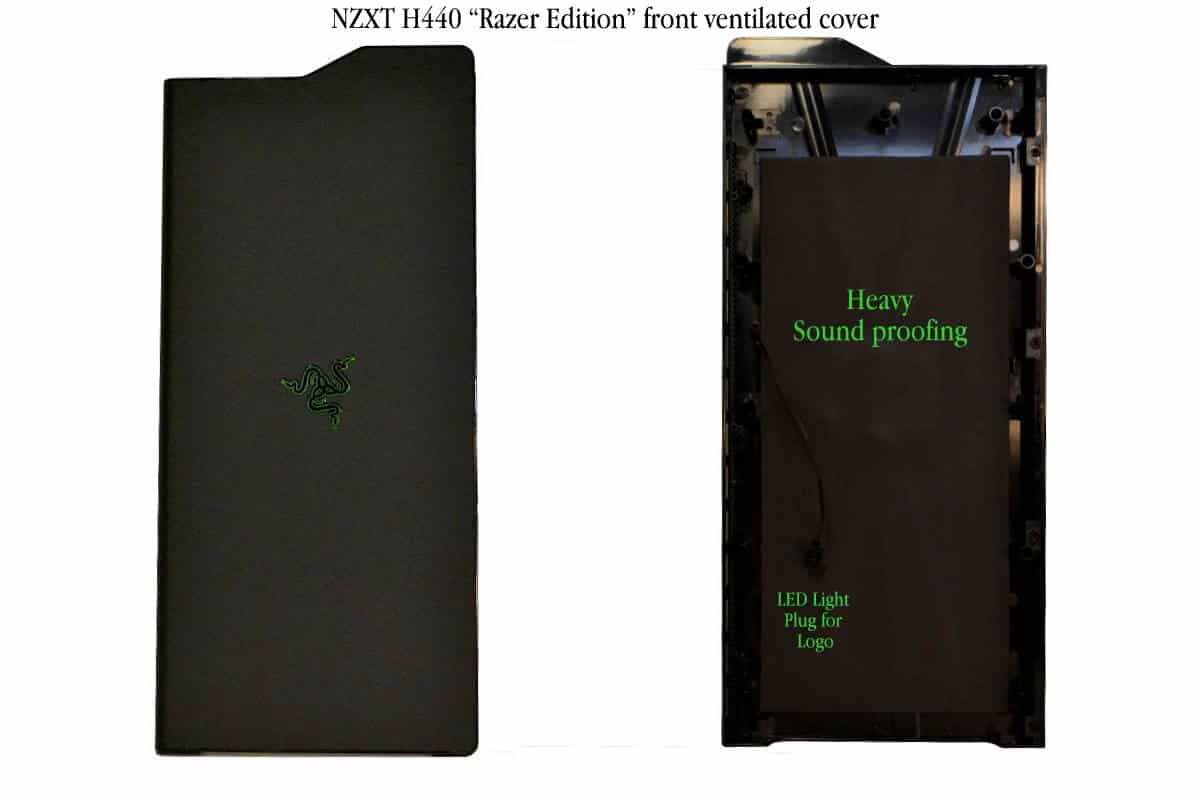
An interesting and heavy piece is the front cover. You cannot see the ventilation holes on the side but the front has that Stealth Black paint that is almost impossible to photograph and the official “Razer” logo on the front. Inside the plastic covered inner core is wire that lights the logo up during operation and the heavy sound proofing that makes the NZXT so silent.
When the above panel cover is properly and carefully removed what you see is what is shown below. This is the front of the case with the front cover off. The Filter is very strong and tightly woven for good airflow and filtering of average contaminates that are usually flying in the air of the average home. While some homes are dustier than others due to age of the dwelling and the conditions around the build it’s easy to see why a filter like this would be beneficial. Long are the days when the insides of out builds were covered with brown dust all over everything from household contaminates. This filtered and fan system is both clean and clear running and the filter is easily cleaned with air or water. Make sure that when you clean a filter like this that is fully clogged, take the filter outside so not to re-contaminate the home again. Running water over the removed filter is an easier way to clean it inside the home by letting contaminates go down into the drain and into the pipes, but cleaning outside is recommended.
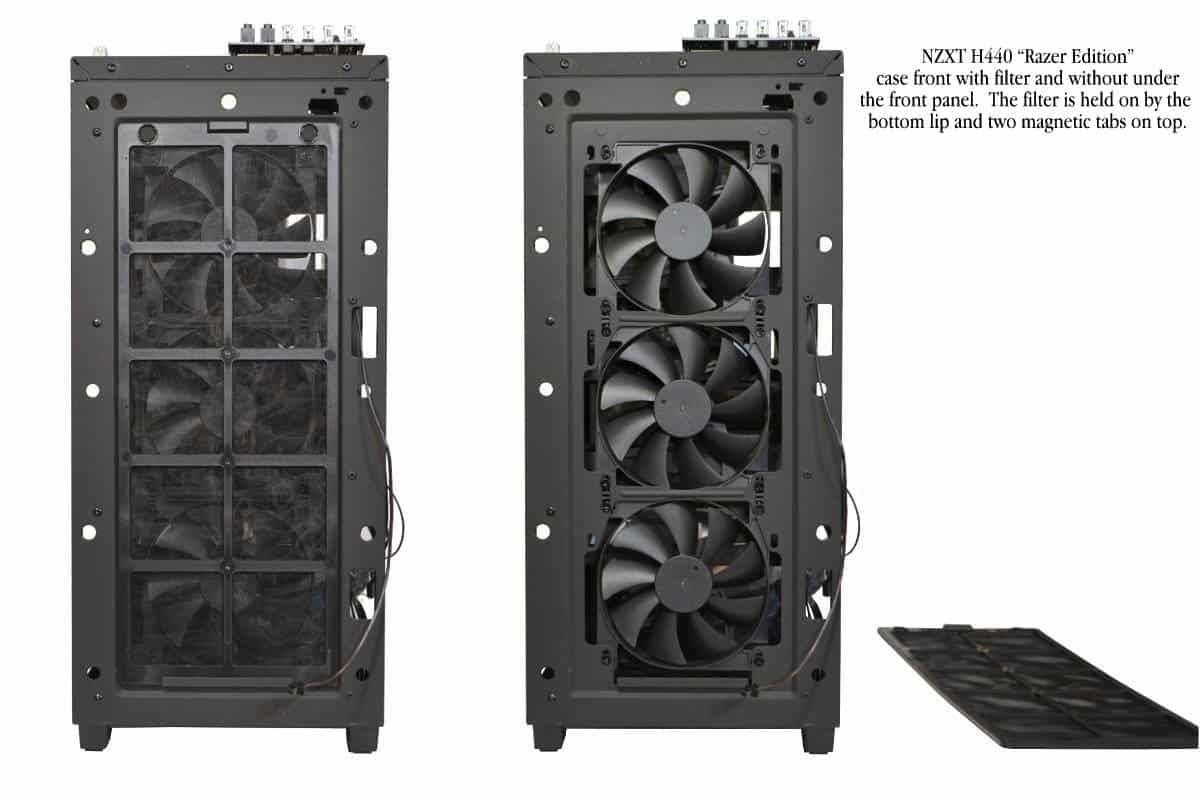
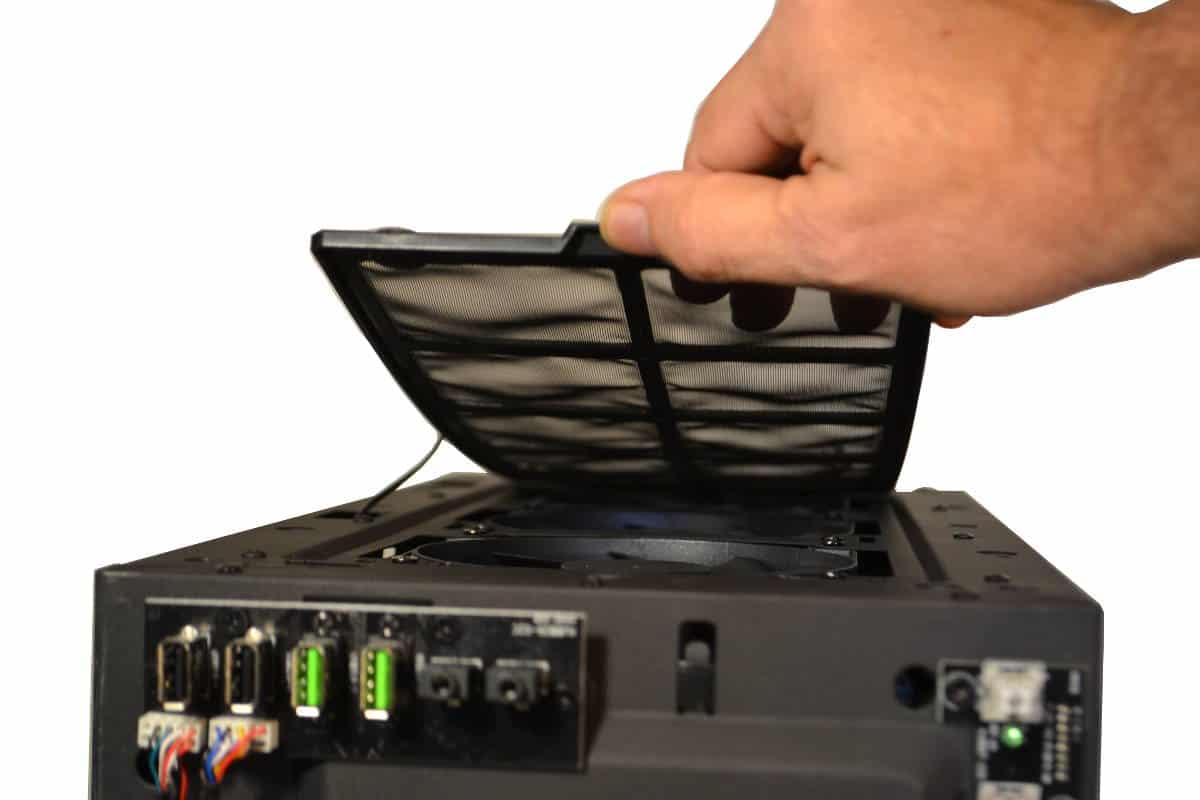
Removing the filter is very simple. Simply place your finger under the tab and pull back. The magnetic hold will disengage and the filter will have to be gently lifted out to remove it completely. Remember that if the filter is really bad the best way to do this is to cover the front with a new clean kitchen type garbage bag and pull the filter into the bag and let it fall to the bottom of the bag and then carry it outdoors to clean it completely.
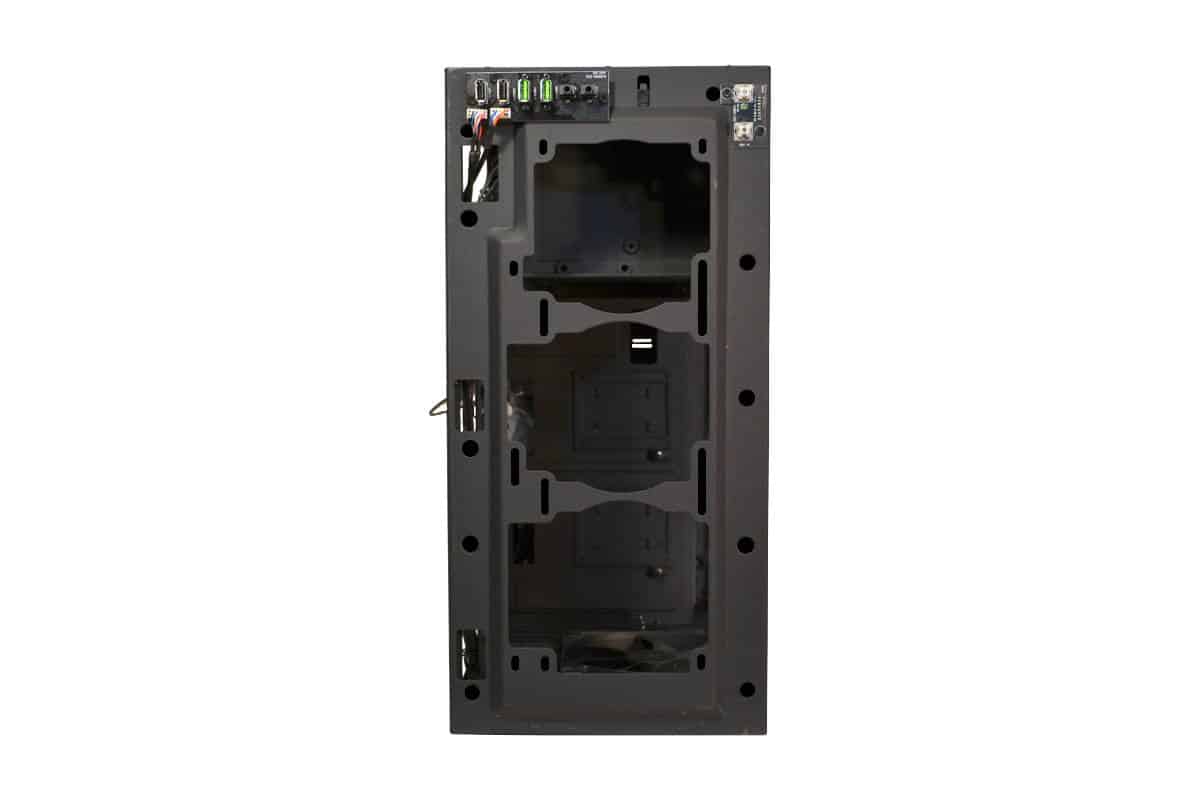
The all steel top construction of the NZXT H440 “Razer Edition” ATX mid tower case can hold a maximum of a 360 x 120 radiator on top. The adjustable exhaust fan on the back can be fitted to allow less or more space between the top radiator and the back of the case making this case very nicely built for an all in one 360MM water cooling or custom water loop solution. This The NZXT H440 case was made for this type of set up but you don’t have to go water cooling, the fact is that you have the option of many different optional air and liquid solutions to cool the inner computer components. A 280 X 140 radiator can fit as well as a single fan cooler type of either the 140 or 120 varieties.
Internal Printed Circuit Boards
There is a special type of cases that have printed circuit boards installed inside them. It denotes an attention to detail and quality assurance that overpowers far surpassing the average case with simple toggle switches and jacks hot glued inside the front panel. A printed circuit board is more likely to have the best switches and jacks with unsurpassed contacts. It is a tell that denotes a case that is made to withstand the test of time and also to be made for a long time to come because having them made is not the cheapest way to go.
In these days of slow economic growth, one does not have to look to far to see cost cutting measures but this case does not follow those traits. The traits of this case is as well defined and well groomed as any top quality case in existence today.
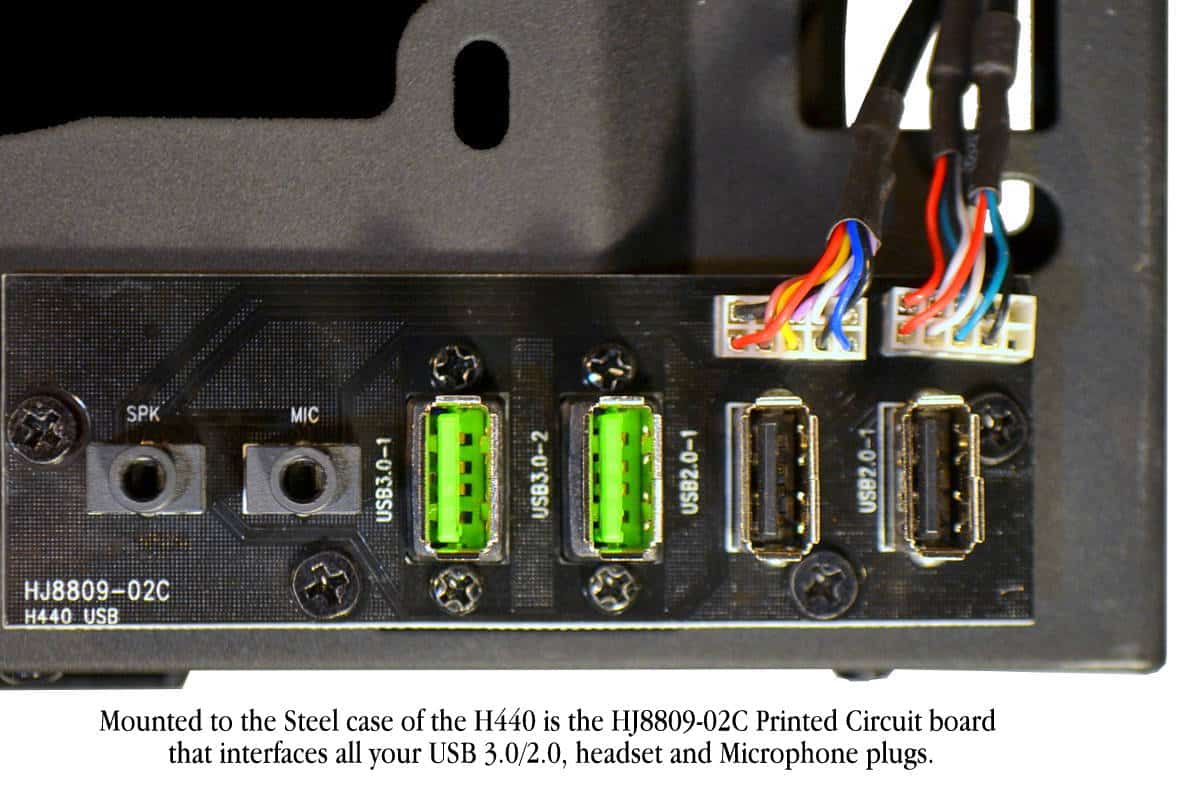
1. The HJ8809-02c data interface PCB. Built specially for the H440 this small black (not green) board is held down hard with 4 Phillips head screws mounted to the steel frame. it uses two 10 pin connectors to connect the Headset/Microphone, USB 3.0/2.0 data connections and if you will notice that the two USB 3.0s are not only soldered in place, but are screwed down to hold the plug steady and withstand a sudden jerk from a hot tempered player with an attitude.
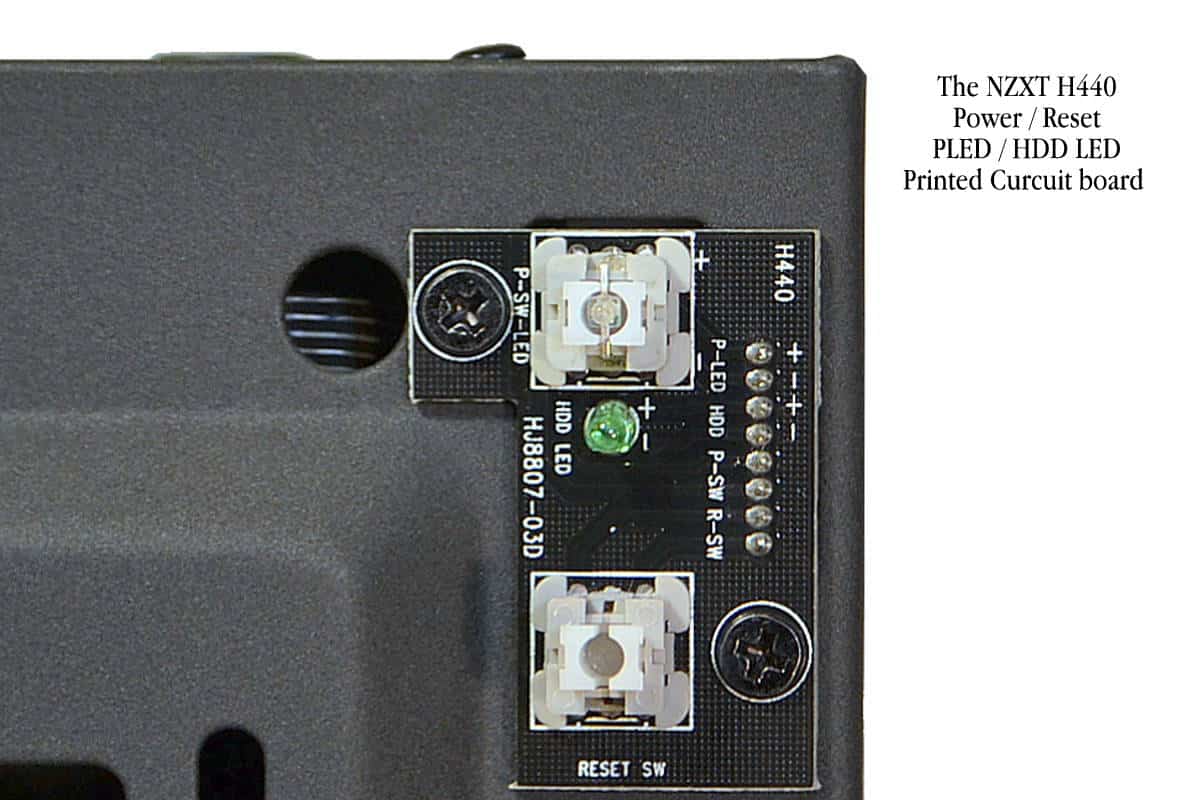
2. The HJ8807 power and reset switch board with power and HDD LED lamp indicator circuit board fastened down tightly by two Phillips head screws and plugged into an 8 pin long connector. The Switches are high quality as the LEDs that are mounted with them.
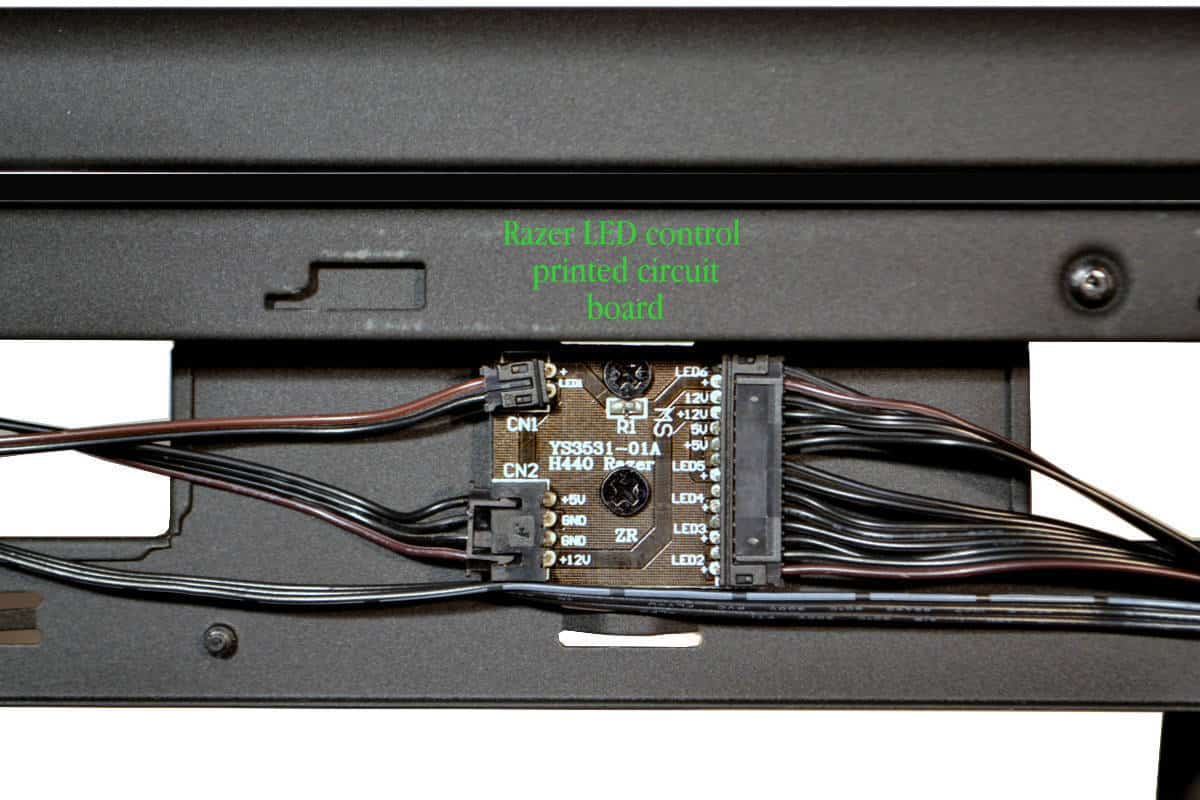
3. The YS3531-01A. This is Razer’s main control bus for all its internal lighting inside the NZXT H440 mid-tower ATX case. This bus also allows the Green illumination to be switched on and off by the mounted press and lock switch in the back of the case
4. The HJ8916-01E NZXT Fan power bus for up to ten fans. This PC board combination of fan connectors is unique as the connections are parallel to the motherboard tray and not straight up and down as the versions of the last generation. Even this configuration was developed by Professional Case Modder’s that released their ideas to be used for companies to pick up and use these ideas to incorporate them into the newer cases and peripherals and it worked. We always wanted to make things better even without the offer of monetary rewards.