


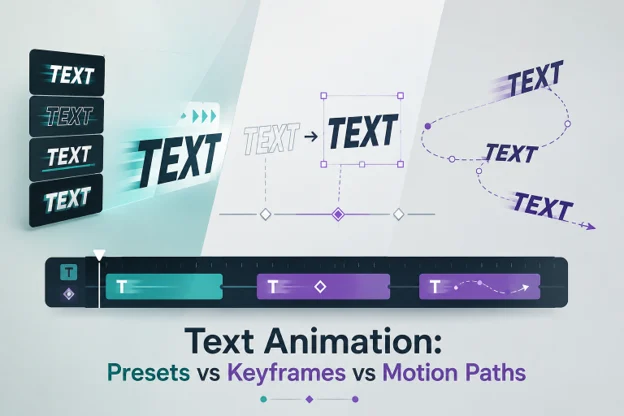
Moving words across a screen can involve several different animation techniques. Each text animation method provides a different level of creative editing control. Wondershare Filmora brings presets, keyframes, and motion paths into one editing workspace.
Presets provide ready-made movement for titles without requiring detailed manual adjustments. Keyframes control specific properties, while motion paths create customized movement routes. This guide explains each method and helps you choose the right approach.
Part 1. Use Preset Animations for Fast, Repeatable Movement
An animated text maker uses presets to create repeatable movement quickly. Look at the table below to understand when each preset play:
| Preset Category | When It Plays | Best Suited To |
| In | At the start of the title clip | Openers, lower thirds, and captions that need a clean entrance |
| Out | At the end of the title clip | Section titles that must clear the frame before the next shot begins |
| Loop | Repeats the selected animation throughout the title clip | Badges, watermarks, and social overlays that stay on screen throughout |
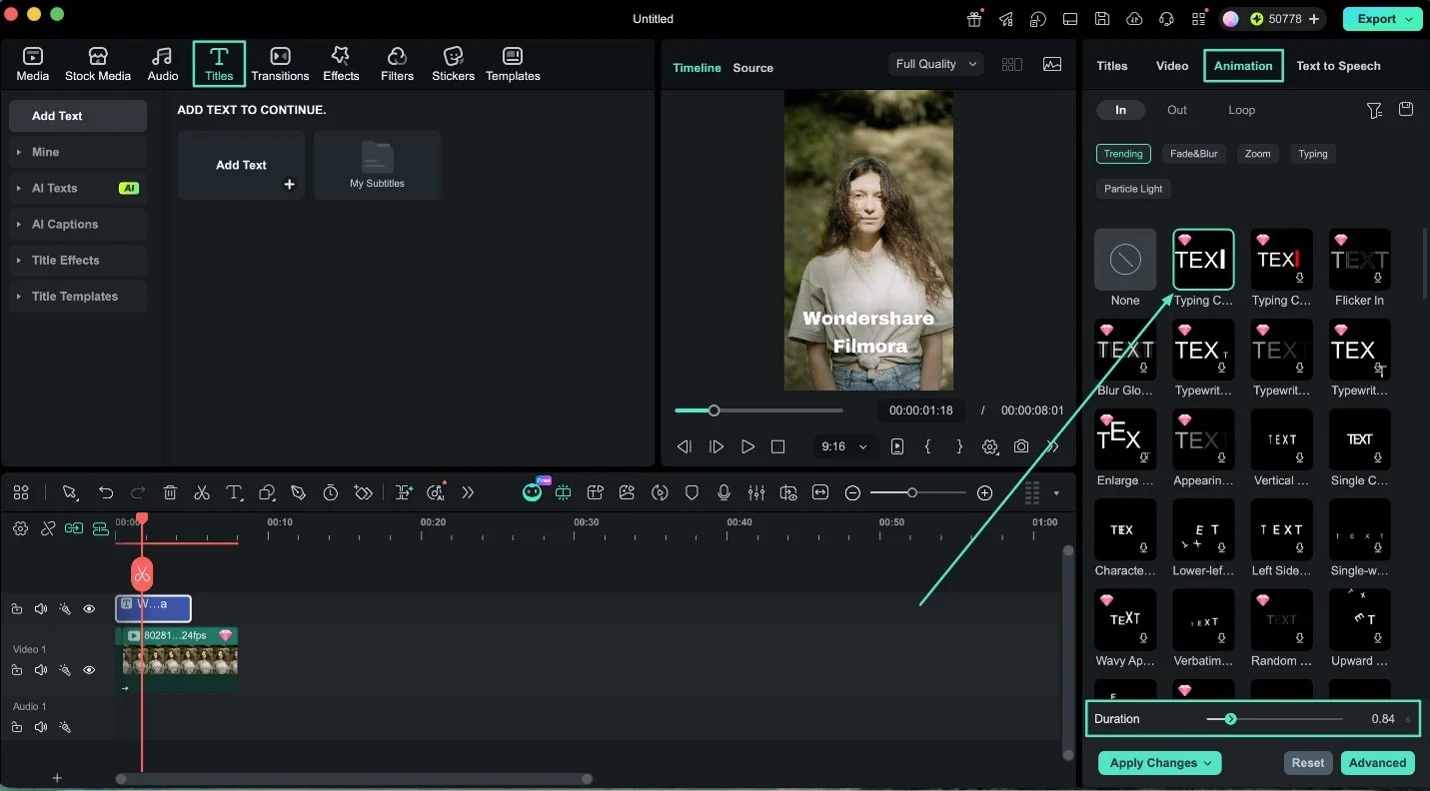
Add a title from the “Titles” tab and place it on the timeline. Select the title, open “Animation,” then choose your preferred preset option. Click a preset thumbnail to view its movement inside the “Preview” window. Adjust the animation movement duration with the “Duration” slider present in the settings. For Mac projects, the Filmora video editor for Mac provides dedicated desktop editing tools.
Part 2. Use Keyframes for Precise Property Changes
Keyframes provide greater control when you create animated text with custom changes. Set property values at two timeline points to define the desired transition. The table below shows which text properties you can control with keyframes:
| Property | What Changing It Between Two Keyframes Does |
| Position | Slides the text from one place in the frame to another |
| Scale | Grows or shrinks the text, which is how a title pushes forward |
| Rotation | Tilts the text as it plays, which suits stamps, tags, and price flashes |
| Opacity | Fades the text in or out at a moment you choose exactly |
Click the title on the timeline and switch to the “Video” tab. Then, open “Transform” in the properties panel. Move the playhead to where the movement should start, then click the “Keyframe” icon beside the property you want. Move the playhead again and change that value, and Filmora records a second keyframe.
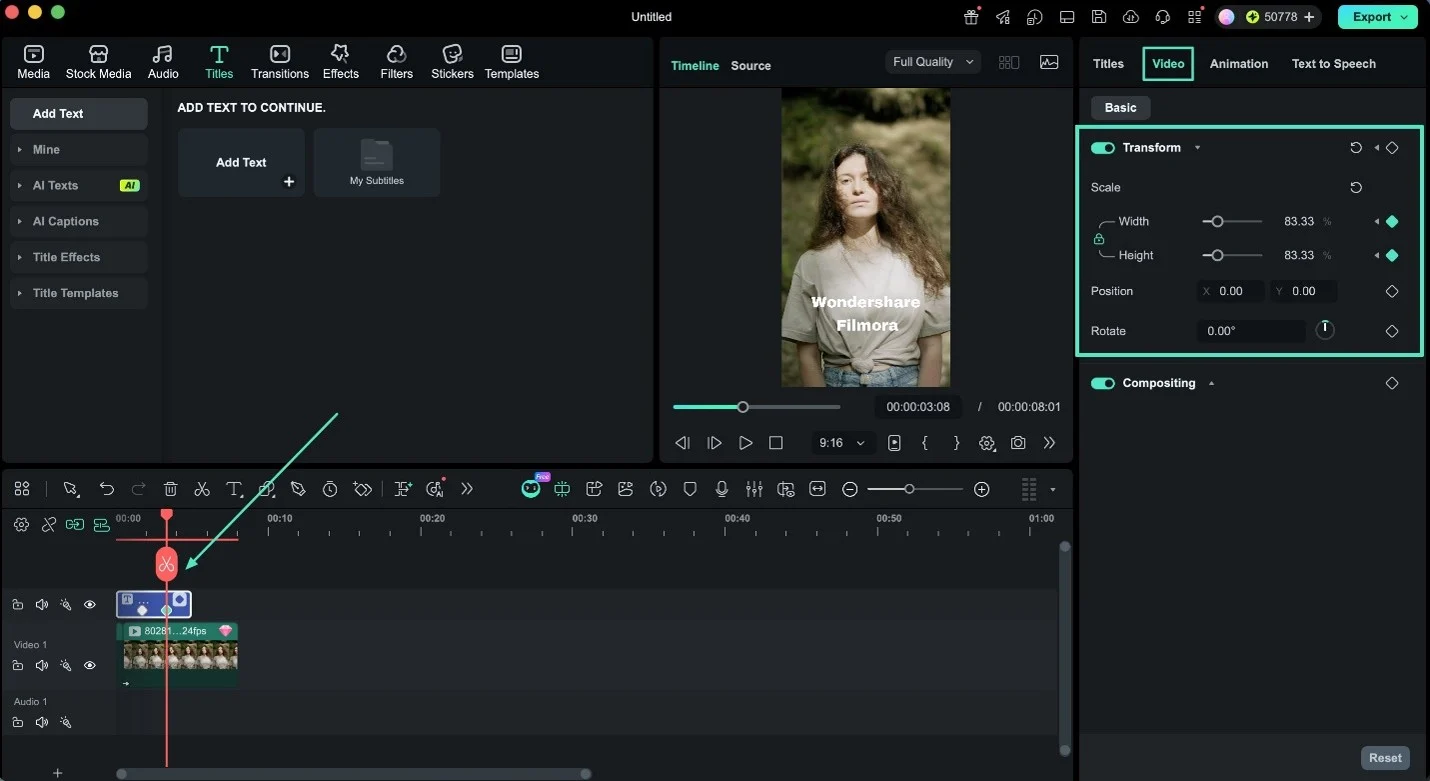
Keyframes let text reach exact positions at specific frames within your timeline. Complex movements may require more keyframes, making later timing adjustments more time-consuming.
Part 3. Use Motion Paths for Curved or Custom Movement
Keyframes suit custom movement, but curved text animation requires more control points. Filmora’s Bezier Path lets text follow custom curves drawn by editors.
Drawing the Route
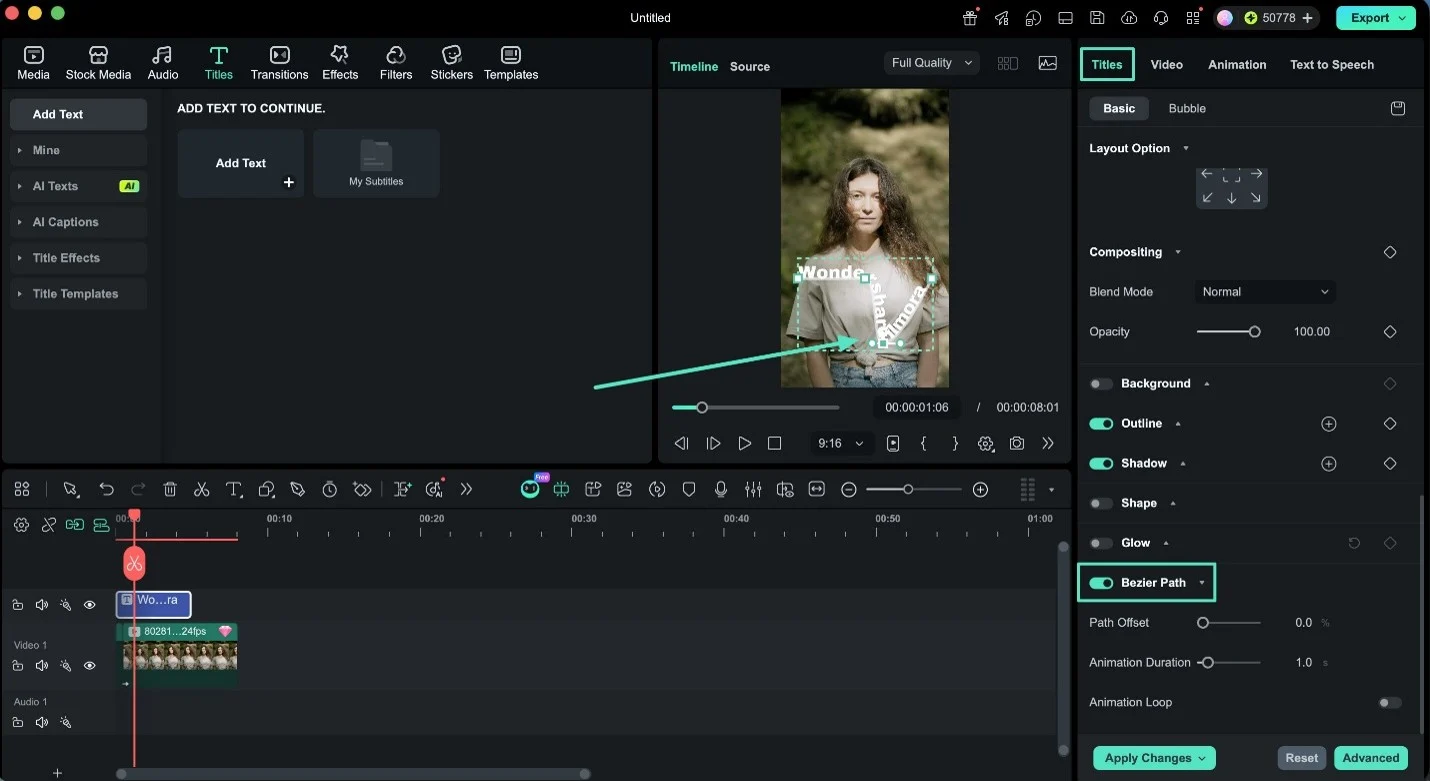
Click the title, open the “Text” section in the properties panel, and turn on “Bezier Path.” Click along the “Line” under your text to add a control point, then drag that point to bend the route. Dragging the handles on either side of a point changes how sharply the curve turns. Select a point and press “Delete” to remove it.
Controlling the Travel
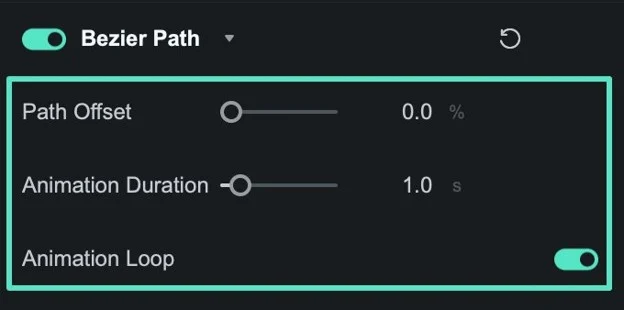
Adjust “Path Offset” to change the text position across your selected route. Set “Animation Duration” to control travel time from beginning to path end. Enable “Animation Loop” when you want the same movement to repeat continuously. Avoid preset text shapes because enabling them disables the selected motion path.
Part 4. Compare the Three Methods by Editing Need
Each method serves a different purpose when using an animated text maker. Comparing them side by side reveals how much editing control each provides. The following table highlights their setup demands, adjustments, and movement capabilities:
| Editing Need | Presets | Keyframes | Motion Paths |
| Setting Up One Basic Move | One click | Two keyframes | Two path points |
| 20 Captions in One Project | 20 clicks | 40 keyframes | 20 drawn paths |
| Landing a Change on an Exact Frame | Not possible | Place the keyframe there | Set the duration |
| Building a Curved or Wavy Route | Not available | One keyframe per turn | One point per curve |
| Changing the Timing Later | Swap to another preset | Drag every keyframe | Edit one duration value |
Presets suit repeated tasks, while keyframes provide exact control over animation timing. Motion paths handle curved movement without requiring keyframes across every direction change.
Part 5. Avoid Using More Control Than the Project Needs
Choose only the control required to create animated text for each project. Matching tools with project needs prevents extra work across your editing timeline.
| A Preset Is Enough | The Project Needs More |
| A lower third that appears and then clears | A title that has to hit a specific drum beat |
| Captions repeated across a talking-head cut | An opening title that travels around the subject |
| A watermark that simply stays on screen | A logo reveal that scales and fades at set moments |
| Social text that only needs to look tidy | Text that curves around a shape in the frame |
Most projects need simple controls, so checking basic options first saves time. Presets support faster revisions, while keyframed titles require more manual adjustments. For broader workflow guidance, the Filmora Mac proxy editing guide covers proxy-based media handling options.
Conclusion
Choosing the simplest method keeps text animation easier to build and revise. Filmora presets work well for common titles needing fast, repeatable movement effects. Keyframes provide timing control, while motion paths support curved custom movement routes. Select only the controls your project needs to keep future changes manageable.