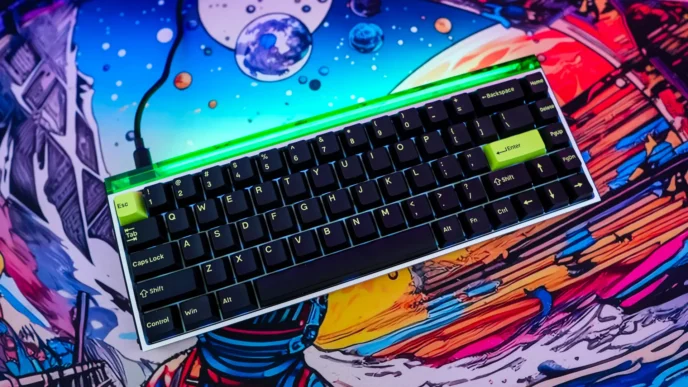
Setting up the ASUS ROG Falchion Ace HFX Keyboard
Getting the Falchion Ace HFX setup is quite easy. Using the supplied keyboard go ahead and plug the keyboard into your PC. Windows will automatically recognize and you’ll be good to go.
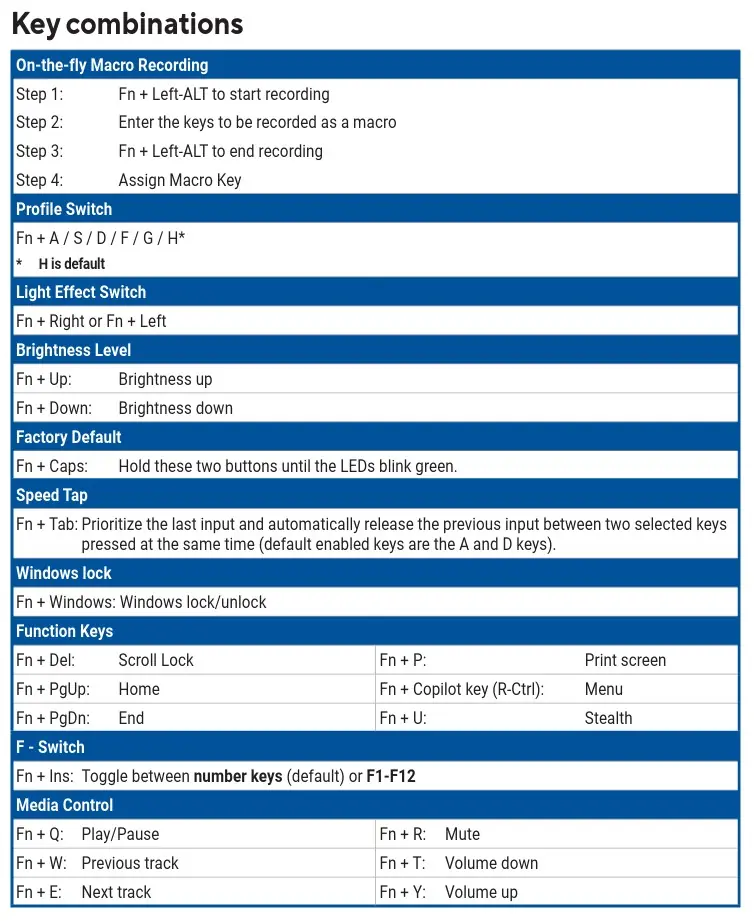
Now ASUS has built a lot of functions into the keyboard itself that do not require any software to work. These bring back a lot of keys and functions that you lose by going down to the 65% form factor.
ASUS Armoury Crate Software
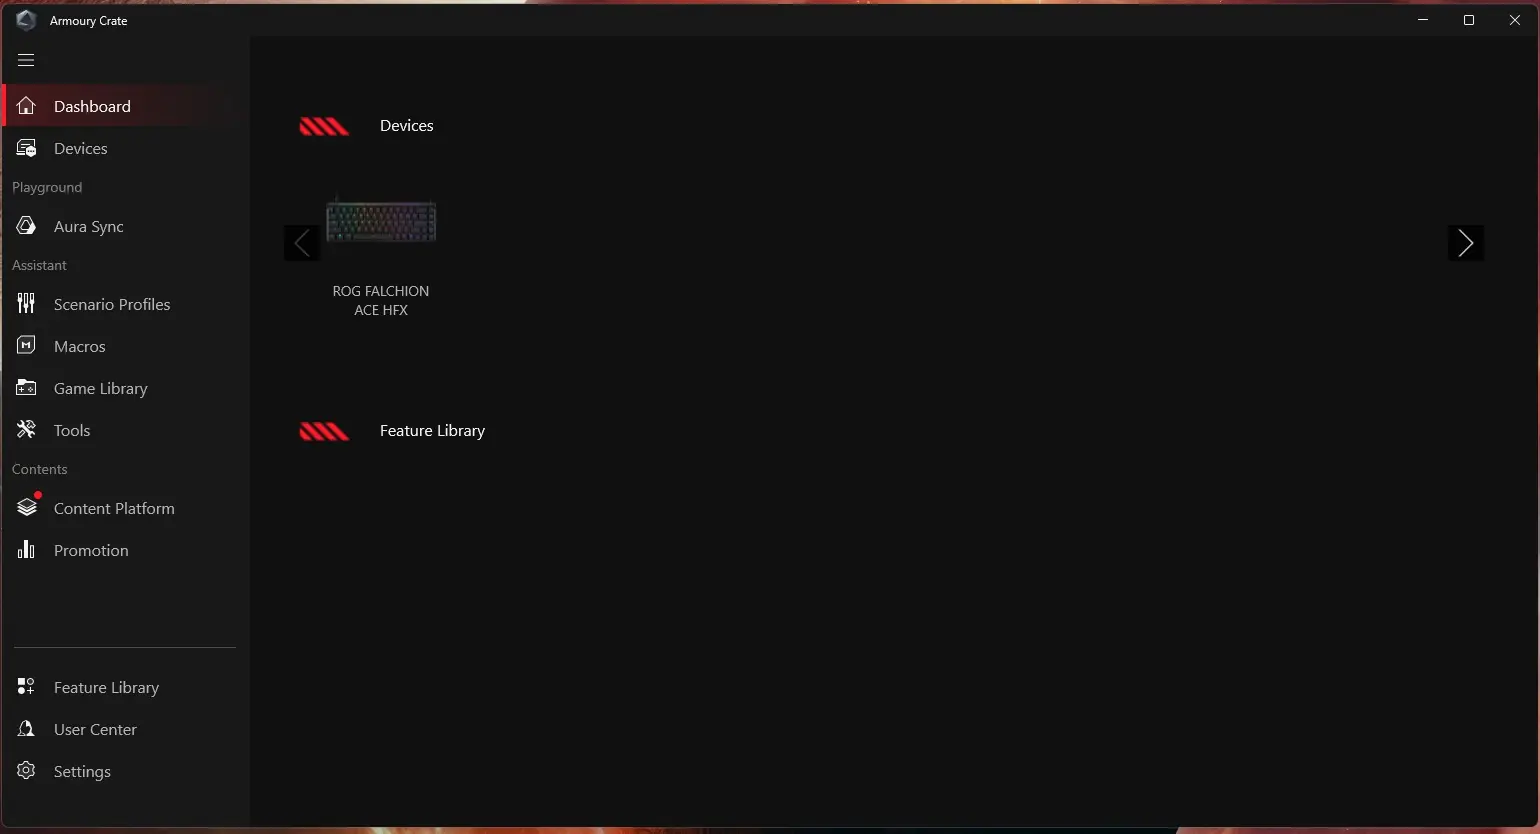
If your do want software control you’ll need to download the ASUS Armoury Crate software. Luckily the Falchion Ace HFX does support Armoury Crate Gear, which is essentially a cut-down (less resource heavy) version of Armoury Crate. Since I do run an ASUS motherboard I had Armoury Crate installed so when I plugged in my keyboard it was recognized and Armoury Crate installed the module for it.
So going into Armoury Crate you should see the Falchion Ace HFX listed.
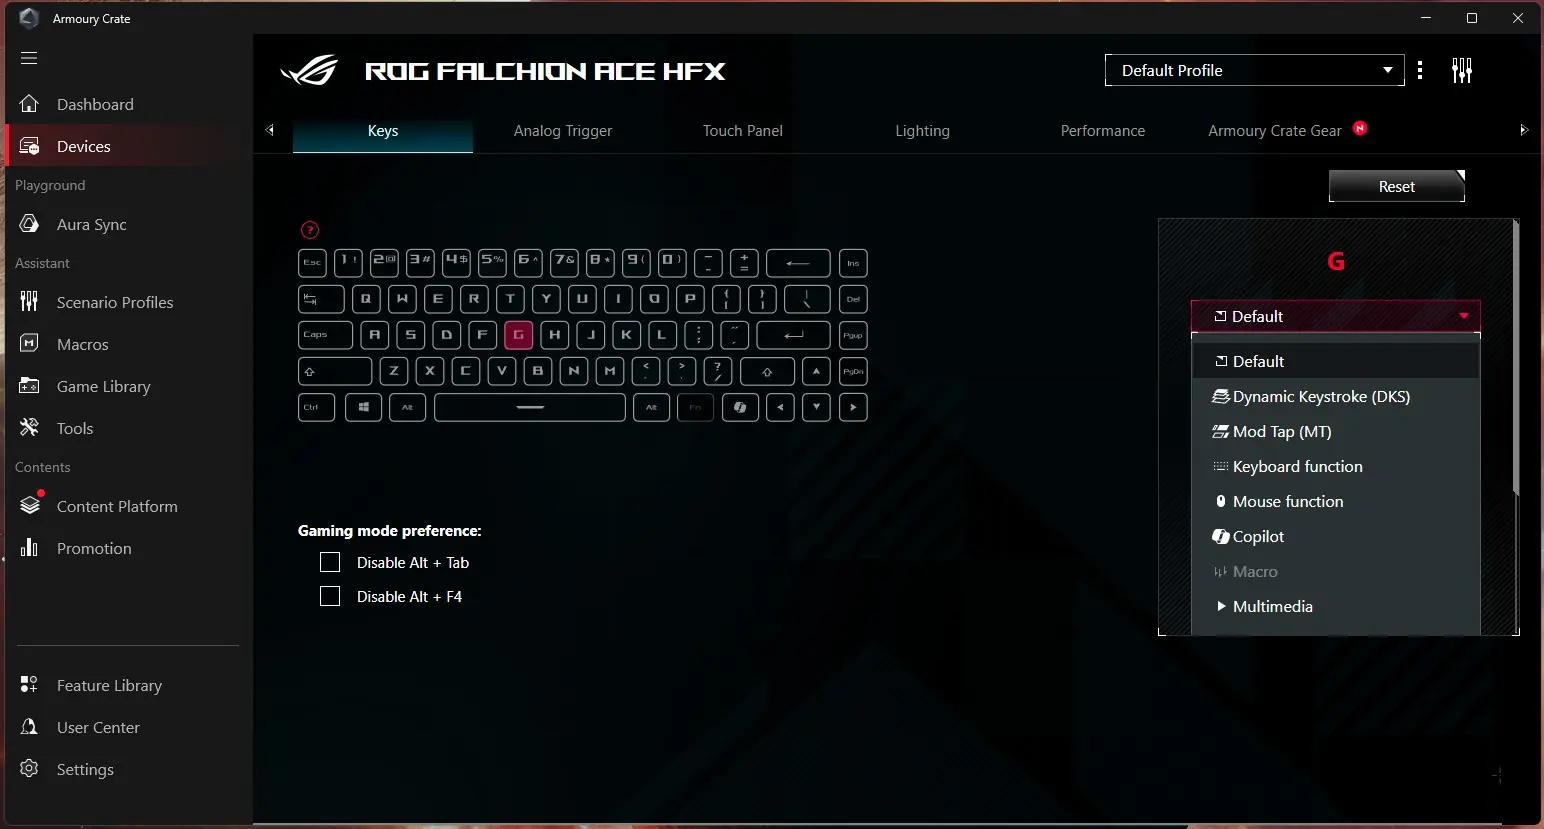
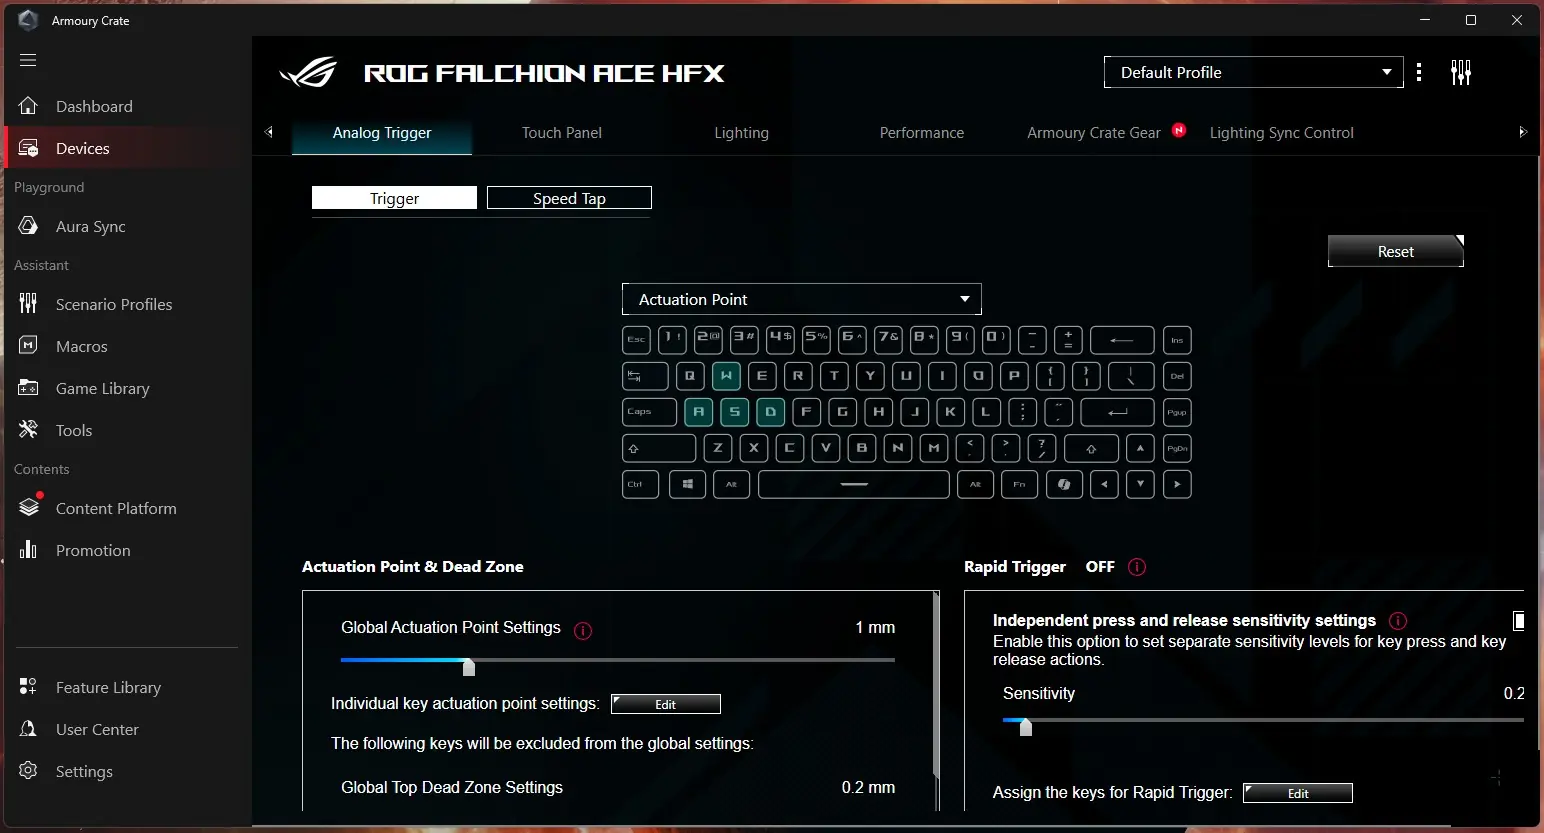
Clicking into it we are brought to the Keys tab. Here you can fully reprogram each key on the keyboard. There are a whole slew of functions to choose from and you can also set the Fn layer here too. Next is the Analog Trigger tab, here you can set the actuation point, dead zone, speed tap, and rapid trigger settings. One of the coolest things about a magnetic switch keyboard like this is that you can set the actuation point for each individual key.
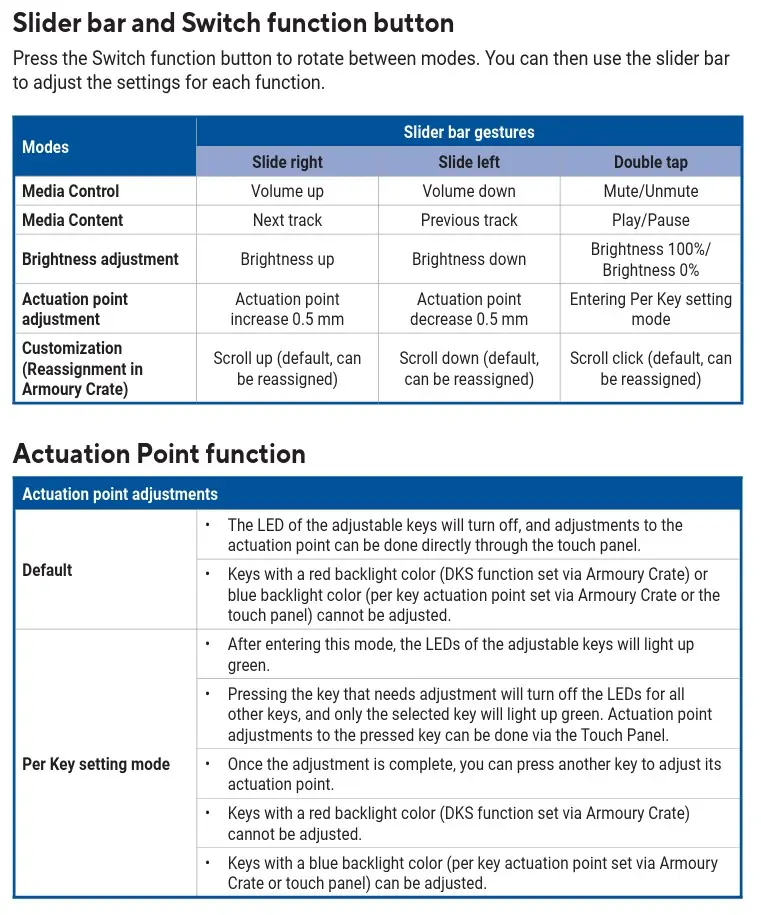
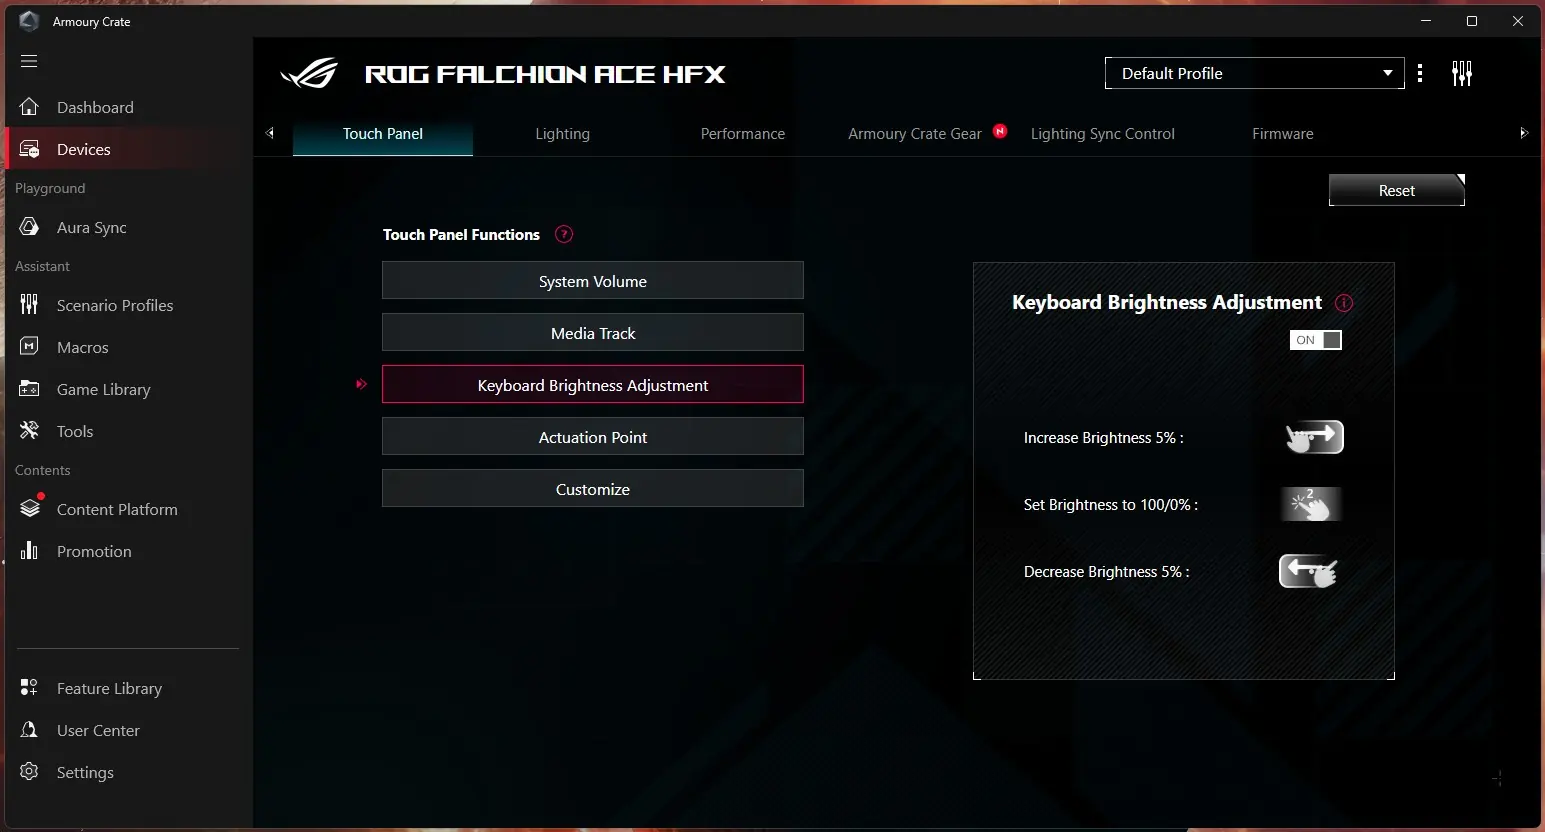
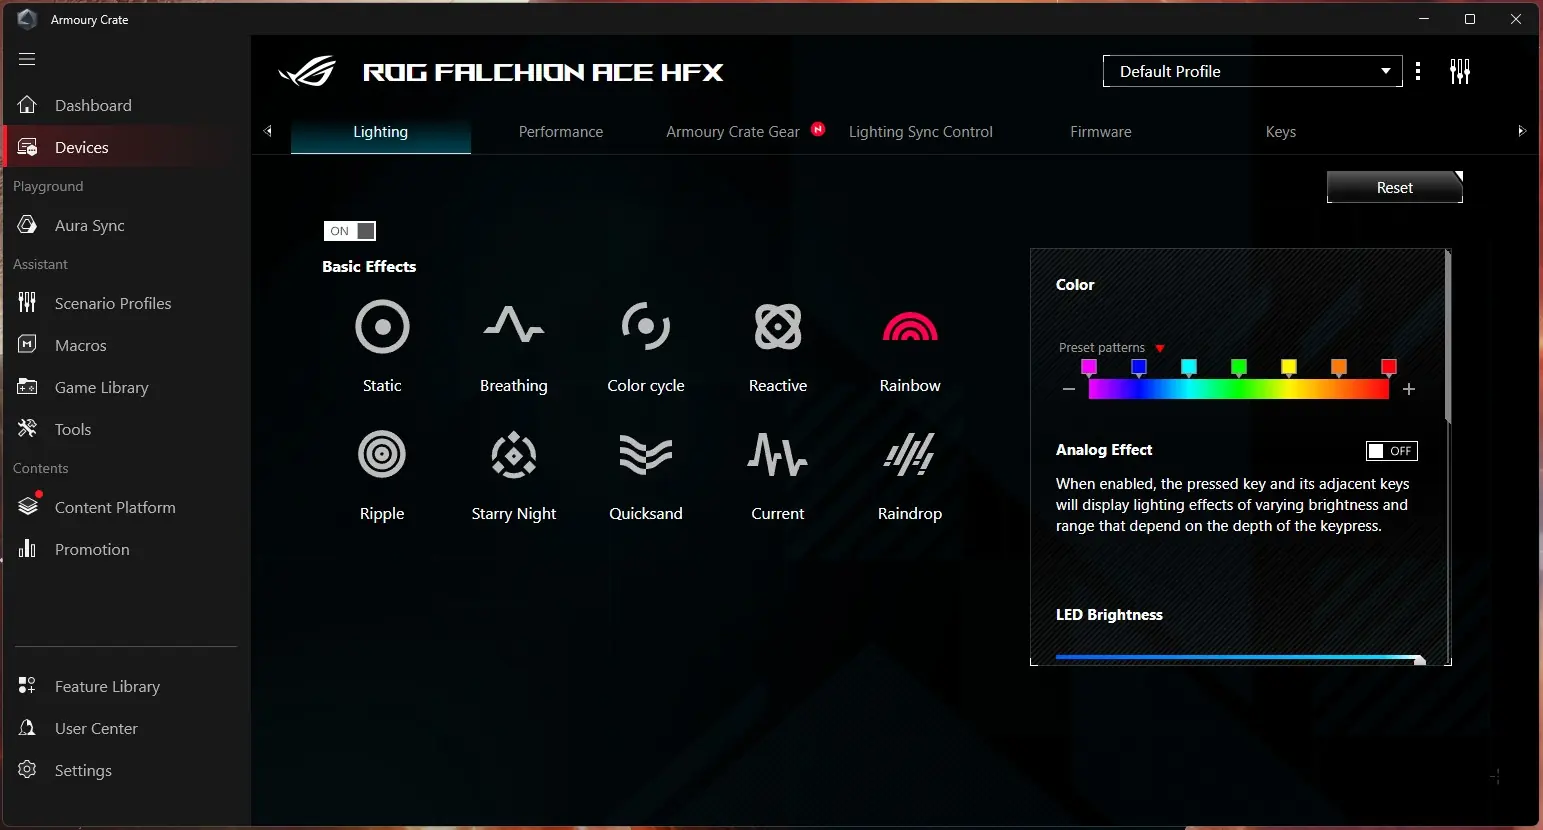
Next is going to be the Touch Panel tab. Here you can see the 5 different touch panel functions and how to use them. The last one is set to “customize” so you can create your own touch function here. After that is Lighting, where of course you can set the lighting effects on the keyboard.
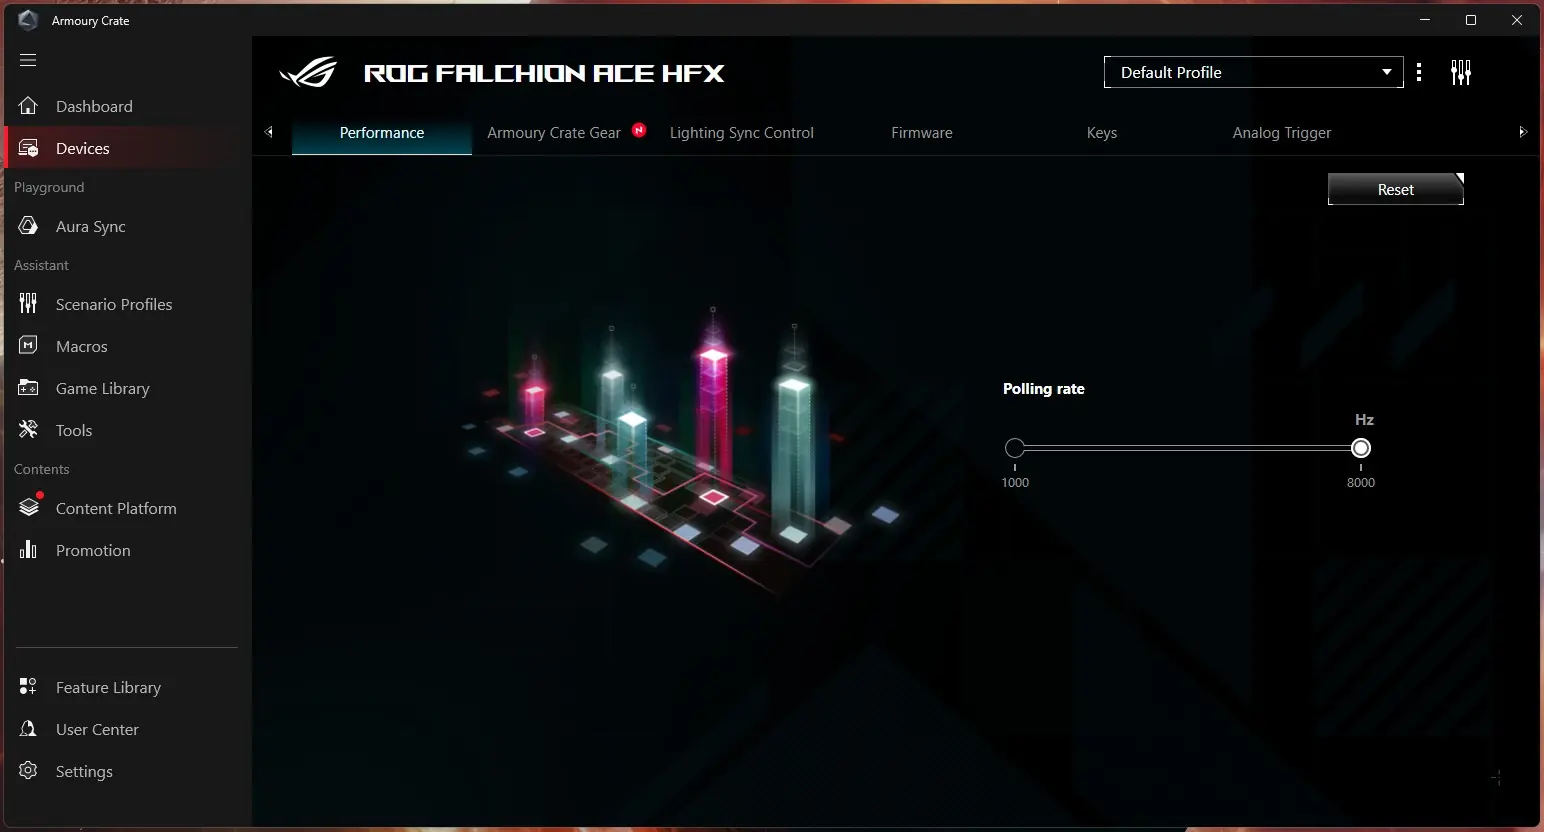
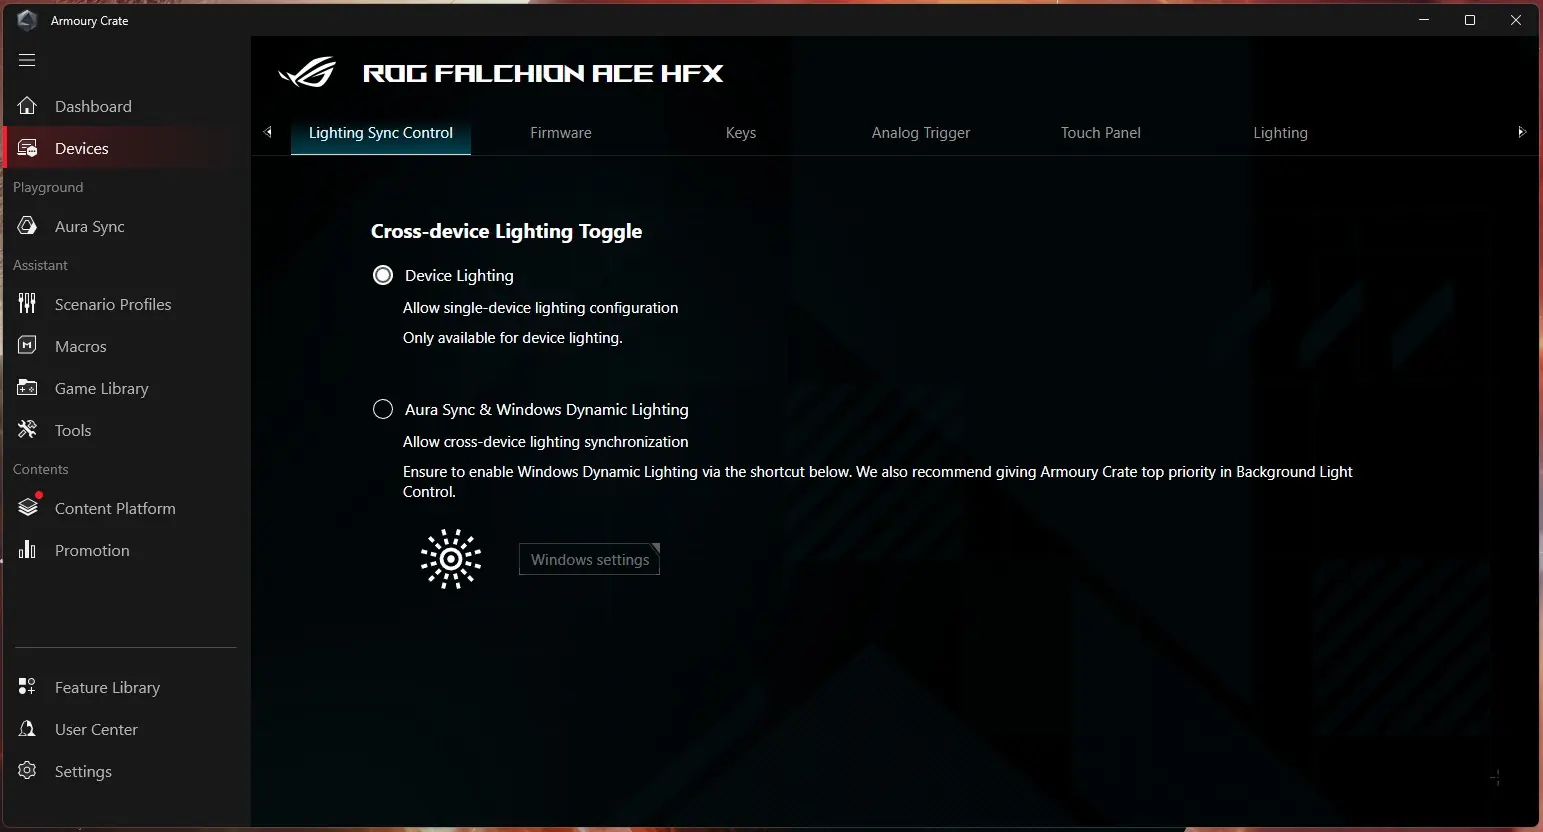
Under performance you can set the polling rate at either 1000 Hz or 8000 Hz. Lighting Sync control you set the cross-device lighting toggle. Finally you have the firmware tab where you can easily update the keyboard’s firmware.