Setup and Software for the ASUS ROG Harpe Ace Aim Lab Edition
Getting the ASUS ROG Harpe Ace Aim Lab Edition setup is extremely easy. Just make sure that it is charged up, plug in the dongle to your PC and then simply move the slider on the bottom of the mouse to 2.4 GHz mode and the mouse will come on and be ready to use.
You do not need to install any software for the mouse to work normally and you can even use buttons on the mouse to make on-the-fly adjustments. If you do want to however customize those adjustments and make other changes you’ll need to download either the full ASUS Armoury Crate, or the more lightweight Armoury Crate Gear.
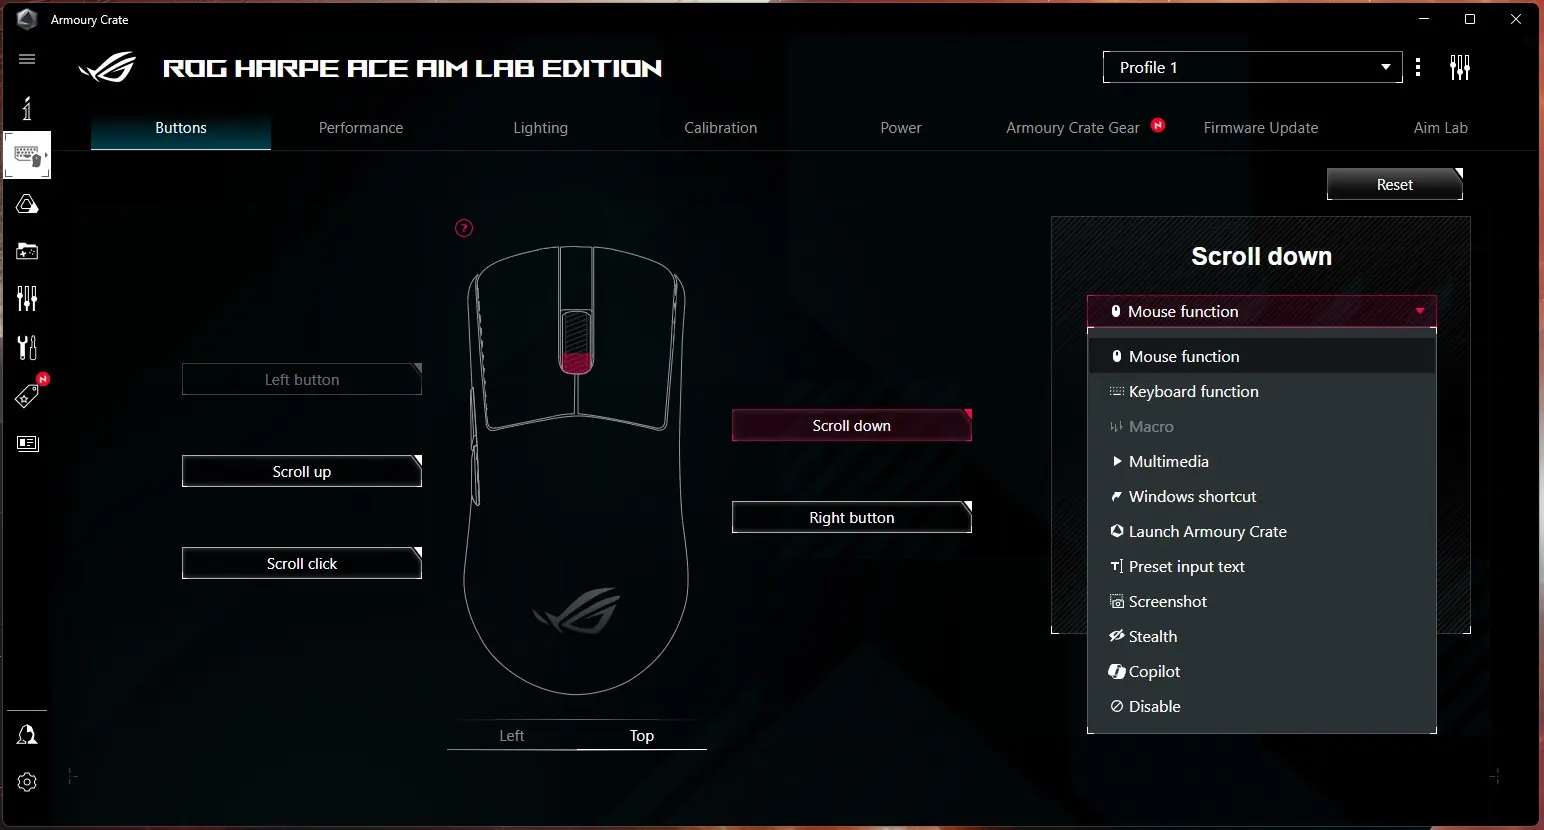
Since I’m already using Armoury Crate on my PC I just decided to use it. Opening up the ROG Harpe Ace Aim Lab Edition section of the software the first tab is Buttons. Here you can reprogram the different buttons on the mouse.
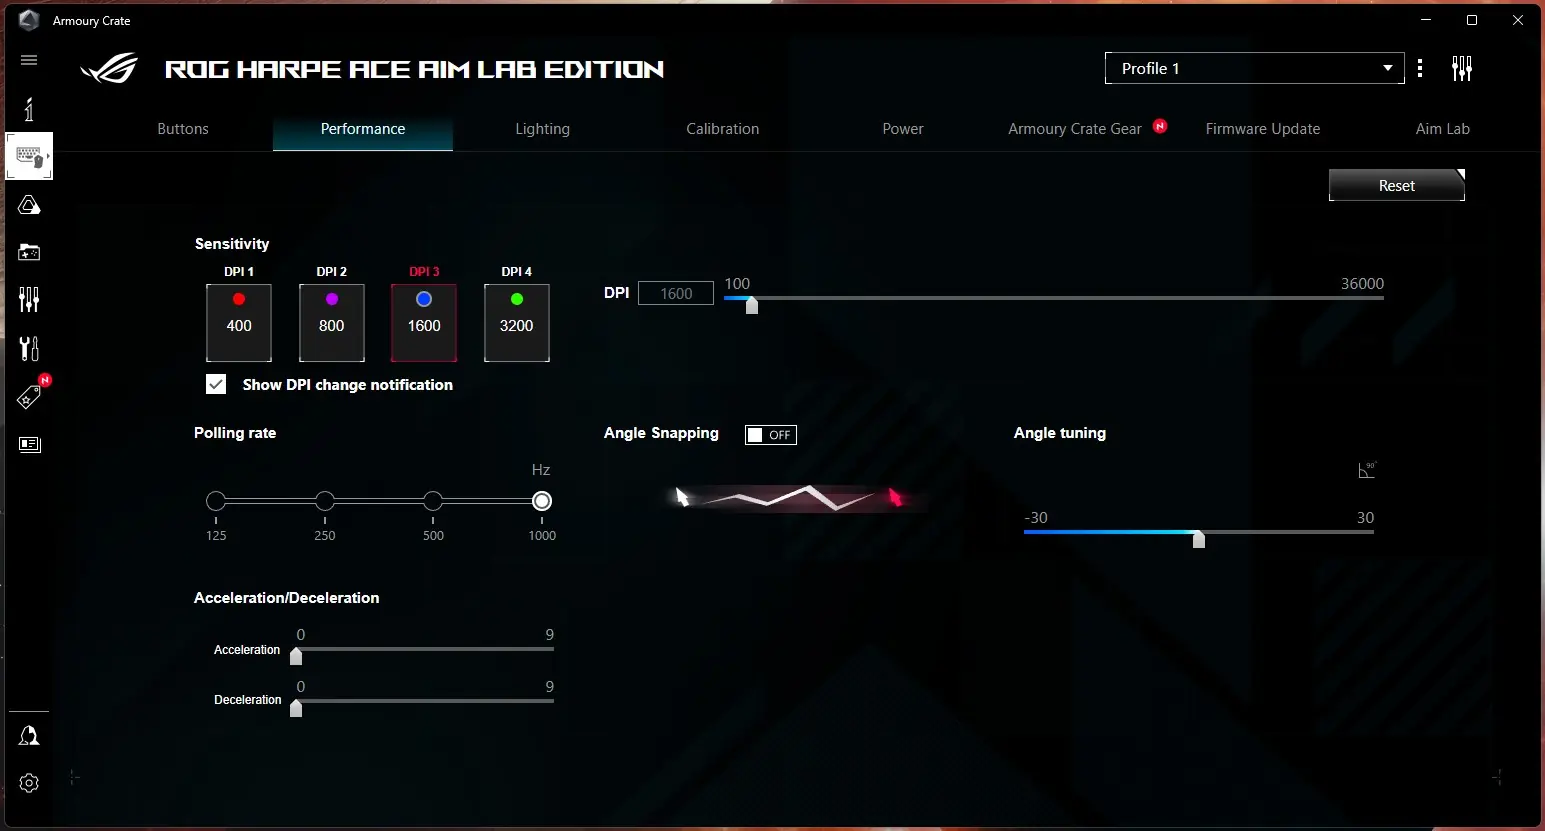
The next tab is Performance. Here you can set the 4 different DPI levels, polling rate, acceleration / deceleration, angle snapping, and angle tuning.
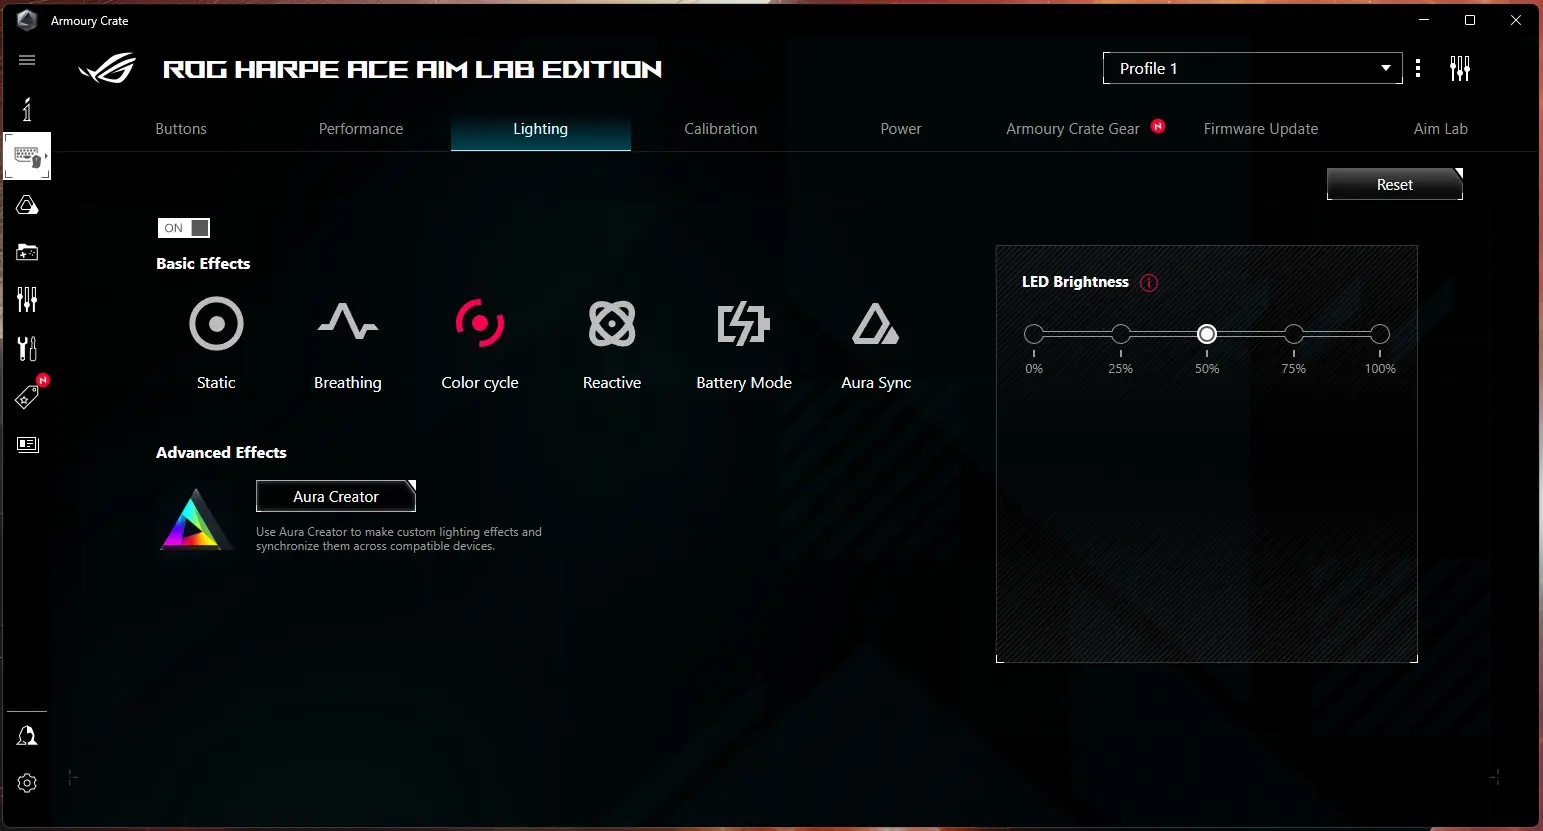
In the lighting tab you can set an effect for the lighting and the LED brightness. The only lighting on the mouse is going to be on the scroll wheel.
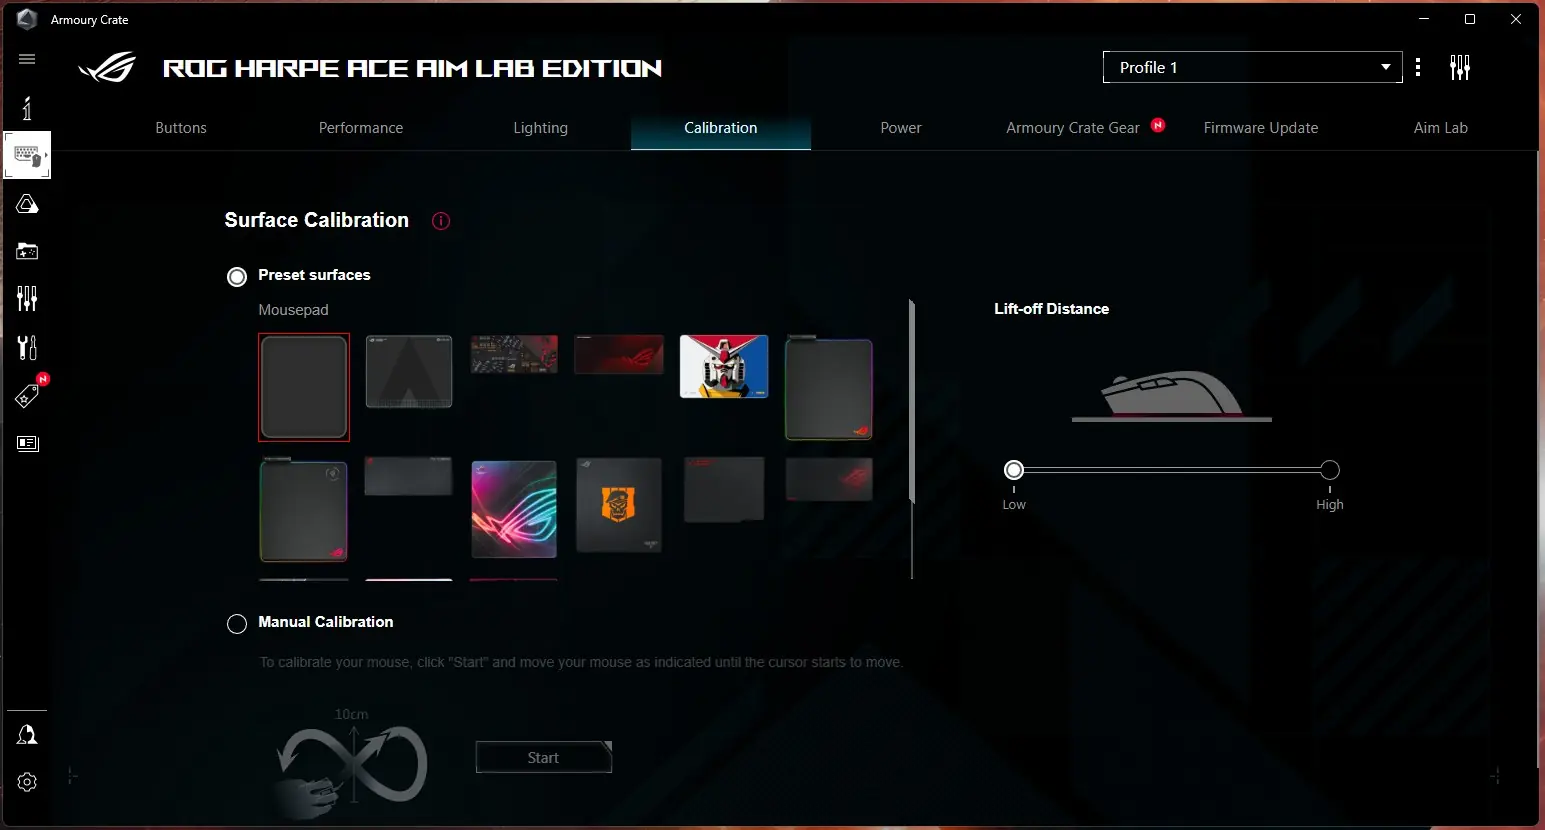
For Calibration you can manually calibrate the mouse to your gaming surface and ASUS actually has preset surfaces built in. You can also set the light-off distance here.
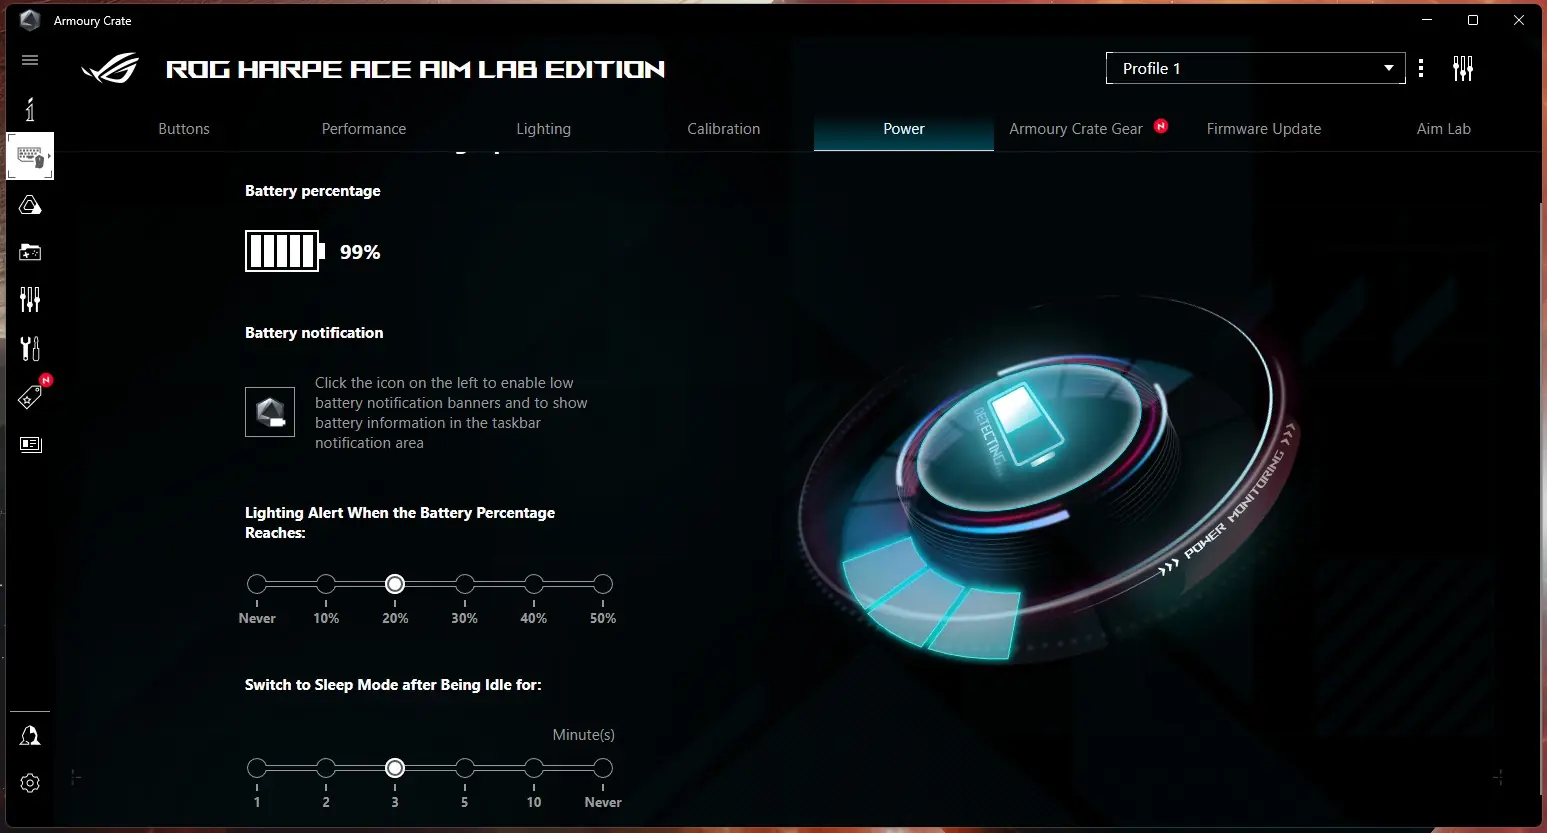
Power will show you your battery level, when to put them mouse to sleep, and when a lighting alert will come on when the battery is low.
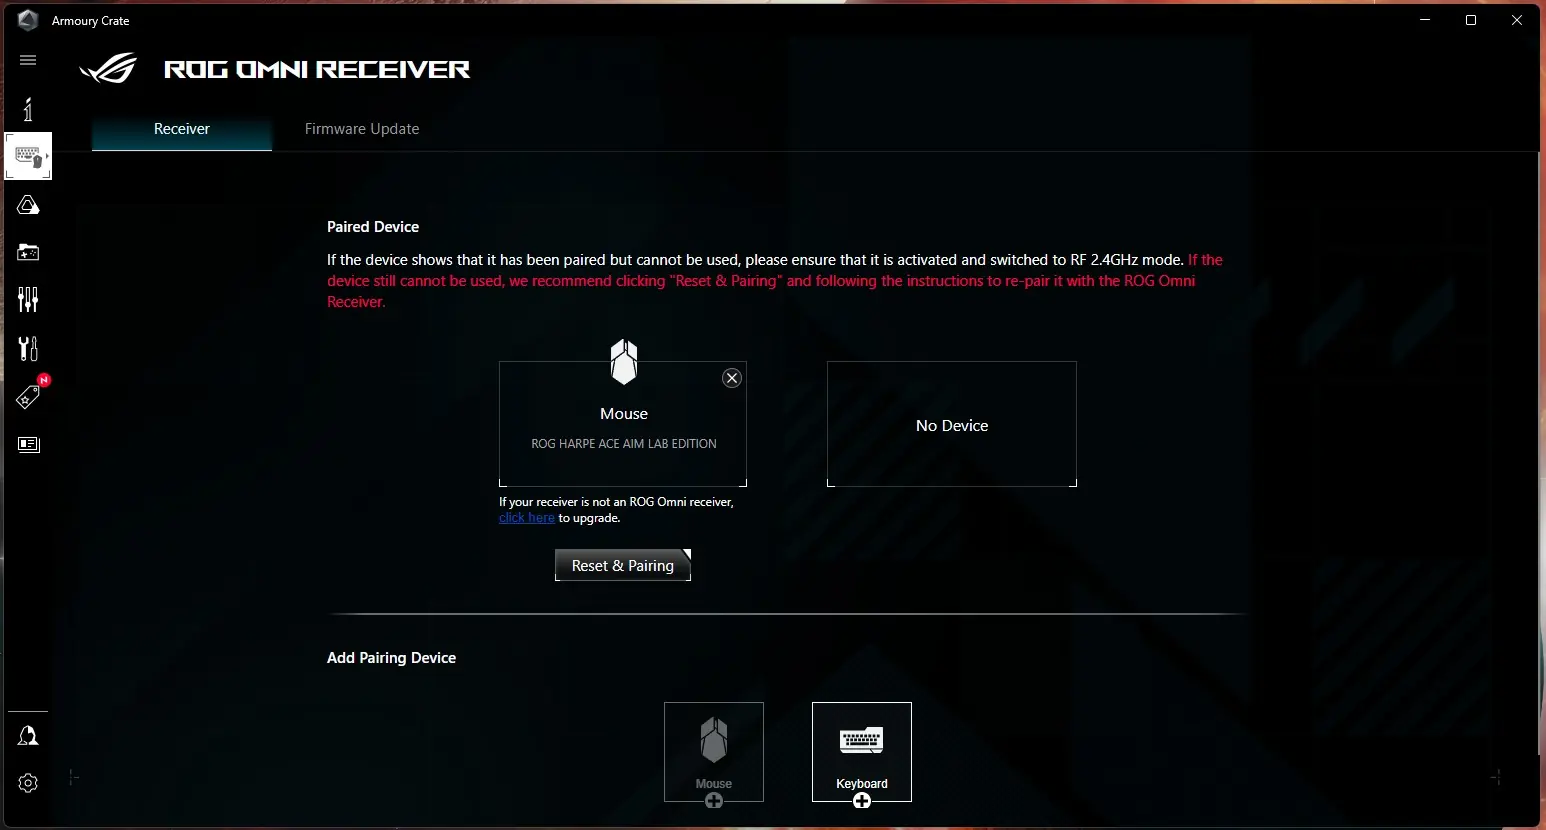
There is also a section for the Omni Receiver. You can actually use this to have the receiver pair to other ASUS devices.