Installation
As with most AIOs, the installation of the Corsair iCUE H150i ELITE CAPELLIX is quite easy. As DIY PC building seems to be getting more popular each and every day, the option of AIO liquid coolers is sure to entice those wanting to have a more advanced build, and easy installation will go a long way towards not scaring off first-time builders. As we mentioned when we covered the included accessories, Corsair has included all of the necessary mounting hardware for a large list of both Intel and AMD processors, but they have also included a physical installation guide and manual. We have seen quite a few companies move to digital versions of their product manuals, and while we appreciate their reduced waste, we still prefer a physical copy of installation instructions, and were happy to have them for this kit.
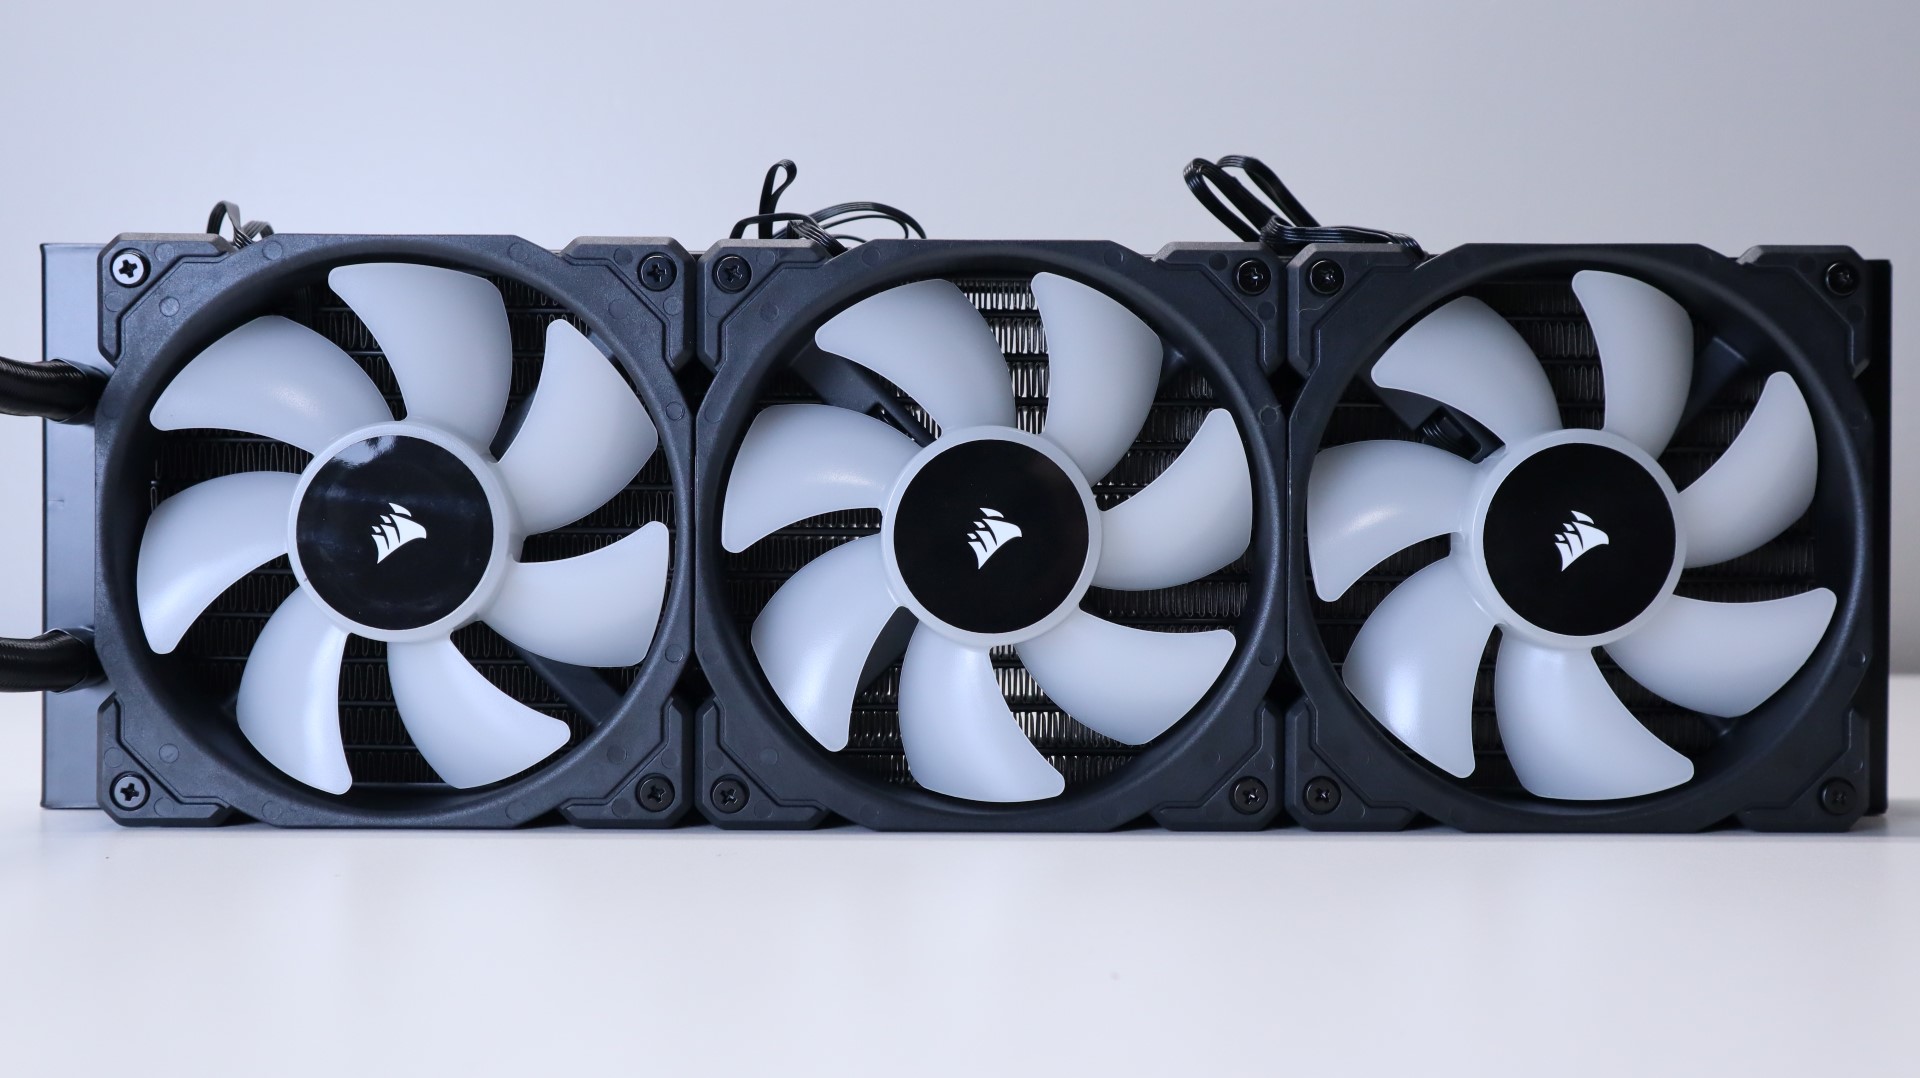
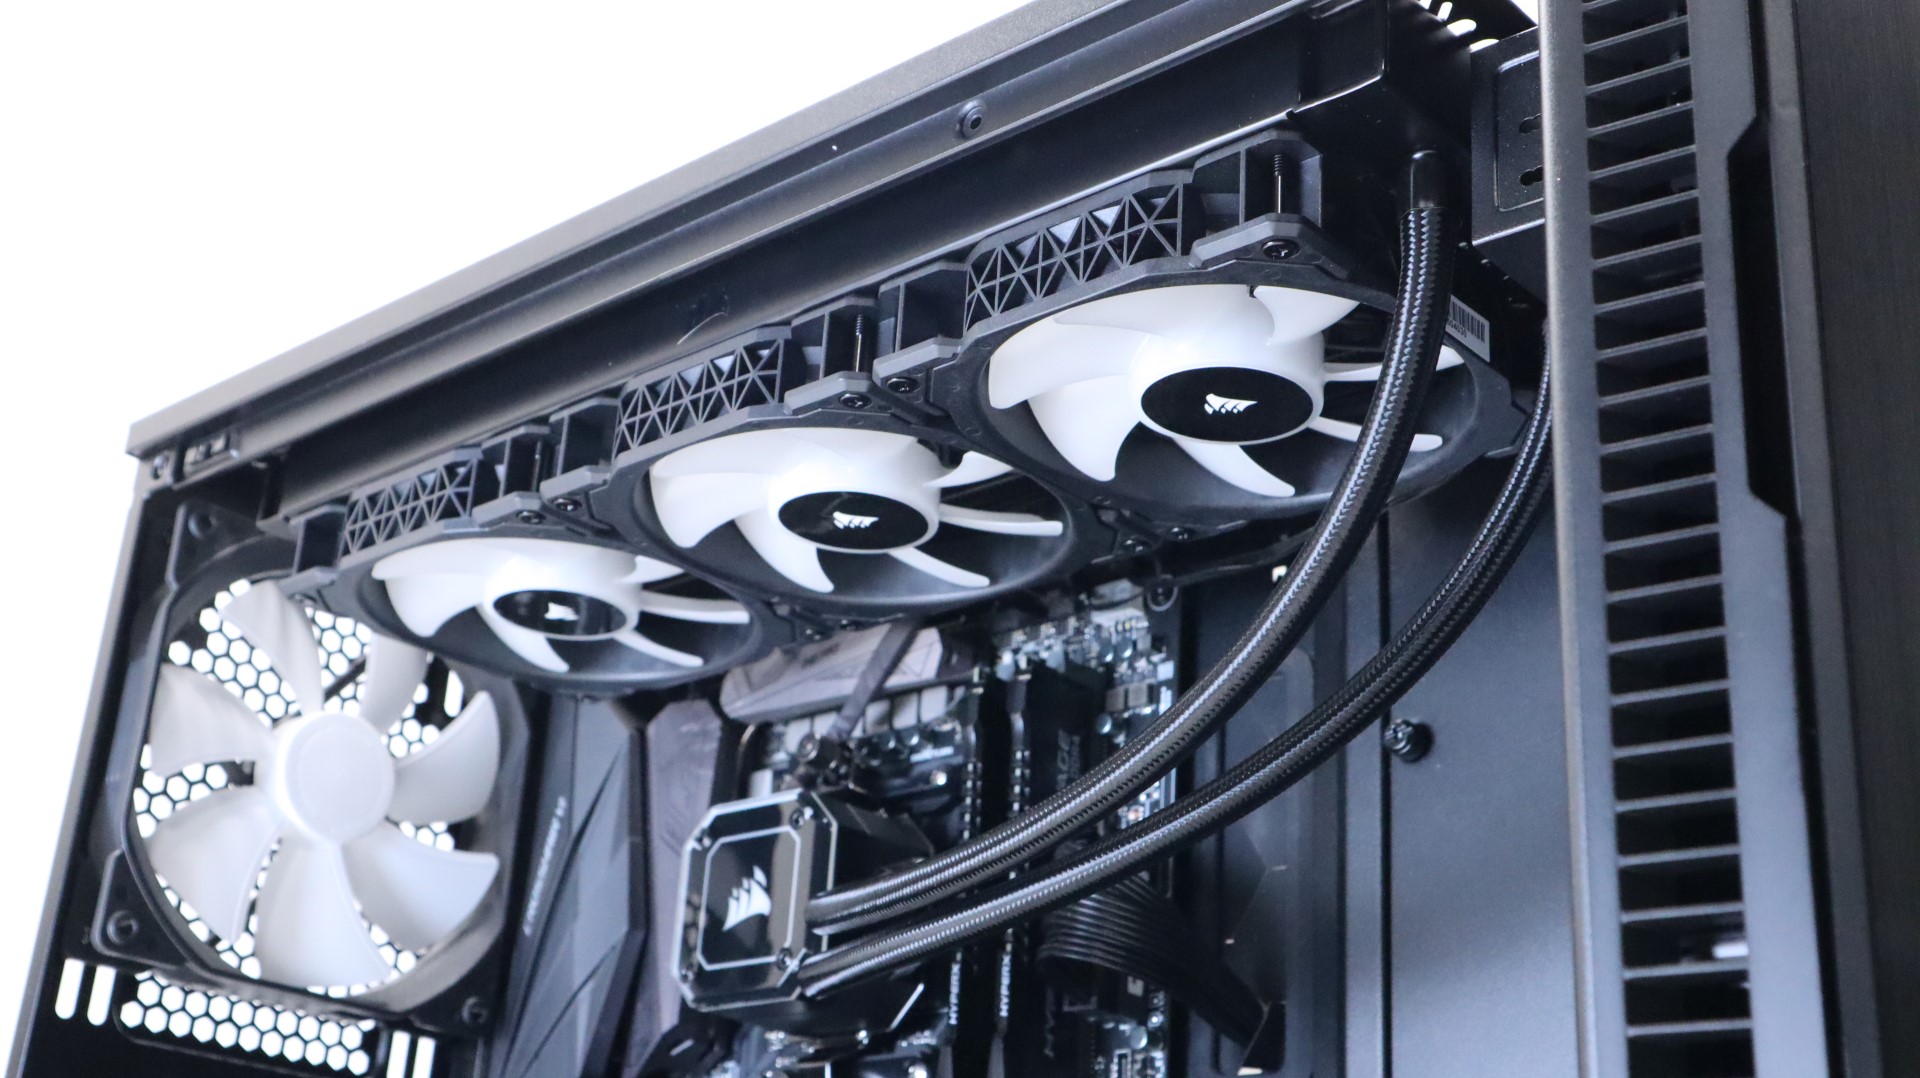
Our testing is performed with fans in a push configuration, so to get things started, we first needed to secure the fans to the radiator using the supplied screws. This is a very simple process, and as long as you line up the screws with the screw holes, and know how to use a screwdriver, there isn’t much else to it.
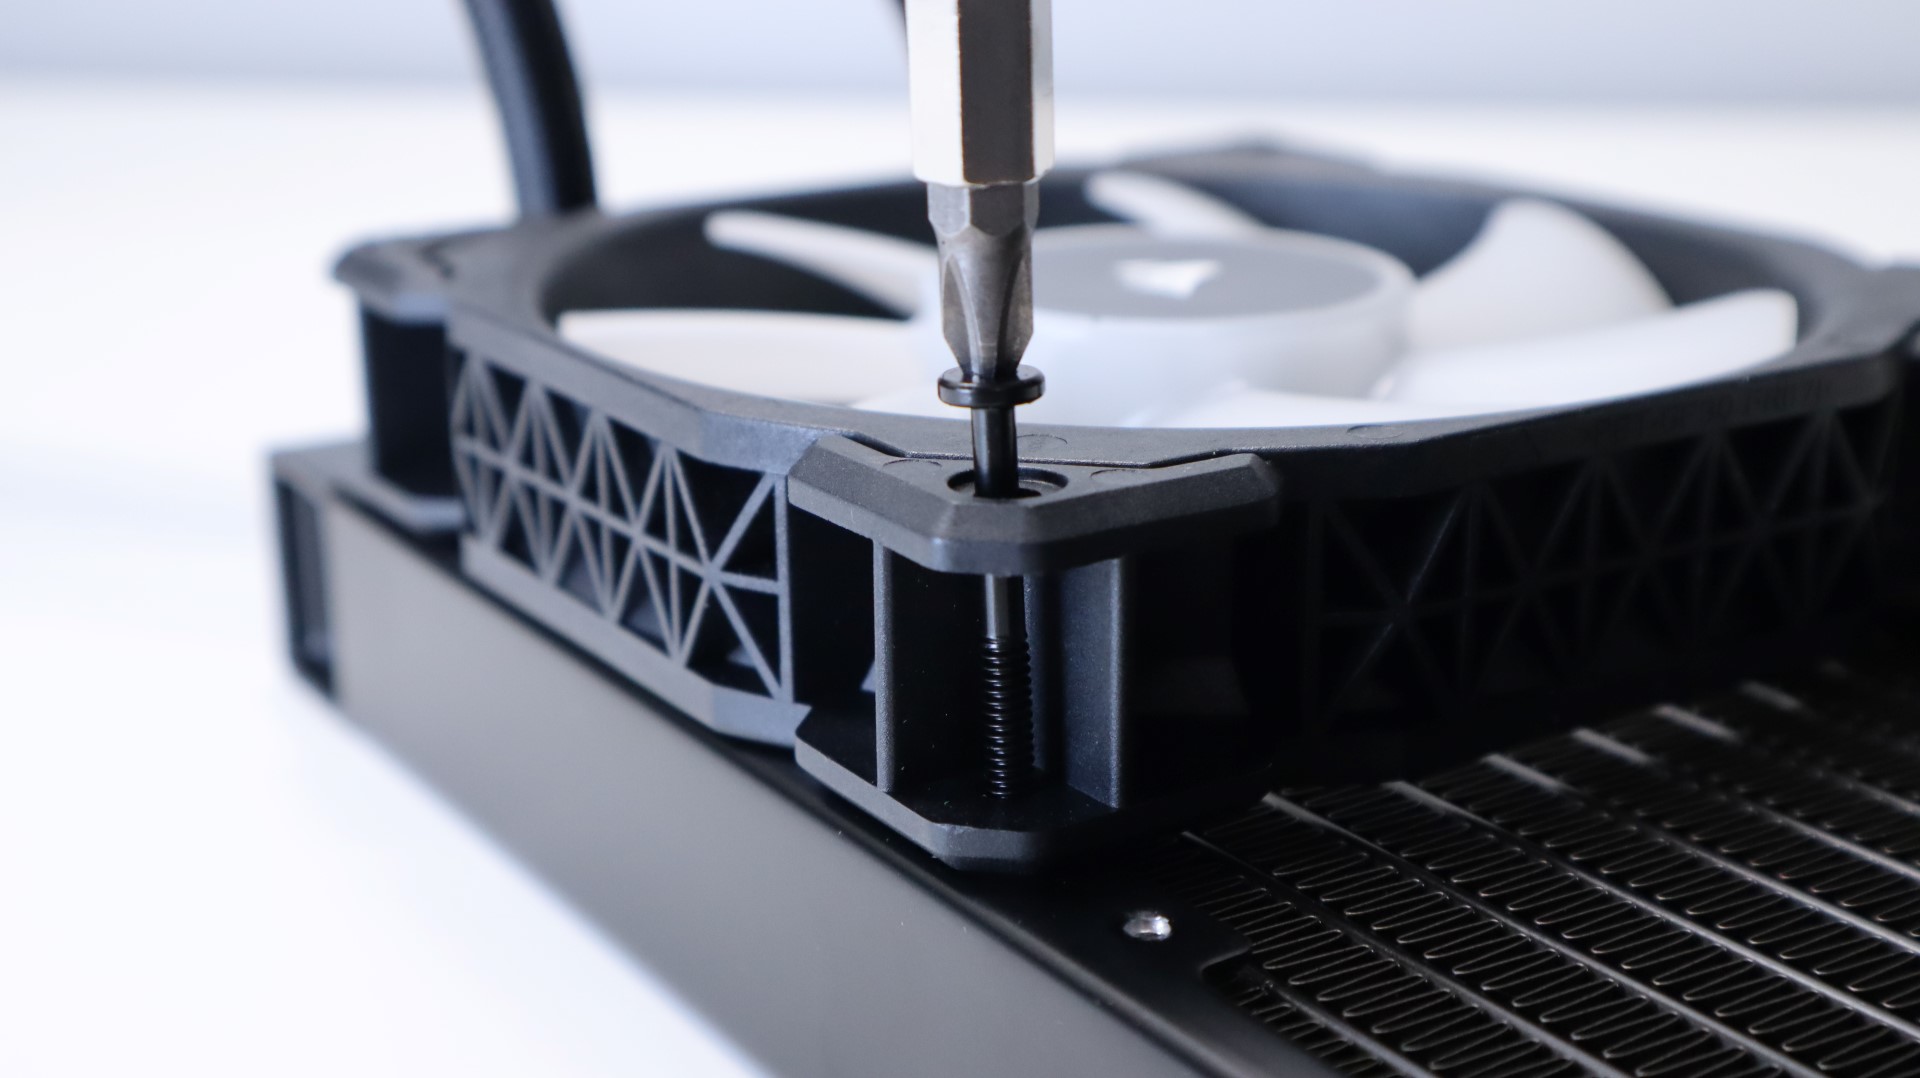
We did however notice that the included screws seemed a bit long. As shown below, the screws were not only long enough to go through the fan body and fully into the threaded holes on the radiator, but they were so long that they continued down in to the fin array of the radiator.
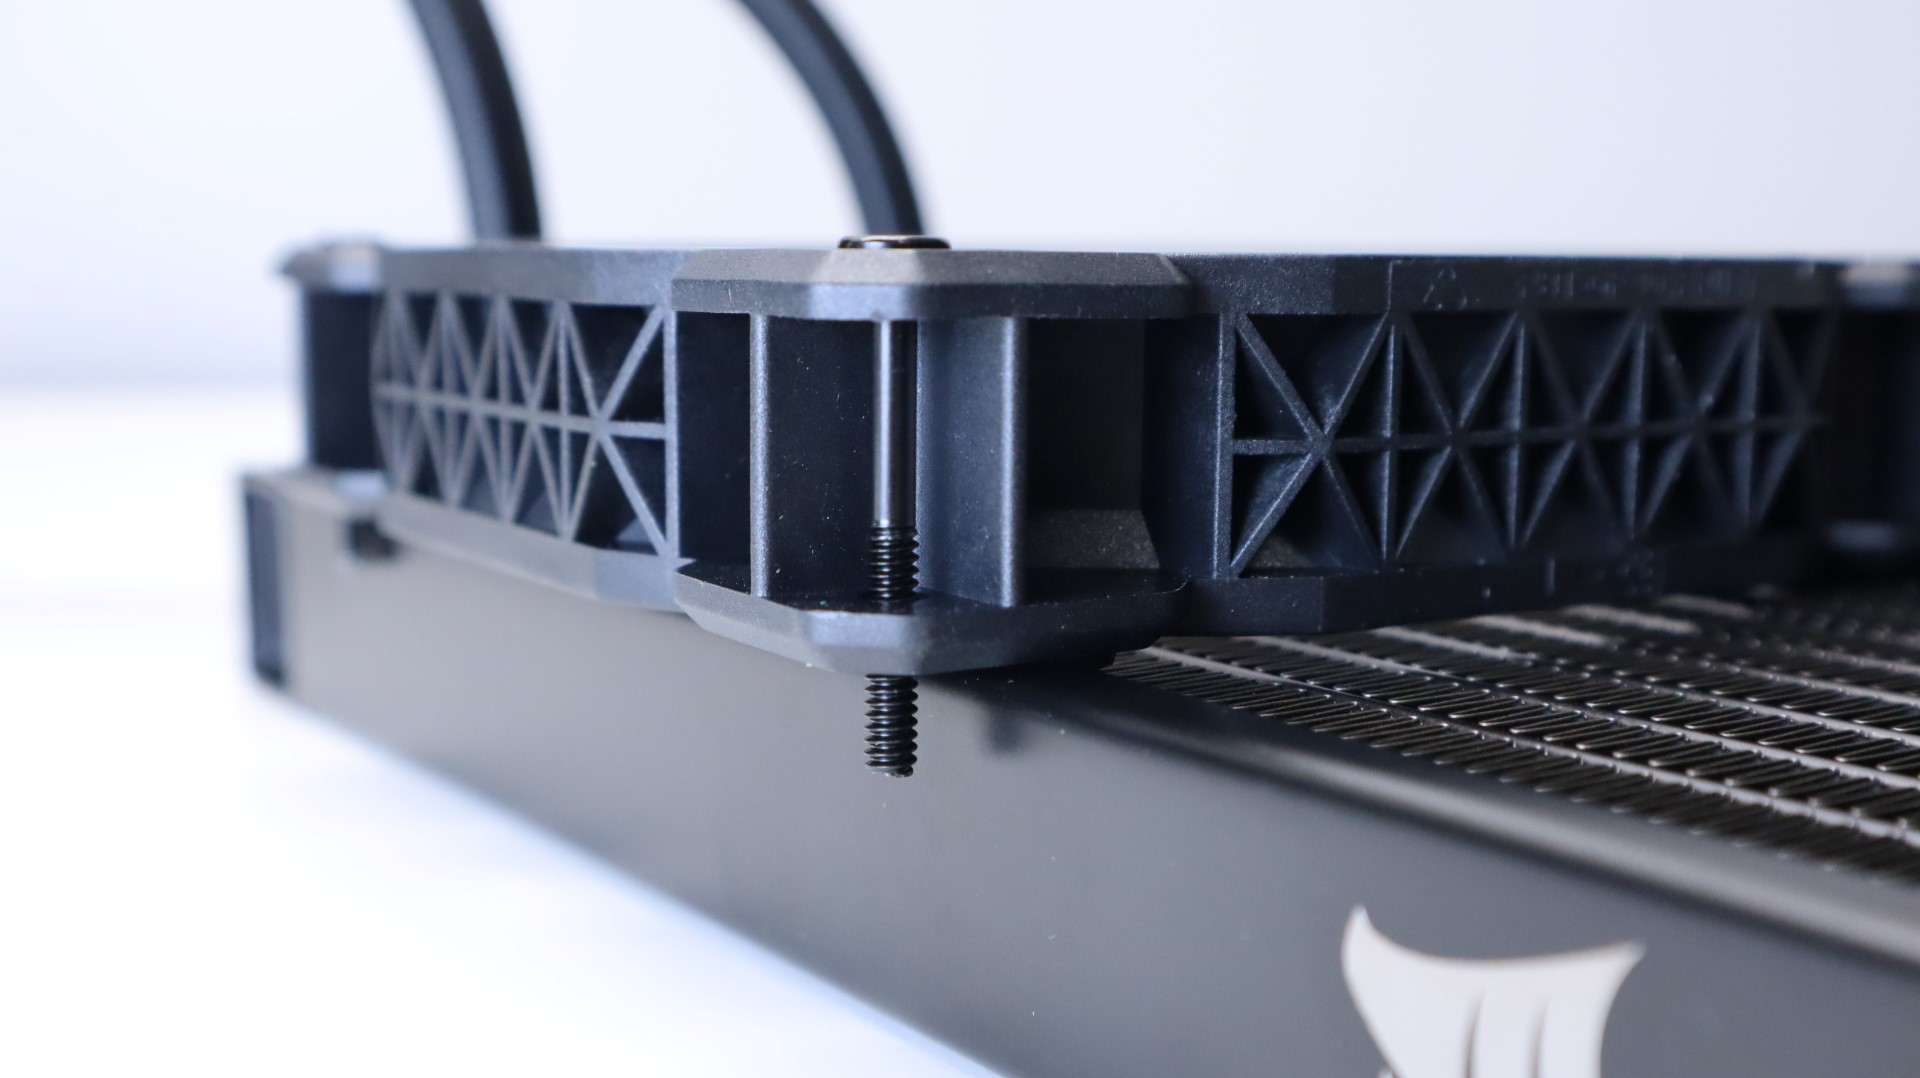
We really don’t like seeing this, and feel like it may have been something missed in the design of the cooler. Thankfully these screws don’t go near the actual liquid channels of the radiator, otherwise we could have had some real issues.

One thing to keep in mind however, is the orientation of the fans with regards to their power cables. We mounted the fans to the radiator so that their PWM cables would be between the fan frames and our motherboard tray. That allows us to easily route them behind the motherboard tray for easier cable management.
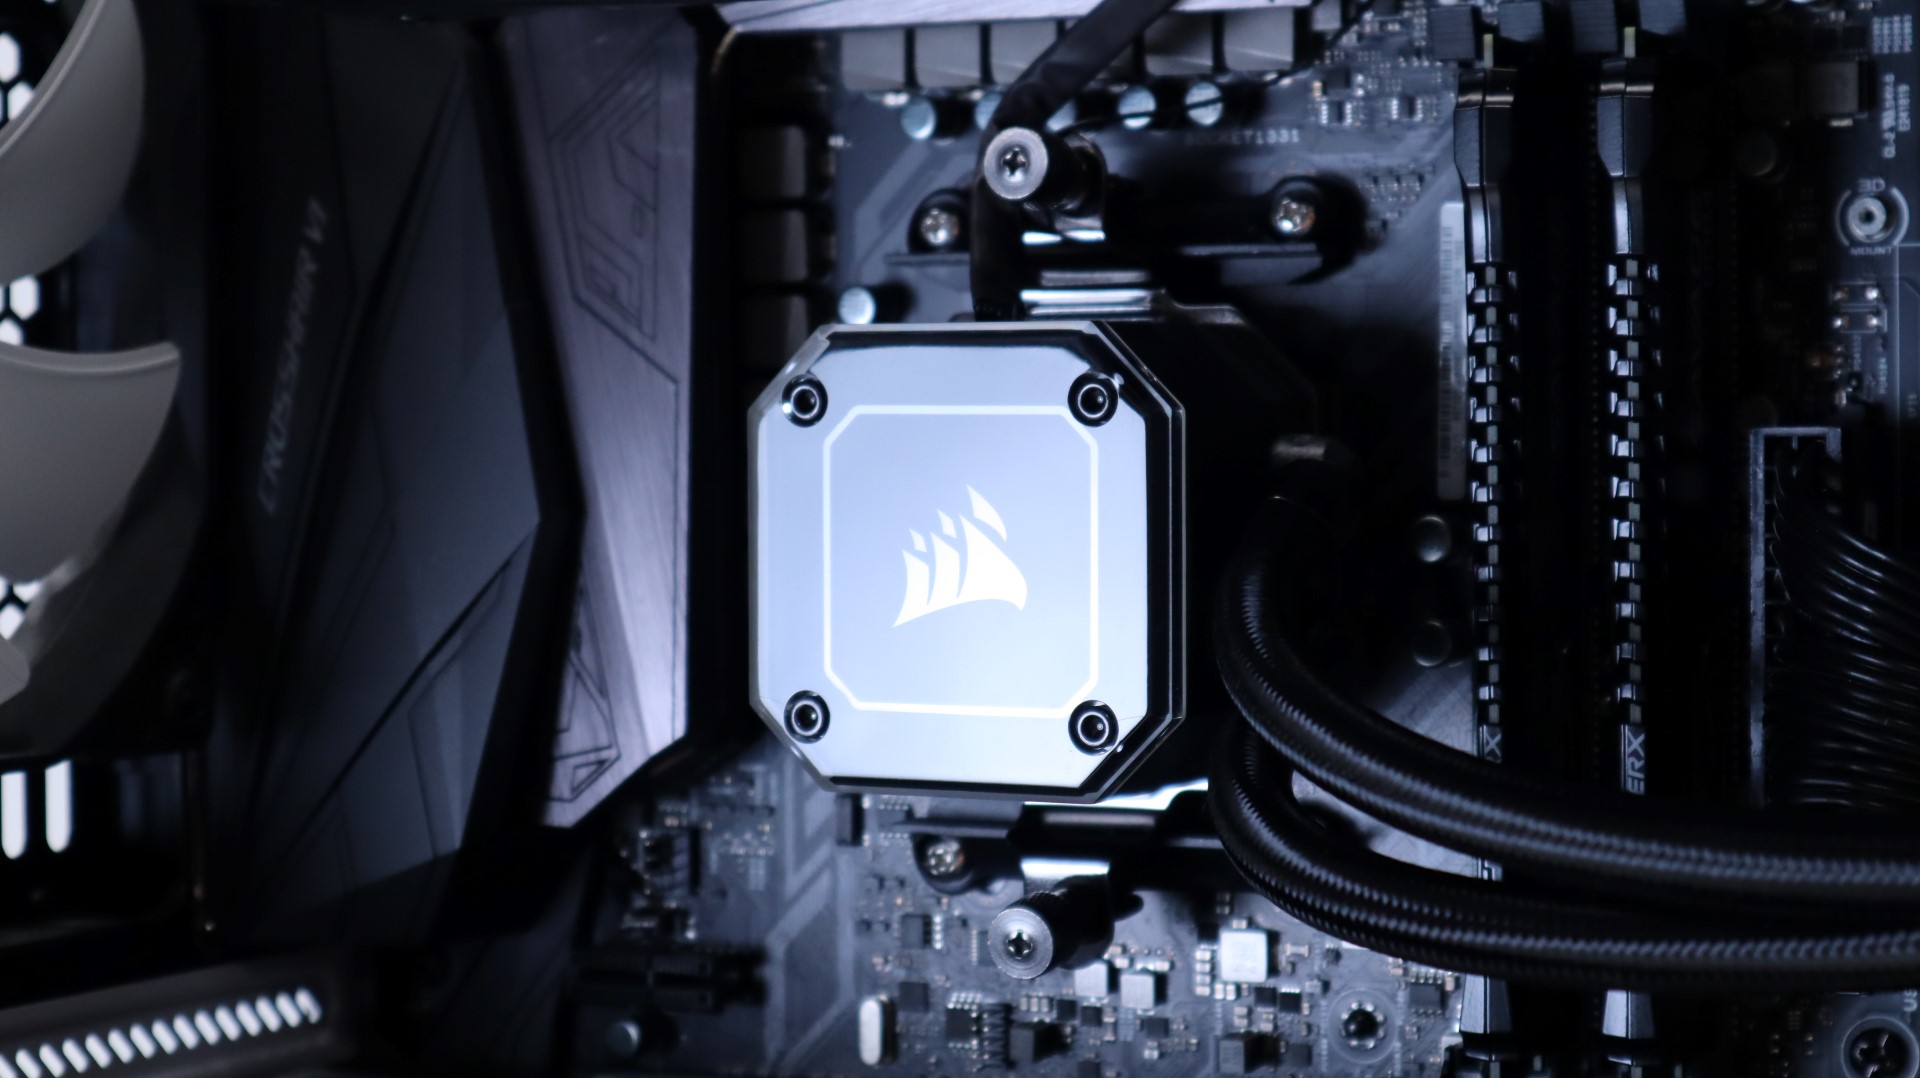
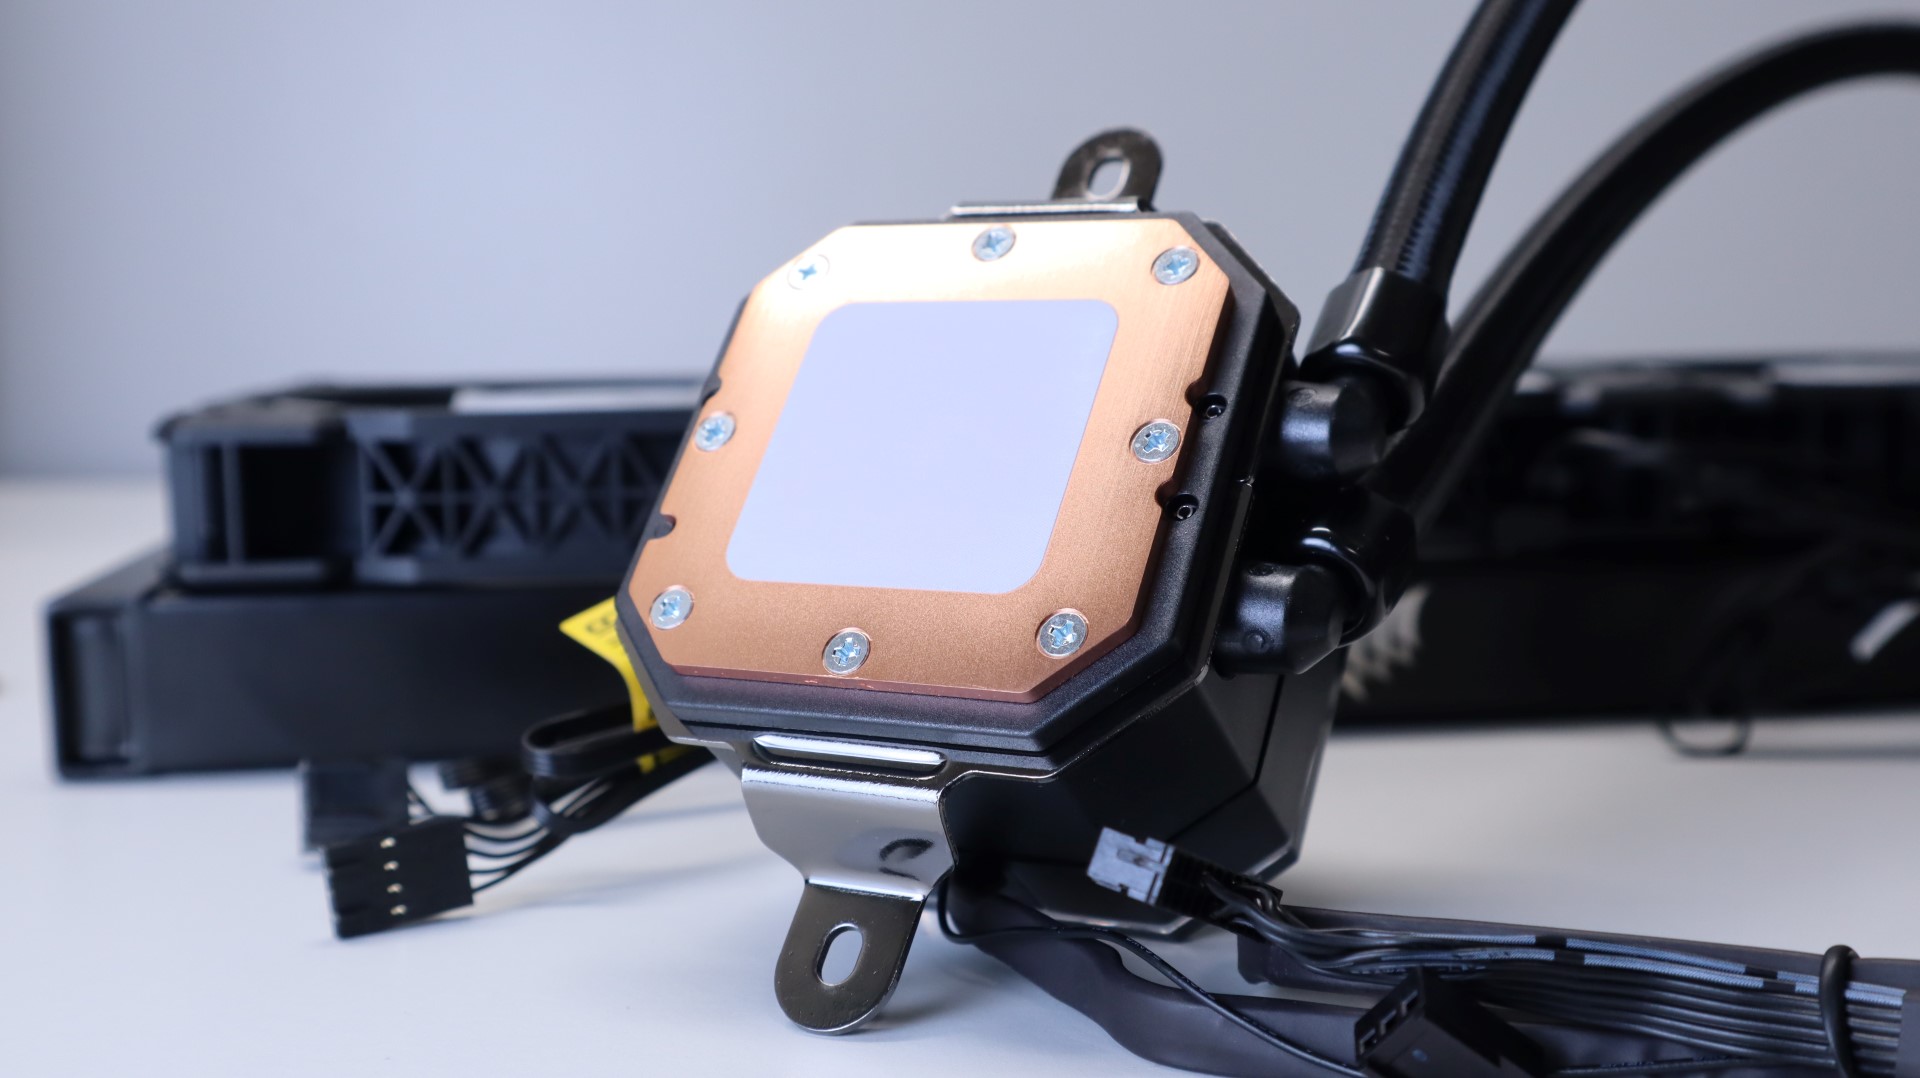
The iCUE H150i ELITE CAPELLIX comes from the factory with Intel 115X mounting hardware attached, so our first step of CPU block installation was to remove that gear so that we can install the AMD mounting hardware for our Ryzen 7 1800X test system. Simply pulling apart the two halves of the Intel bracket allows them to slide out of a thin channel along the side of the block. With the Intel hardware out of the way, we just had to slide in the two AMD brackets in their place.

The AMD mounting solution makes use of our motherboard’s AM4 mounting solution, which only requires two mounting tabs to be present on the AMD mounting brackets.
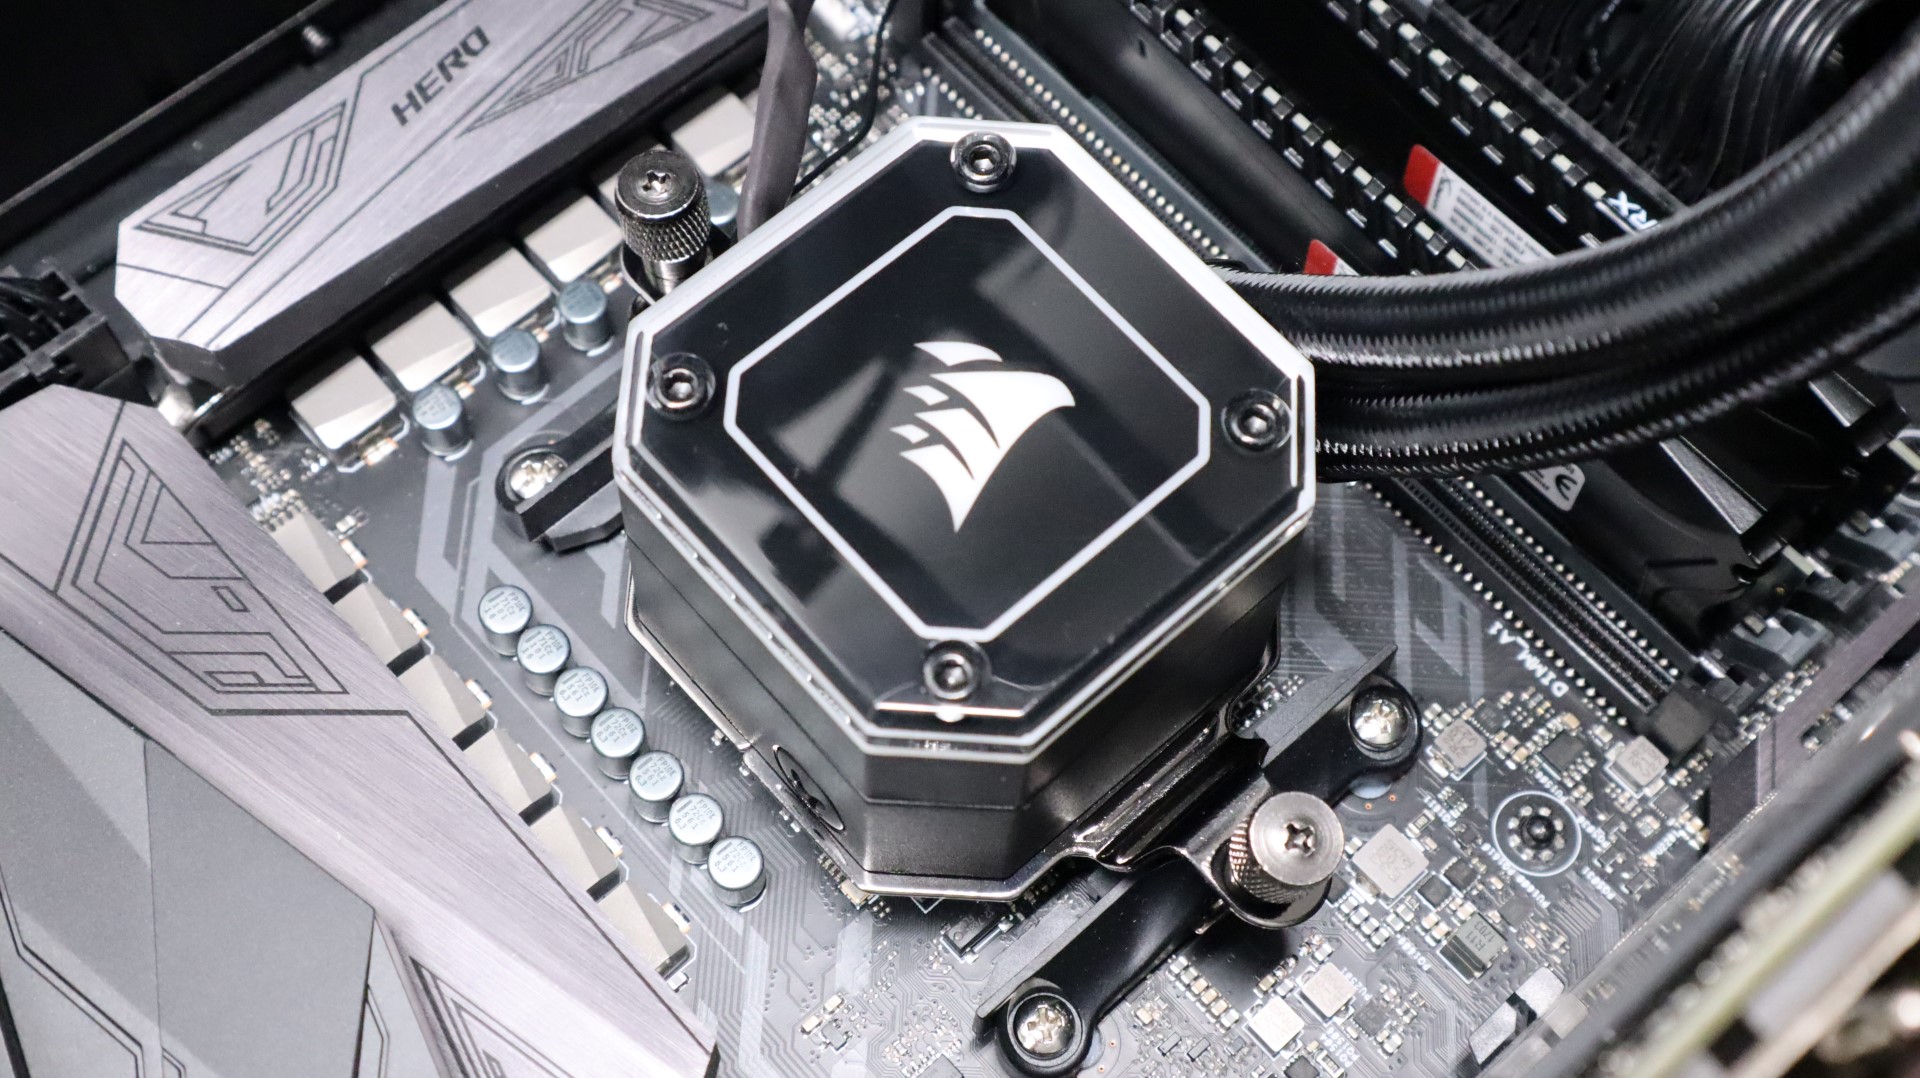
Placing the cooler onto the CPU, we were able to first line up one side’s clip with the plastic AM4 mounting bracket and tighten it down slightly to remove a bit of slack. Then we simply tilted the cooler to be flat against the CPU and proceeded to latch and tighten the other thumbscrew. While there are Philips-Head sockets available in the thumbscrews, over-tightening can occur, so we recommend using just your fingers to secure the cooler.
Next up is attaching the radiator to the top of our case. Just like attaching the fans to the radiator, attaching the radiator to the case is a simple task. Using the 12 included screws and washers, simply align them with the appropriate mounting points on your case, and tighten. We also made sure to thread the fan cables through our case’s cable management openings in preparation of wiring everything up.
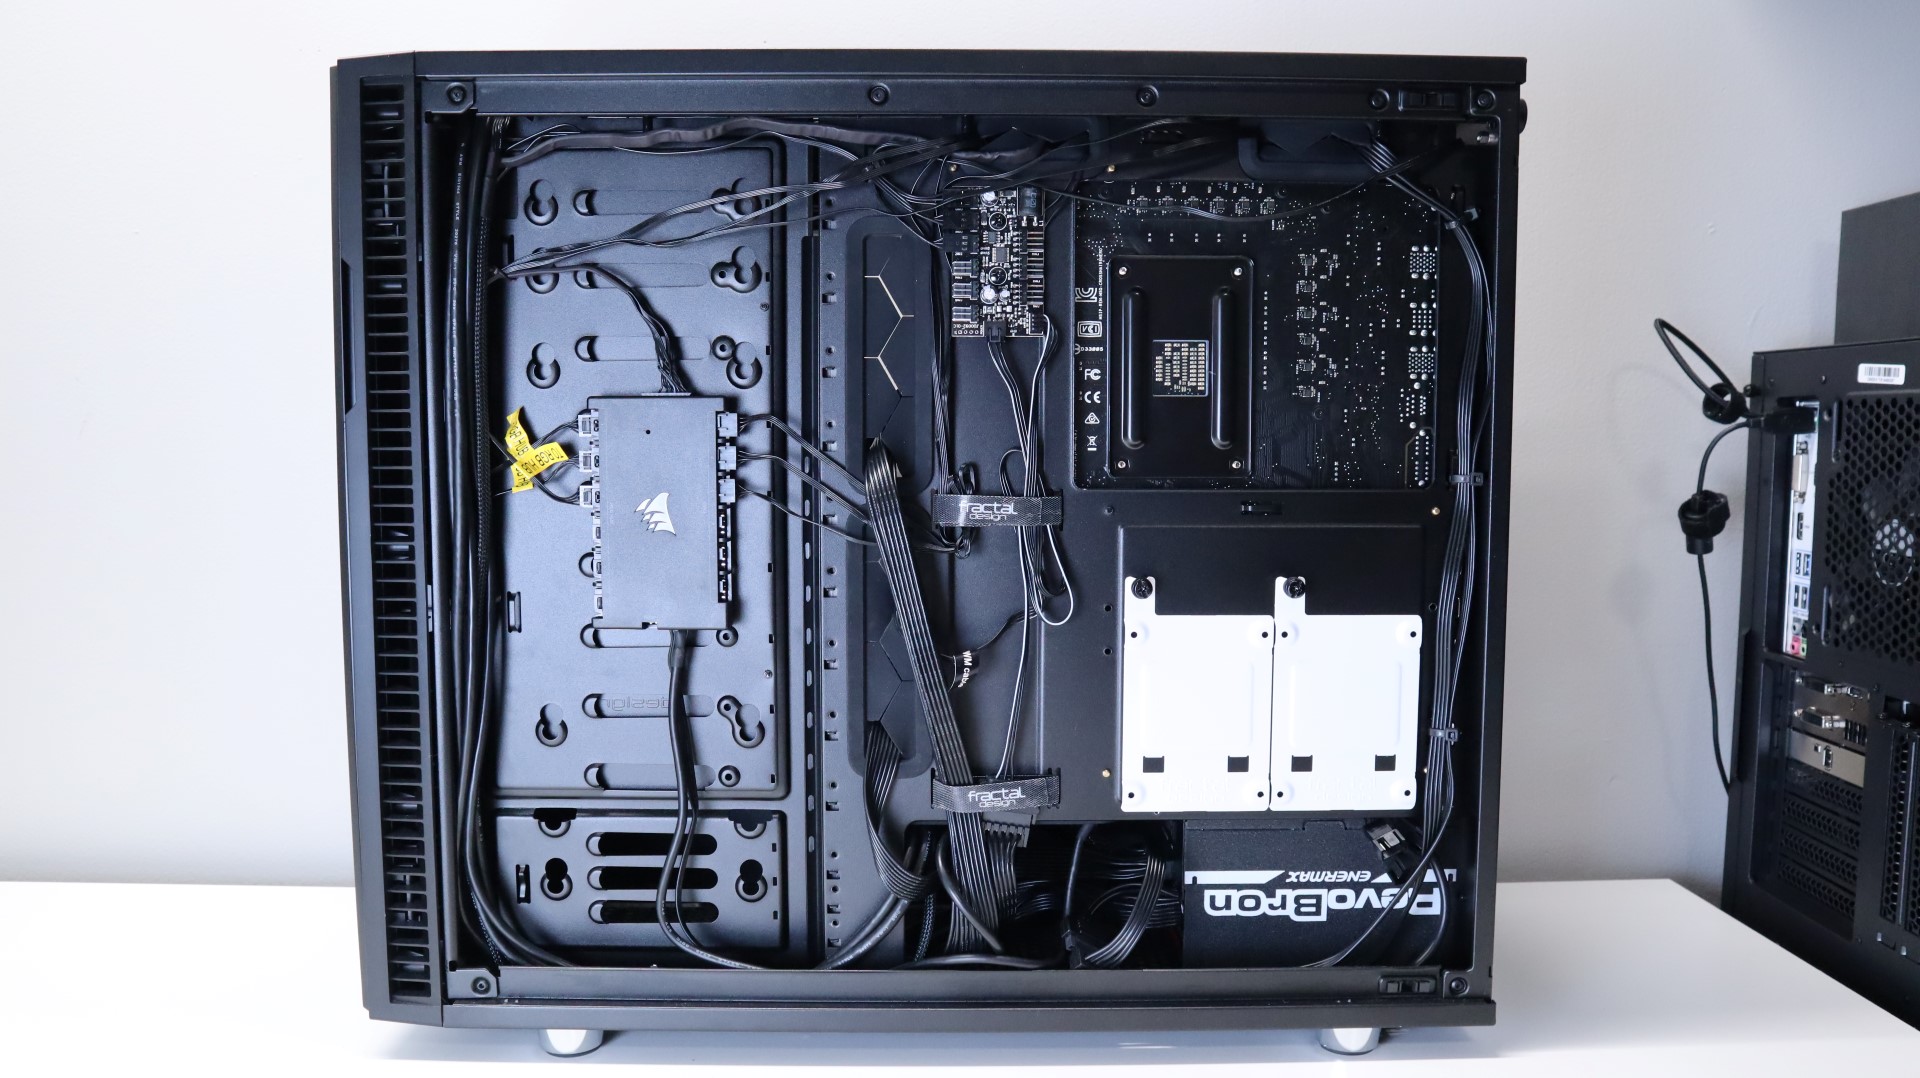
With the iCUE H150i ELITE CAPELLIX installed, it is now time to connect all of the cables to their respective components. After threading the hardwired cable from the pump through our case’s cable management opening, we first connected the flat connector to the corresponding opening on the iCUE Commander Core, which we attached to the back of our case’s motherboard tray with the included double-sided tape. This connection provides power and lighting controls for the pump block. Connecting the 3-pin pump tach cable to our motherboard’s CPU_FAN header allows the cooler to present the necessary speed information to our test system for monitoring.
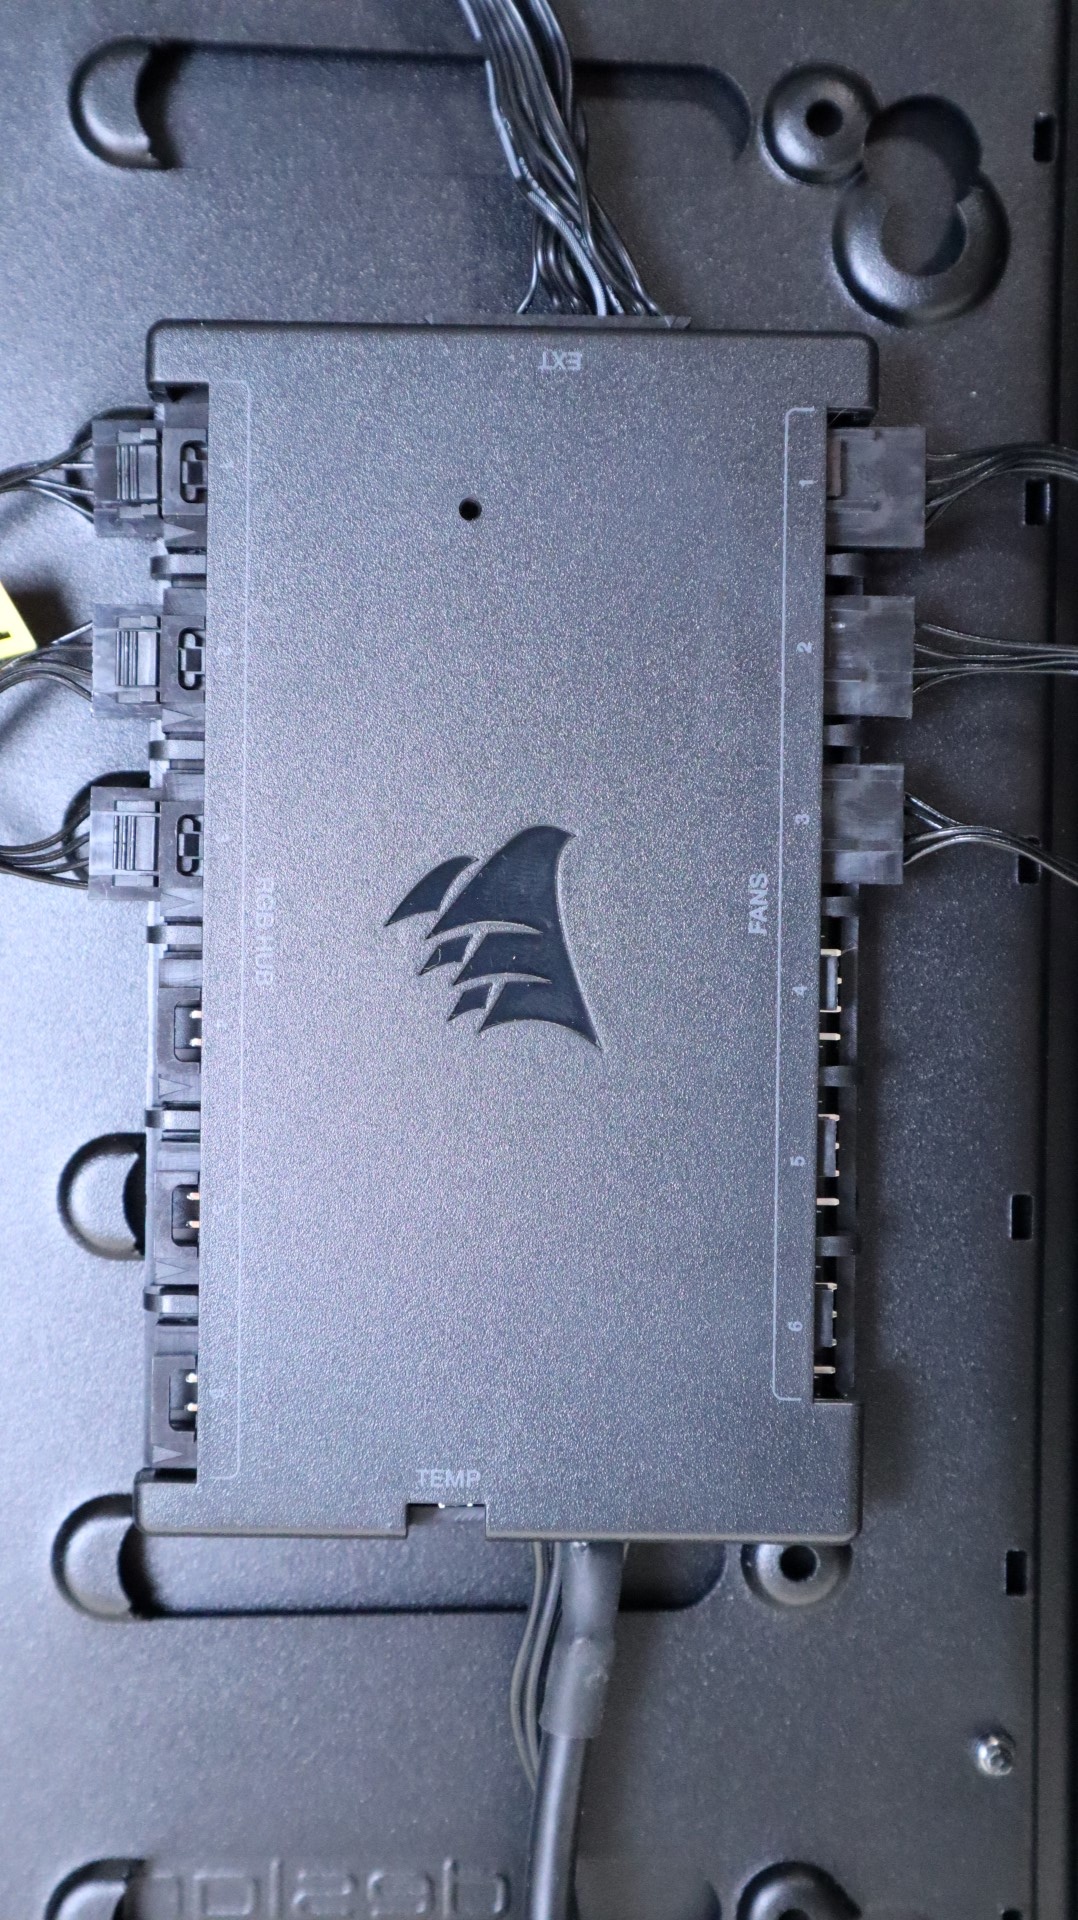
Last, but certainly not least, we connected the iCUE Commander Core’s USB and SATA power to the rest of our system. The attached USB cable is long enough to allow it to run behind the motherboard tray and come up below the motherboard for easy pairing with an available USB 2.0 motherboard header. While still present, our test system’s motherboard only has a single USB 2.0 header, making our case’s front USB 2.0 ports useless without an internal USB hub. We would have loved to see an additional USB 2.0 header on the iCUE Commander Core, put you have to step up to the Pro for that option.
With the cooler fully installed and wired up, we are ready to see how it performs!