
Testing
The test rig consists of the following parts:
Processor: Intel Core i7 3770K
Motherboard: Gigabyte Z77X-UD4H
Video Card: Zotac 560 Ti
Memory: Samsung Green MV-3V4G3D/US – 16GB
Power Supply: Enermax Maxrevo 1350W
Storage: OCZ Vertex 3 240 GB raid 0 Running Windows 7 64bit
Cooling: SilverStone TD03-E
Case: Phanteks Enthoo Luxe
For testing we are looking for a hub that outputs consistently at the rate we are asking for without any hiccups. We will be using the CAM 2.0 software for all our testing. This software is designed to integrate all of the data and control you need for running and maintaining your PC. This means you have all your system and temperature data as well as fan control in one place. Lets go ahead and take a look at what CAM 2.0 gives you.
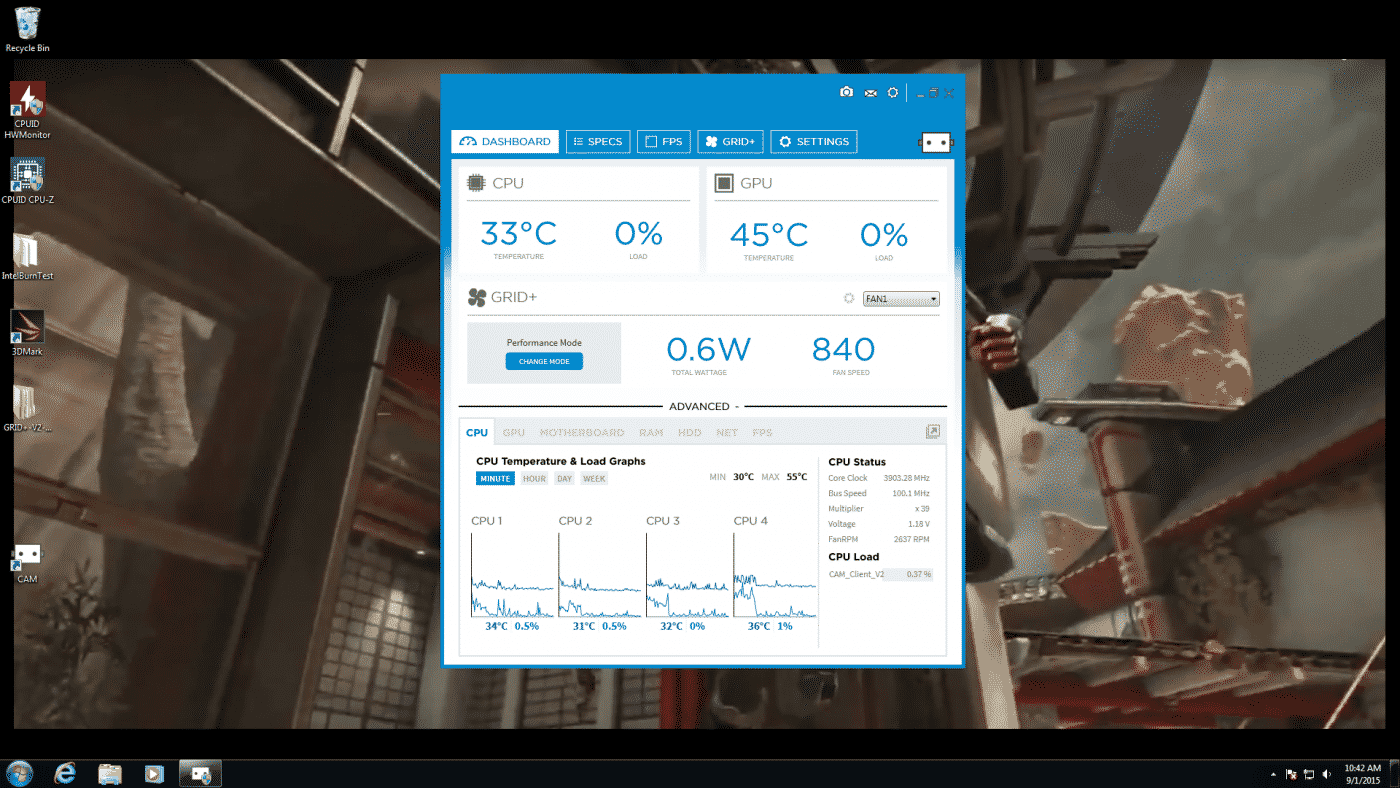

The ‘Dashboard’ is your basic page that includes everything you need to know about your system at a glance as well as some minor control. The ‘Specs’ page is all of your detailed system info in one place.

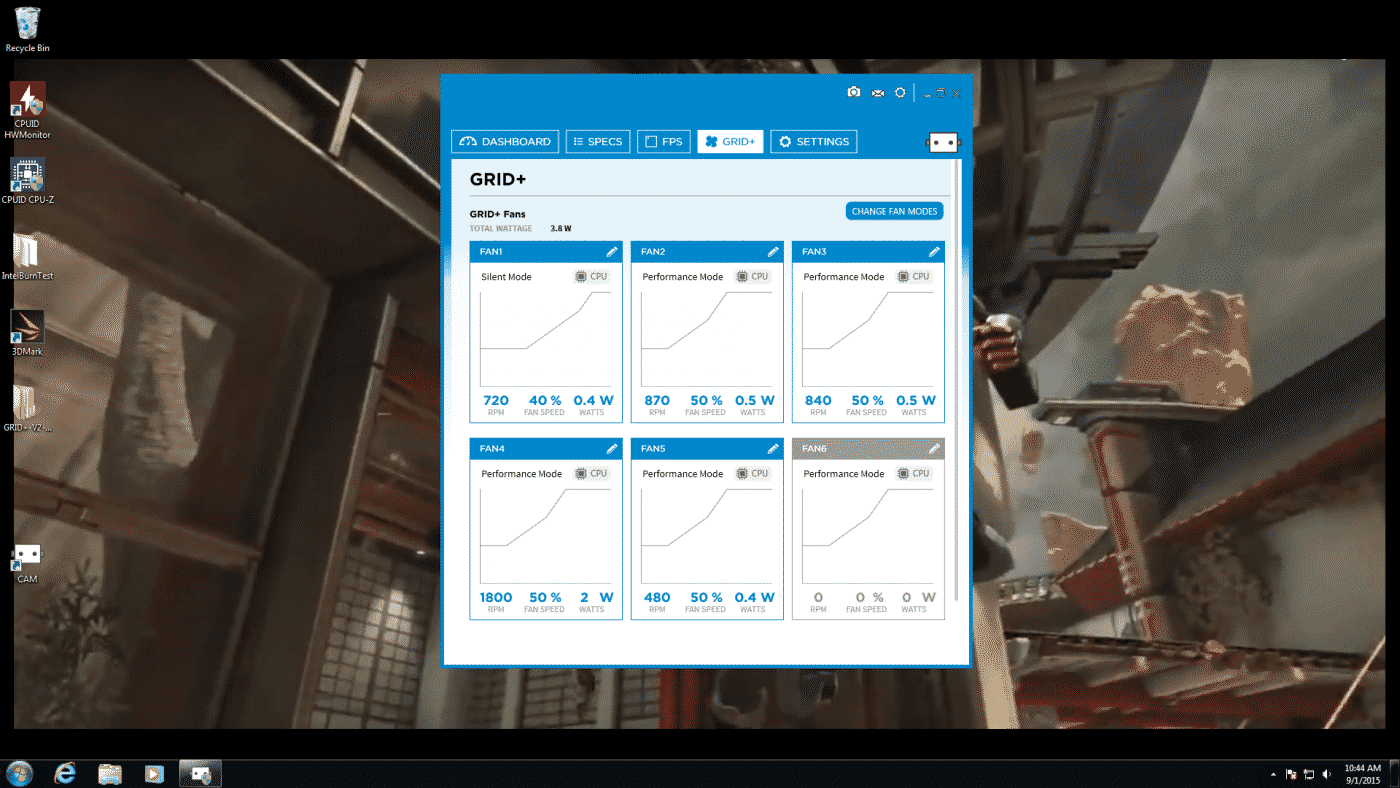
‘FPS’ is a page where you can configure an on-screen CAM overlay that is customizable to show you what you need and where. This is especially useful if you do a lot of overclocking that you want to keep track of while gaming. ‘Grid+’ is where we are going to get down to business. This is the page where we can monitor and adjust each of the six channels on our Grid+ V2 individually or as a group.
Once you click on the Grid+ tab to make adjustments go ahead and click on ‘change fan modes’ button. This will give you the options to make changes to each of the fans. Clicking on the ‘fan mode’ drop bar we have options for ‘Manual’, ‘Silent’, ‘Performance’, and ‘New Custom Profile’.
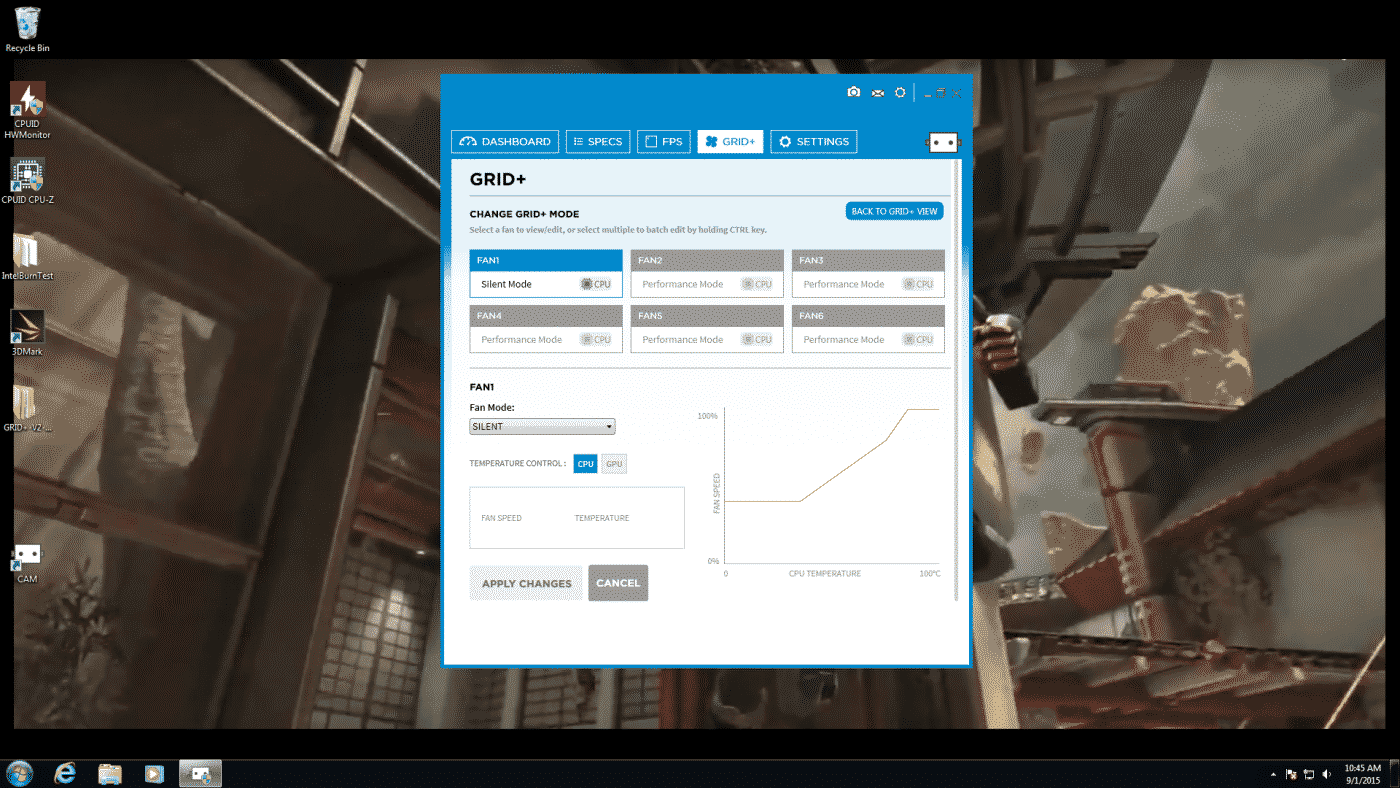

The silent and performance settings are basically good enough if you are just looking to set up your fans and walk away. We are going to go ahead and choose to create some custom profiles for our testing. The first test I am interested in is what happens when I put all the fans to full power. Creating a profile called ‘Full Speed Ahead’ I move all the dots on the graph to the top most position and save. After a couple seconds the fans kick to high speed and I can see the result in the graphs and data for each fan.
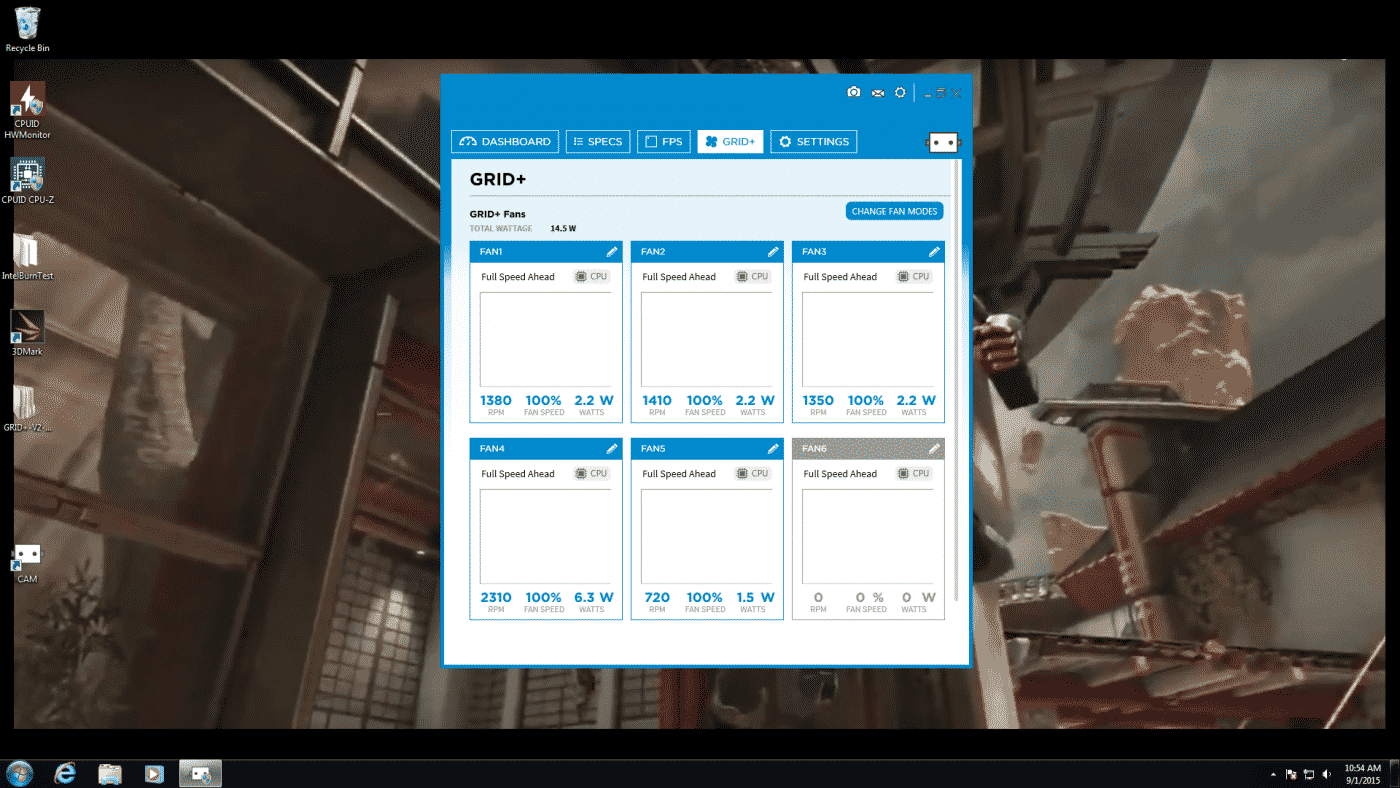
The five used channels are outputting 14.4w total and pushing our Apaches at pretty consistent speeds and most importantly all the way up to and past their rated 1300rpm mark. Fan4 is the pair of split 120mm Silverstone AiO fans. These are pulling even more watts and hitting 2310rpm. Finally the big 200mm Phanteks is also right up near it’s limit as well. So at full power the Grid+ V2 powered all my fans well and was very consistent with power delivery with no notably large dips in speed.
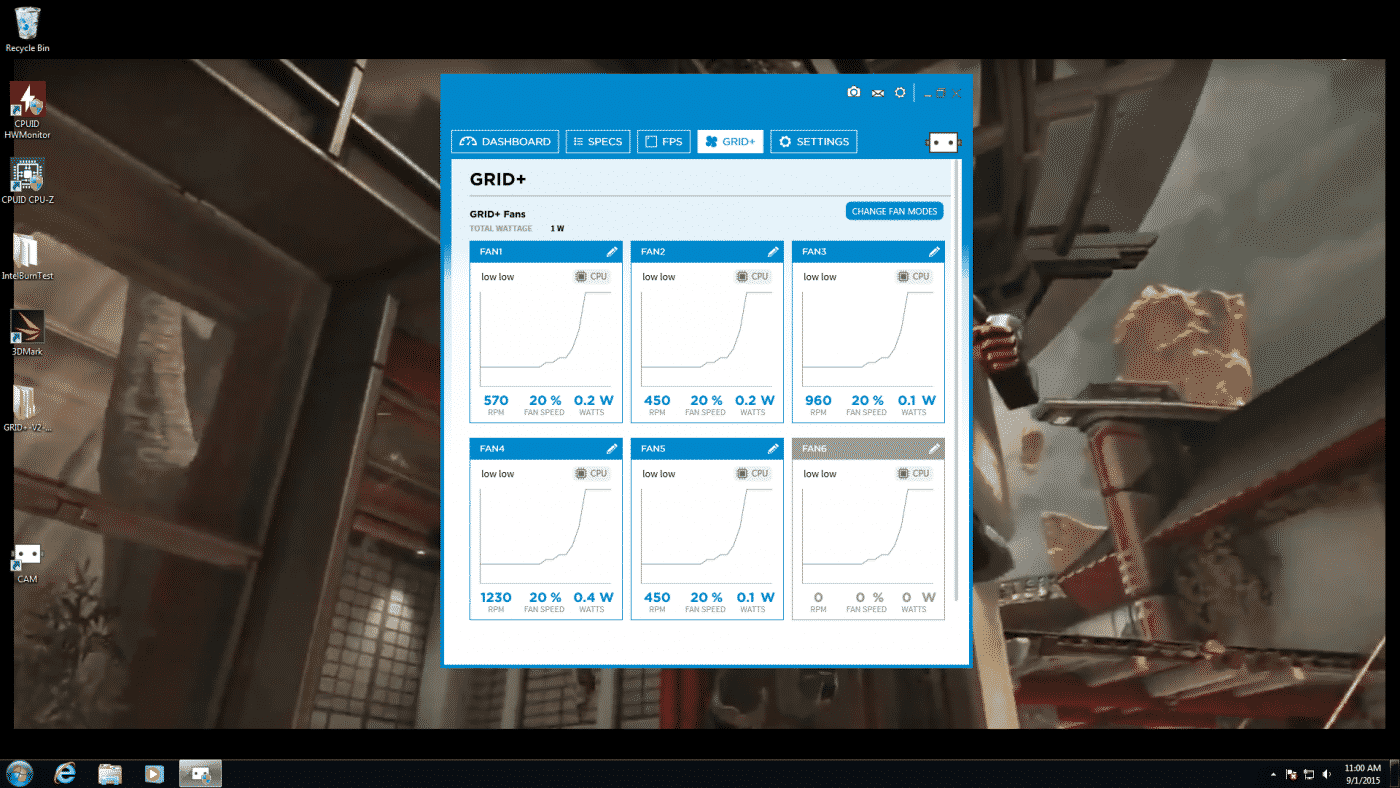
Now for some low speed tests. I set the speeds at absolute zero power as well as the minimum of 20% fan speed. When set to zero power the unit did in fact cut power from all the fans. There was no stuttering from the fans receiving just a bit of power either which demonstrates good control. Set to the lowest setting we were able to achieve some very silent operation but were a little inconsistent with the power output on the three Apaches. This could also be the result of slight variations in the motor response of the fans.


Hmm, no plugs for thermal sensors? Must be in a device with a processor running windows to control it, no direct control of target temps without the software running on a computer with a USB port plugged into it? It does look sleek, I’ll give it that.