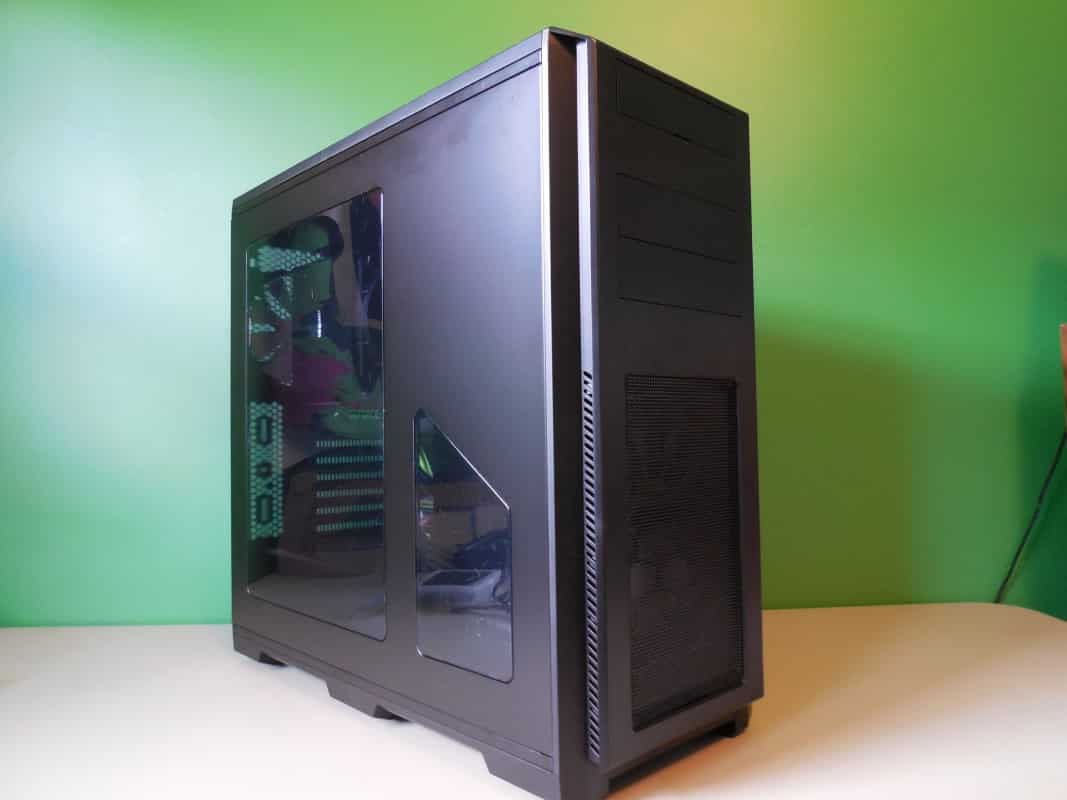
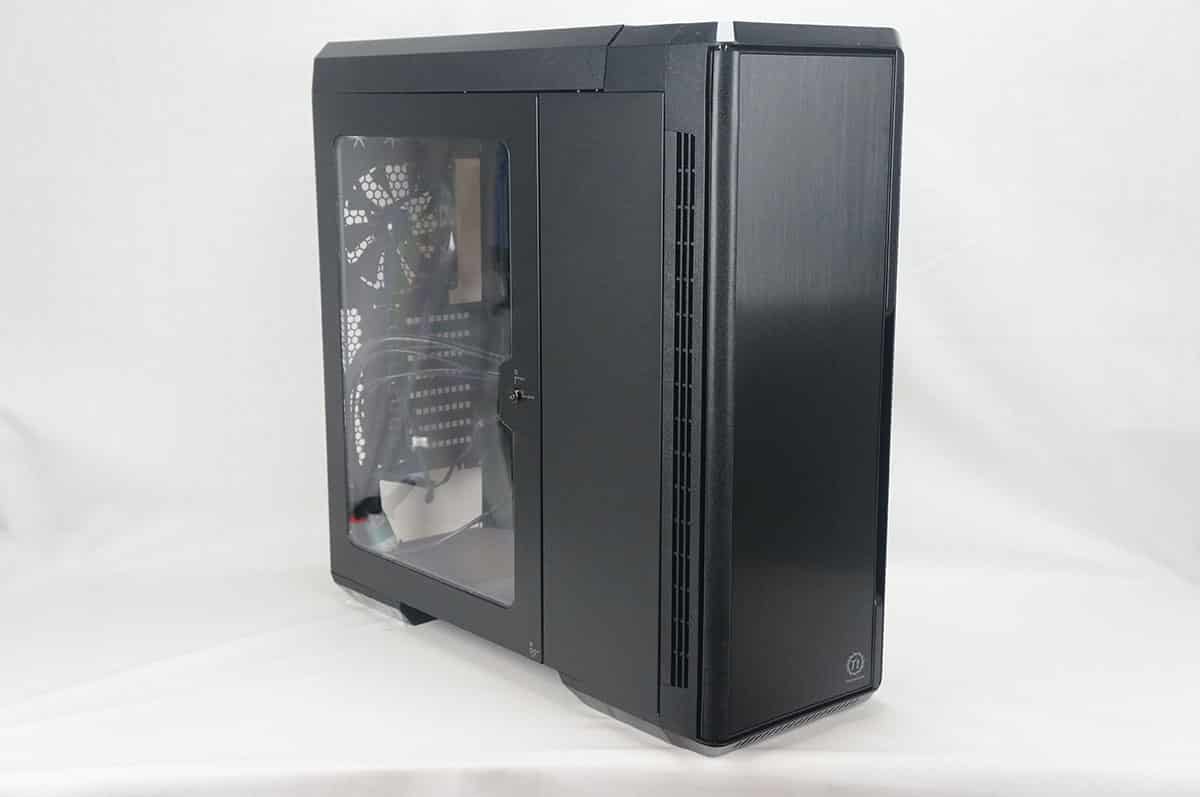
A Look Inside
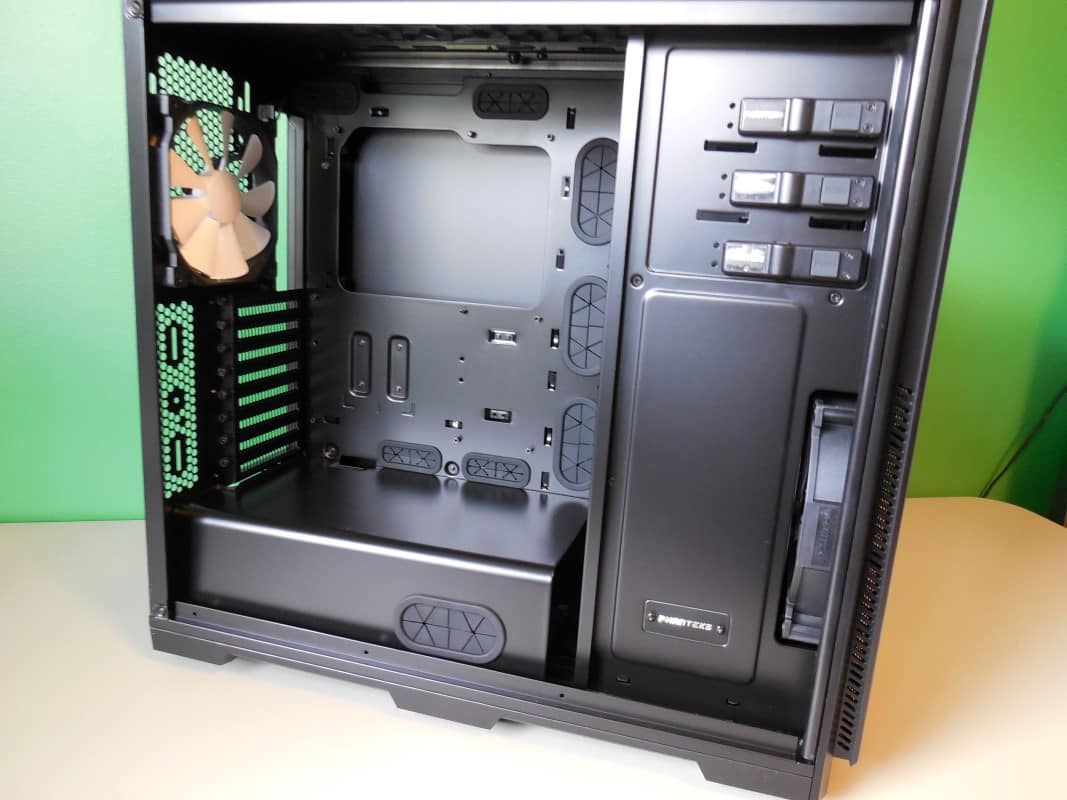
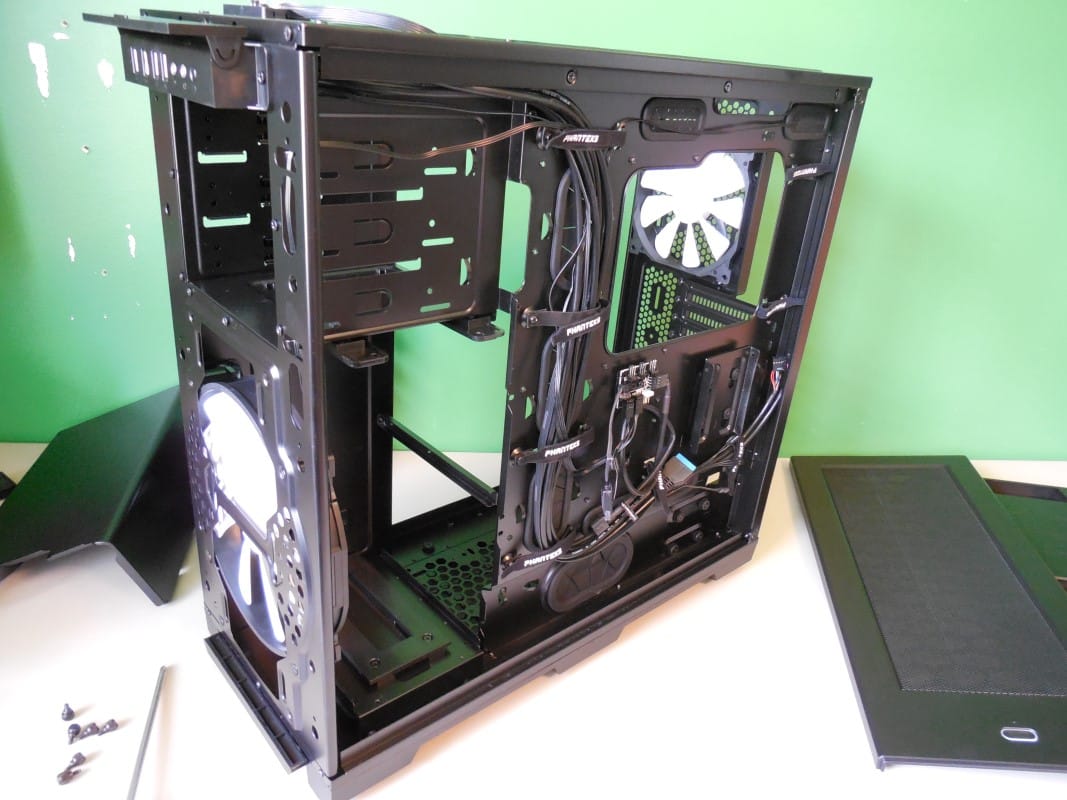
The main thing that catches the eye when looking in the main compartment is the included PSU shroud. Phanteks has an ear to the door of the mod scene and this is one place they’ve shown it. A fantastic touch for an entry level case.

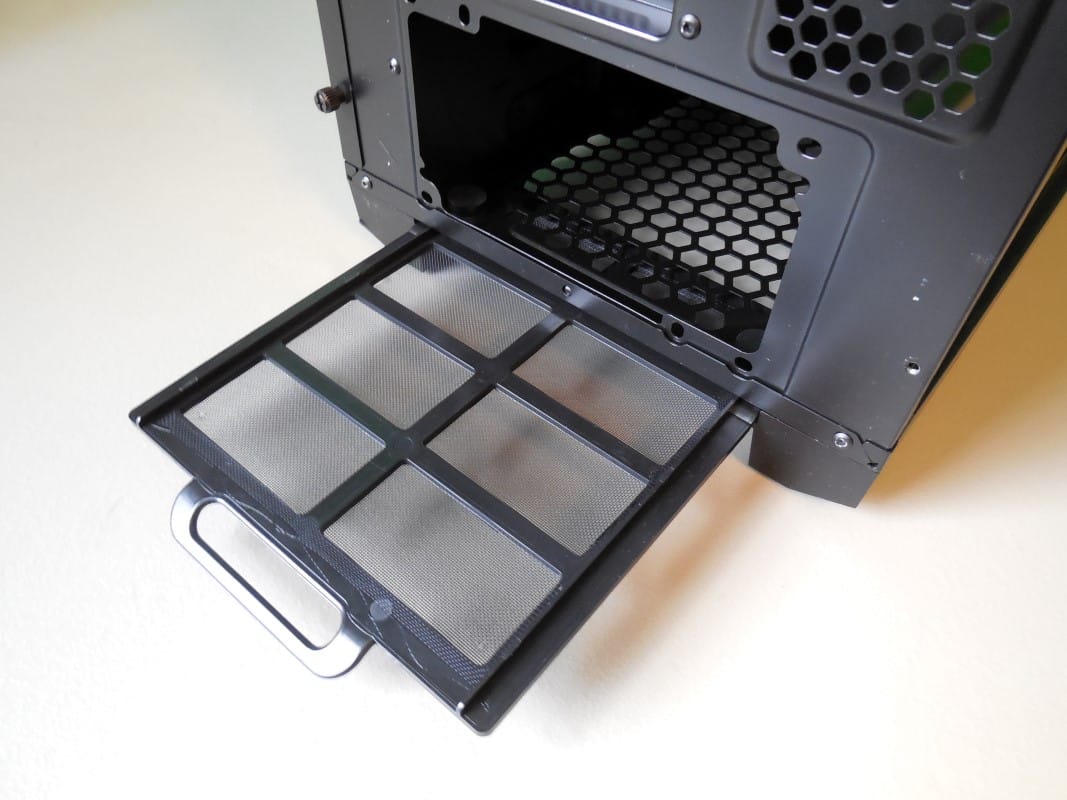
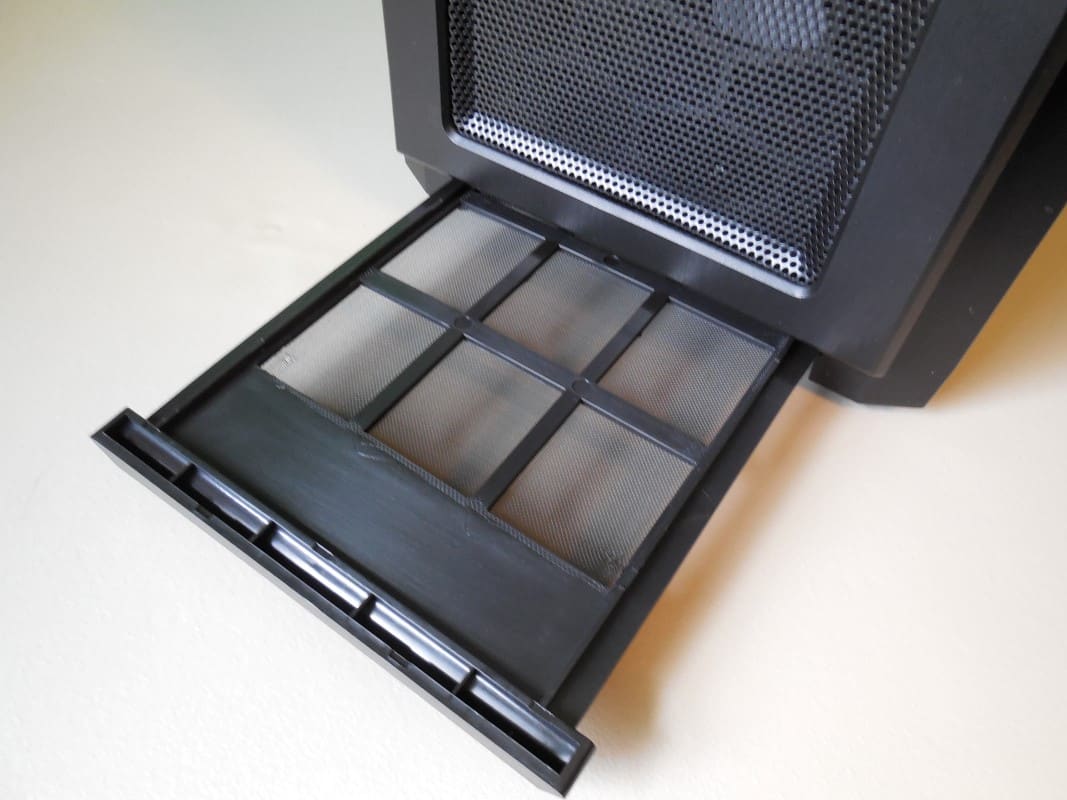
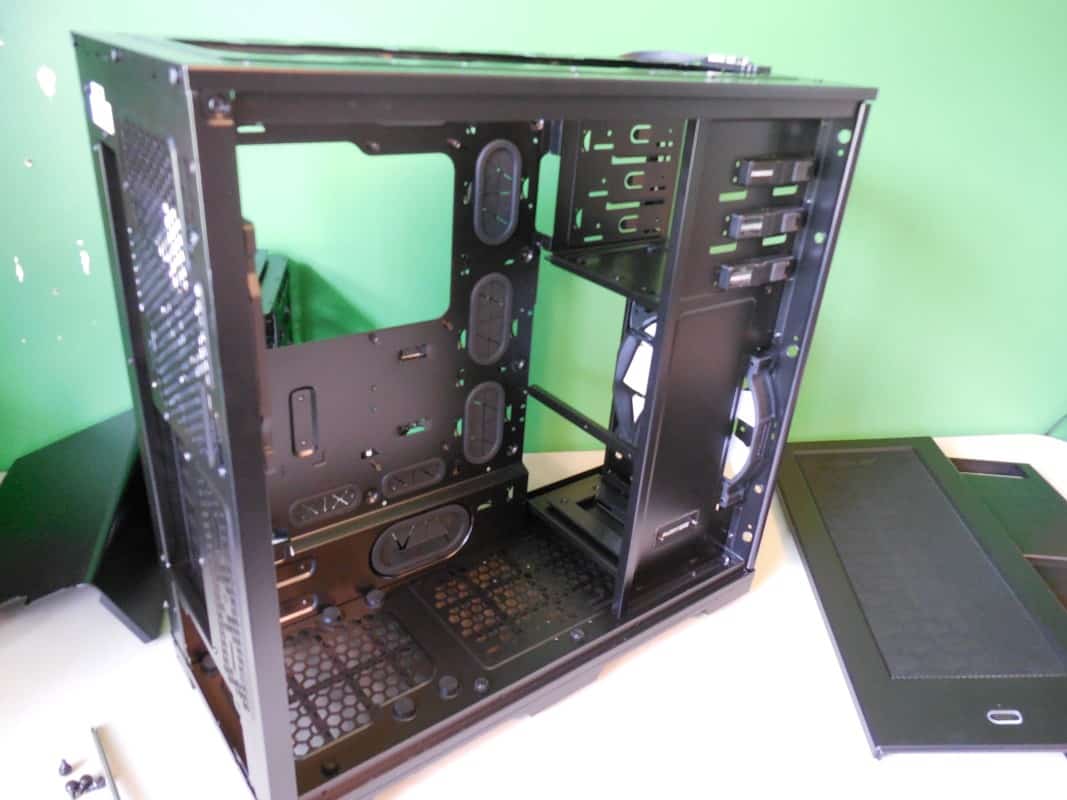
At both bottom end of the case you will find removable dust filters. In fact all the intake and exhaust points have dust filters and most of them are easily removed.
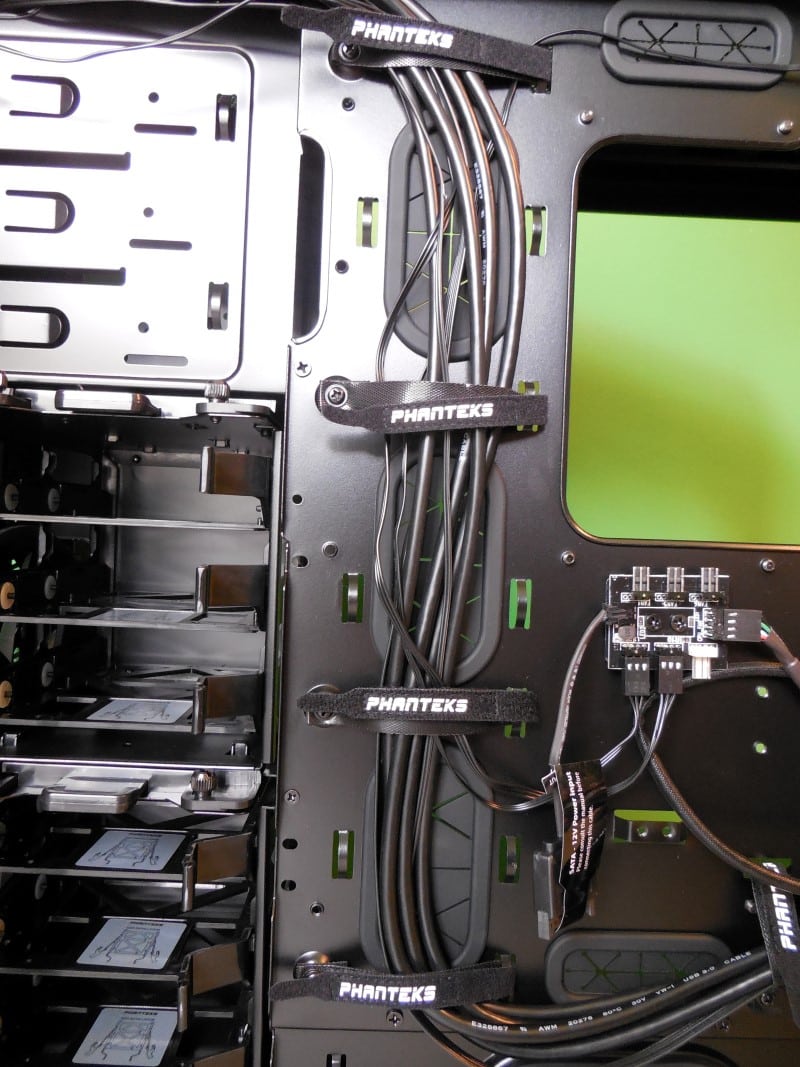
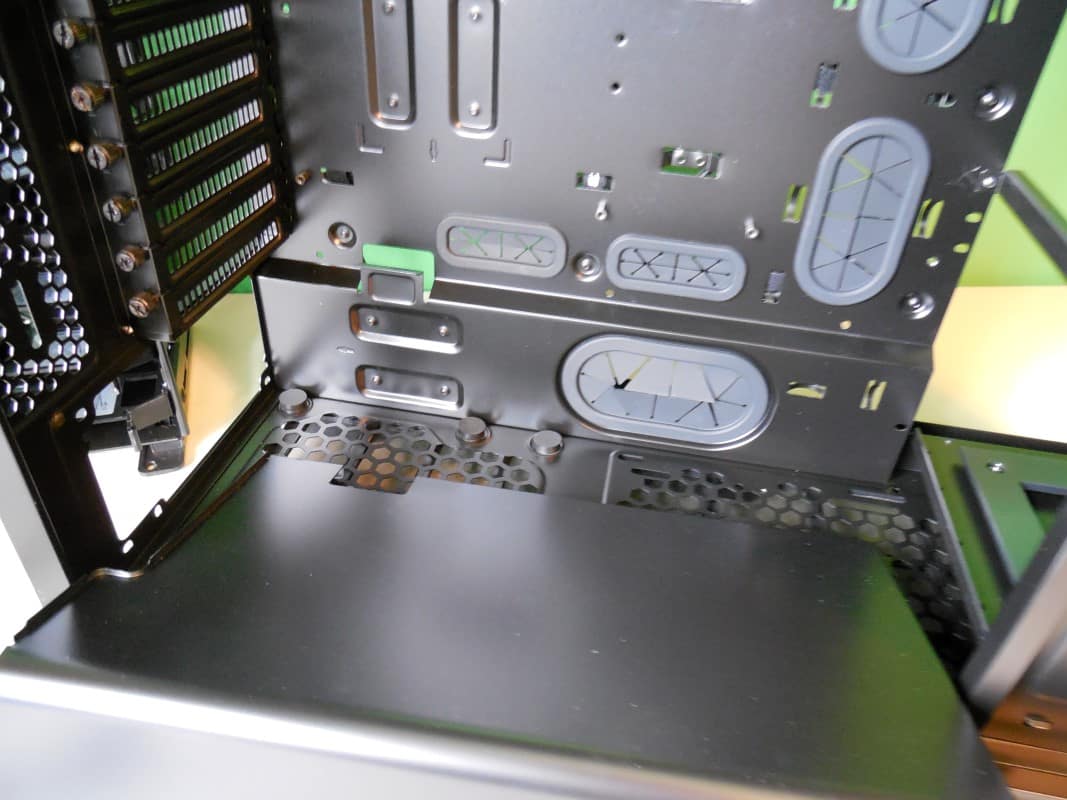
Moving to the back side, we get into the guts of this beauty. You will find that the cable management options on the Pro are second to none. In addition to 8 cut outs with grommets, there is a dedicated pass through for the 5.25” bays. Beyond that there is a plethora of wire management tabs to attach zip ties to and of course there are also the 8 pre-installed velcro tie downs. You really won’t find this level of cable management support at this price range anywhere else.
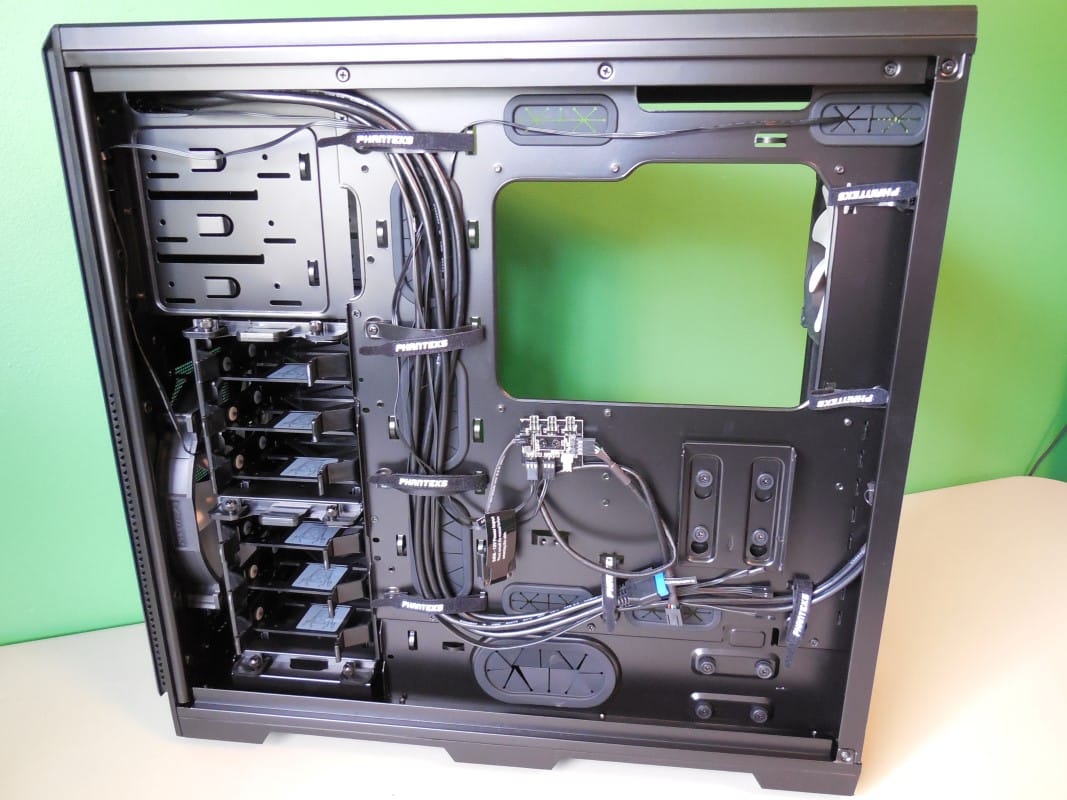
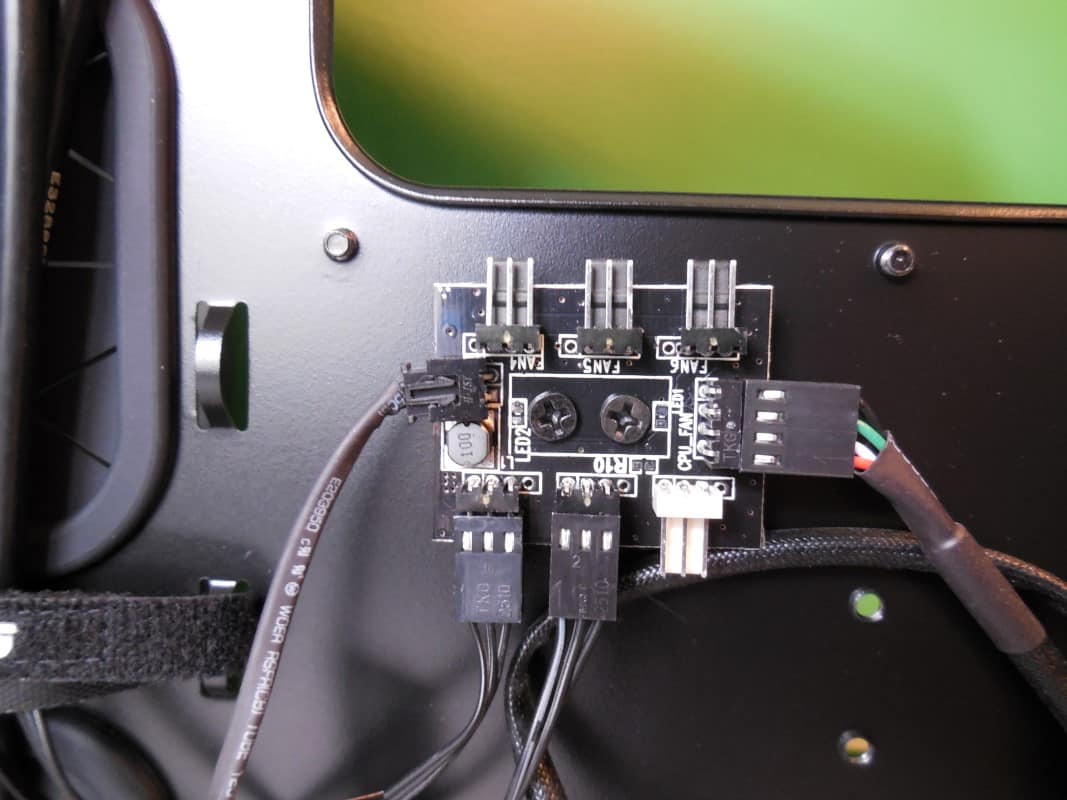
Also on the back panel is the fan board. This is a scaled down version of the one found on the Primo. It has support for up to 6 fans, and can be powered by a SATA power connector or PWM controlled by the motherboard using the CPU_FAN header.
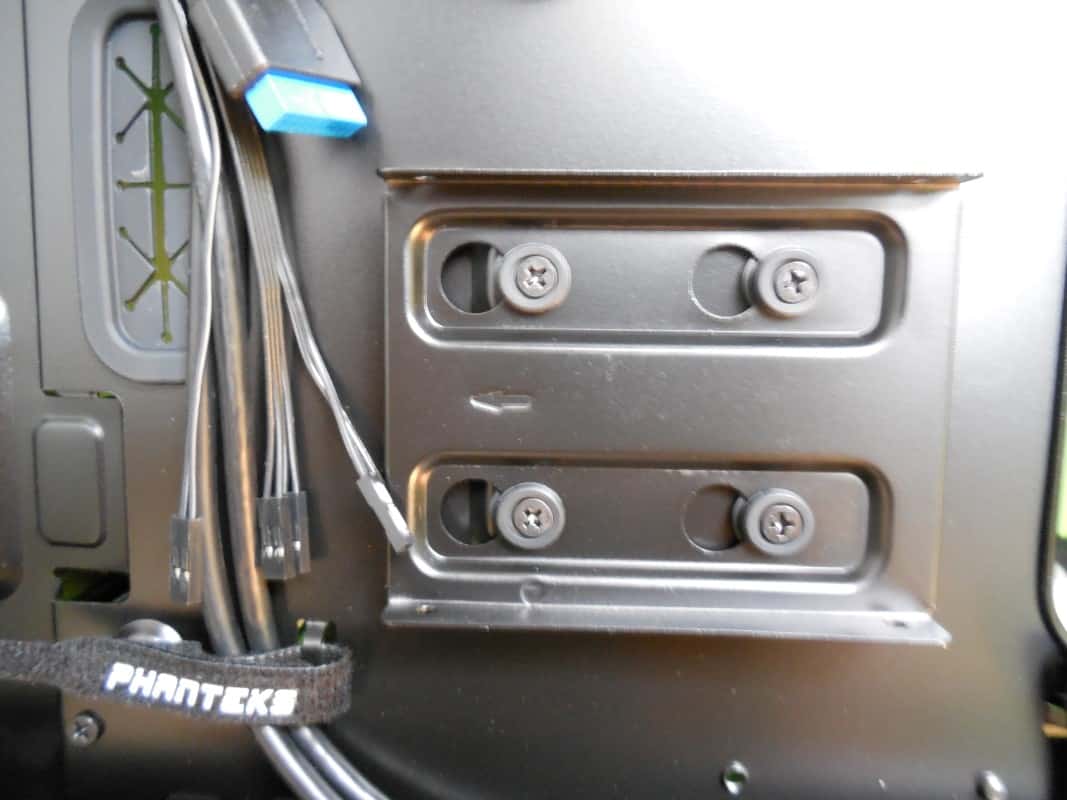
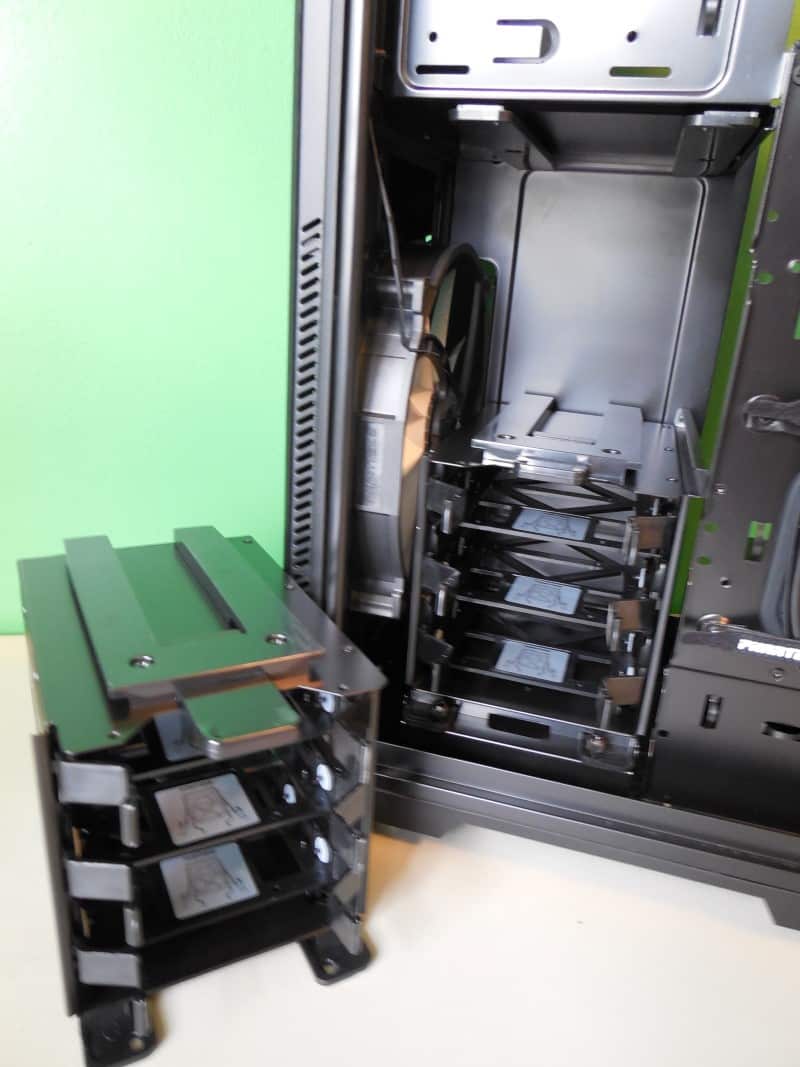
For storage, you will find no shortage of options here. The Pro has support for up to six traditional hard drives or seven compact SSDs or 2.5” drives. One of those mounting locations is a dedicated SSD bracket that mounts snuggly right behind the motherboard or optionally behind the PSU.
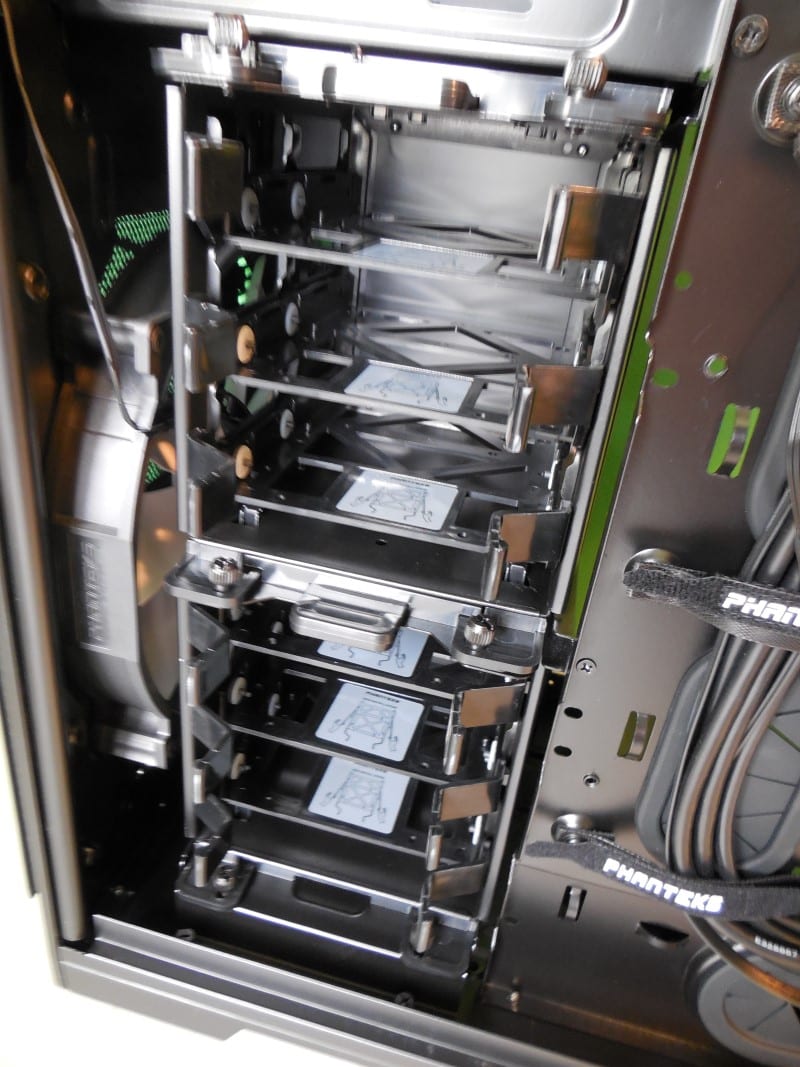
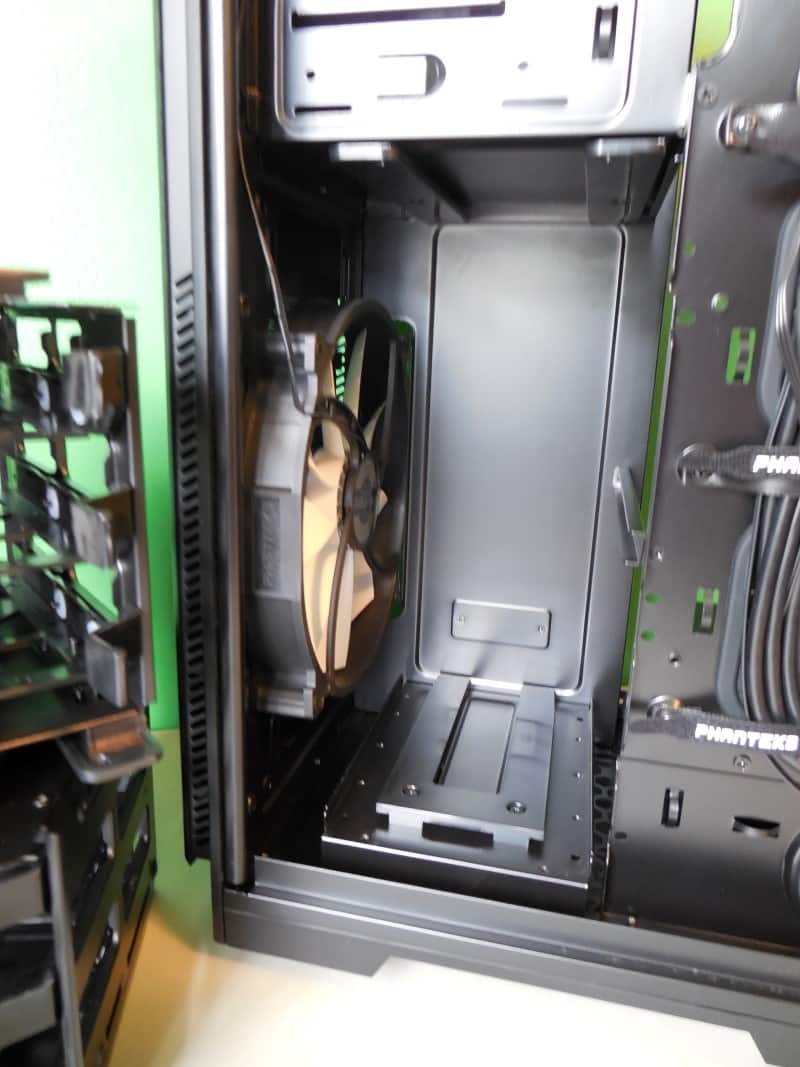
And for those that find they are not filling all six bays they can be easily removed to create space to increase airflow or add other cooling components such as radiators or pumps, etc. These drive bays come out completely without tools. Simply remove the thumb screws by hand and pull the bays out by their tabs.
Back to the PSU shroud that we mentioned earlier. You will find that unless you are dismantling the case this is the only part that will require a screwdriver. It’s a very simple set of three screws accessed from the back panel and you can lift the shroud up and out.

When I said you can basically take the thing apart without tools, I meant it. Starting with the front panel simply pull forward on the edges and the plastic cover pops right off. Repeat for the top panel. Removing the front panel gets you access to the front 200mm fans screws as well as the ability to remove the front dust cover and the covers on the 5.25” bays.
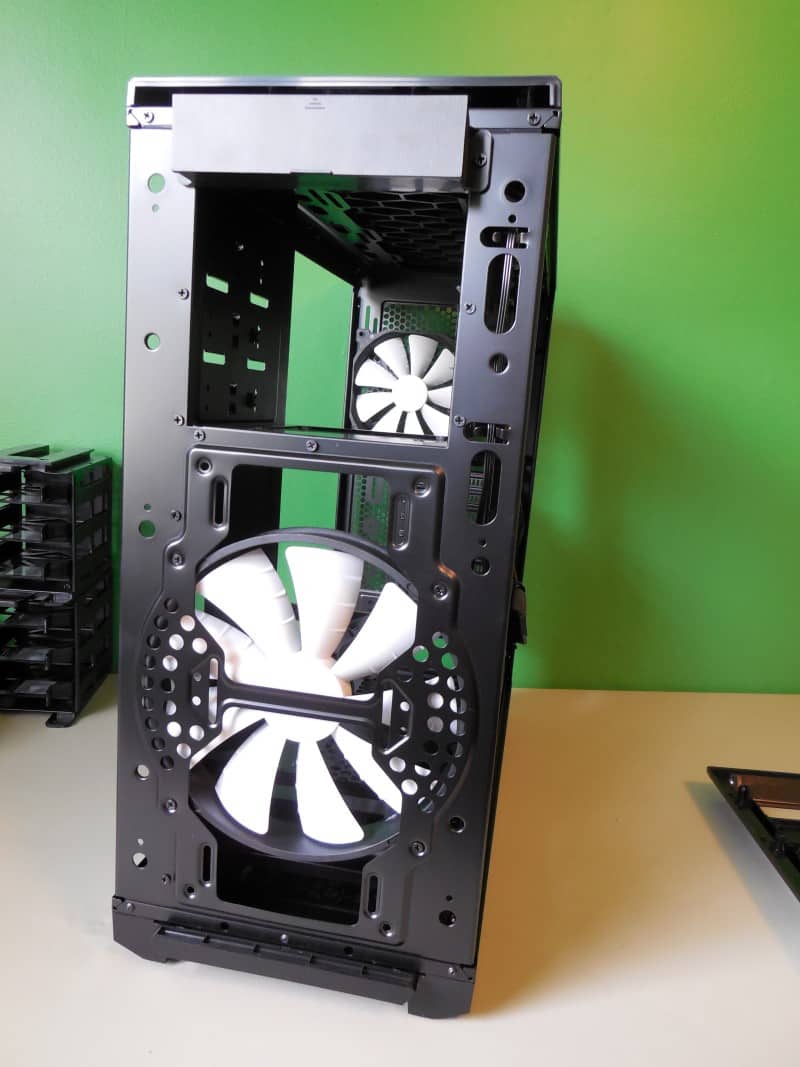

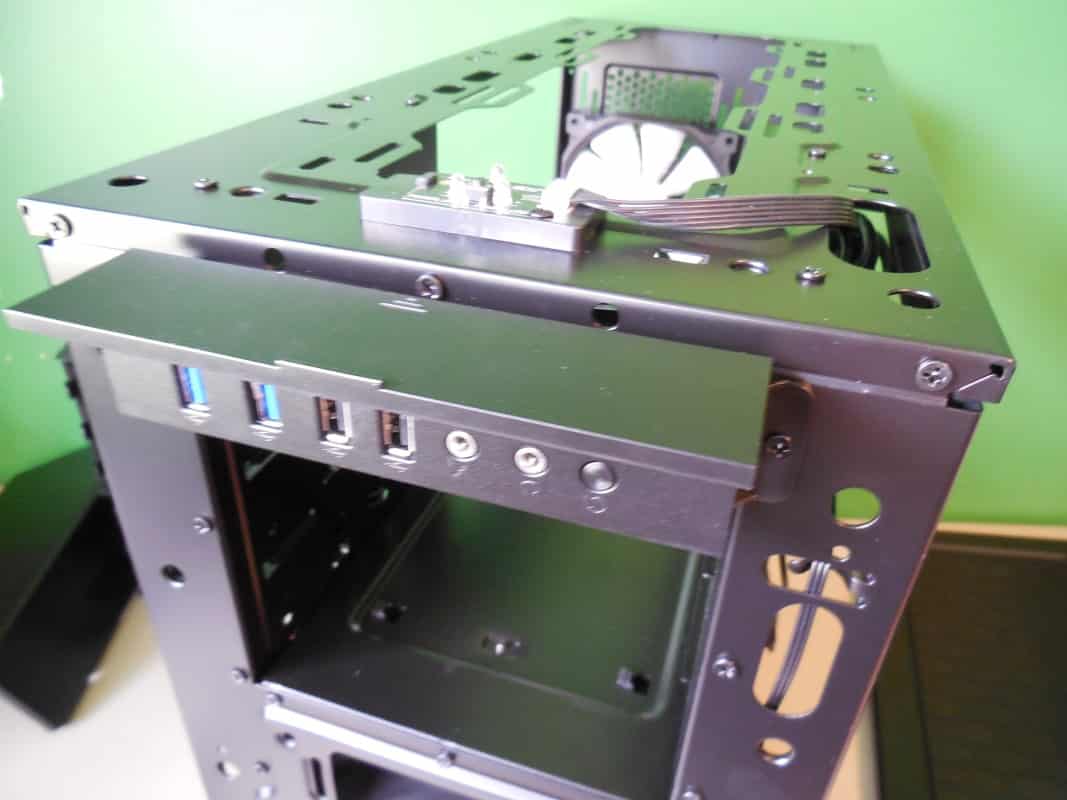
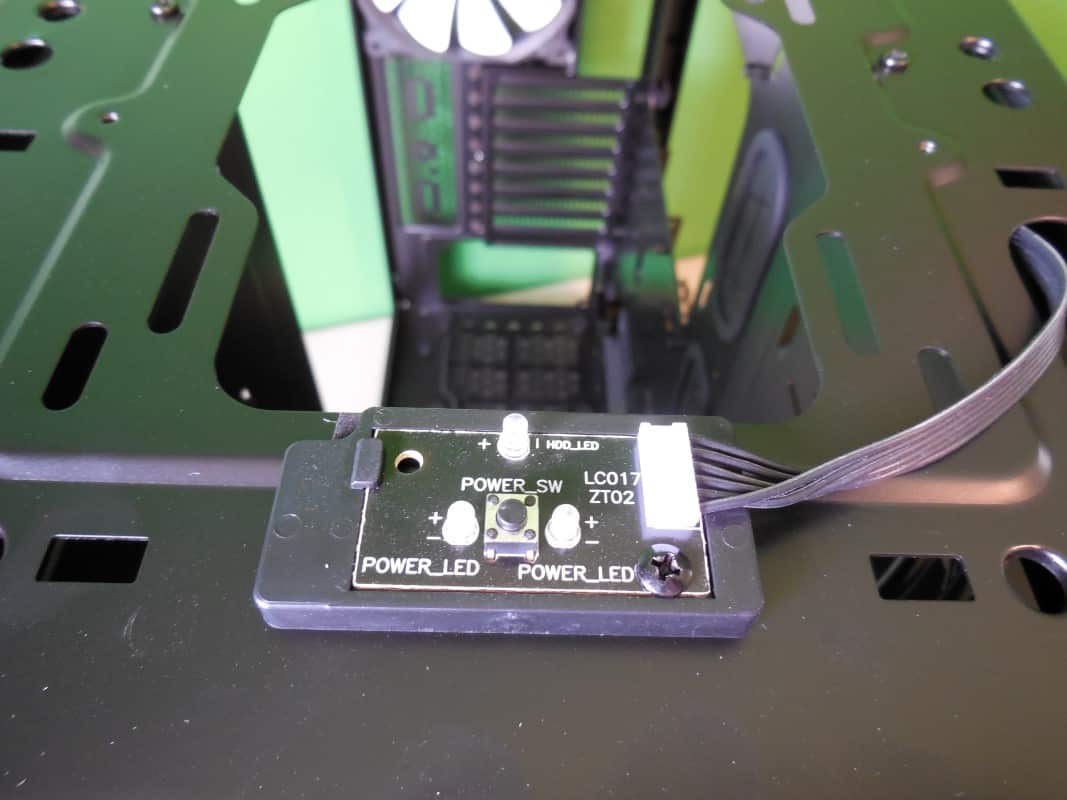
Under the plastic top panel you will have access to the leds and power switch. Also you will need to remove the cover if you want to mount a top radiator or additional fans.
With those simple steps you now have the case completely down to it’s skeleton. The rest of it is held together by screws and can be easily dismantled if you find the need. Next to the many times more expensive Case Labs line I’ve not seen a case this easily broken down and modded. Phanteks is truly doing wonderful things here.
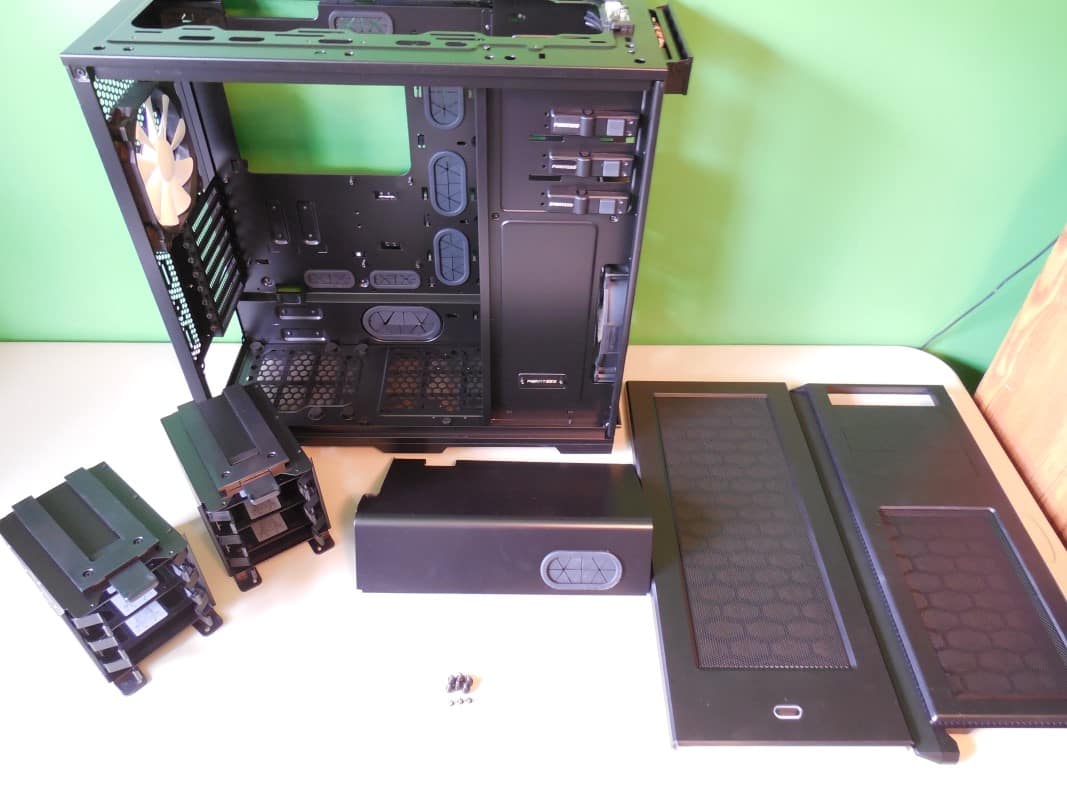
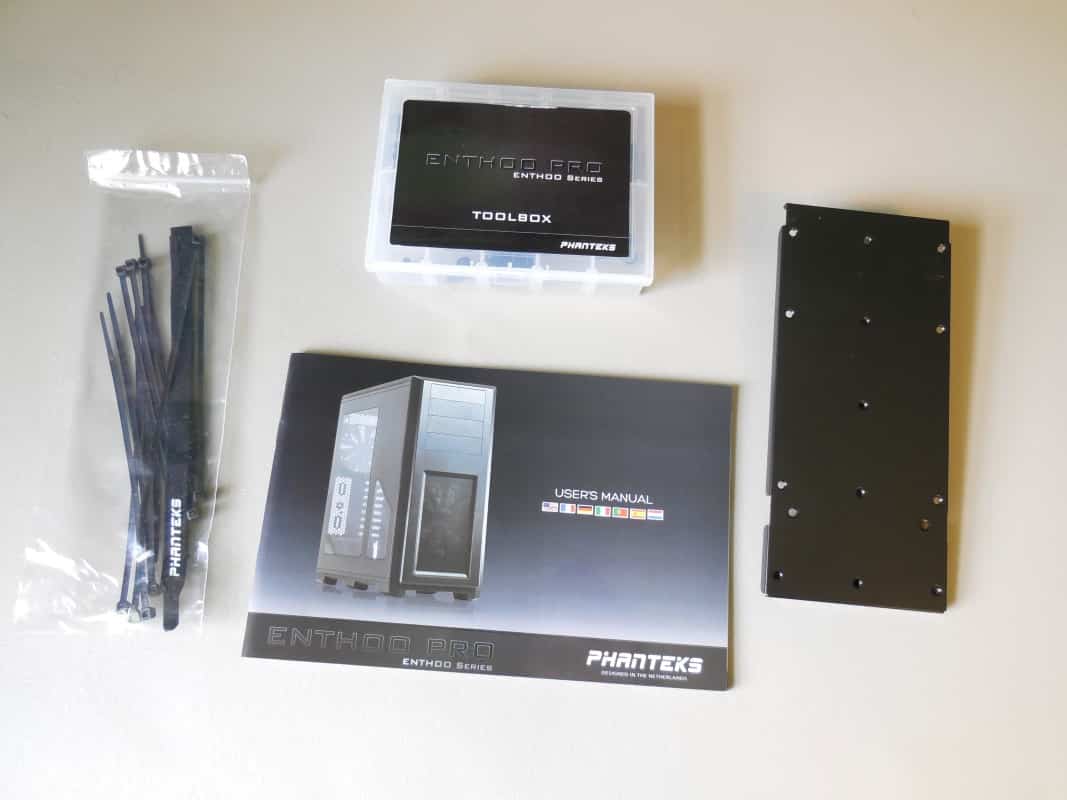
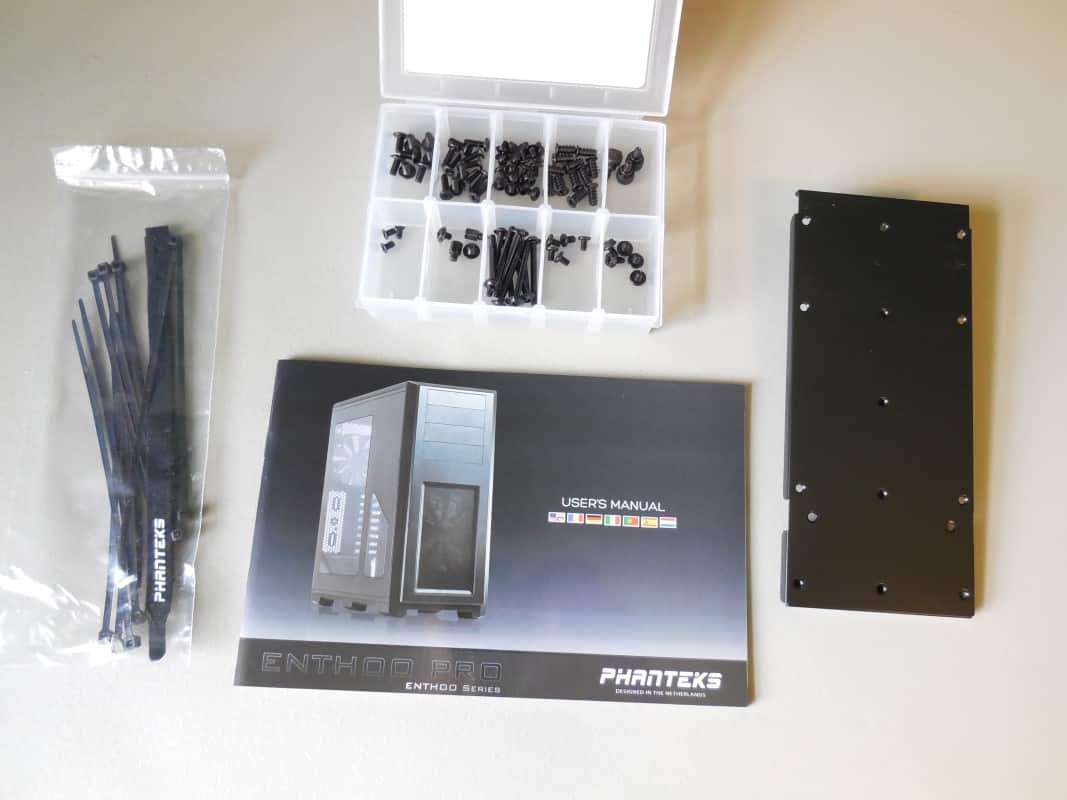
On to the accessory box. Inside you will find four items. A well put together user manual is included with instructions for everything from removing the dust filters, to dismantling sections of the case. There is a small bag of zip ties and an additional velcro tie down. I love that even with the Pro, Phanteks has included a complete set of screws in a handy toolbox just like big brother Primo. And finally there is panel that can be installed below the 5.25” bays for mounting a watercooling reservoir.
Interested in how the Pro matches up to the Primo? Well it’s just your lucky day we happen to have both on hand!
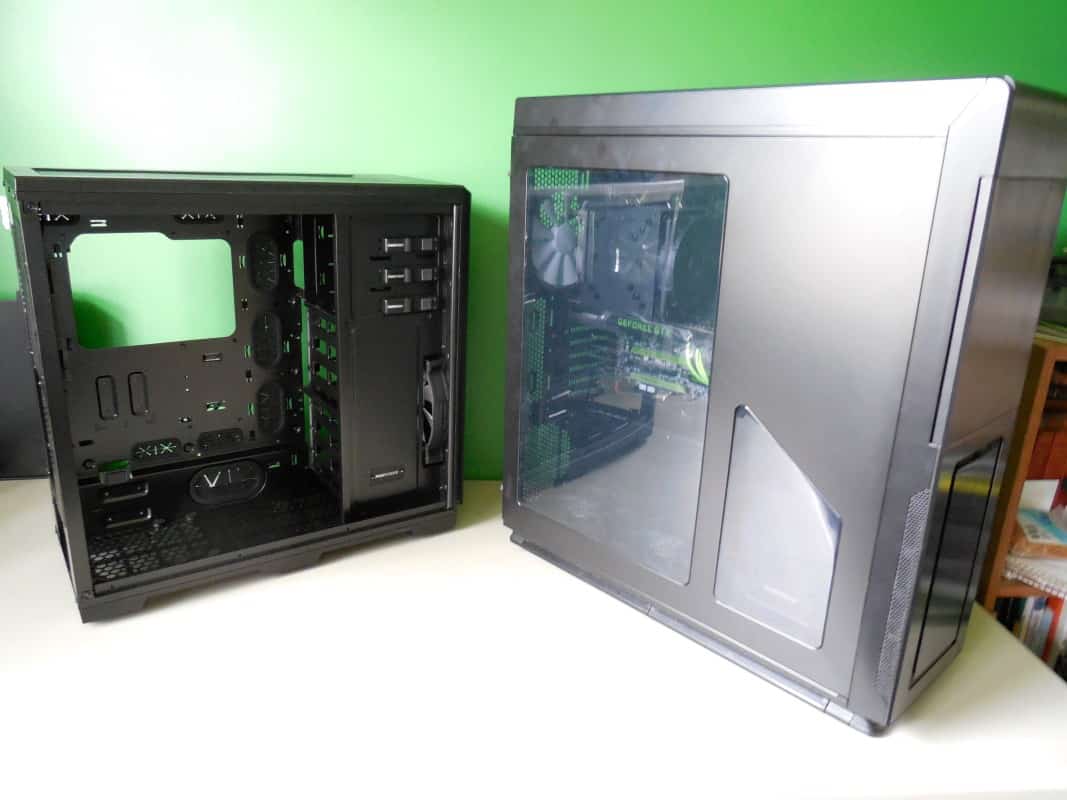

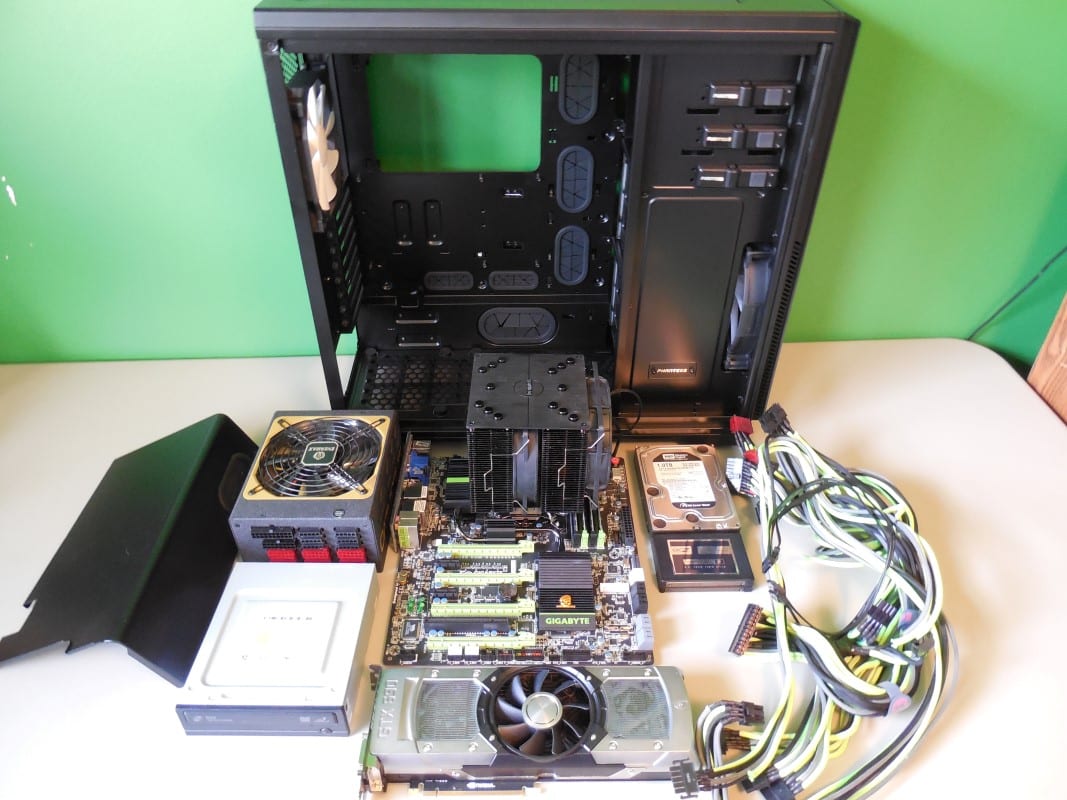
As you can see, although both are marketed as full tower, the Primo is larger in volume by almost 30%. So what does this mean to those of us with big dreams for our smaller Pro case? Lets put everything from our Primo into the Pro and find out.


Just my 2 cents…
1) If you think that the case not having a fan controller is a bad thing, I guess we’re all entitled to our own opinion.
This being said; for folks that are into modding their case(s) – as you pointed out – they’re probably either going to remove the built-in fan controller anyway, so why have it? Personally, I much prefer to install my own controller.
2) If I were to buy this chassis, then the 1st thing I’m going to probably going to do is swap out the existing fans for something I like (or a fan that has better static pressure for radiators). So not having enough fans included in this rather inexpensive case doesn’t bother me.
3) While it’s always nice to have an entire chassis built from steel (or aluminum); for this chassis to come in under $100, sacrifices have to be made. Besides; most brushed aluminum finishes are fingerprint magnets, so if the plastic doesn’t have this trait, then I’m all for it.
Both a bog-standard controller and the PWM controller have their own advantages.
One thing I find no-one explores is that due to the way it works, you don’t get the buzzing at low speeds with the PWM that you tend to find with certain combinations of fans and controllers i.e Corsair fans with Bitfenix Hydra/NZXT Sentry etc.
If you’re controlling all fans at the same time, with decent software it is the far superior solution.
Brechan, thanks for the comments! I completely agree with you on all points here. But when you’re reviewing you have to point these things out.
1) Agreed it’s just something you see at this price range.
2) Understandable, but for most people shopping at this price range they’re not going to want to spend another $15-20 more per fan to replace them. That aside, they are actually quite nice fans, I would just have liked one more. And for water cooling of course you get your own and quite a few more. 😉
3)All true, and again for the sake of the review it just had to be pointed out.
Thanks for reading!
Very interesting point, I know what you’re talking about but it hadn’t occurred to me that the buzzing was absent. Plus one to Phanteks there.
I will semi disagree with you on the point of the PWM controller being superior. Yes there are a few nice fan controller suites that make it easy to control. However not until your into your OS do you have access to make any changes.
Additionally any decent add in controller is going to have more fan support and better functionality in the area of thermal performance. There is no way the small board that comes with the Pro can output at high levels as consistently and for as long while keeping heat build up under control. It is a fine place holder, but is no substitute.
Thanks for reading and keep commenting Adrian!
Thanks for responding to my “Reply” so soon, it means a lot.
Now; speaking of reviews, I realize it takes a lot of time to (upload, edit, etc.) produce a quality review of just about anything. But.
More sites are including the size of radiator supported for the particular product (usually PC chassis’) but completely forget to post the maximum thickness ( or heaven forbid thinness ).
For those of us that are considering a specific (new) chassis for an upcoming build, how difficult is it to post the maximum thickness of supported radiators?
Some company(s) are doing away with the “traditional ” fan controller, let alone 5 1/4″ bays altogether…
Those of us that water cool the old-fashioned way, may want this external 5 1/4″ bay specifically for a controller that can handle 20+ watts, which includes the D 5’s, the EK 4.0’s and the DDC’s.. So the inclusion a controller that can only handle only 12 watts (max) is wasted space. Better filled with something useful.