Installation and Setup
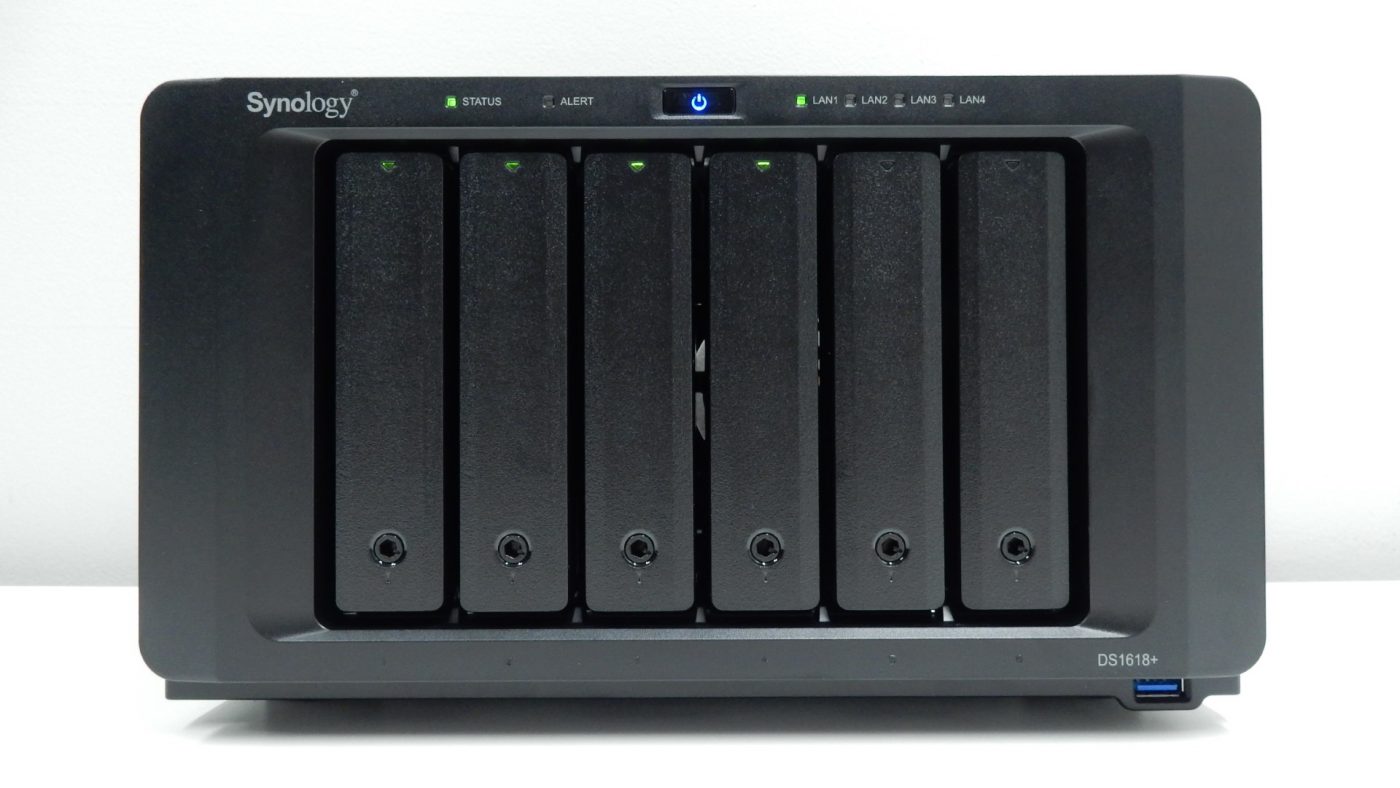
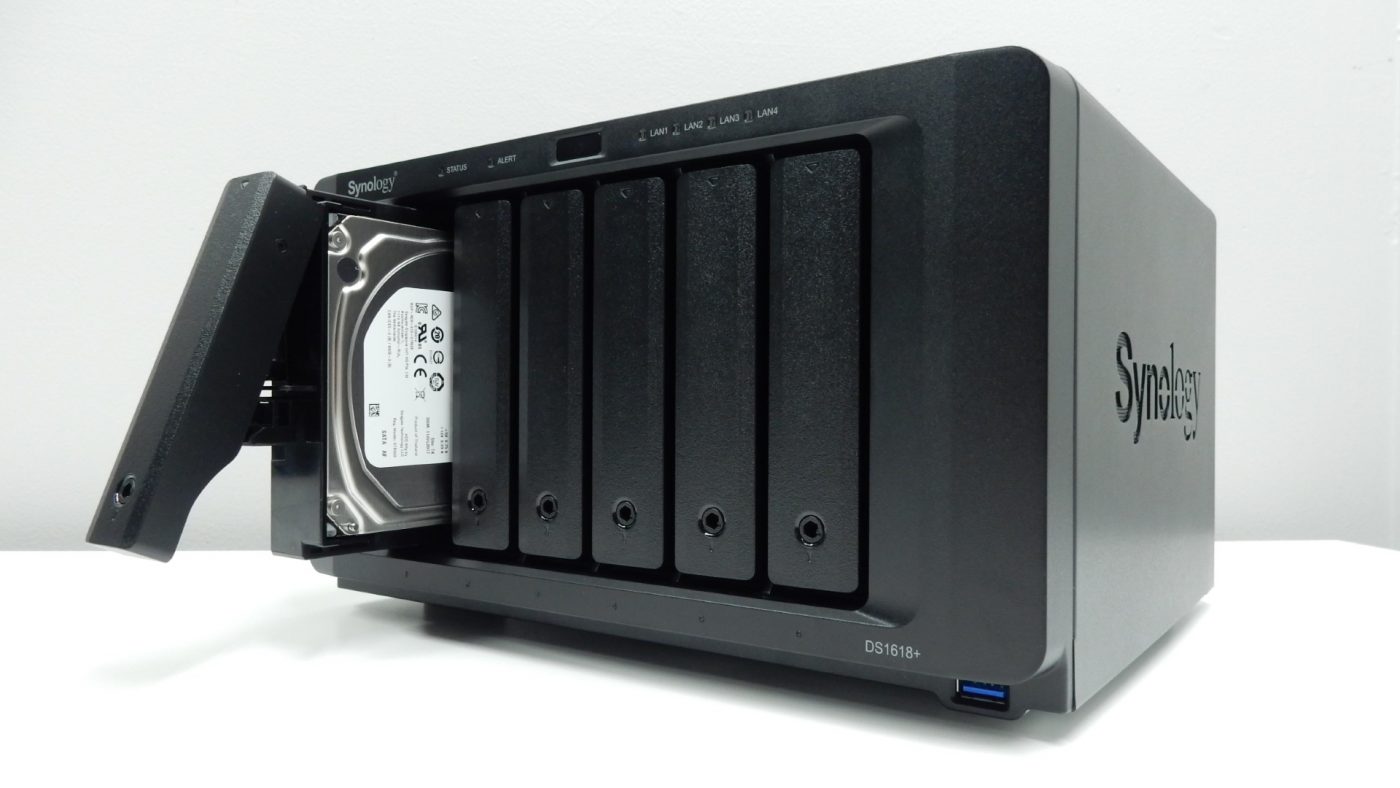
Before we can get working with the software and features of the DiskStation DS1618+, we have to install a few drives for storage. After using the included key to unlock the drive bays, you simply push in on the bottom of the tray lever and pull it out. Synology has provided a tool-less design for installing 3.5″ drives, while 2.5″ drives will require the use of the included screws to keep the drive in place.
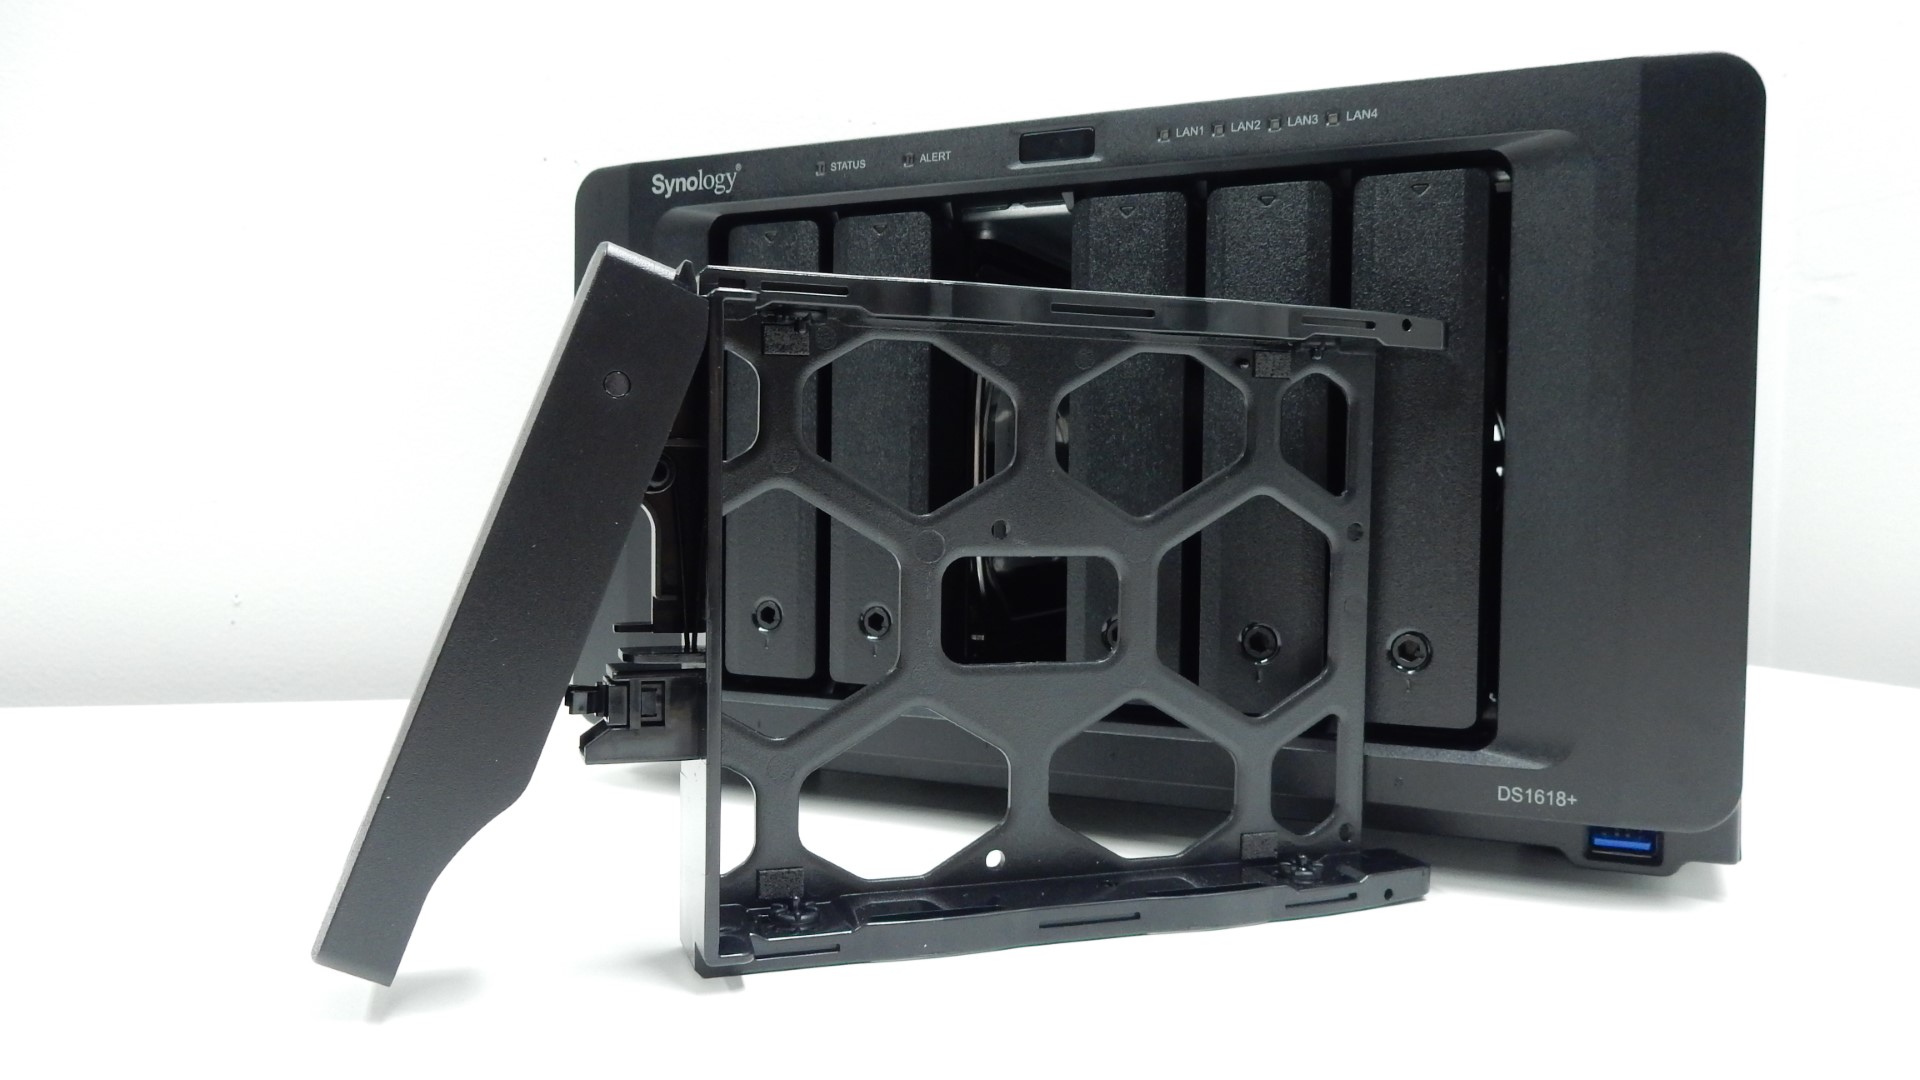
With our drives situated in their trays we slid them back into place, clicking the tray levers to secure them. With the power cord plugged in and NIC 1 connected to our network, it was time to get started. Powering the unit on is handled by the center-mounted power button, though the DS1618+ does offer Wake on LAN/WAN support for remote power needs.
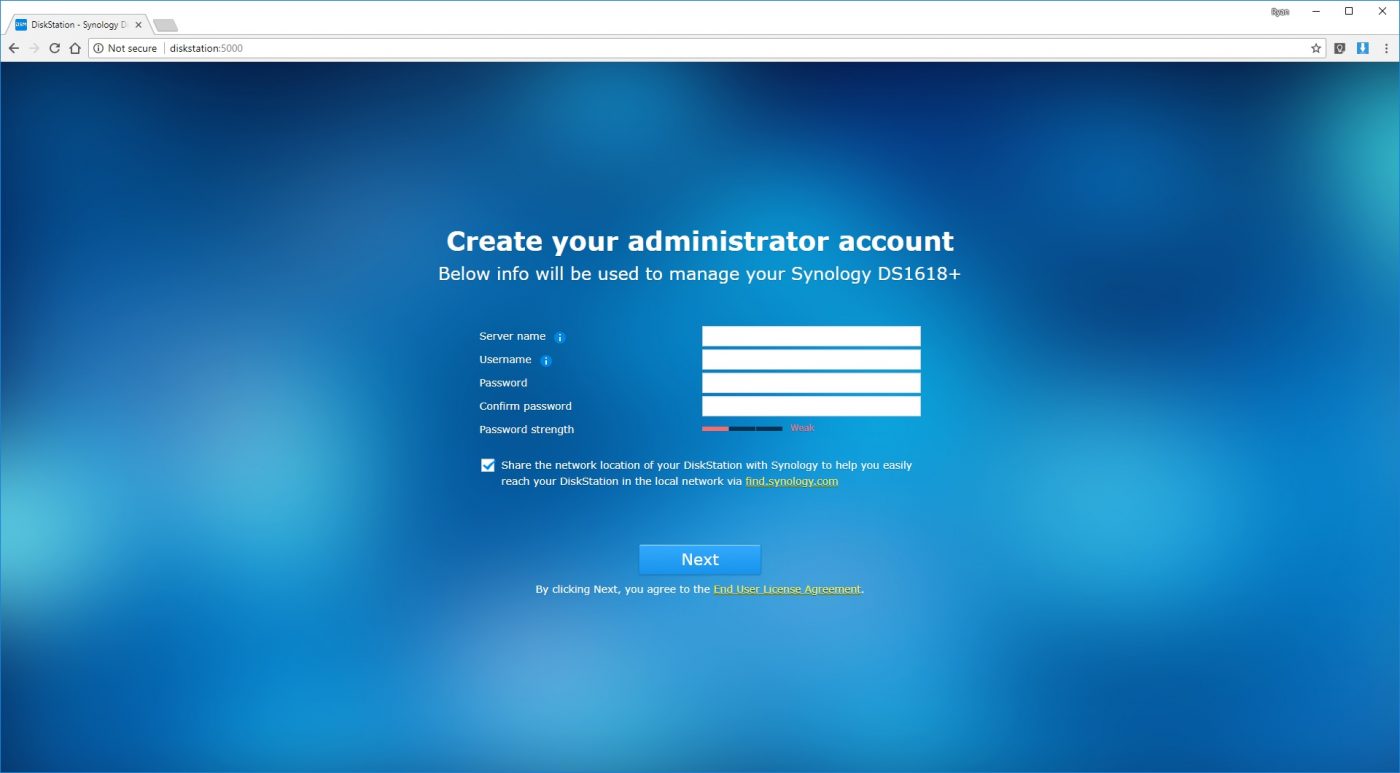
Once powered on, Synology makes it very easy to find the NAS on your network. Simply browsing to http://find.synology.com or http://diskstation:5000 will point you in the right direction to get started with system configuration. We are first prompted to name our NAS and create an administrator account to manage the DS1618+.
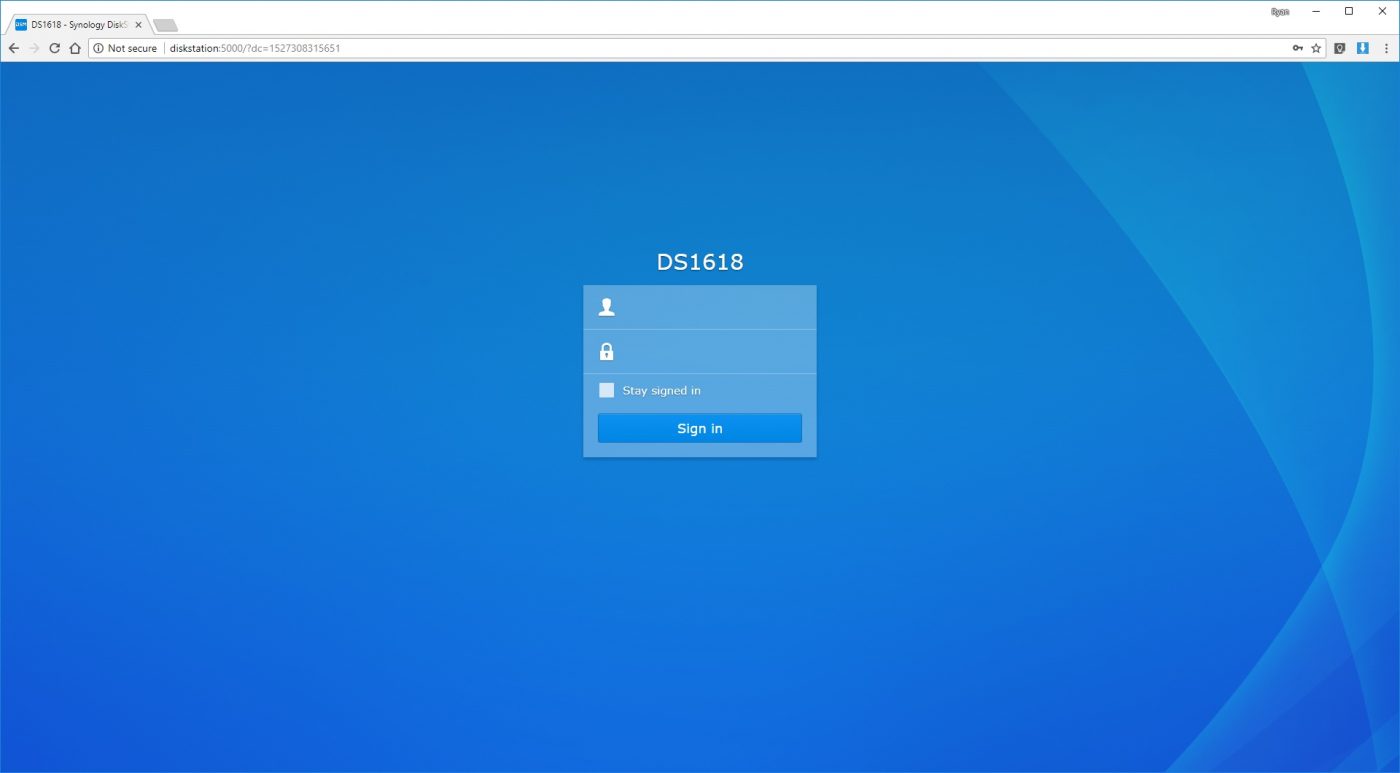
Next up we log into the NAS using our administrator account that we configured in the previous step. You have the option here to stay signed into the NAS, which is a personal preference choice to make.
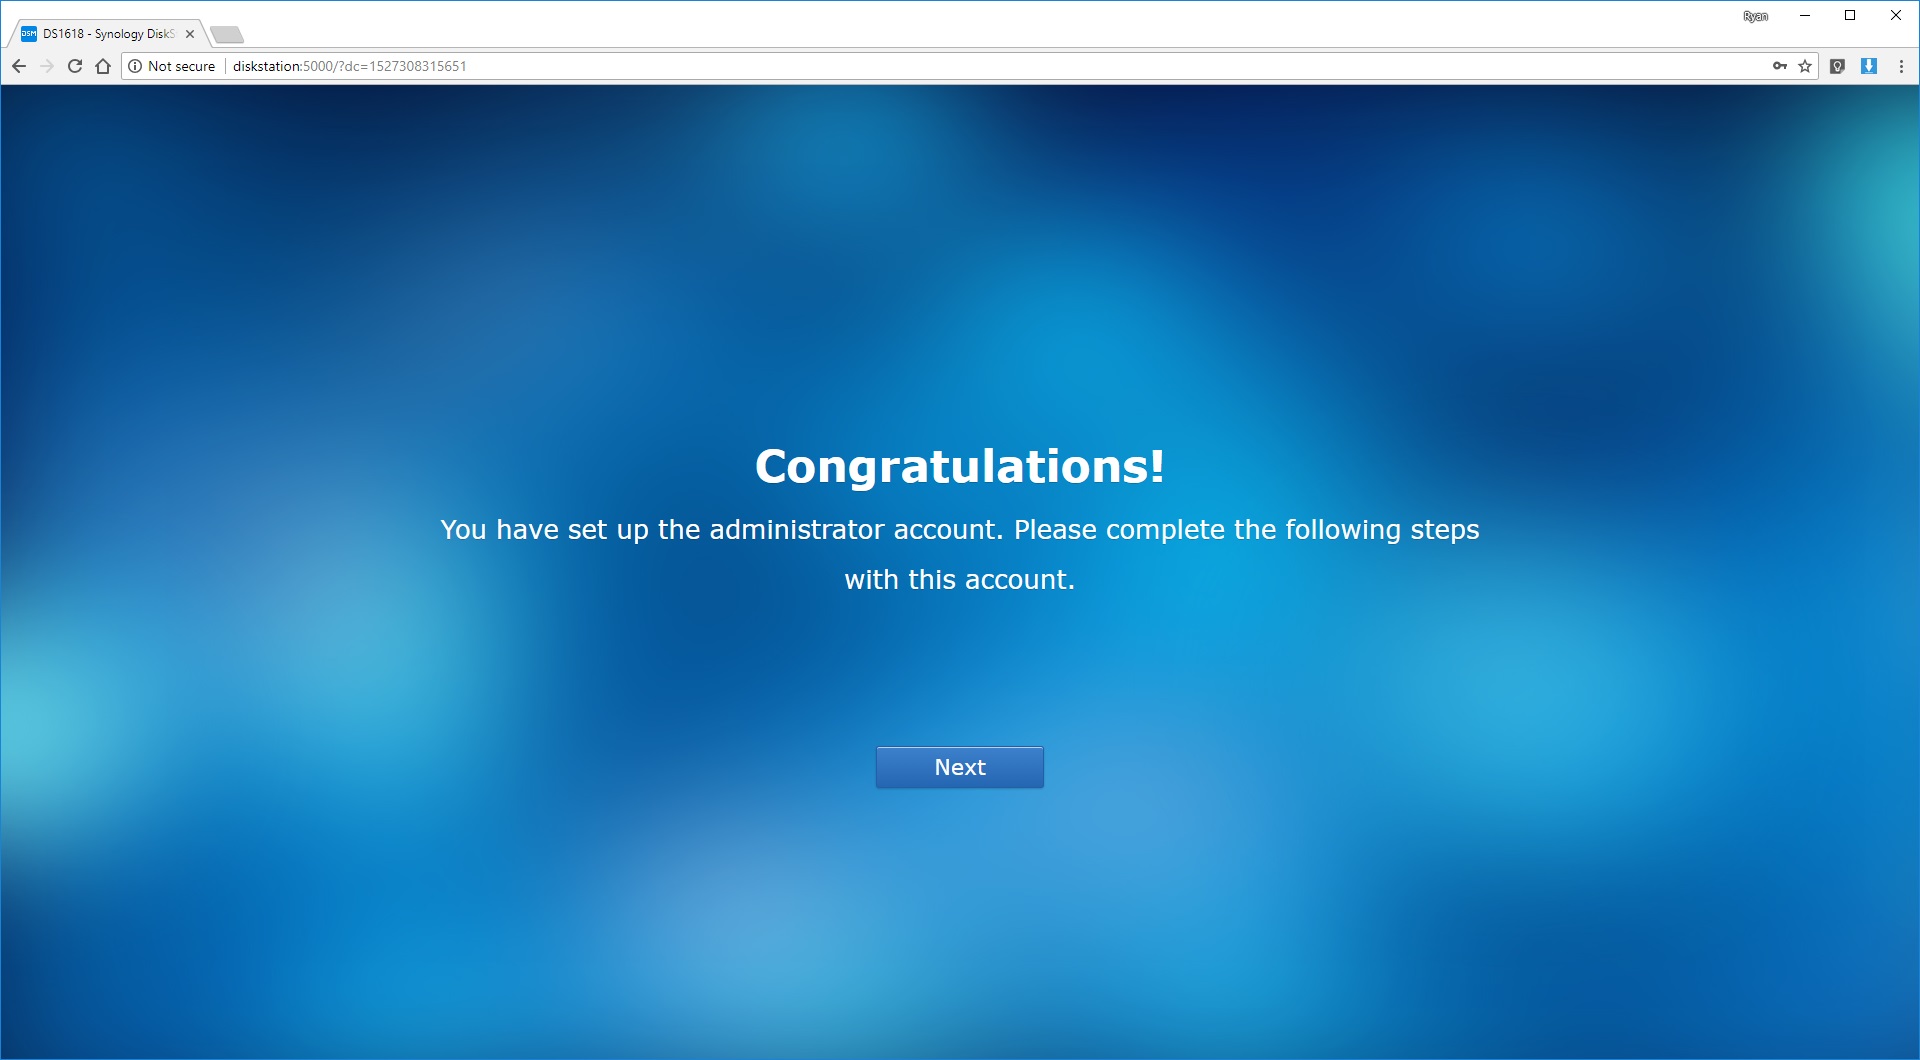
After logging in, we are greeted with a message confirming the creation of an administrator account and to complete some follow-up steps to fully configure the NAS.
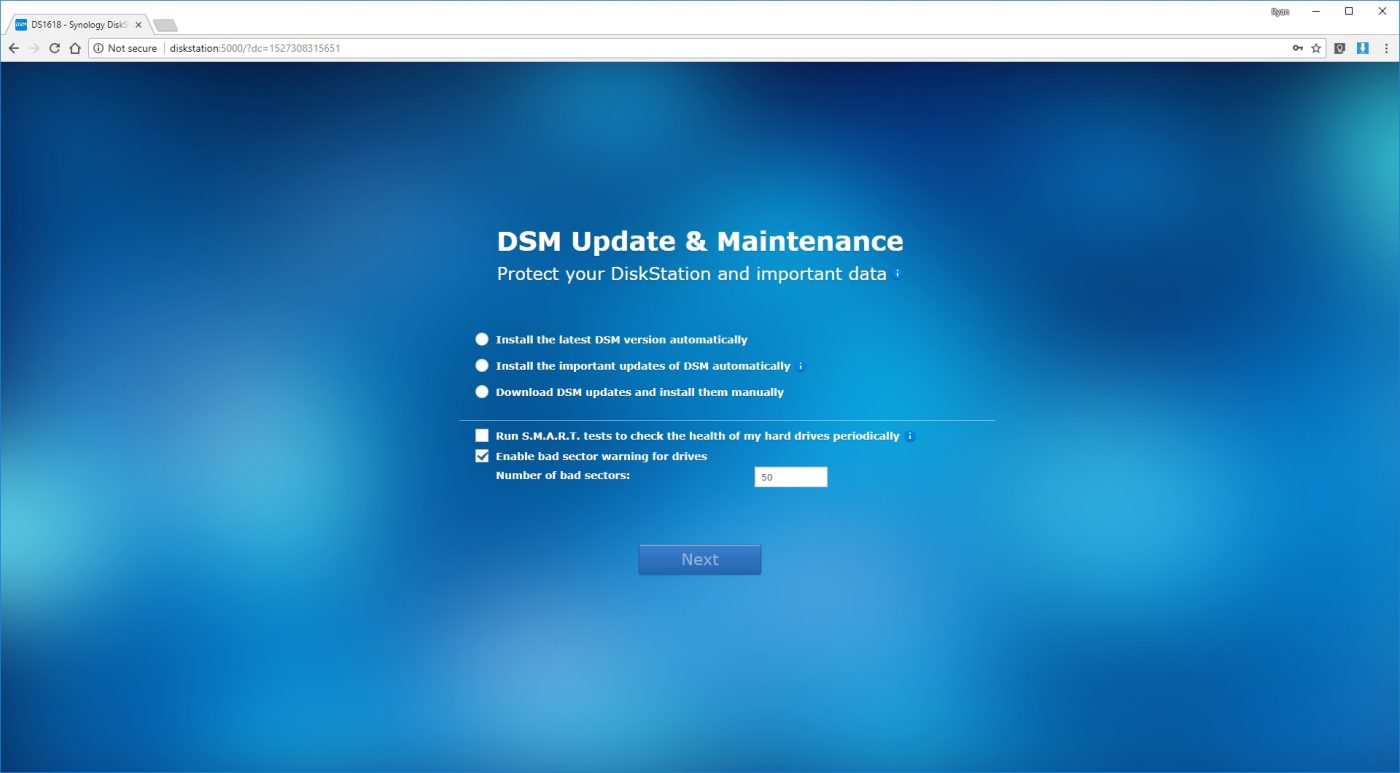
Keeping your NAS up to date not only ensures you are getting the latest versions of any applications you might use, as well as new features that Synology rolls out, but also make sure that your NAS is secure with regards to security and vulnerability patching. You can also enable periodical S.M.A.R.T. tests for your drives at this point, though this can be enabled or disabled later on. Warnings for bad drive sectors can also be enabled and adjusted here.
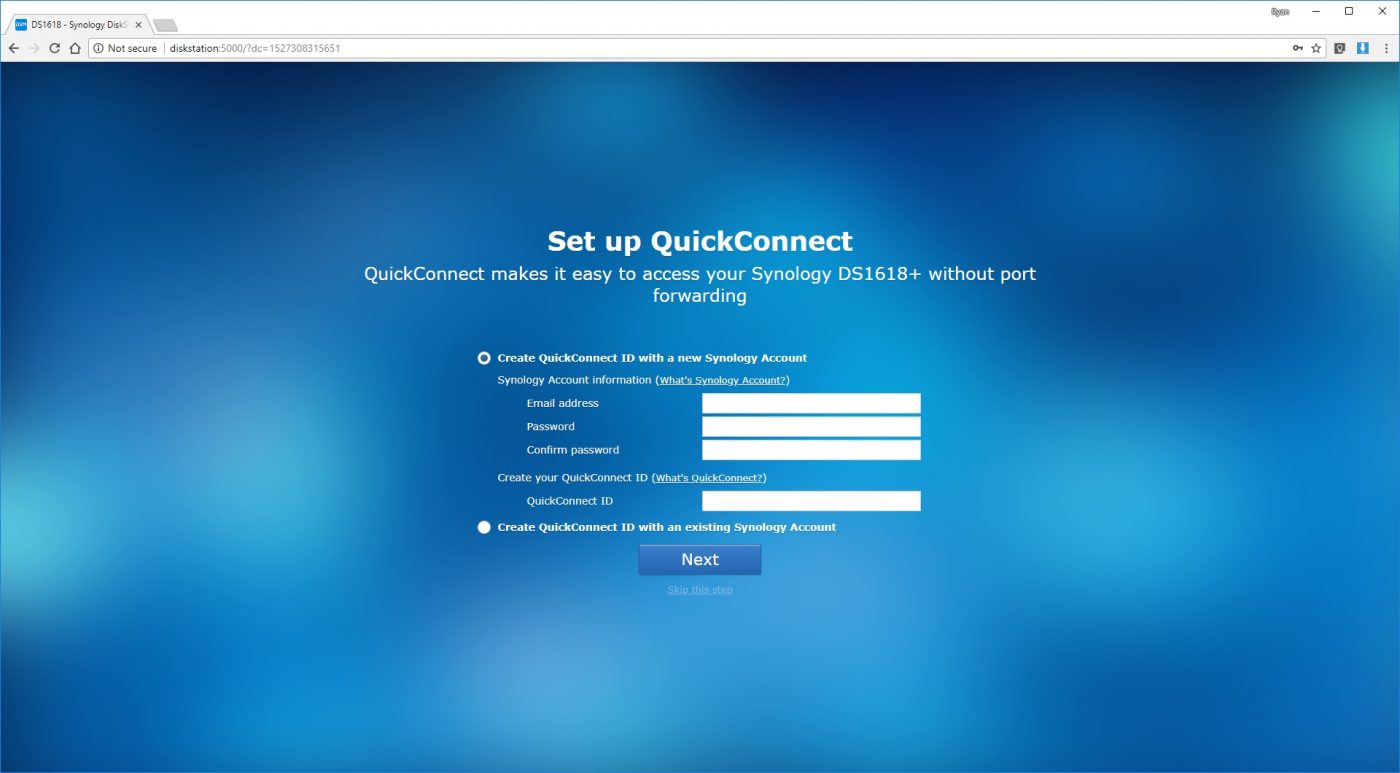
Synology QuickConnect lets you access your NAS remotely, without port forwarding, via your Synology account. This can be an easy way to configure remote access for those users who aren’t comfortable making changes to their network to enable port forwarding.
After those quick steps you are all set and ready to take a quick tour of Synology’s Disk Station Manager, or DSM, environment. This last screen also lets you opt in or out of sending anonymous statistics to Synology.

Once in DSM, the first step we took was to make sure we were up to date with the latest version. Lucky for us, our DS1618+ had the latest version already installed, but the process for updating is quite simple.
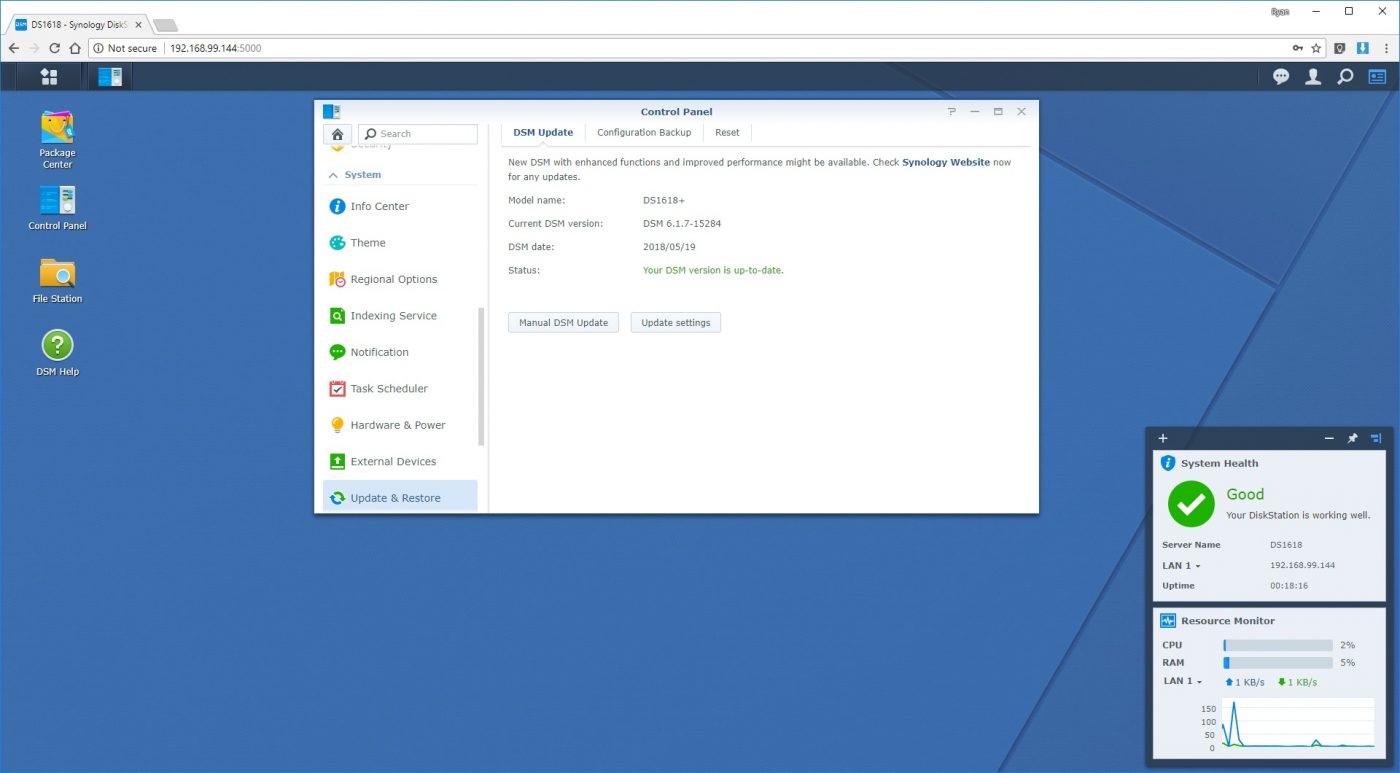
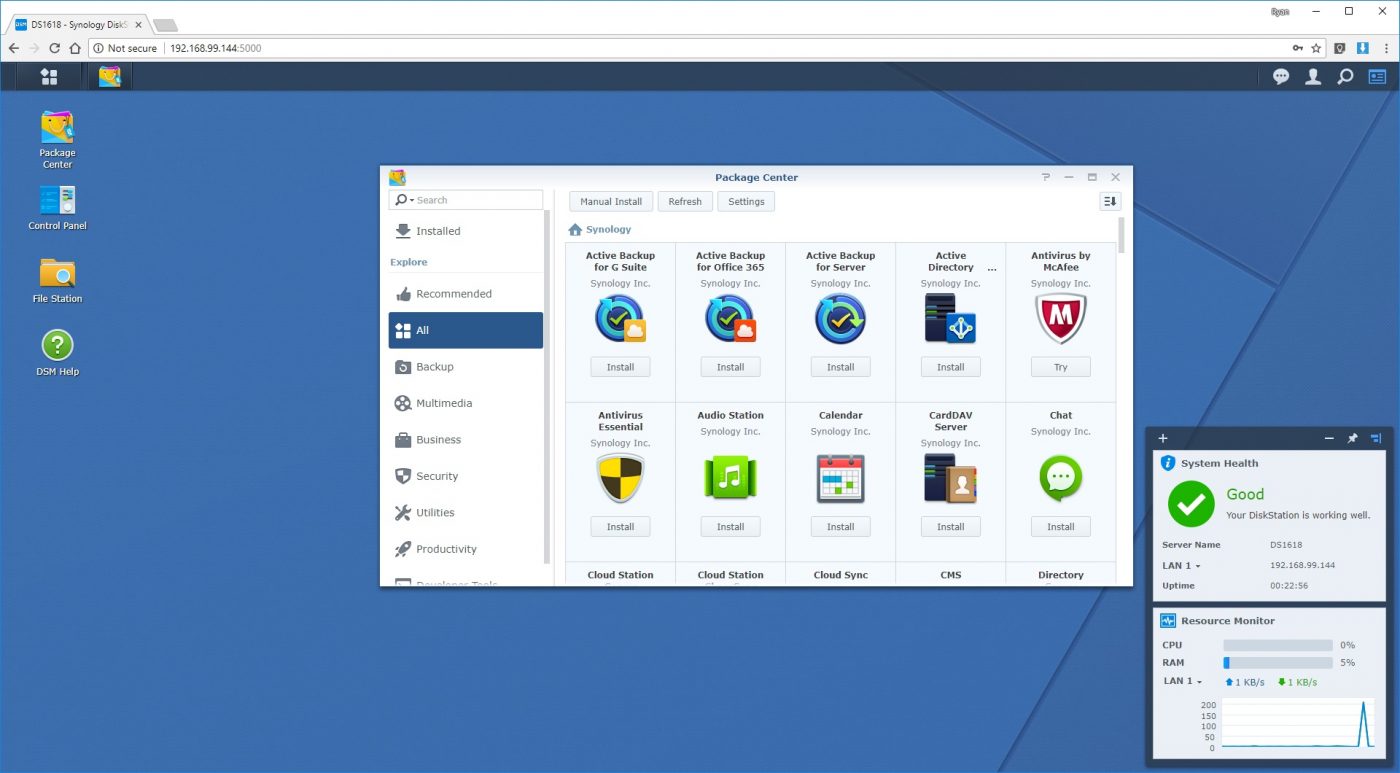
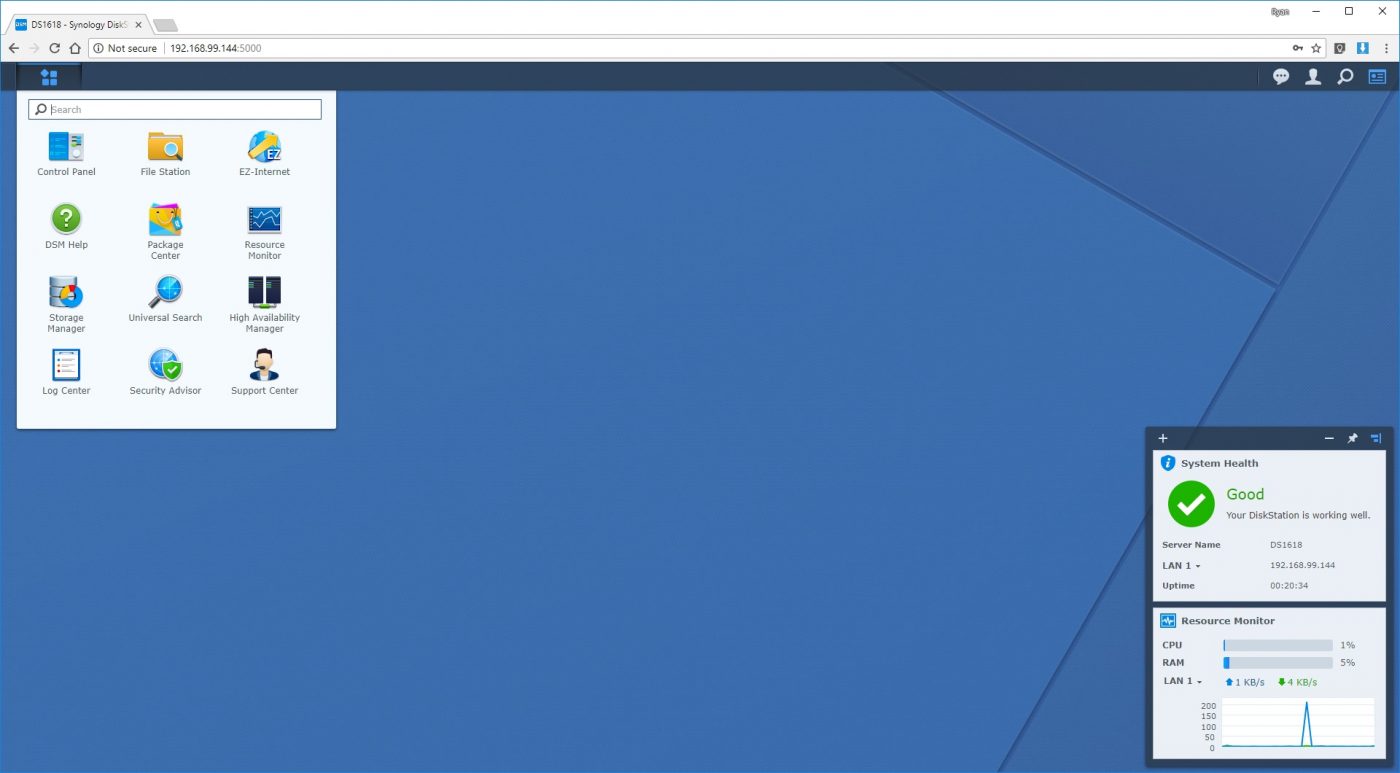
Like most modern NAS operating systems, DSM features a menu system that is similar to that found in Windows or Linux operating systems. DSM places access to the menu in the top left corner of your browser window, and clicking the menu button drops down a pane with multiple system options. In addition to being available in this menu, multiple applications are conveniently placed on the “desktop”, and include quick access to Package Center, Control Panel, File Station, and DSM Help.
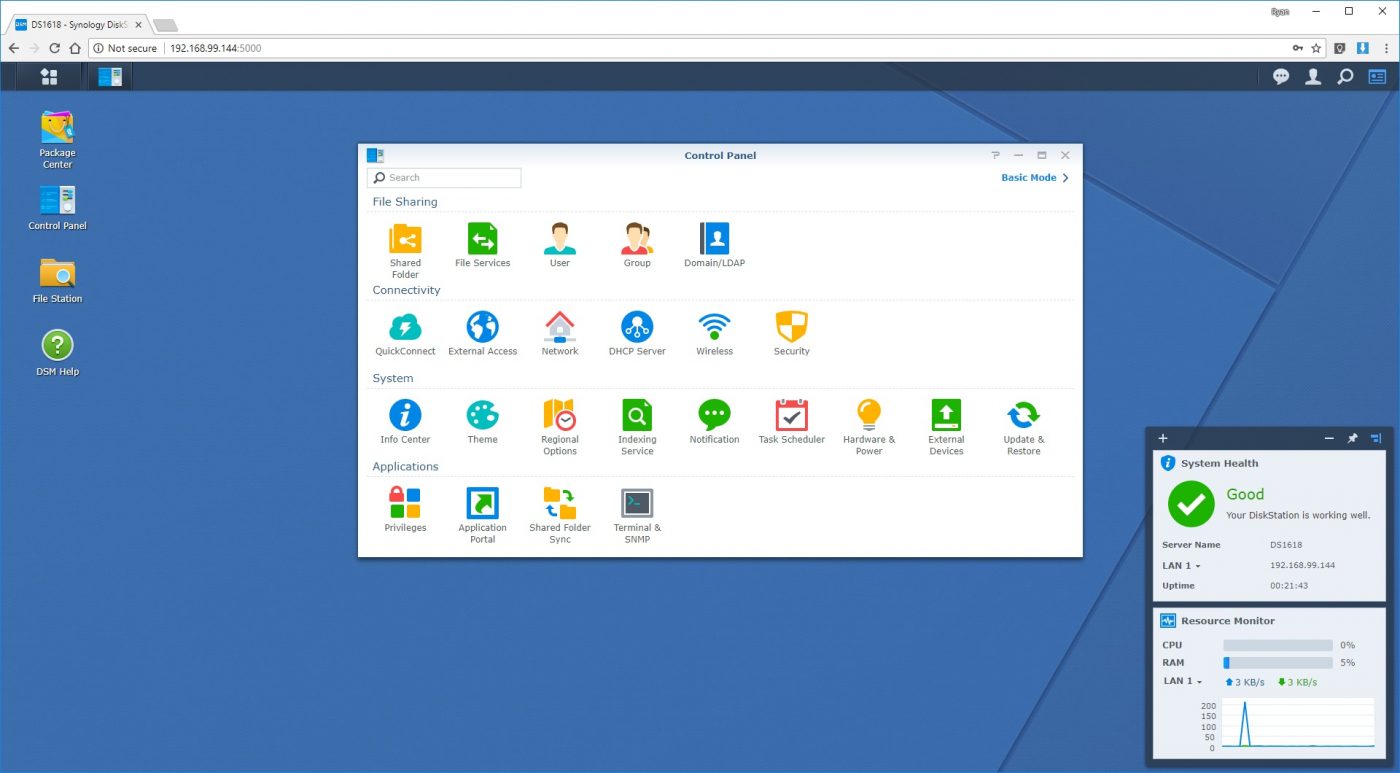
The Control Panel gives you access to multiple system configuration applications and settings, grouped into four categories; File Sharing, Connectivity, System, and Applications. From here you can configure just about every aspect of the DS1618+, aside from actual disk storage options, which we will go over shortly.
The Package Center application can be thought of as an “app store”, similar to Apple and Google offerings on phones. Here you can explore recommended applications that might be a good fit for most users, or you can choose to browse packages by type, such as Backup, Multimedia, and Productivity, to name a few.