Installation
Installing extensions is very, very easy, and using them can be quite convenient. Especially this is true for water cooler’s, as you can easily disconnect your components without disturbing the wires on display in the front.
Extensions work by having one end that has a normal male connector designed to plug into a computer component, while the other is a female version of the same plug to attach to the PSU cable.


The first thing to do is simply attach all of your PSU cable ends to the female plugs.

Next pass the extensions through to the inside of the case. You simply use the same route that you would have used for the PSU wires themselves.


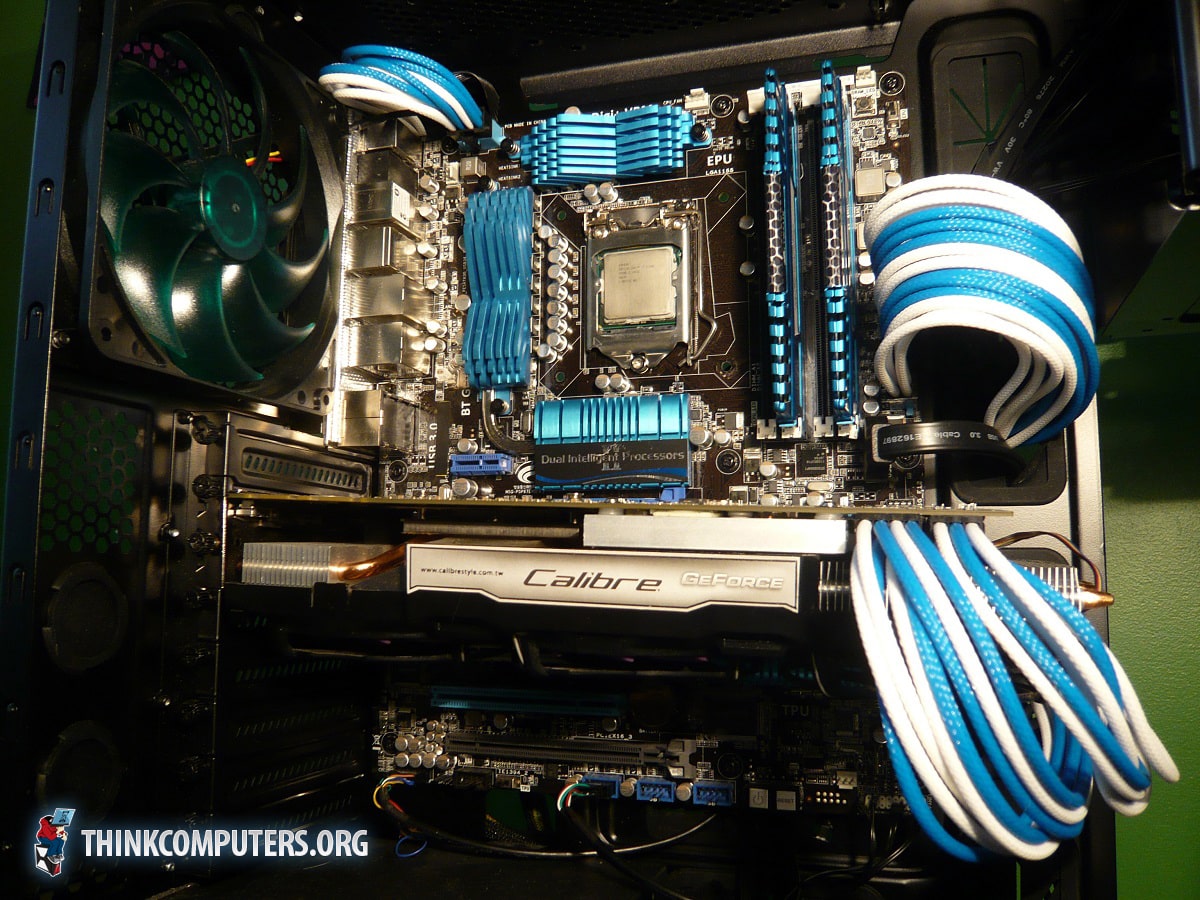
With all the wires passed through to the front simply plug them into their associated components.


Finally after plugging them in, pull the slack back to the backside of the case. With the desired amount of slack, you can begin arranging the cables so that the patterns they were made with are visible. This process can take some time and effort and is known as “training your wires”. You are teaching the wires to take and hold new bends and positions. Be aware with these extensions, that the lower AWG of these wires means they are thicker and does make them stiffer and less inclined to learn a new bend. Not impossible, just harder.

Unfortunately as you can see the 8 pin CPU extension we received was pinned with the natural curve of the wire going against the direction we needed. The result is that the individual wires no longer want to take the correct position to create the pattern they were made with.

You did a great job. Thank you! Buyincoins