Installation
As with most AIOs, the installation of the Lian Li GA II Trinity SL-INF 360 is a pretty straightforward process. As DIY PC building seems to be getting more popular each and every day, the option of AIO liquid coolers is sure to entice those wanting to have a more advanced build, and easy installation will go a long way towards not scaring off first-time builders. As I mentioned when I covered the included accessories, Lian Li has included all of the necessary mounting hardware for a large list of both Intel and AMD processors, but they have also included a physical installation guide and manual. I have seen quite a few companies move to digital versions of their product manuals, and while I appreciate their reduced waste, I still prefer a physical copy of installation instructions, and was happy to have them for this kit.
All that being said however, there were definitely some times during installation that I was cursing whoever designed the hardware for connecting and controlling the lighting and fans for this cooler, along with the included installation manual, and the overly complex method of applying thermal paste.
Our testing is performed with fans in a push configuration, and thankfully that is how Lian Li had them installed from the factory. Again, this is a pretty handy feature that takes a bit of work out of the installation process, but just be prepared to do some extra work if you are wanting to change the placement and orientation of the fans in your build.

The interconnected fans really reduce their cable management needs, but you still have to connect them to the included hub. Thankfully the reduced cabling made routing them behind the motherboard tray quite easy.
From the factory, the SL-INF 360 has Intel mounting hardware installed, so my first step of CPU block installation was to install the AMD mounting hardware for my Ryzen 7 1800X test system. This is a pretty trivial process that involves sliding the Intel mount off the side and replacing it with the AMD hardware. I have seen other manufacturers use a similar setup, Corsair being one of them, and this usually makes swapping out the hardware easier, though it does leave me feeling a little uneasy that there aren’t any screws or anything keeping the mounting hardware attached to the pump housing.

Next up is attaching the radiator to the top of our case, which is a simple task. Using the twelve included screws, simply align them with the appropriate mounting points on your case, and tighten.
As I mentioned earlier, Lian Li provides a stencil, paste, and spreader in order to apply thermal paste to the base of the cooler. This is a bit different than simply installing a cooler with pre-applied paste, or just putting paste on your CPU and letting pressure do the rest. The stencil method takes a bit more time in order to line up the pattern on the bottom of the cooler, and to spread the paste evenly over all of the cutouts. That being said, it does result in a nice looking pattern of paste that is laid out in a manner that Lian Li recommends.

Placing the cooler onto the CPU, I was able to first line up one side’s clip with the plastic AM4 mounting bracket and tighten it down slightly to remove a bit of slack. Then I simply tilted the cooler to be flat against the CPU and proceeded to latch and tighten the other thumbscrew. While this cooler does offer thumbscrews to secure itself, I did utilize a Phillips head screwdriver to fully tighten the mounting hardware.

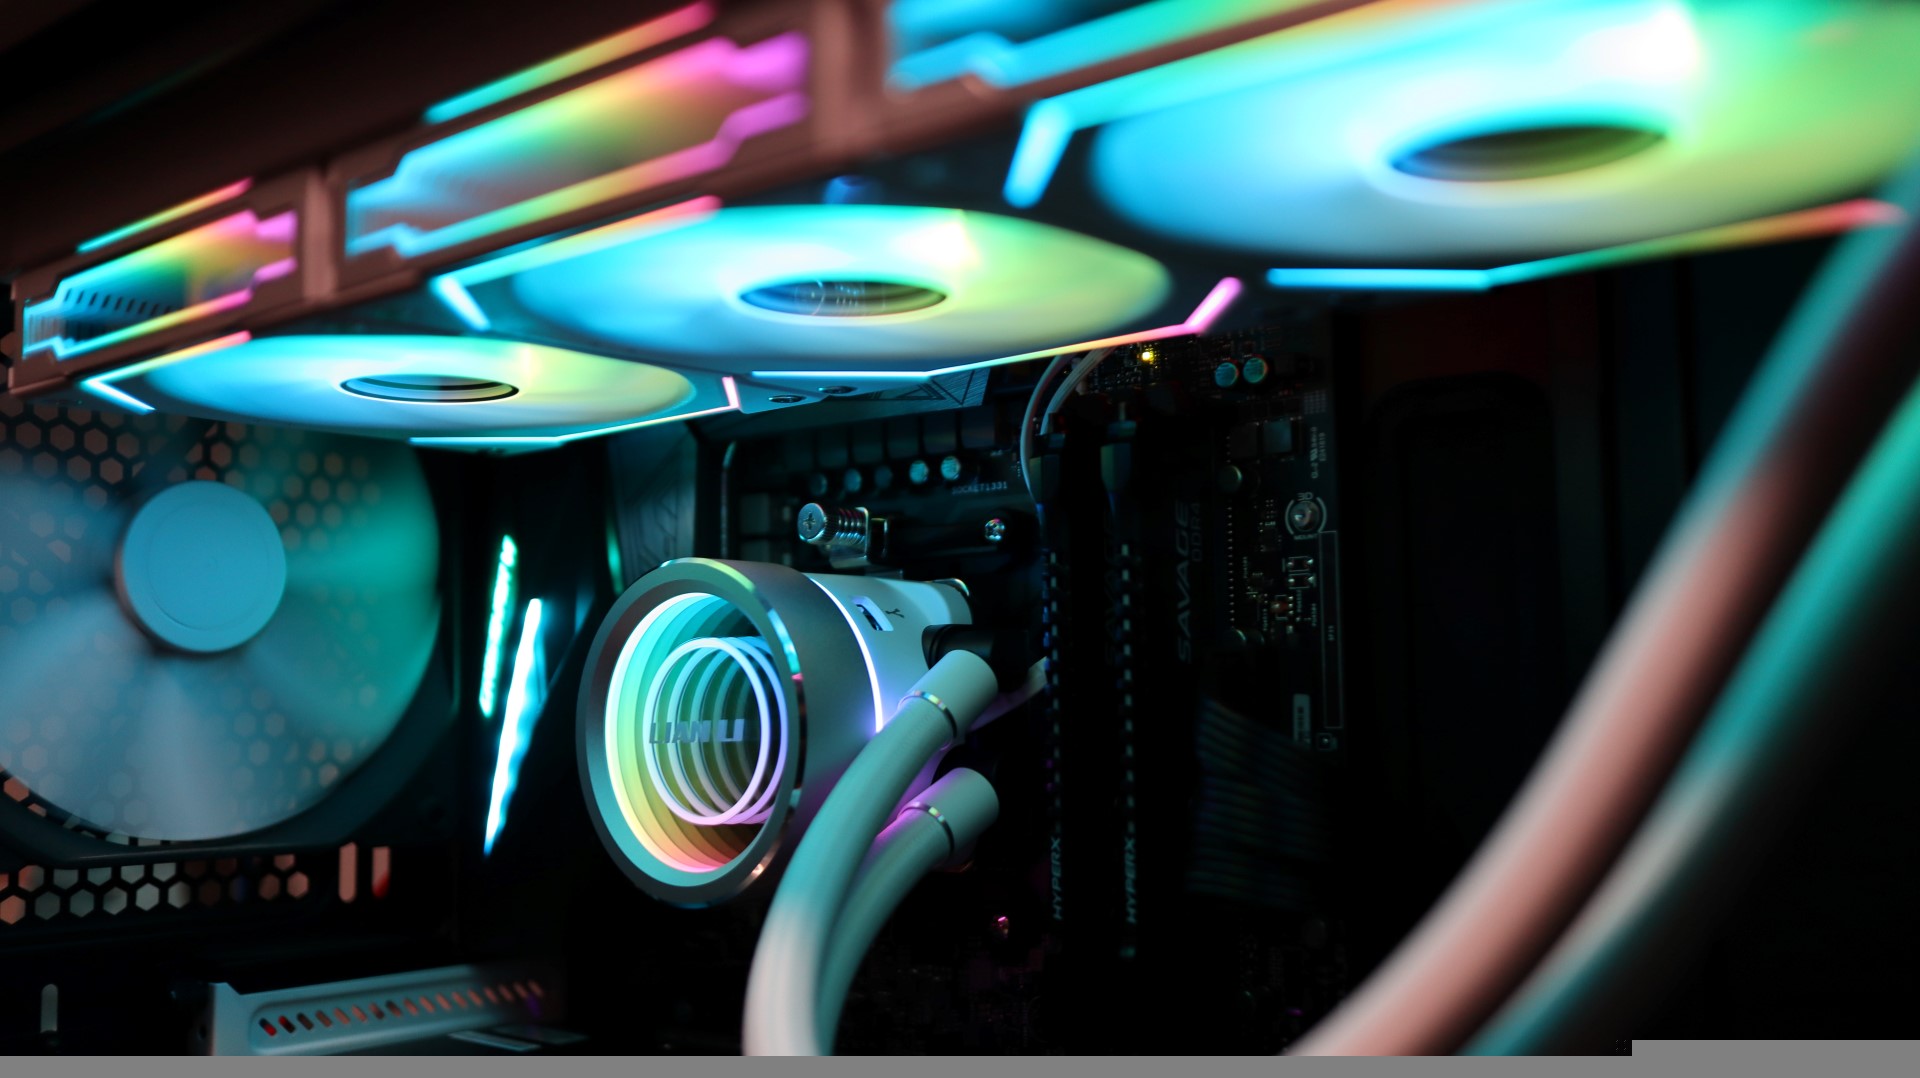
In order to power the SL-INF 360’s pump, I needed to connect the SATA power cable to my power supply, and make sure the PWM cable was connected to my motherboard’s CPU_Fan header. This will allow me to not only power on the pump, but monitor its speed. Next I connected the pump’s USB 2.0 cable to my motherboard.
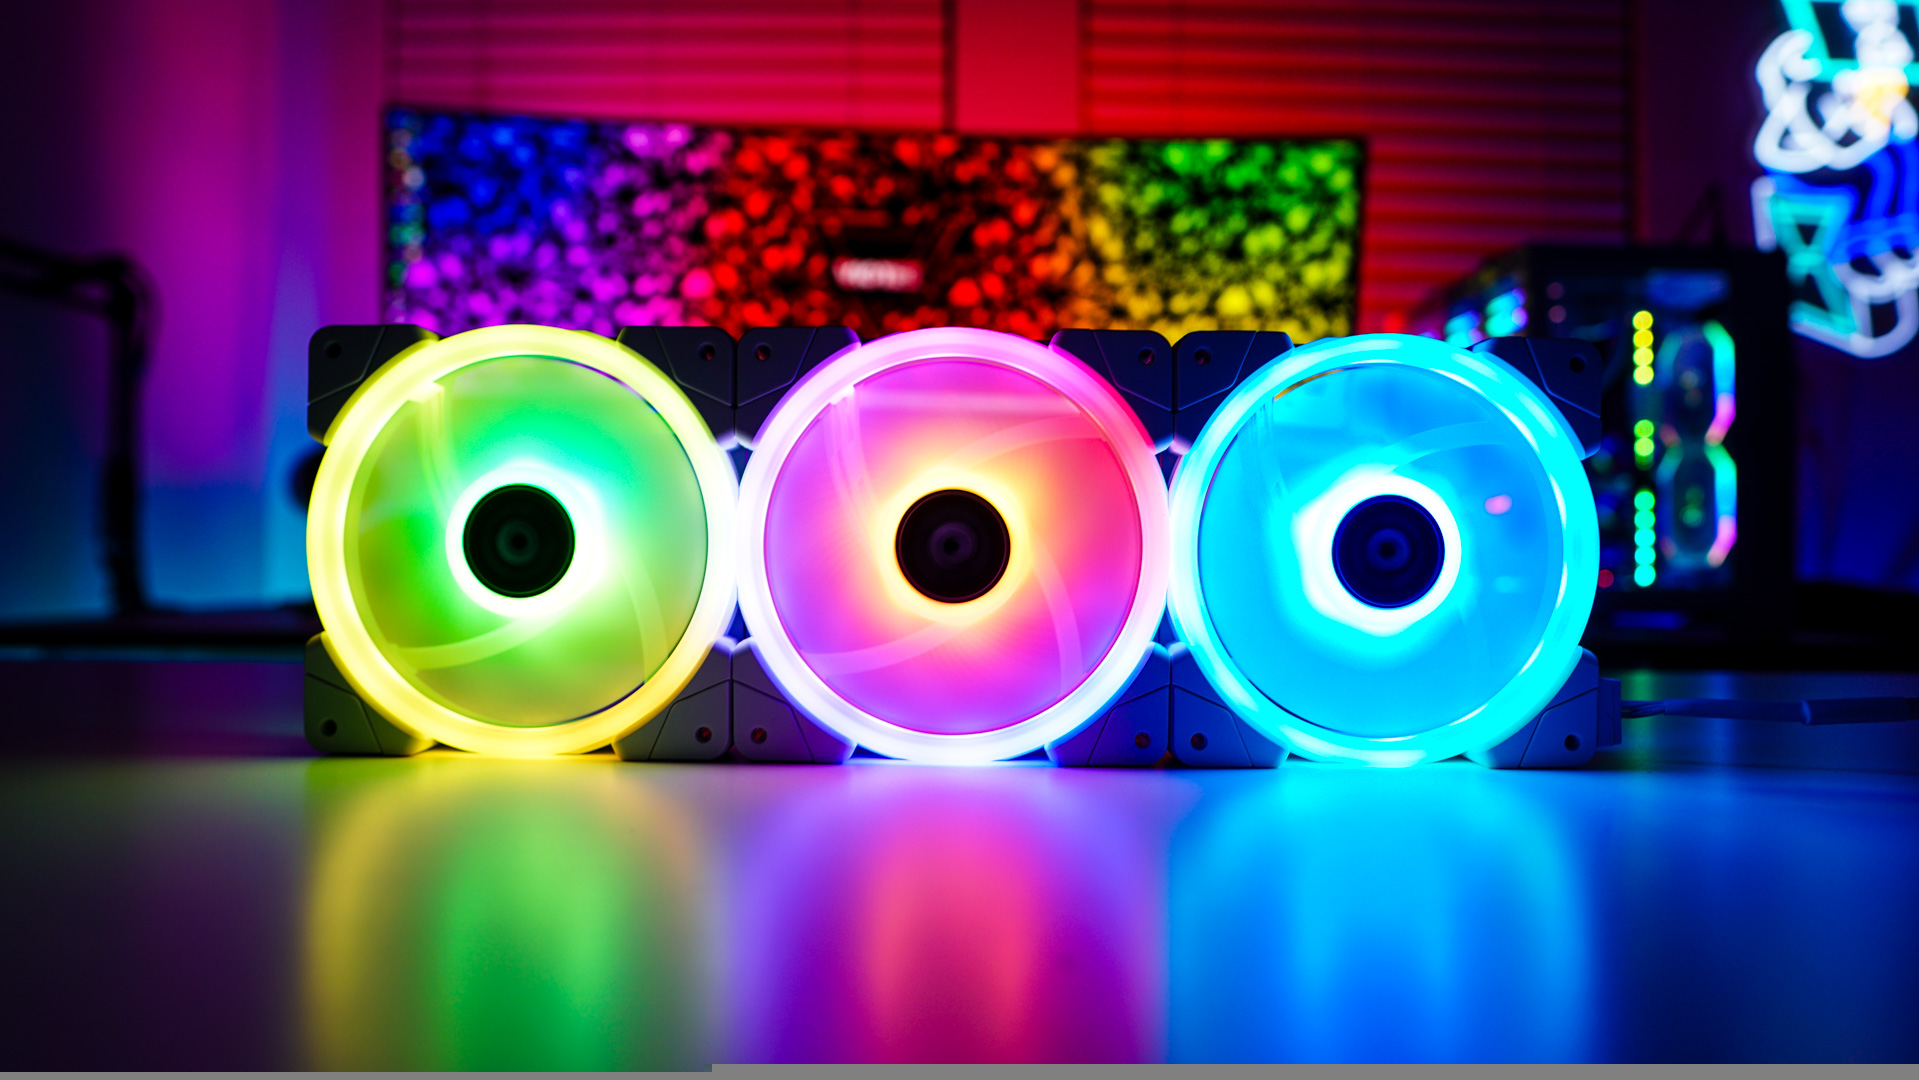
It isn’t uncommon for illuminated fans and coolers to have multiple cables – one for lighting and another for the fan itself. And Lian Li has even improved this area with regards to their fans, as not only are the fans connected to each other without the need for each fan to connect back to the controller, but the fans come pre-attached to the radiator like I previously mentioned. However, on the pump housing, there are three hardwired cables to start with – 1 x SATA power, 1 x PWM, and 1 x USB 2.0. That wouldn’t be so bad if the included instructions were more clear, but they aren’t. As you can see in the image below, Lian Li makes it look like you need to connect an additional ARGB cable between the pump housing and either your motherboard or a lighting controller. Additionally, they show a cable needing to connect the controller to another ARGB header and PWM header. That is also in addition to the Micro USB to USB 2.0 cable and the built-in SATA power. Just looking at the diagram, I was initially thinking I needed to connect the following: 2 x SATA power, 2 x PWM, 2 x USB 2.0, 2 x ARGB, on top of the pair of cables coming from the pans that go into the controller as well.
Thankfully, as it turns out, you don’t have to double up on your connections. Lian Li just doesn’t do a good job of indicating that you can use the included controller for your lighting and speed controls, or you can connect to a compatible motherboard or other controller if you prefer.