Setup & Testing
To get things started you’ll need to plug in the GV100 into any open USB Type-C connector on your PC or laptop. ORICO did include a Type-C to Type-A adapter cable so if you don’t have a Type-C connection you don’t have to worry. When you plug in the drive it will instantly turn on. The drive comes completely empty, so not software or anything like that on it.
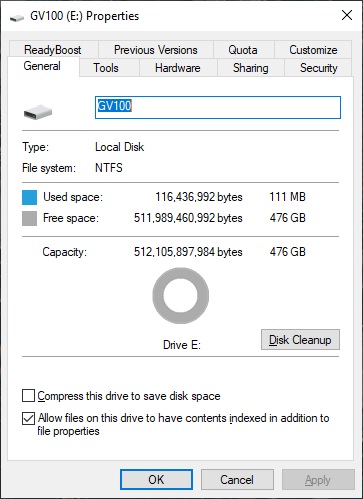
For those wondering the 512GB version of the drive will give you 476GB of usable space.
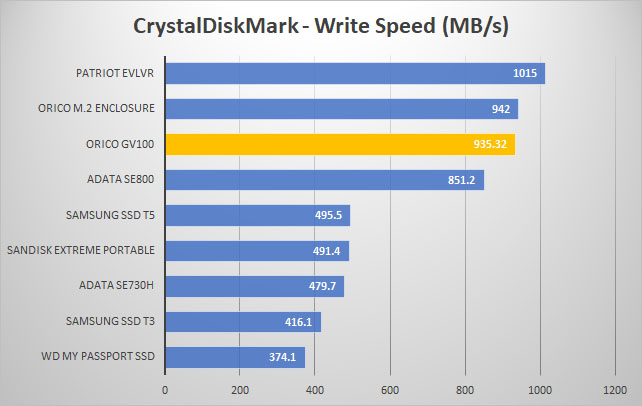
To test the drive we will first be running CrystalDiskMark, this will give us a good idea of read and write speeds of the drive.
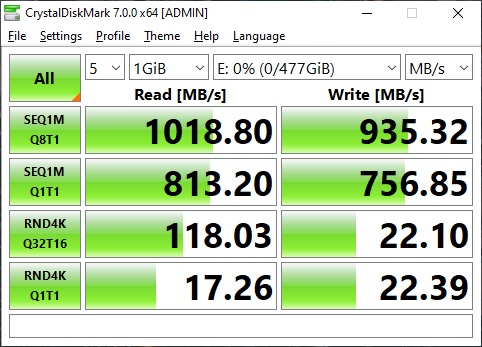
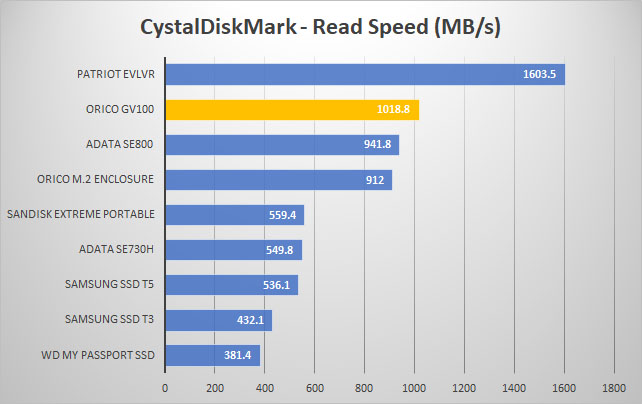
As you can see we have very good results here at 1018.80 MB/s read and 935.32 MB/s write. So how does that compare to other portable drives that we’ve tested?
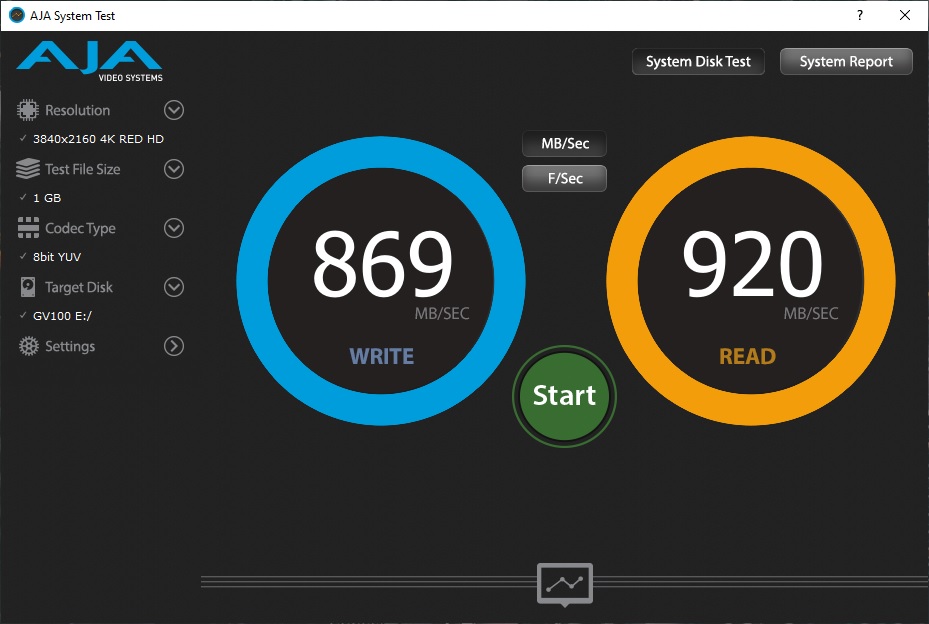
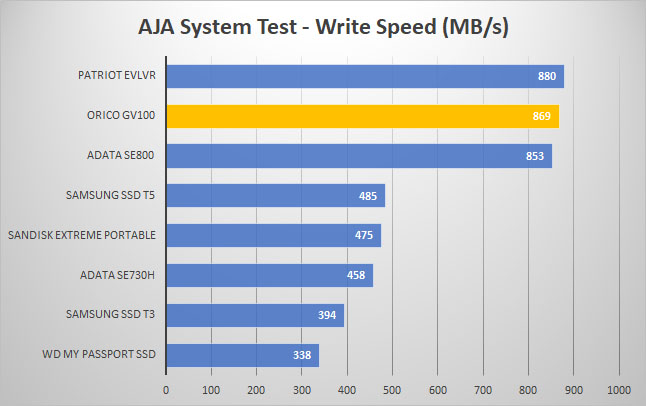
Next we run the the AJA System test. It tests different types of video formats and gives you throughput results for the drive. Our configuration was 4K RED HD footage, 1 GB test file size, and the 8bit YUV codec.
And those results compared to other drives.

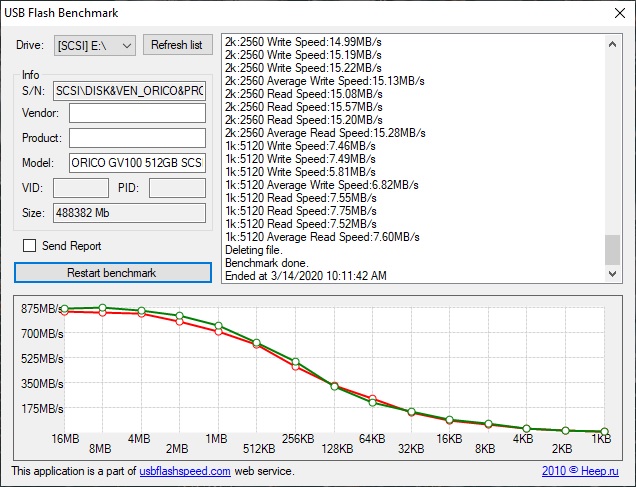
Next up is the USB Flash Benchmark, which will transfer various different file sizes to the drive and record the transfer speeds.
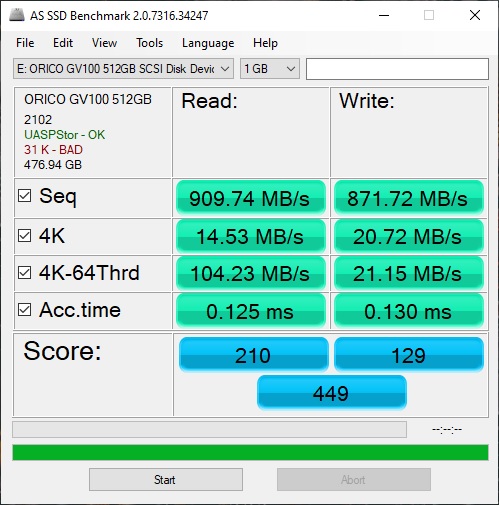
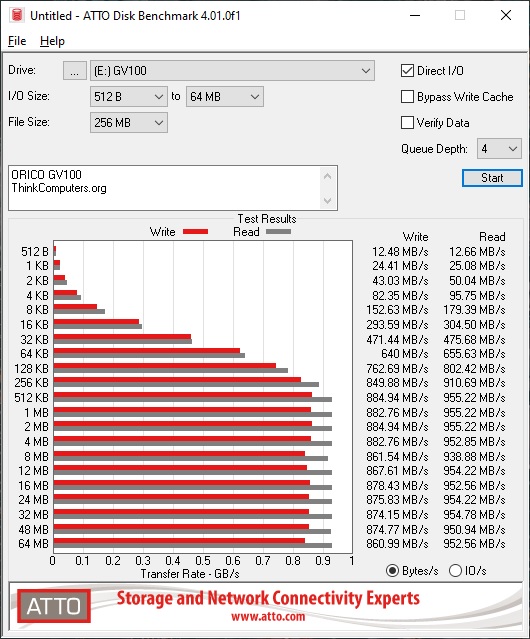
We have also added the AS SSD Benchmark and ATTO Disk Benchmark to our portable storage testing.