Setup and Usage
Just like the TourBox NEO, the TourBox Lite is supported by the TourBox Console application, which I have found to be a powerful and intuitive software package. There is a lot of customization that can be made to the TourBox devices, across many content creation platforms, and it was all very easy to pick up, which I think a lot of other companies could learn from.
As is expected with most USB devices, the TourBox Lite is very easy to set up. After downloading and installing the latest version of the TourBox Console companion software, you simply connect the Lite to your PC using the supplied USB Type-C cable, and let Windows detect and install the device. Next you simply fire up the Console application and from there is where the world opens up to customization and configuration.
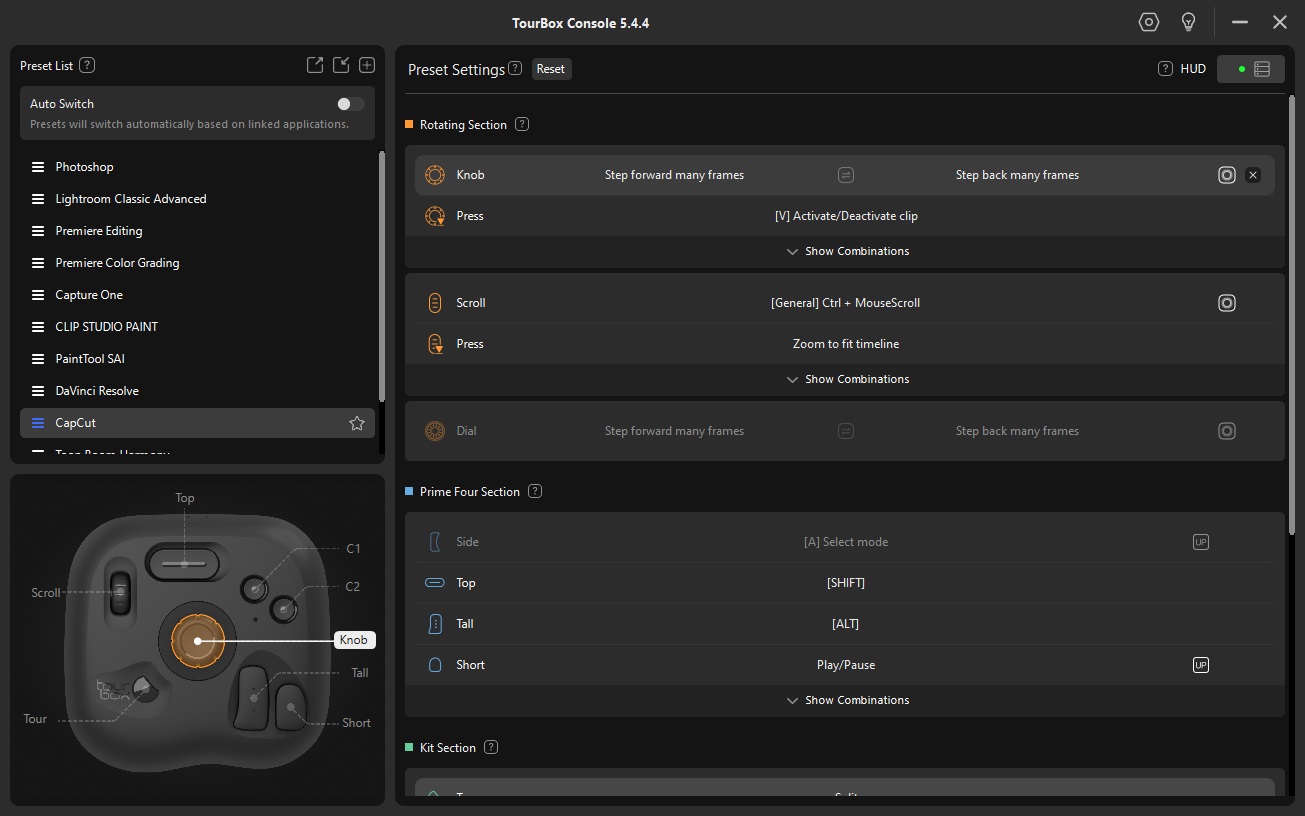
With TourBox Console open, you will be presented with a very intuitive layout. In the top left section of the window you see a list of presets for various content creation applications. Many of the most popular options are here, including Adobe Photoshop and Premiere, DaVinci Resolve, CapCut, and even my custom profile for my go-to video editor, HitFilm Express. Each of these presets can be exported via the application, but TourBox also offers a wide range of presets that are available for download on their website. There are options for digital painting, photo and video editing, audio production, video conferencing, office productivity applications, and more. You can even create a custom preset for applications that might not have one, and export them to share with other TourBox users. Thankfully upgrading my previous version of TourBox Console saved my custom preset for HitFilm Express without me having to make that specification, but I definitely should have backed that profile up before running the update.

Just below the preset section is a top-down image of the Lite, with labeled call-outs for each input. This is a great reference for customizing the preset settings, and when you are working to adjust a certain input option, the input’s label will highlight so that you know you have the right one selected.
Where you do most of the customizing of the TourBox Console is the Preset Settings section. This is where you can customize each and every input option. These controls are separated into the three previously mentioned sections – Rotating, Prime Four, and Kit. Depending on the input type, you can adjust exactly how they function. For instance, the Knob’s default function in Adobe Photoshop is to decrease brush size when rotated to the left, and increase size when rotated to the right. You can easily swap this direction by clicking the double-arrow button on this setting, and you can even adjust the speed at which the size increases or decreases with a modifier button.
I do wish that TourBox would have removed the control options from the software that the Lite doesn’t support, as it is a bit odd/confusing to see button options that don’t exist for the Lite still showing up in the Preset Settings area.
There is also an option to expand the section for each input to show the combination options, and adjust them to your needs. I found this to be a very intuitive way of identifying and adjusting the options for each input and combination of inputs. And if you ever feel like you’ve really messed things up, there is a reset button that lets you start over. My suggestion would be to copy a preset first, and then make your changes, that way you can always fall back to the default if needed.
At the bottom of the Preset Settings area is a Custom Section that lets you create your own combinations or double-click options beyond the defaults. It is here where you can really customize the functionality of the TourBox Lite to your exact needs.
Another part of the TourBox Console application is the Global Setting window that sets standard options like starting with the PC, a notice when switching presets, and more. You can also toggle the General and D-Pad HUD windows that can be used as a quick, on-screen reference for the NEO. These HUD options can help you keep your focus on the screen, and reduce your reliance on going back to the Console application window to refresh yourself on button configuration.
When I looked at the TourBox NEO, I had recently started utilizing CapCut to create more engaging short-form content, and I have continued to use that application for my shorts videos. This review of the TourBox Lite was a continuation of that workflow, one that I have become much more proficient at as time has gone by. I have definitely found that spending time with the NEO, and now the Lite, has improved my content creation workflow, as they both have an amazing amount of customizations available via Console, and multiple control surfaces to interact with in a small form factor.
With the CapCut preset selected, I continue to utilize the General HUD to provide a quick visual reference for the Lite’s controls. Instead of relying on hovering over options in the CapCut interface, I have been really working to learn and use the options available to me on the Lite when they make the most sense. Unfortunately, the lack of the D-Pad buttons means that I have had to adjust some of my workflow that I was very used to with the NEO. I lost quick access to the Split function, and ended up using the C1 and C2 buttons for my In and Out selection options instead of the D-Pad Left and Right. The same thing goes for stepping forward and backward frames on my timeline with the Dial, a function I have moved over to the Knob.
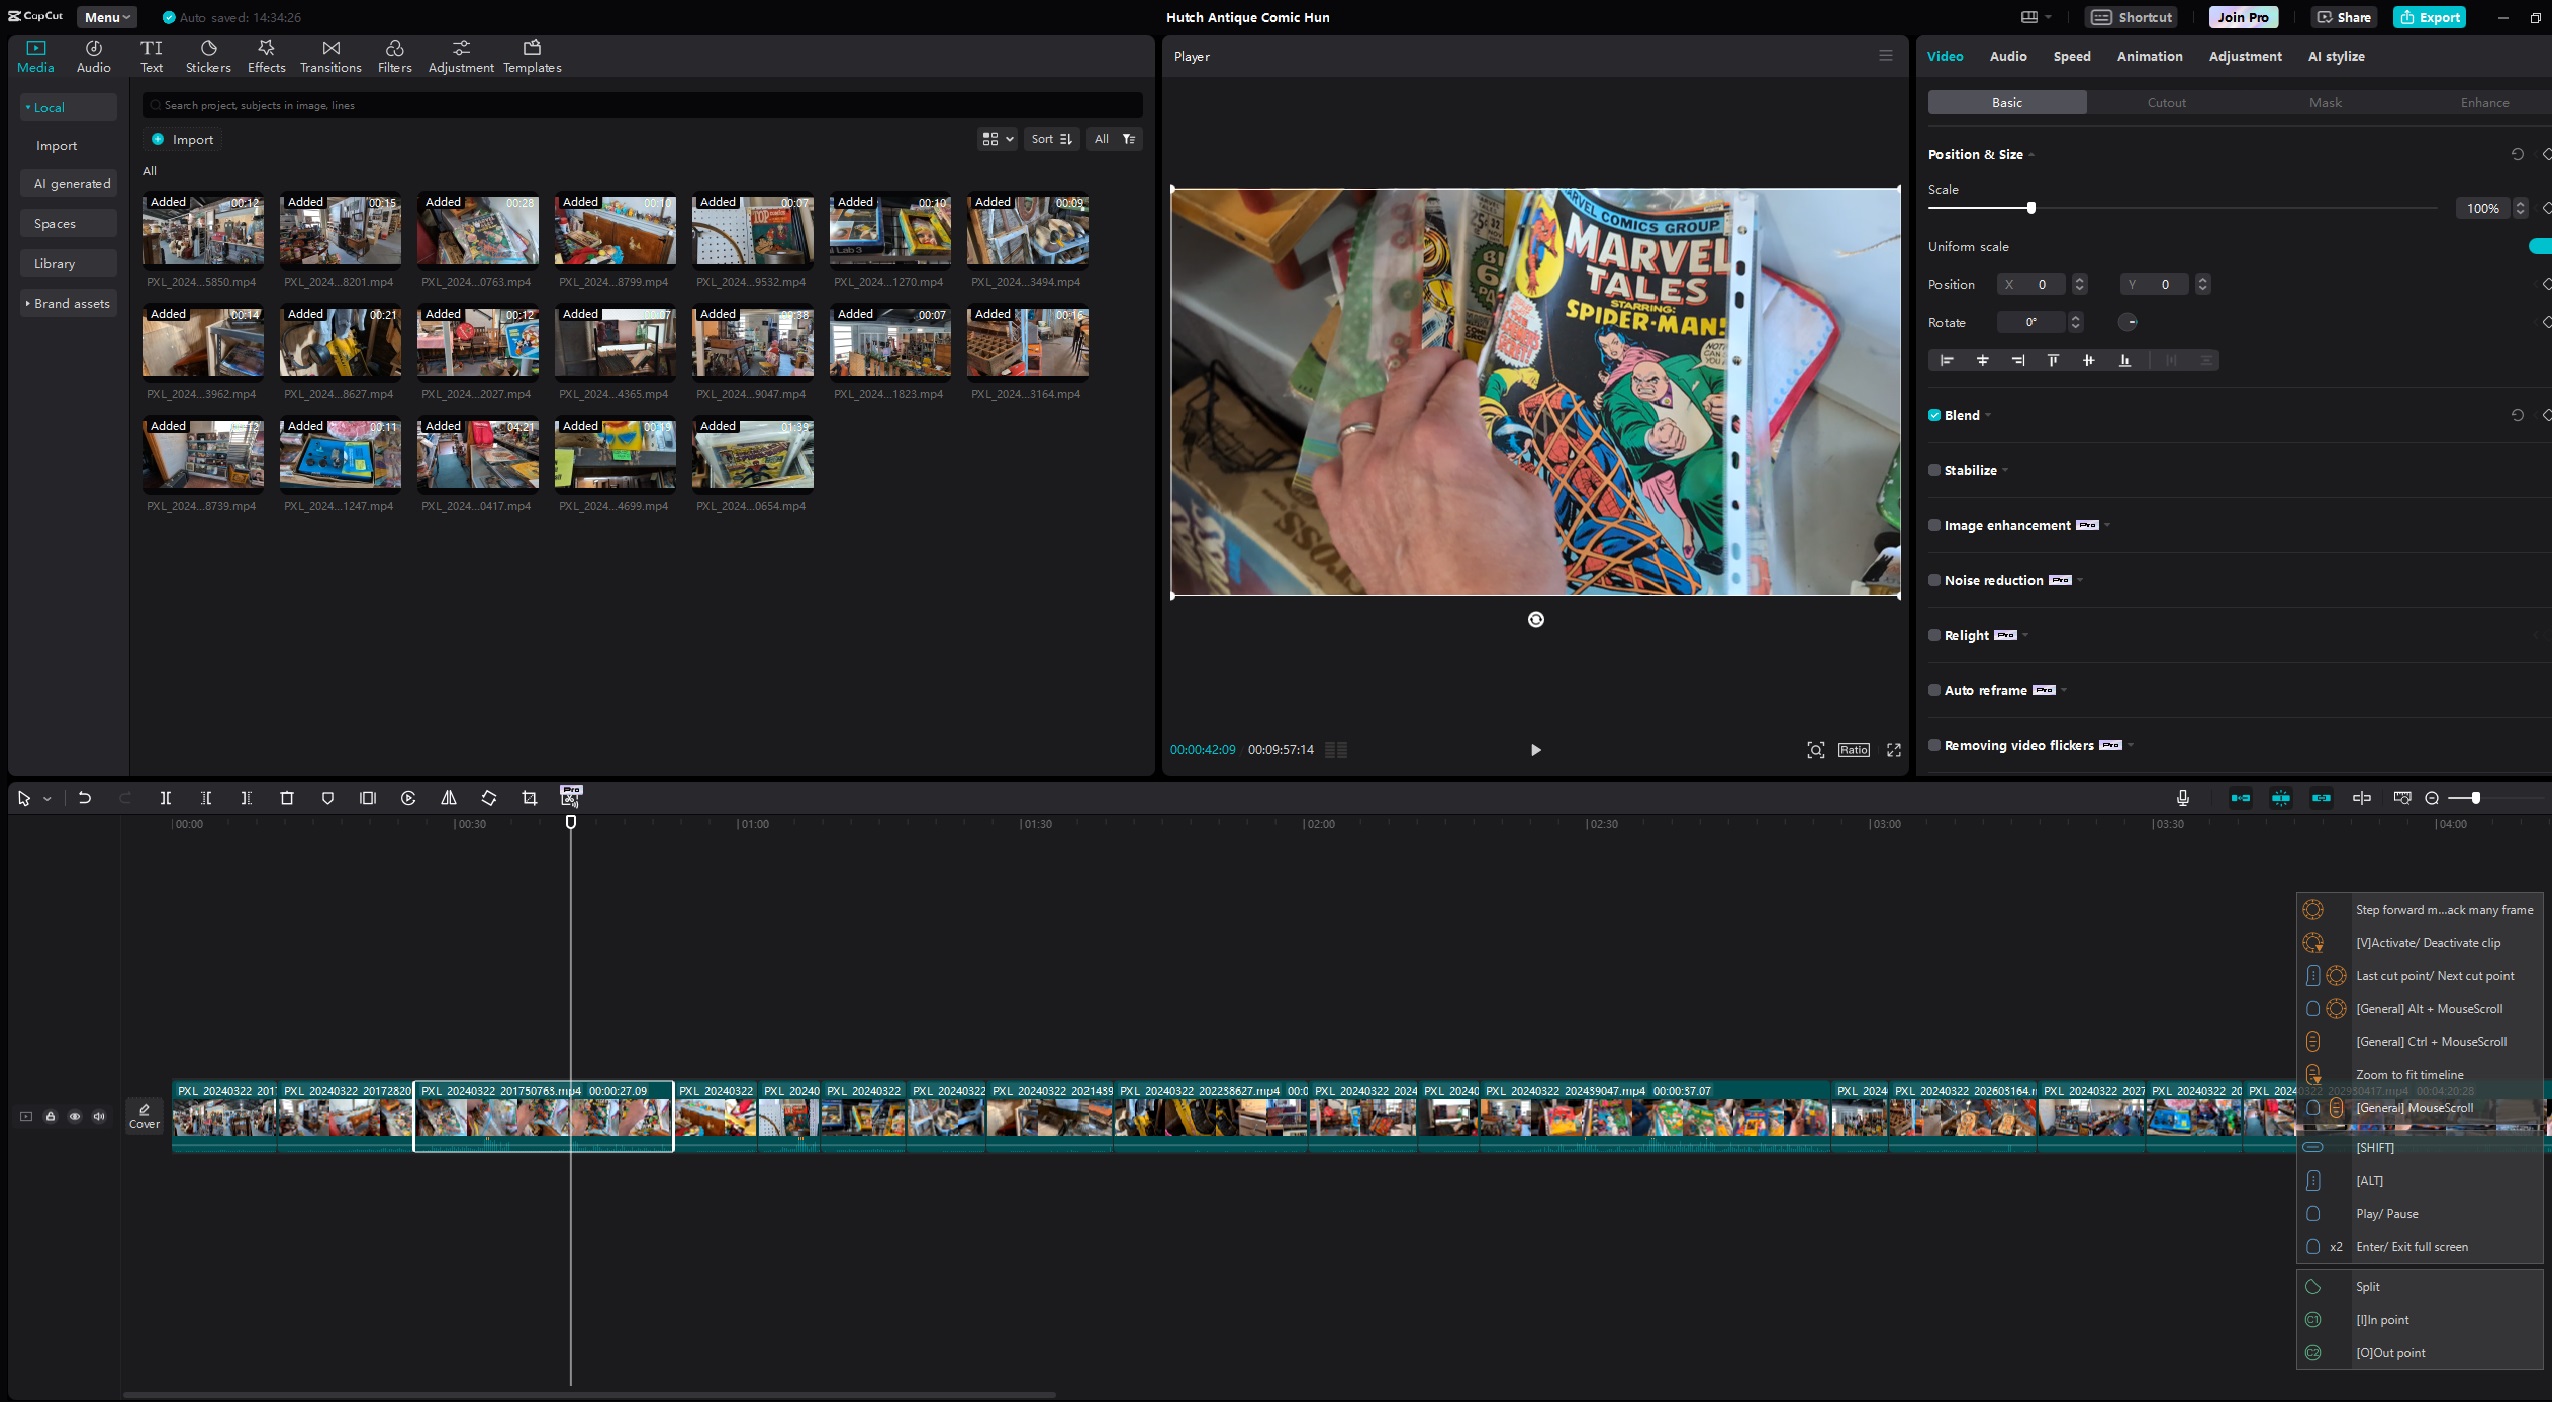
I have really found the General HUD to be beneficial, especially after changing up the control layout with less buttons on the Lite. Being able to quickly reference the settings for each button has been great, and having the option to move the HUD to another monitor or even take advantage of its transparency while over the CapCut window, has been very convenient.
Regarding getting used to the feel of the TourBox Lite, when I first started using the NEO, I found myself wanting to use it in a way that was similar to my keyboard layout. I had been using the “I” and “O” keys to set In and Out points in other applications, and figured I could just set the C1 and C2 buttons to do the same thing, which I could. However, the physical layout of the NEO just didn’t lend itself to using those buttons for those functions. I was essentially trying to force the NEO to work to my preconceived thoughts on how it should function, as opposed to adjusting my interactions with it to my advantage. I was literally placing my hand on the NEO in a way that just didn’t make sense based on its layout. Once I approached it as a tool to train me, instead of trying to make it fit my needs, things came around for the better. I found that using the D-Pad with my thumb was much more efficient, and that also gave me quicker access to the three Rotation inputs, which sped up my jogging and precision on the timeline.
That being said, the smaller size of the Lite did feel better to me, especially the slightly lower height. I feel like I have even better access to the control inputs. It has taken me some time to adjust to my new input configurations, but just like with the NEO, spending time with the Lite has been all I needed to get used to the new layout and feel to add some efficiency to my work.