Hopefully you have had a chance to take a look at Part 1 of our streaming guide, and have come back for another round of info. If not, please feel free to check out the initial entry into this series: Beginner’s Guide To Twitch Streaming – Part 1.
When we left off in Part 1, we had created a single Scene in Streamlabs OBS, complete with a game visual and audio sources, microphone audio input, and webcam video. And while that may not seem like much, the goal of that article was to get you started streaming to Twitch as quickly and easily as possible. Digging into the advanced features of Streamlabs OBS was not part of that article, and will not be included here either. This second entry into our beginner’s guide series will focus on adding a few additional scenes and source types to add a bit of variety to your stream. While we do plan to cover the more advanced features of streaming setups in future guides, you won’t find us discussing the pros and cons of encoder types here.
Guide Topics
If you took similar steps in setting up your initial stream configuration, you probably ended up with a suitable, but not ideal setup. There was definitely nothing flashy about the configuration of our initial setup, so this time around we want to add a few pieces of “flair” to our stream, which I have listed below.
- Transition Screens – Sometimes you need to step away from your stream for a minute, but don’t want to shut things down all the way. Using a full-screen image to show your viewers that you will be right back, or that your stream will be starting soon is a great way to do this.
- Chat Overlay – An important part to growing any stream is to have good interaction with your chat. By adding a chat overlay to your stream, viewers can watch in full-screen mode and still see your chat via an overlay. This allows for better immersion to your stream, and doesn’t require your viewers to focus on two areas of their screens to stay involved.
- Goal Overlays – Let your viewers know what your goals for an individual stream or your channel are. For example, you may want to gain five new followers this session. Well, now your viewers can see that goal and your progress towards it, and they can even take action and follow to help you advance this goal. Tie in some sort of reward to your goals, and this can be a quick way to grow your audience.
- Notifications – What better way to announce your new followers than with a visual and/or audio notification. These can range from simple text pop-ups and audio notifications, to animated images and tons of other custom options.
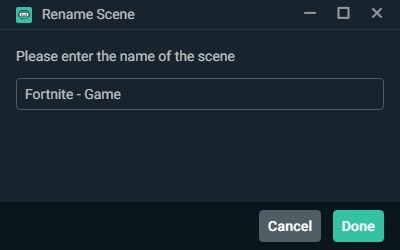
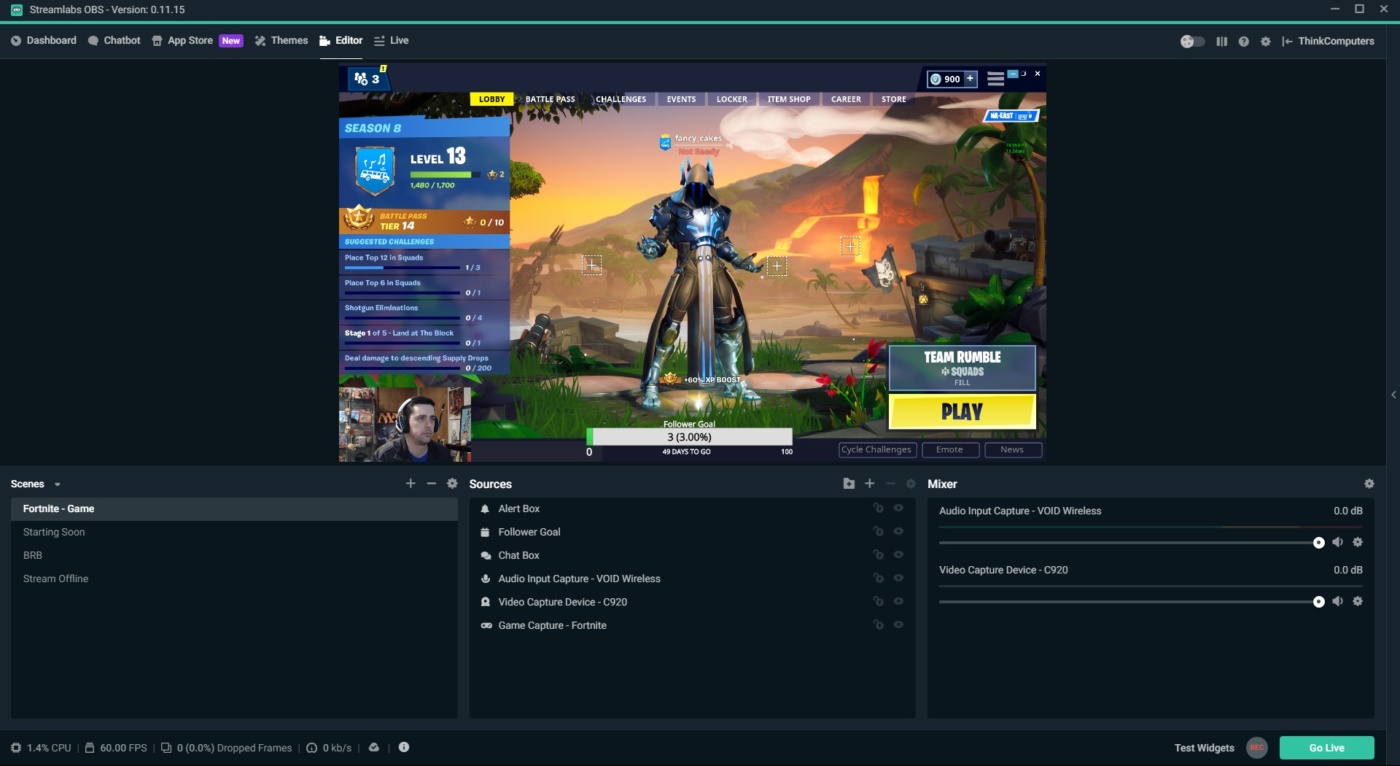
Before we get started with adding new scenes and sources, we wanted to rename our existing scene from the generic “Scene” to something that is more indicative of what the scene actually encompasses. In order to do so, we need to right-click our scene in the Scene portion of Streamlabs OBS, and select “Rename”. A small window will pop up, allowing us to rename our scene. Since our initial scene was formatted for streaming Fortnite, we chose to rename it as “Fortnite – Game”. Clicking the green “Done” button will bring us back to our Streamlabs OBS window, with our newly renamed scene.