Building in the Corsair Carbide 330R Titanium Mid Tower Case
First before I say anything we all need to understand on foregone conclusion. “This is not a sportive Gaming case with window and flashing lights. This is a case with grace and silence as a theme. It is meant to blend into the surrounding and stay quiet while inside it is meant to house as much power as you can afford.
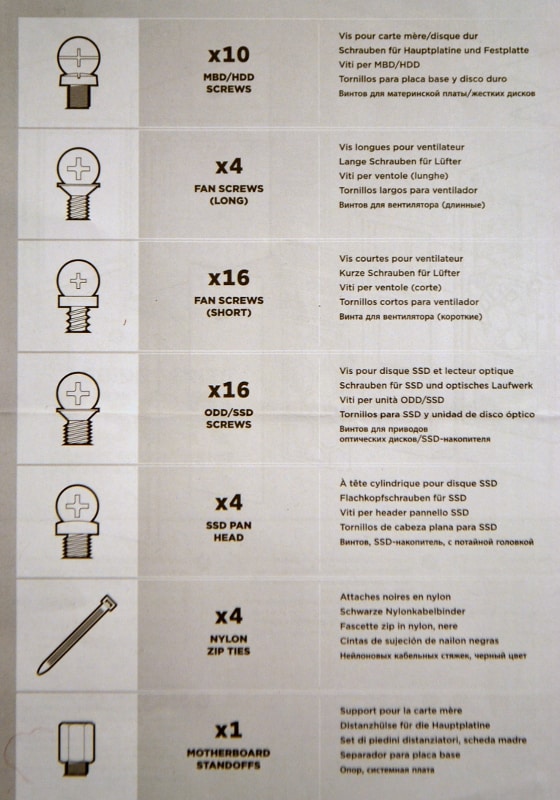
That said, The first thing that I was disappointed about was the lack of SSD hangers in the accessories package. I am sure the later cases will have them at the time that this case is available, and there are two places were SSDs are able to be connected to the back of the motherboard but I didn’t get those hangers. The hardware as it goes from the time of this review is as followed below.
The Screws are made very well and machined amazingly precise and you won’t be breaking any of these off with a medium sized Phillips head. They are strong steel screws.
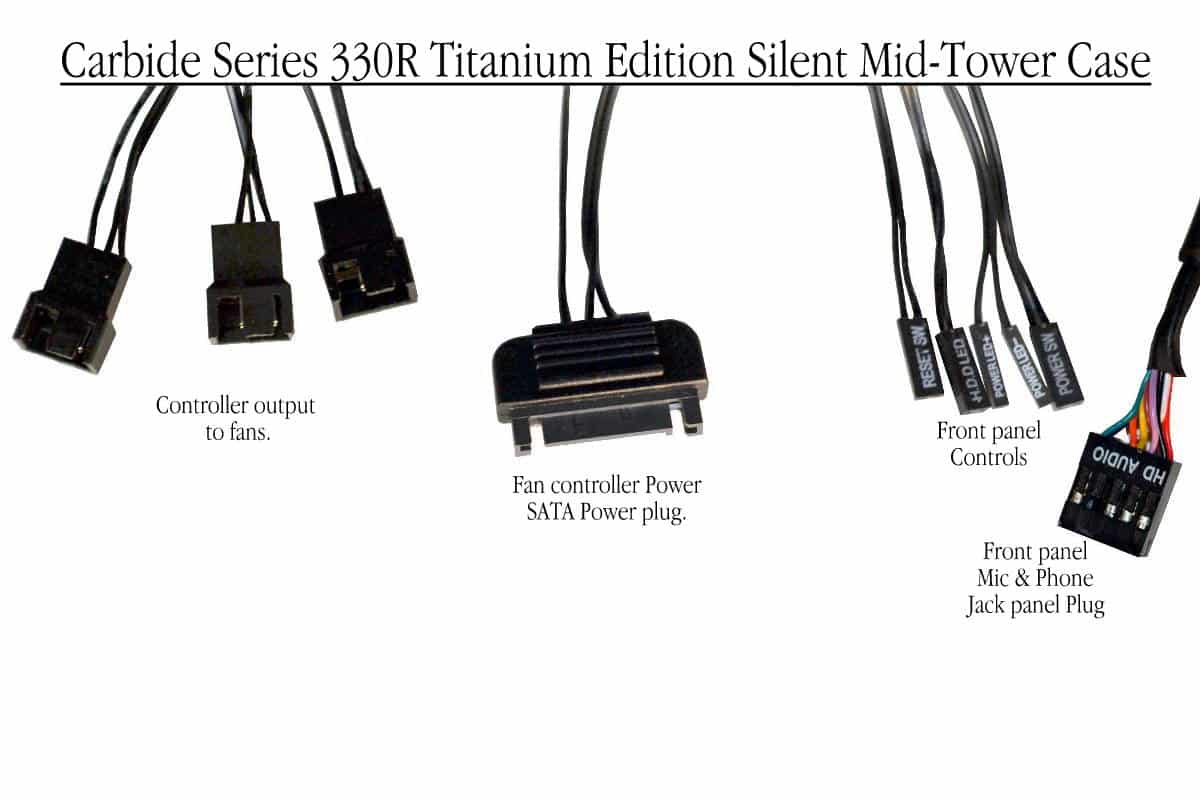
There is a generous amount of pin-outs for the front panel for Power button/PWR LED, Reset button and HDD LED along with the power for the Fan Controller SATA power connection. There are three outputs plugs that can take care of any fans that you don’t want to plug straight to the motherboard, even if your fans are PWM 4 pin fans either. They will work with this unit as well and the plugs will fit right in. They just won’t be using the PWM feature, but will use the voltage step down process of fan control.
The Front and Rear case fans are not prewired into the fan controller so if you use the controller for them it only leaves you with one or 2 more fans with a “Y” wire connector to run two more.
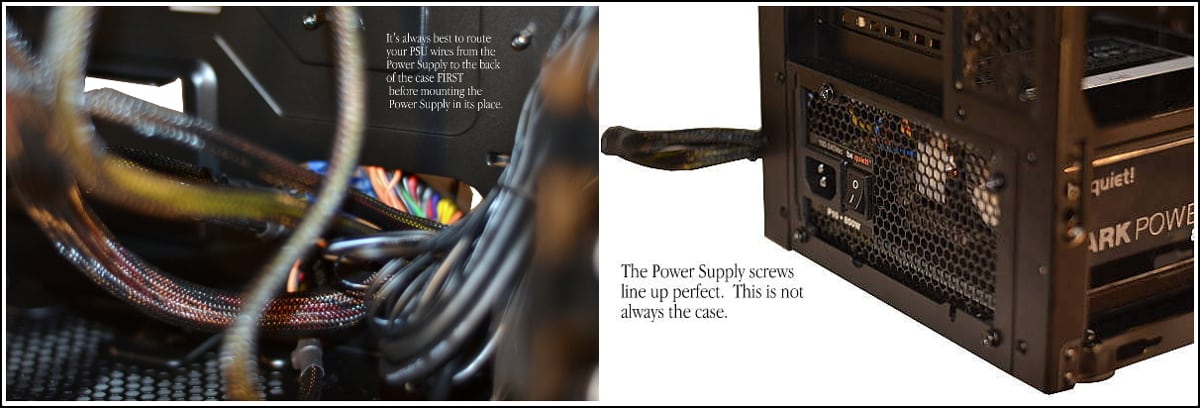
Before you install the heavy Power Supply into your case be sure to untangle all your wires power supply and case wires, and then slowly run them into the holes, out the back of the case, to make things simple for you when installing the brick of a PSU. They are heavy and sometimes long so make sure you route the wires in a comfortable way to make for easy wire management later on. It’s always best to think wire management from the beginning of the build. If not you may find yourself uninstalling something just because the wires went in the wrong way or they are tangled up and won’t let the back of the case close. Also for the Corsair 330R Titanium case the power supply holes are a perfect match up and sits perfectly into place which is not the case in some cases, pardon the pun.
Putting in the back plate at the right time is paramount. I can’t tell you how many times I have had to completely remove a motherboard because I forgot to fit the back plate into the case first. The fit of the motherboard back plate was also a precision fit.
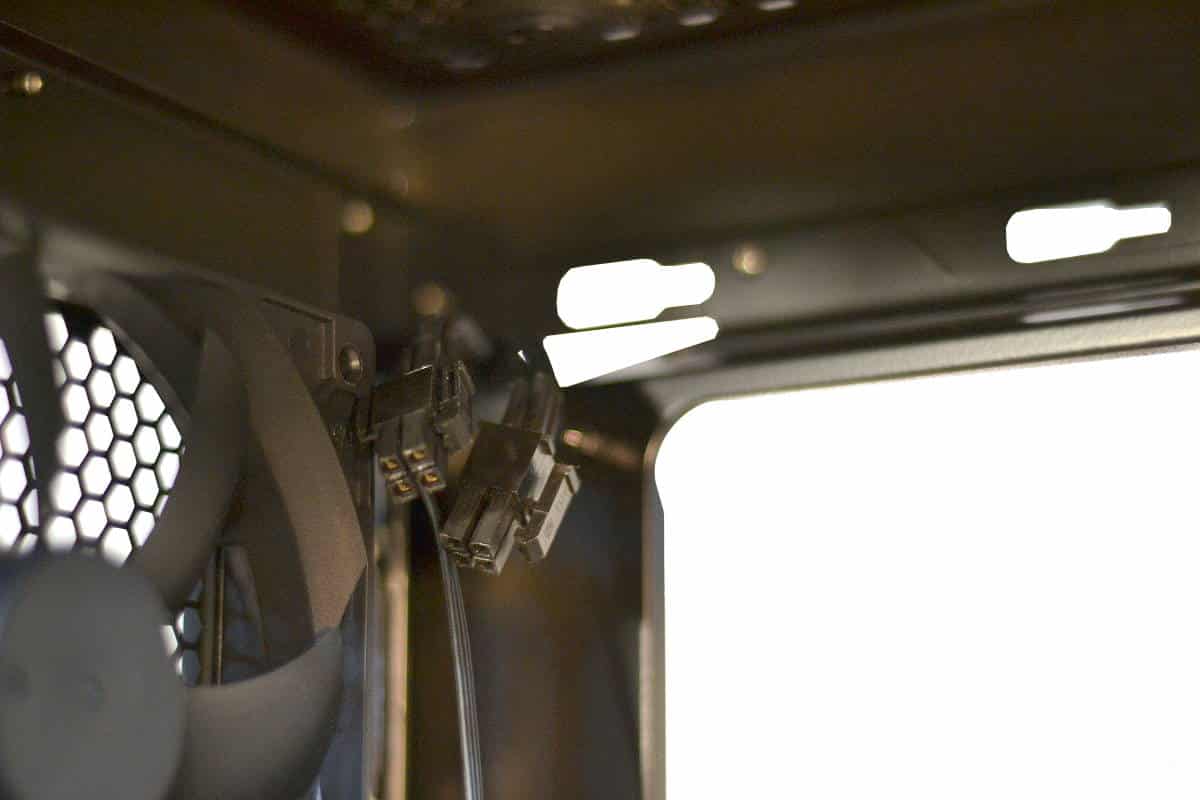
Another thing that this case likes is that you route your CPU power connector through the hole in the back corner of the case before mounting the motherboard. This little wiring tricks in the beginning can save you a lot of headache and if you can use a CPU power connector extension just in case you need more room. The Corsair 330R Titanium Edition has only one hole for the CPU power wire so if your motherboard’s CPU pin-outs are dead center or far frontal type then you will need an quality CPU power wire extension then fitting the wire in first and even plugging it in as you move the motherboard into place is highly recommended.
Also I would highly recommend the builder to populate the motherboard before fitting it into the case. I preinstalled the CPU, Memory, and the air type CPU cooler and back plate before mounting the motherboard into the case; it’s easier to do outside the case than inside.
If you have ever tried to mount a motherboard into the motherboard tray without a pin guide you know what a headache and fear that there is that you might damage the back of the motherboard and ruin it by trying to get the stand-offs lined up correctly. With “Corsair’s Center Pin Guide” you have no problem fitting the motherboard precisely into the Corsair case.
The Corsair does not include a side window but if it did it would look great with a nice cooler.
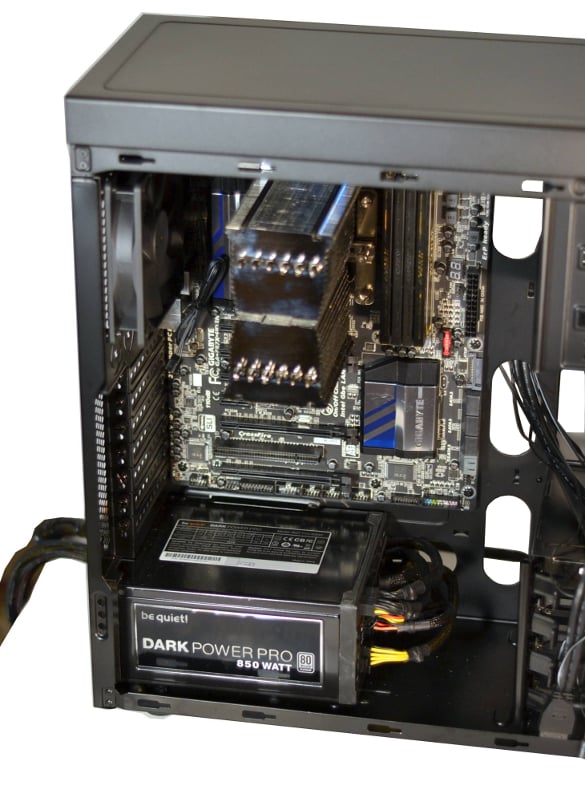
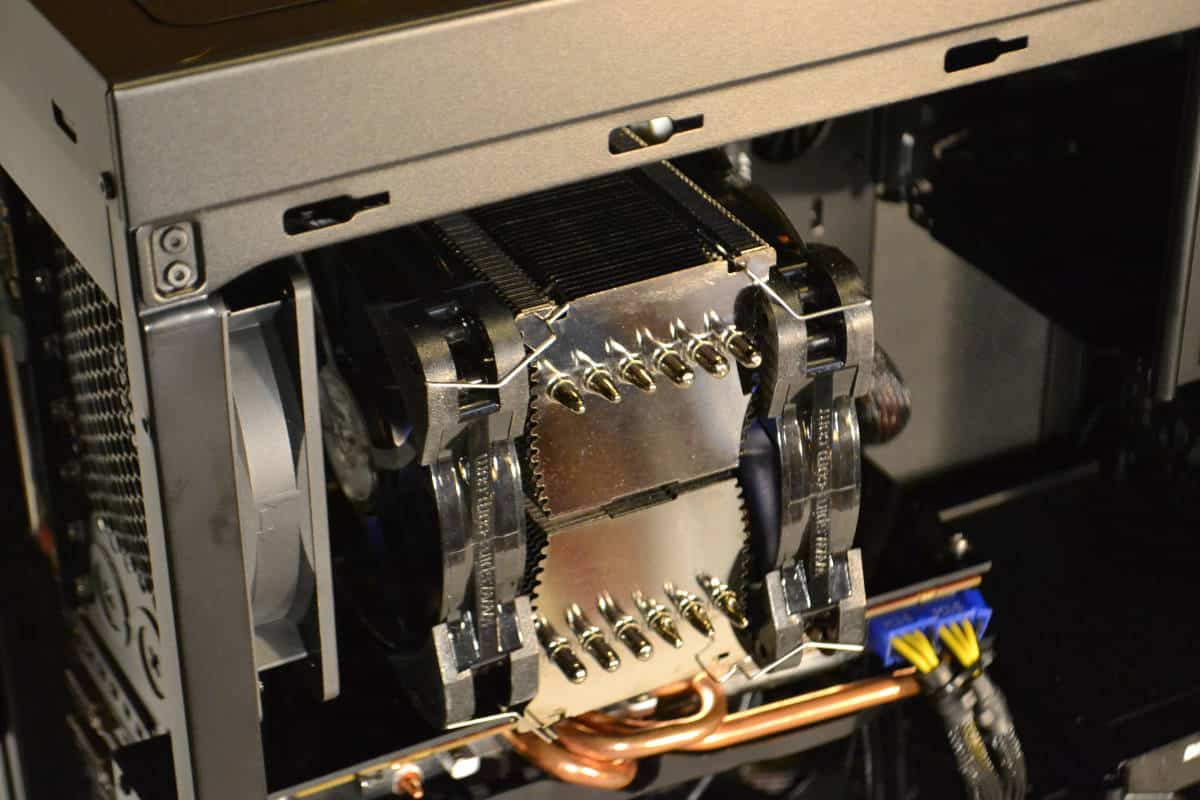
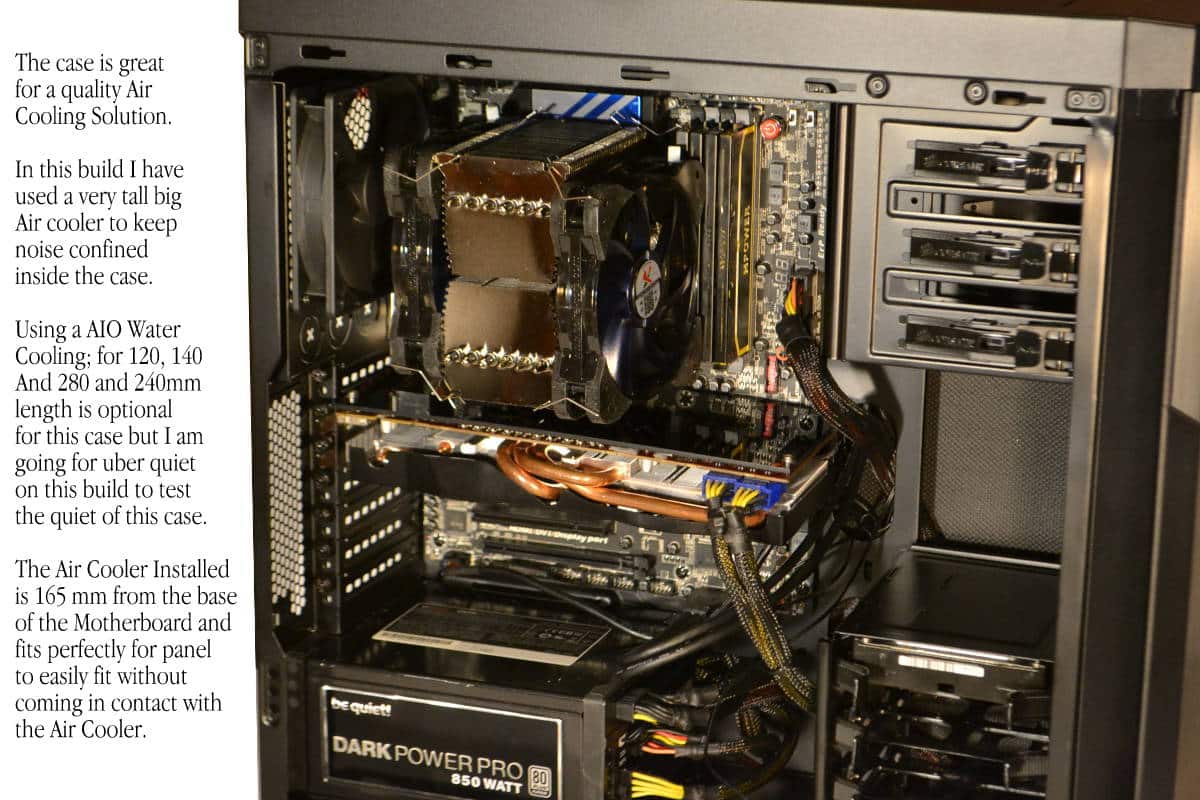
I was able to fit a very tall air cooler into this case with no problems at all. In the specifications it says that it allows 160 mm of cooler clearance. Well they are talking about the Cooler only and after it is mounted on the board as I found that I had 168 mm of space from the base of the motherboard with this cooler and the padded sound proofed panel did not touch the cooler when installing the panel to the case frame.

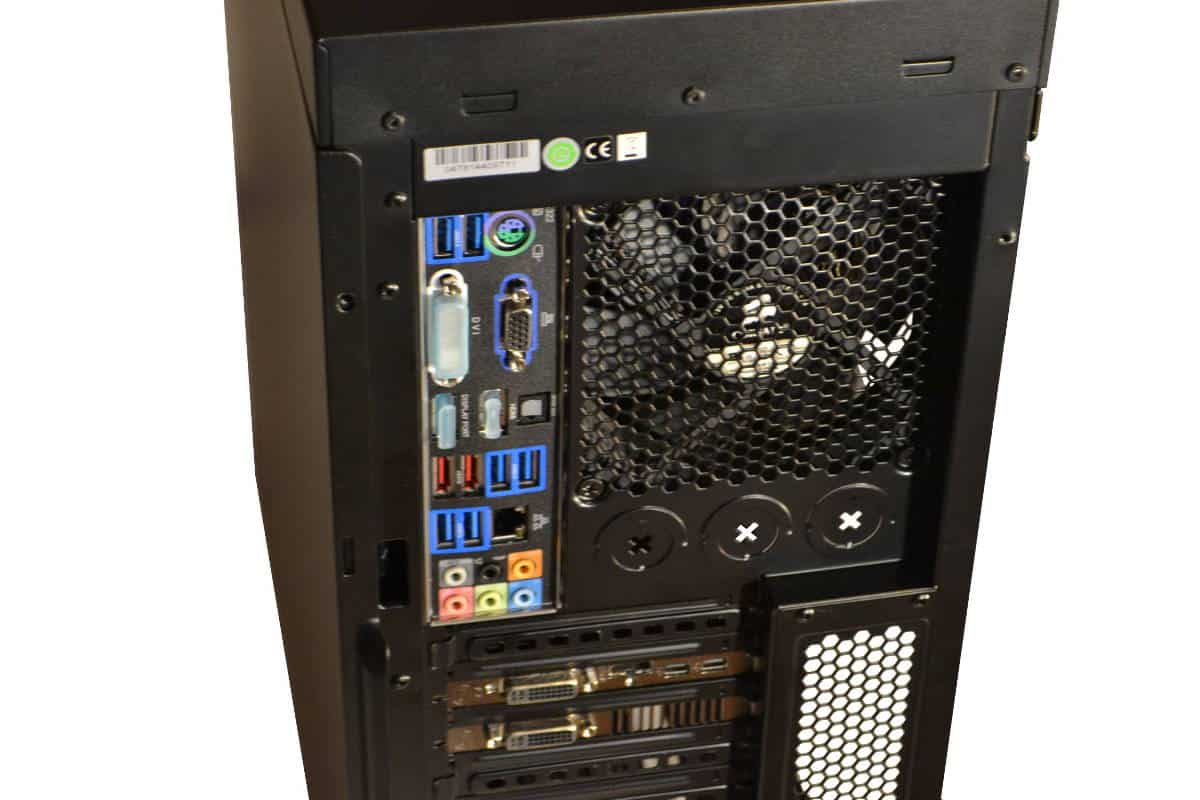
The Back of the build is very professional looking and extremely airy for exhausting heat and what sound is left inside of the case.
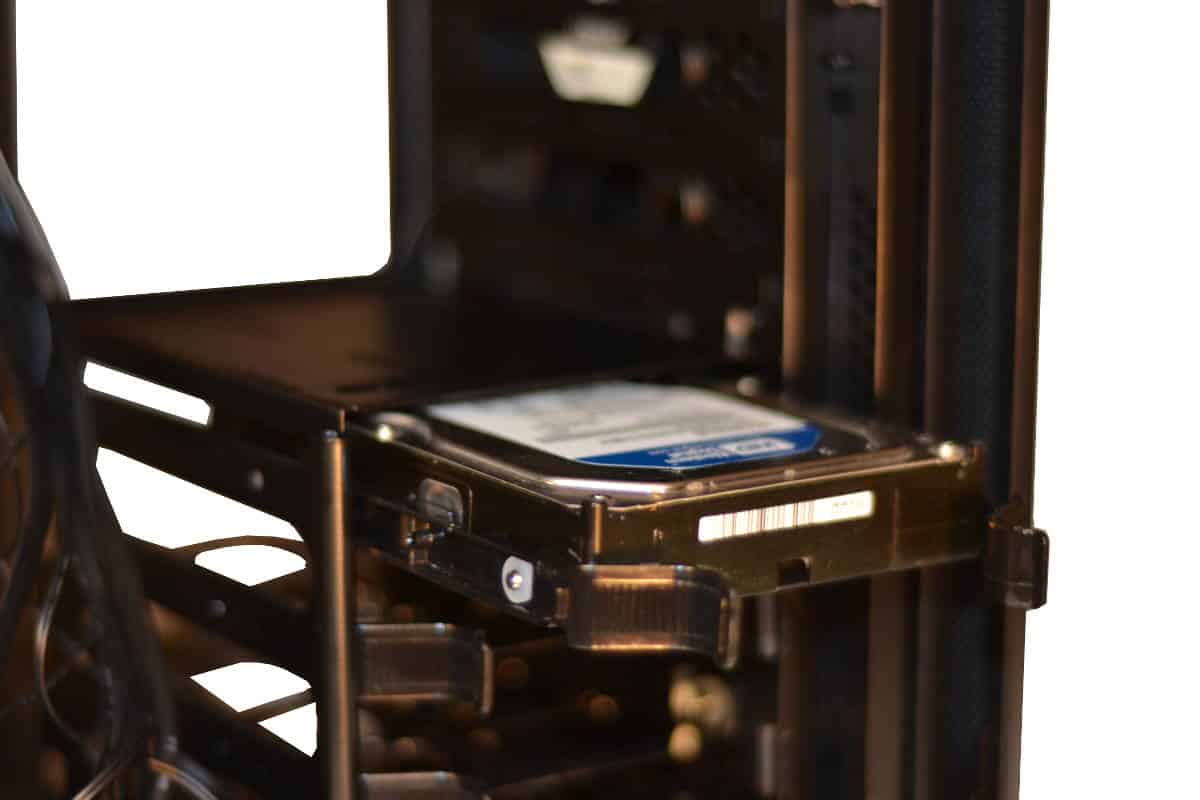
The Hard drive cassette frame is exactly the same as the Corsair Graphite 600T, 760T, and the 780T cases. Why mess with perfection. Each cassette or drawer has four side pins that line up perfectly to the Mechanical Hard drive and the screw holes in the floor of the cassette to mount the smaller SSD or Laptop drives into the cassette then you merely line up the drive with the cassette mounted into the drawer unit and slide in until you hear and feel a snap and it’s in.
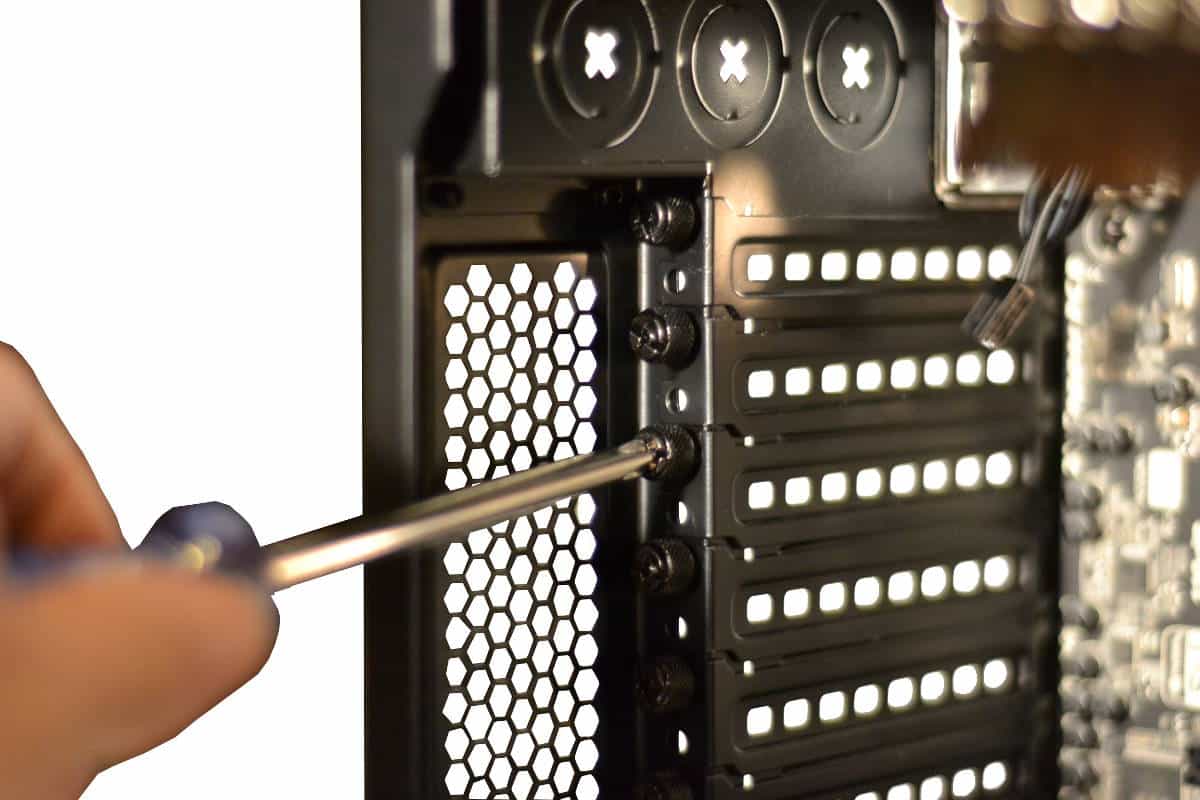
When case companies say that a case is tool-less you had better have a solid pair of side cutters and a Medium sized Phillips head screw driver. The torque on every case made is so tight that if you don’t have a Phillip’s head just get up now and go get one from a neighbor or buy a good one at the local hardware or auto parts sales store. You will need one, and please always buy quality tools. It’s better to buy a good tool once, than to buy a bad tool many times.
The Corsair case hardware is top quality and the best in my opinion as I have broken many aluminum screws in the hole and had to drill them out. This hardware is hardened steel parts and will take all the punishment you can give it. Except a cheap screwdriver that is too small for the fit.
Now is the best time to fit your air cooler fans or mount your AIO Water Solution into the case, before mounting the graphics card in place. Everything is stable and easy to get to and not ready to fall over at the first puff of air you exhale onto it so get in there and mount that fan or two but wire them before mounting for optimum ease.