
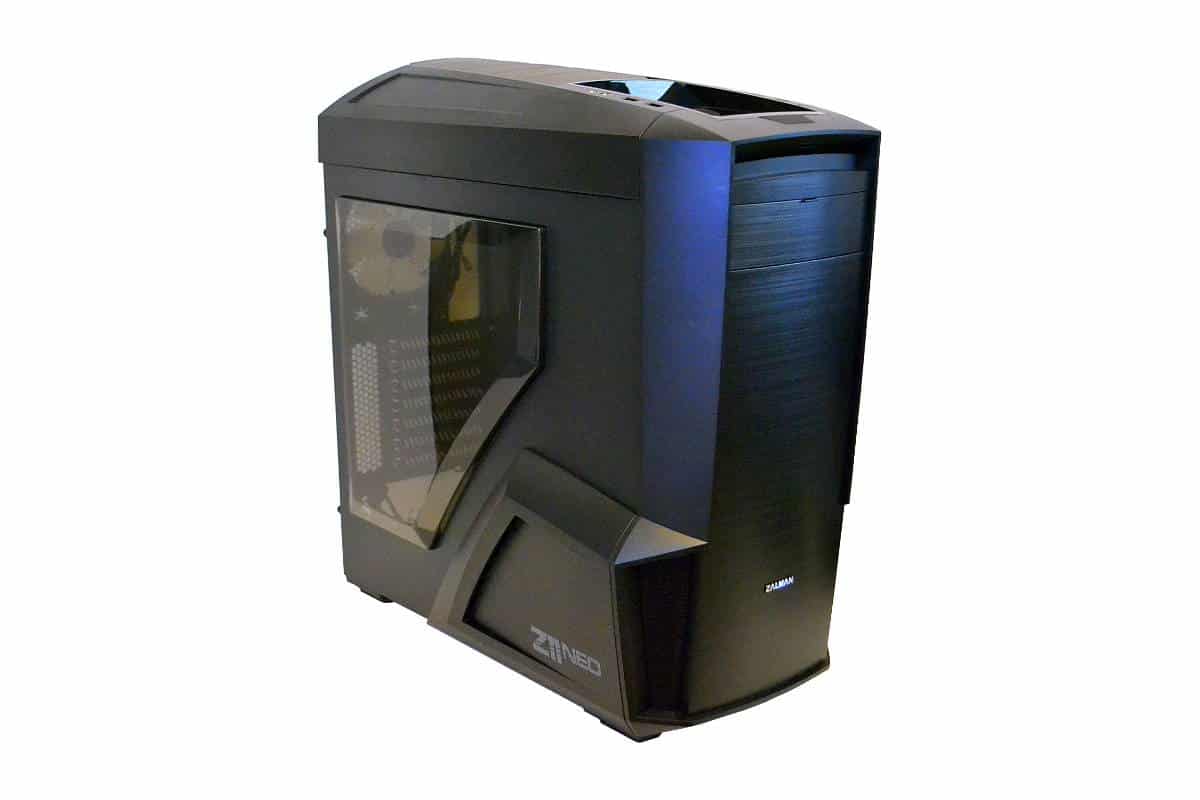
Outside of the Zalman Z11 NEO Mid-Tower Computer Case
The outside of the Zalman Z11 Neo is futuristic very serviceable and very quite too. I know what about those inner panel 80mm fans in the side panels right? Well I did not hear them running when I finished my build and I really thought I would. The fans that come with this case are quiet, but the one up front is a Molex connection so hooking it up to your motherboard will not work unless you get a Molex to 3 pin fan connector, but all in all the cases outer look is beautiful on or off.
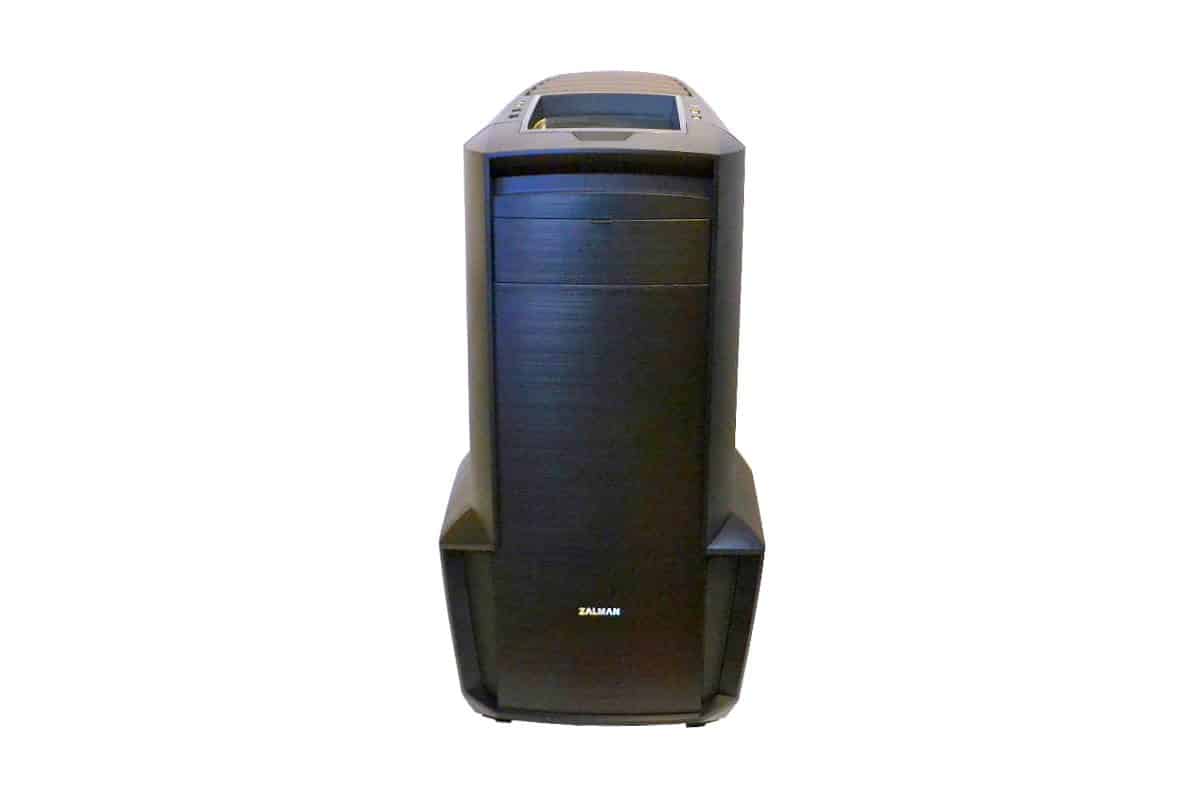
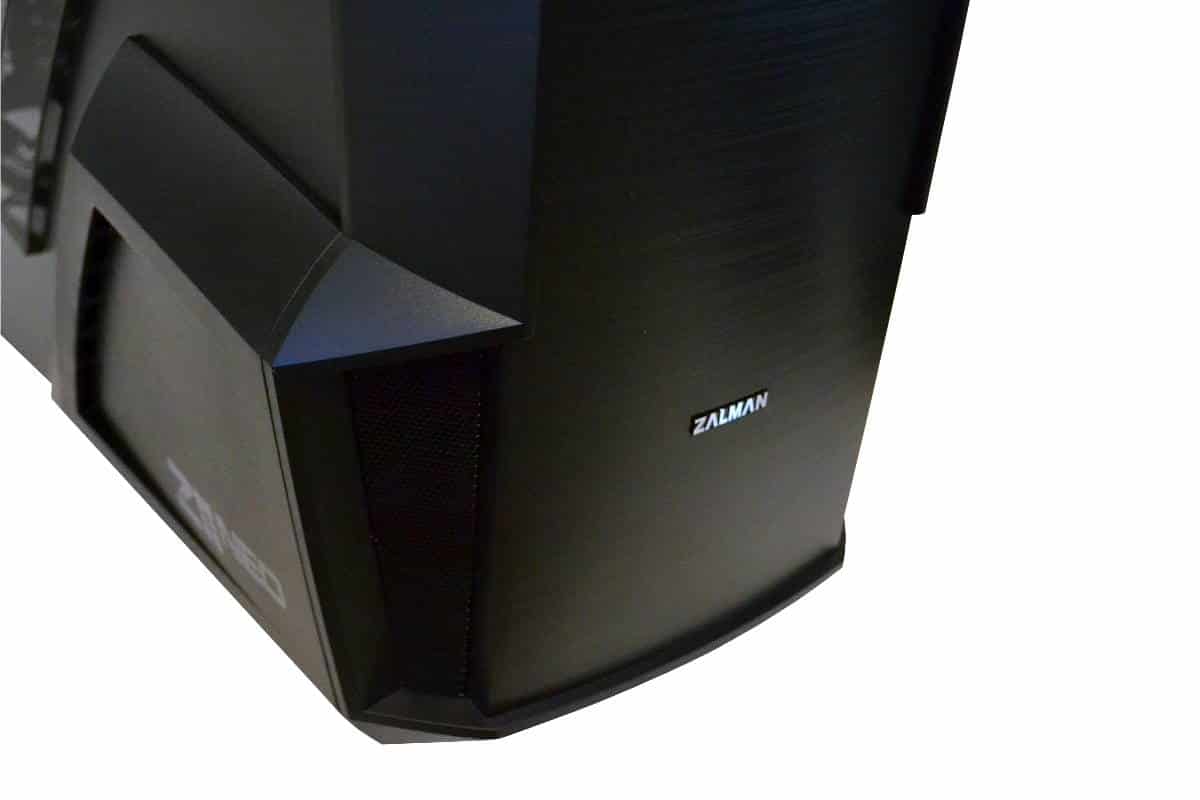
The front has a very Z11 look. Why did I use the same case as an example, well that’s easy? The Z11 has been around a long time and its front is very unique among other cases. There really is not another case that I can reference it to because the case has a look that is truly Zalman and truly unique. The Chrome look of the Zalman Logo at the bottom adds some class to an all black rest of the case and the NEO emblem in the side intakes make it look ever more attractive.
The side vents really do intake air into the case and they really are almost silent. The brushed aluminum black anodized look on the front is very appealing and the door on at the top for the optional optical disk drive really adds to the overall character to this case.
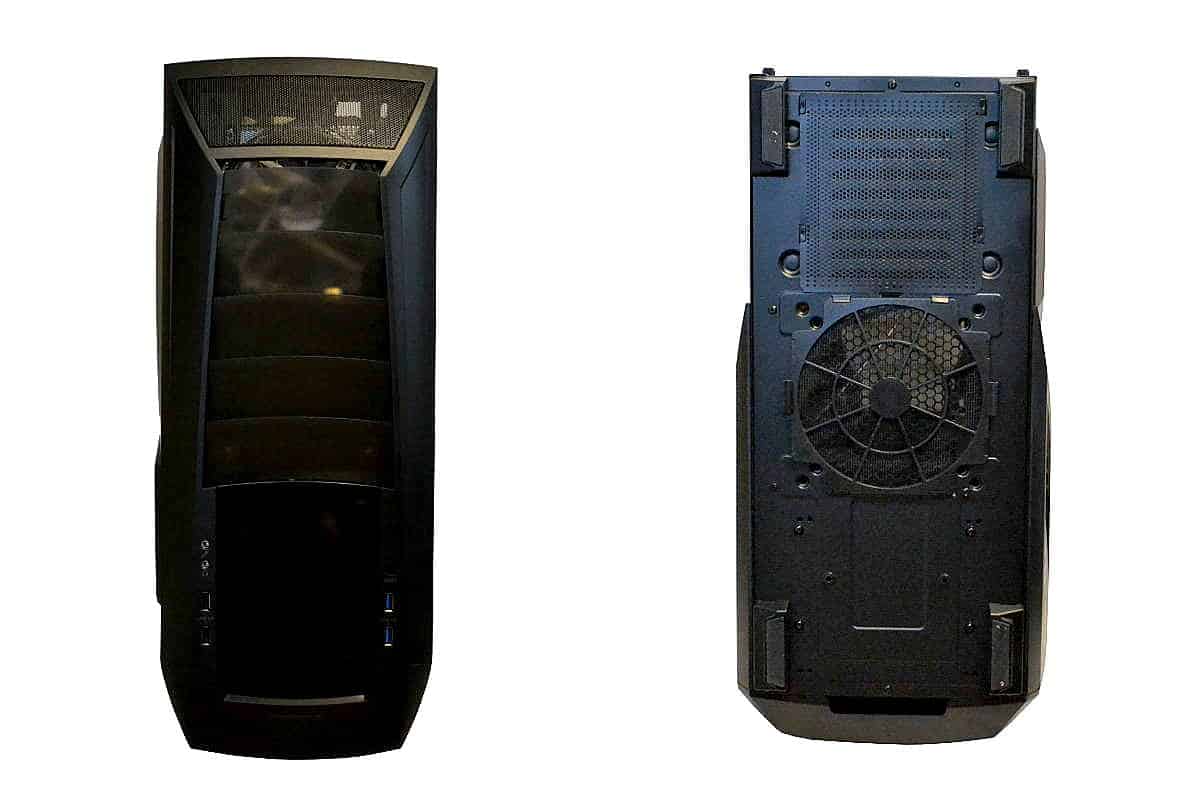
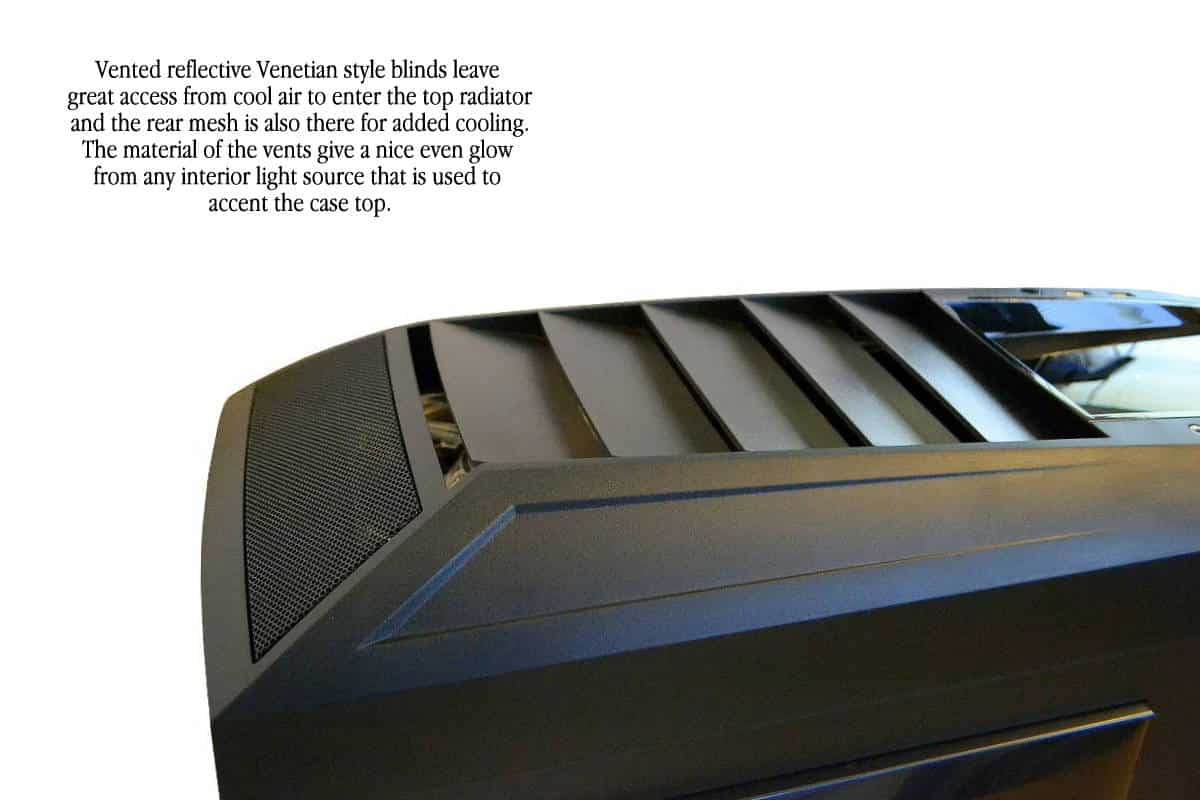
Top and bottom of the case is just as unique. On the top is where the On/Off button location is and the Reset – 3.0 USB on one side and the 2.0 USB on the opposing side with the headphones and microphone jack finishing the total controls in the front top. In the back top is all air access view with a pitted glass finish that glows with the light from the blue LED fan on the top. The last part of the top toward the back of the case is metal mesh for even more airflow from the inner workings of the case. It would be best to make the top of this case all exhaust since there is not any filtration here.
The bottom of the case bottom to top shows first the front panel removal handle for popping off the front. Be careful when you do this because the hard-drive LED is connected here. At each corner of the bottom have rubber padded feet that stabilize the case and insulates it from noise inside the system if you install any. The middle of the bottom has a removable filter that is easy to snap out and remove and clean and the back has a stiff plastic dryer vent to keep the air entering the power supply clean.
Changing this filter might be easy to remove but putting it back into place may take some patients and a few words not in your local dictionary so you might want to install your Power supply fan up to keep from having to worry about this filter altogether.
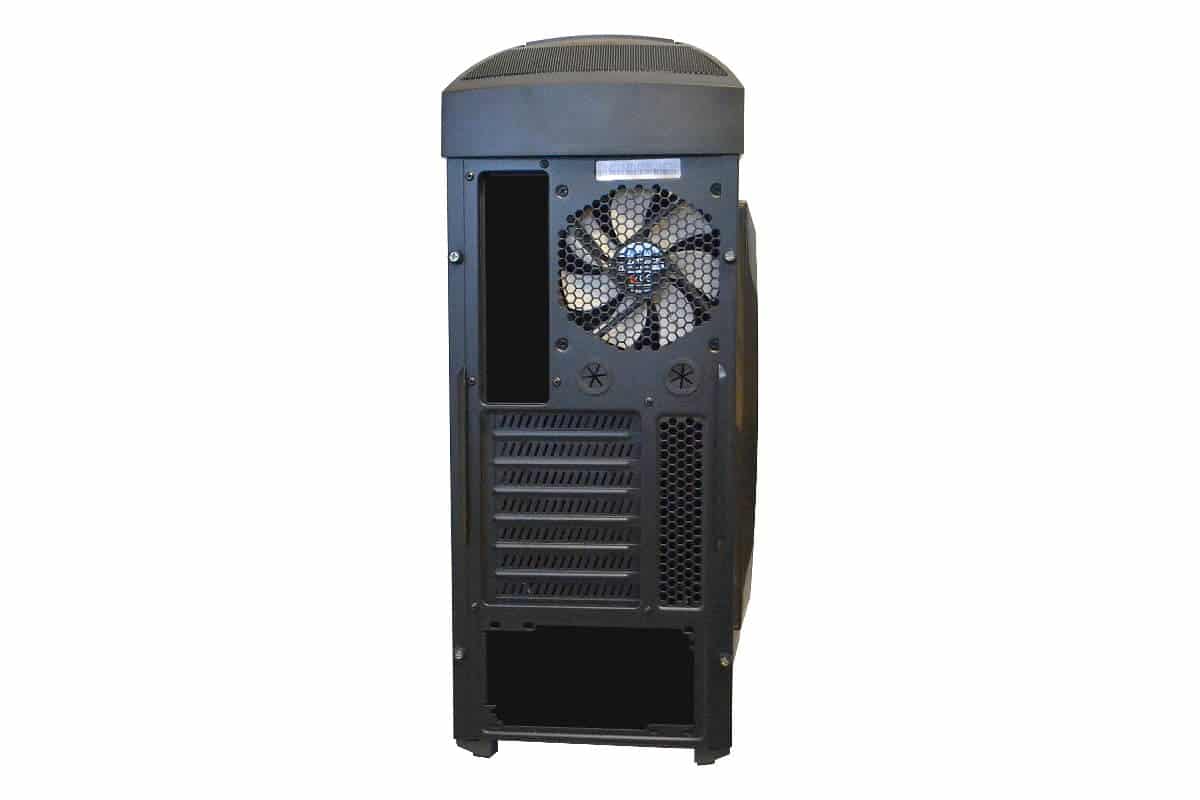
On the back you can see the padded panel screws. This is one of my favorite inventions because it is so nice to take out tight thumbscrews without hurting my thumbs. There is only a 120mm Exhaust fan and its really nicely done in white and not lighted. Under that you have the two general in/out water cooling access rubber coated for your rubber tubing needs. The 7 PCI Slots are disappointing Knock-out type and the case only gives you one PCI cover to use to cover a slot that is no longer in use so be careful and be sure that the slots that you knock out are truly the ones you need voided because once you knock it out there is only one cover to fill that void. The power supply cut out at the bottom is made for both fan up and fan down so that works great for the builder. My personal preference for this case is fan up since I don’t like trying to change that filter. Don’t feel bad I never figured out the Rubik’s Cube either, so no biggie.
The top caddy area is high gloss and very pretty but you don’t need to throw any metal or anything else that might scratch into it unless you want to put some Gorilla Glass plastic covering to keep it from getting all marked up. The fans and the shape and artistic effects of the top give the Zalman Z11 NEO a great Modding potential for those that dare to do a theme build on a budget. This case is beautiful and there are a few things that could be done to make it look even cooler.
NOTE: When removing the top and installing it back on be really careful of the reset switch. The actual button is inside a tube that has to be aligned before securing the top down fully.
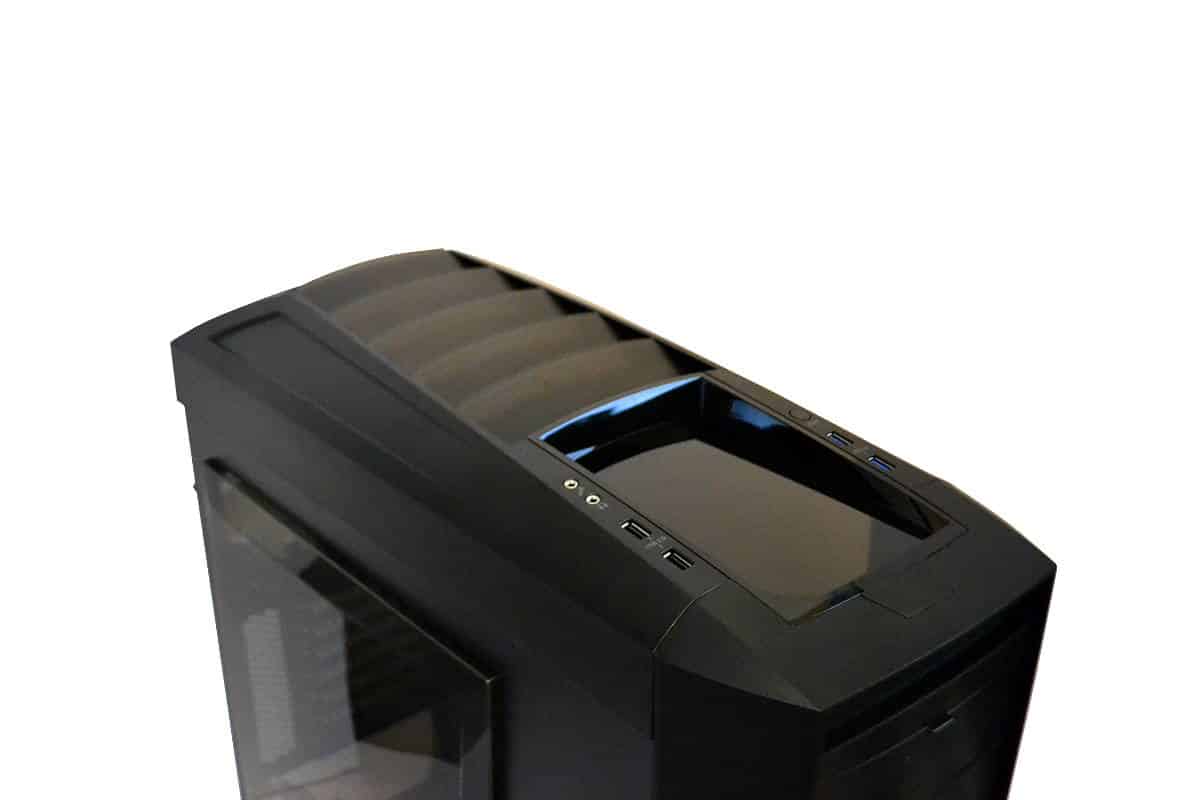
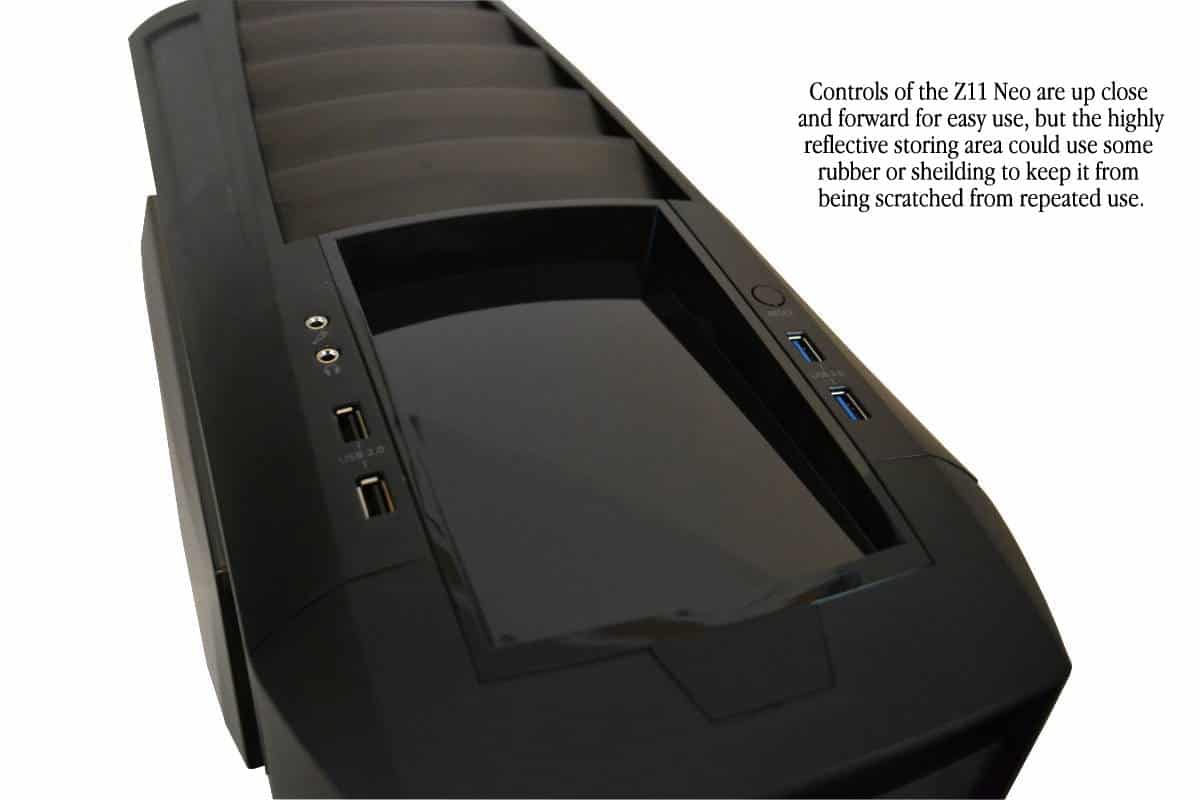
Another Look at the top control panel shows the very futuristic theme of the case and the high gloss caddy area in the center. I would really consider covering this part of the case with at least some padded material to keep it from getting scratched up. I would suggest a clear vinyl cover or rubberized layer to protect the almost mirror finish.
The better look at the top rear of the case shows the really open air design of the top of the case. The vents glow with any lighting that you use and are a great effect that is hard to not like.
One of the most evident parts of the case is the outcropped front vent that makes the case have a stealth fighter/bomber aircraft design and it really works and it’s really not loud with 80 mm fans. I didn’t hear the fans running at all when I had everything hooked up which really surprised me since I was sure that the fans would be noisy but they were not.


It seems to be much cheaper your side of the pond which makes it a more viable option. Here in the UK it faces much stiffer competition: http://www.ukgamingcomputers.co.uk/zalman-z11-neo-review-a-72.html
Please hire someone to write articles who proof reads their work…and who’s first language is at least English.